@FeignClient使用详细教程(图解)
Posted 杰拉德·皮克·谢
tags:
篇首语:本文由小常识网(cha138.com)小编为大家整理,主要介绍了@FeignClient使用详细教程(图解)相关的知识,希望对你有一定的参考价值。
@FeignClient使用详细教程图解
作用
@FeignClient用于创建声明是API接口,该接口是RESTful风格的。Feign被设计成插拔式的,可注入其他组件和Feign一起使用。最典型的是如果Ribbon可用,Feign会和Ribbon相结合进行负载均衡。
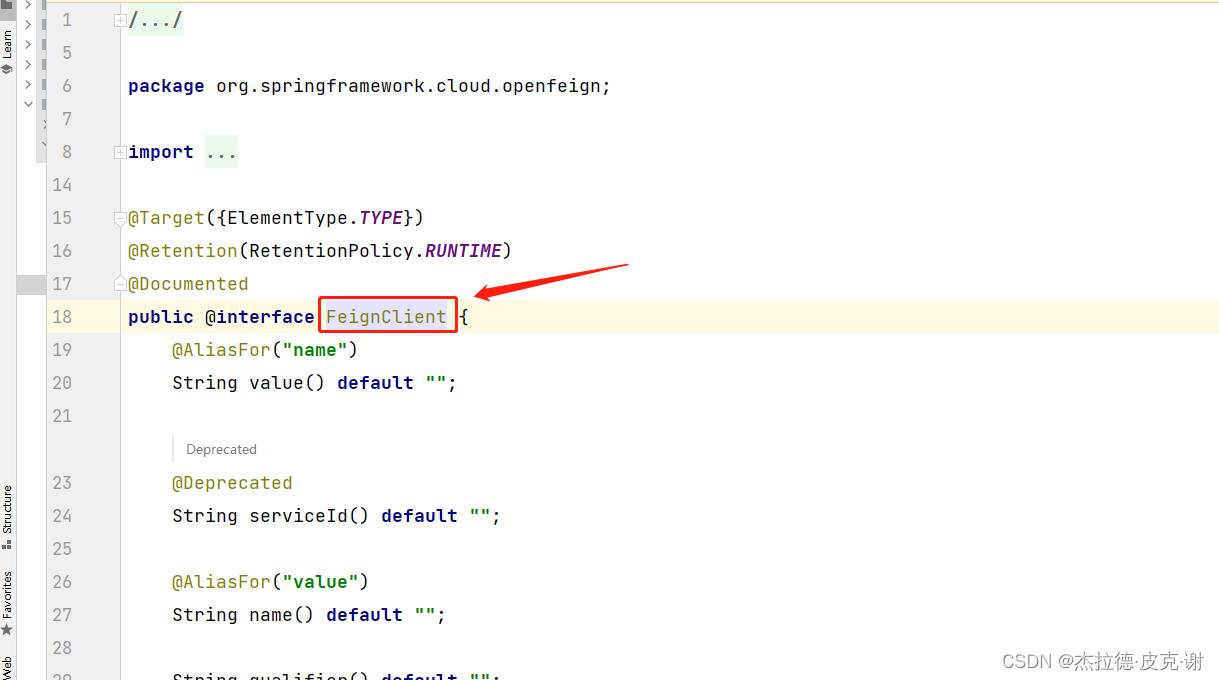
@FeignClient标签的常用属性
- 源码截图

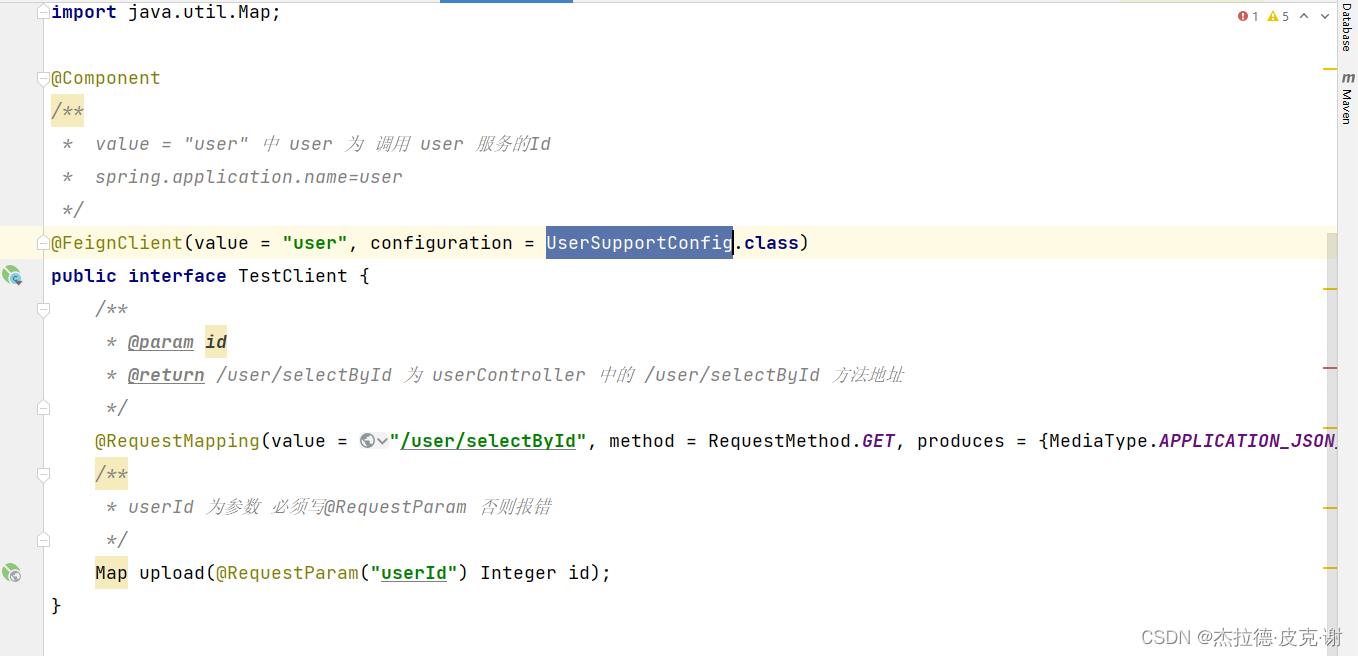
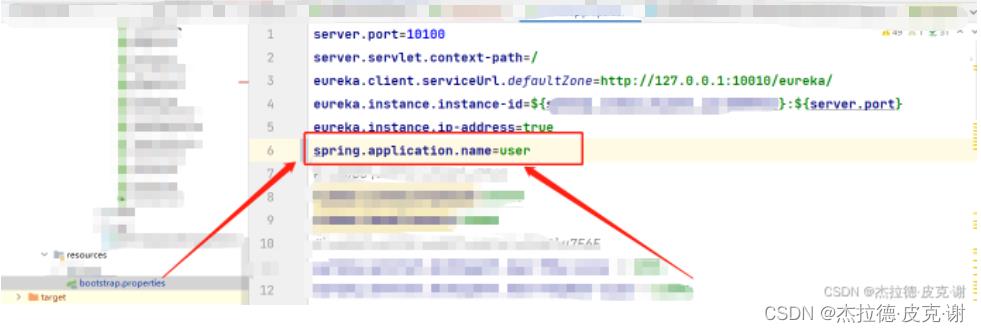
name(和value相同):指定FeignClient的名称,如果项目使用了Ribbon,name属性会作为微服务(某个中心的名字)的名称,用于服务发现(图解如下)- url: url一般用于调试,可以手动指定@FeignClient调用的地址(图解如下)
- decode404()即404是被解码,还是抛异常。
- configuration()指明FeignClient的配置类,默认的配置类为FeignClientsConfiguration类,在缺省情况下,这个类注入了默认的Decoder、Encoder和Constant等配置的bean。
- fallback()为配置熔断器的处理类。


- FeignClient的配置类(configuration())
public class FeignUserSupportConfig

    @Bean
    @Primary
    @Scope("prototype")
    public Encoder multipartFormEncoder()
        return new SpringFormEncoder(new SpringEncoder(new ObjectFactory<HttpMessageConverters>()
            @Override
            public HttpMessageConverters getObject() throws BeansException

                return new HttpMessageConverters(new RestTemplate().getMessageConverters());

        ));


    @Bean
    public feign.Logger.Level multipartLoggerLevel()
        return feign.Logger.Level.FULL;
使用流程
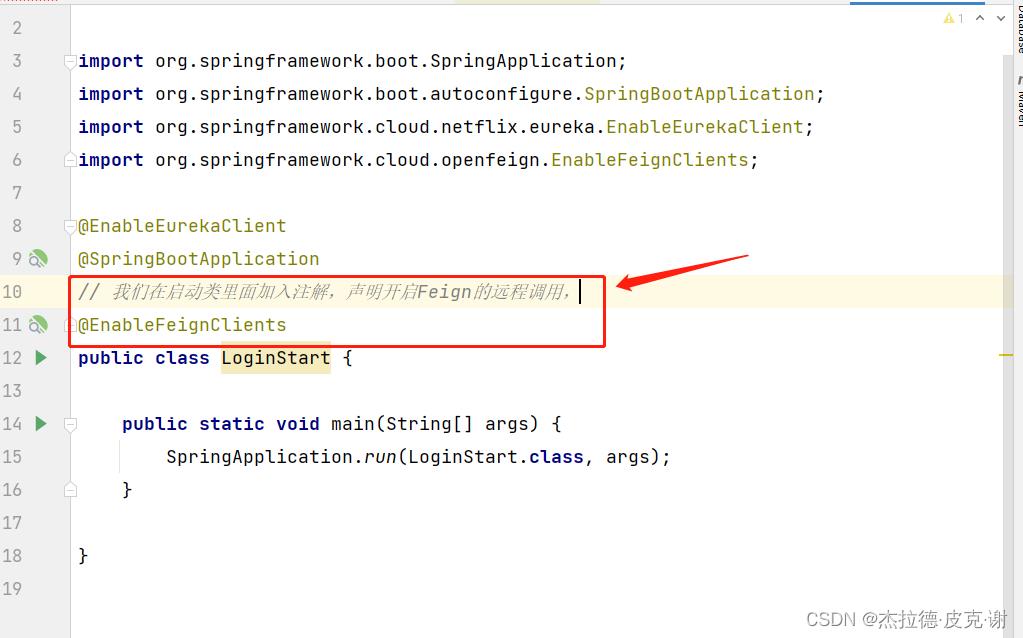
- 1.在启动类增加
@EnableFeignClients

- 2.定义接口
package com.xxx.xxx.client;


import org.springframework.cloud.openfeign.FeignClient;
import org.springframework.http.MediaType;
import org.springframework.stereotype.Component;
import org.springframework.web.bind.annotation.RequestMapping;
import org.springframework.web.bind.annotation.RequestMethod;
import org.springframework.web.bind.annotation.RequestParam;

import java.util.Map;

@Component
/**
 *  value = "user" 中 user 为 调用 user 服务的Id
 *  spring.application.name=user
 */
@FeignClient(value = "user", configuration = UserSupportConfig.class)
public interface TestClientService
    /**
     * @param id
     * @return /user/selectById 为 userController 中的 /user/selectById 方法地址
     */
    @RequestMapping(value = "/user/selectById", method = RequestMethod.GET, produces = MediaType.APPLICATION_JSON_UTF8_VALUE, consumes = MediaType.MULTIPART_FORM_DATA_VALUE)
    /**
     * userId 为参数 必须写@RequestParam 否则报错
     */
    Map upload(@RequestParam("userId") Integer id);
- 3.定义熔断类,发生错误时回调:
import java.util.List;
import org.springframework.stereotype.Component;
@Component
public class Hysitx implements TestClientService
	@Override
	public List<String> test(String[] names)
		System.out.println("接口调用失败");
		return null;
- 4.调用
和基本的service调用一致
1.先引入 @Autowired
2.在方法中直接调用
通俗解释可以把它当成一个spring Bean 可以直接当成一个Service
给@FeignClient 添加Header信息
1.在@RequestMapping中添加
@FeignClient(name="custorm",fallback=Hysitx.class)
public interface IRemoteCallService
	@RequestMapping(value="/user/selectById",method = RequestMethod.POST,
		headers = "Content-Type=application/json;charset=UTF-8")
    Map test(@RequestParam("userId") int id);
2.在方法参数前面添加@RequestHeader注解:
@FeignClient(name="custorm",fallback=Hysitx.class)
public interface IRemoteCallService
	@RequestMapping(value="/user/selectById",method = RequestMethod.POST,
		headers = "Content-Type=application/json;charset=UTF-8")
    List<String> test(@RequestParam("userId")@RequestHeader("Authorization") int id);
3.使用@Header注解
@FeignClient(name="custorm",fallback=Hysitx.class)
public interface IRemoteCallService
	@RequestMapping(value="/user/selectById",method = RequestMethod.POST)
	@Headers("Content-Type: application/json;charset=UTF-8")
    List<String> test(@RequestParam("userId") int id);
Linux下安装Nginx详细图解教程
Linux下安装Nginx详细图解教程
什么是Nginx?
Nginx ("engine x") 是一个高性能的 HTTP 和 反向代理 服务器,也是一个 IMAP/POP3/SMTP 代理服务器,在高连接并发的情况下Nginx 是 Apache 服务器不错的替代品.其特点是占有内存少,并发能力强,事实上nginx的并发能力确实在同类型的网页服务器中表现较好.目前中国大陆使用nginx网站用户有:新浪、网易、 腾讯,另外知名的微网志Plurk也使用nginx。
Nginx 作为 负载均衡 服务器:
Nginx 既可以在内部直接支持 Rails 和 PHP 程序对外进行服务,也可以支持作为 HTTP 代理服务器对外进行服务。 Nginx 采用 C 进行编写, 不论是系统资源开销还是 CPU 使用效率都比 Perlbal 要好很多。作为邮件代理服务器:
Nginx 同时也是一个非常优秀的邮件代理服务器(最早开发这个产品的目的之一也是作为邮件代理服务器), Last.fm 描述了成功并且美妙的使用经验。Nginx 是一个安装非常简单,配置文件非常简洁(还能够支持perl语法), Bugs非常少的服务器: Nginx 启动特别容易,并且几乎可以做到 7*24 不间断运行,即使运行数个月也不需要重新启动。 你还能够不间断服务的情况下进行软件版本的升级。
Nginx的安装
模块依赖性Nginx需要依赖下面3个包
1. gzip 模块需要 zlib 库 ( 下载: http://www.zlib.net/ )
2. rewrite 模块需要 pcre 库 ( 下载: http://www.pcre.org/ )
3. ssl 功能需要 openssl 库 ( 下载: http://www.openssl.org/ )
Nginx包下载: http://nginx.org/en/download.html
依赖包安装顺序依次为:openssl、zlib、pcre, 然后安装Nginx包.
图解教程
第一步: 下载安装所需包
openssl-fips-2.0.2.tar.gz
zlib-1.2.7.tar.gz
pcre-8.21.tar.gz
nginx-1.2.6.tar.gz
第二步:依次安装openssl-fips-2.0.2.tar.gz, zlib-1.2.7.tar.gz, pcre-8.21.tar.gz, nginx-1.2.6.tar.gz
1.安装openssl-fips-2.0.2.tar.gz
[root@localhost mrms]# tar -zxvf openssl-fips-2.0.2.tar.gz

[root@localhost mrms]# cd openssl-fips-2.0.2

[root@localhost openssl-fips-2.0.2]# ./config

[root@localhost openssl-fips-2.0.2]# make

[root@localhost openssl-fips-2.0.2]# make install
2.安装zlib-1.2.7.tar.gz
[root@localhost mrms]# tar -zxvf zlib-1.2.7.tar.gz

[root@localhost mrms]# cd zlib-1.2.7

[root@localhost zlib-1.2.7]# ./configure

[root@localhost zlib-1.2.7]# make

[root@localhost zlib-1.2.7]# make install
3.安装pcre-8.21.tar.gz
[root@localhost mrms]# tar -zxvf pcre-8.21.tar.gz

[root@localhost mrms]# cd pcre-8.21

[root@localhost pcre-8.21]# ./configure

[root@localhost pcre-8.21]# make

[root@localhost pcre-8.21]# make install
4.安装 nginx-1.2.6.tar.gz
[root@localhost mrms]# tar -zxvf nginx-1.2.6.tar.gz

[root@localhost mrms]# cd nginx-1.2.6

[root@localhost nginx-1.2.6]# ./configure --with-pcre=../pcre-8.21 --with-zlib=../zlib-1.2.7 --with-openssl=../openssl-fips-2.0.2

[root@localhost nginx-1.2.6]# make

[root@localhost nginx-1.2.6]# make install
至此Nginx的安装完成!
第三步:检测是否安装成功
[root@localhost nginx-1.2.6]# cd  /usr/local/nginx/sbin

[root@localhost sbin]# ./nginx -t
出现如下所示提示,表示安装成功

启动nginx
[root@localhost sbin]# ./nginx
查看端口
[root@localhost sbin]# netstat -ntlp
结果如下

以上是关于@FeignClient使用详细教程(图解)的主要内容,如果未能解决你的问题,请参考以下文章