node.js开发实战
Posted 潮哥
tags:
篇首语:本文由小常识网(cha138.com)小编为大家整理,主要介绍了node.js开发实战相关的知识,希望对你有一定的参考价值。
1. 什么是RPC调用(远程过程调用)remote procedure call
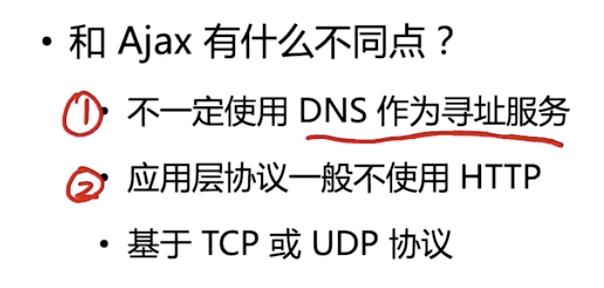
半双工和全双工通信(实现难度和成本)
二进制协议
. 更小的数据包体积
. 更快的编解码速率
2. Buffer 编解码二进制数据包 (node 的二进制Buffer模块)
#buffer创建
// 具体用法参见文档
1. Buffer.from()
2. Buffer.alloc()

var buffer = Buffer.from(\'guiqing\'); // <Buffer 67 75 69 71 69 6e 67>
var buffer = Buffer.from(\'股\'); //<Buffer e8 82 a1>
对于默认的utf-8编码;英文占用一个字节,中文占用三个字节,为16进制

#buffer的写入
buffer.writeInt8
buffer.writeInt16BE
buffer.writeInt16LE

为啥writeInt8没有大小端,是因为一个字节为8位,刚好不需要两位,没有顺序之分
原生动态将多个string转为二进制的话,可能还需要获取写入的string对应的字节长度,以便管理下一次写入的offset;
可以通过Buffer.byteLength()来获取
(Protocol Buffers)用来编码二进制数据
protocol-buffers(npm包,用于方便实现编码二进制数据)
var obj = {
  a: 1
}
var buffer = Buffer.from(JSON.stringify(obj))
console.log(buffer.toString())// 可以将json数据直接这样转为二进制数据
3. net 搭建多路复用的RPC通道

对应的https://github.com/geektime-geekbang/geek-nodejs/tree/master/chapter2/rpc
4. HTTP 服务性能测试
压力测试工具(ab、webbench)
通常用ab (https://www.jianshu.com/p/43d04d8baaf7)
找到性能瓶颈
. top (cpu、内存)
. iostat (硬盘)
5. Node.js性能分析工具
1⃣️ 自带的 profile 启动命令的时候带上--prof (eg. node --prof app.js)
这时会生成一个*.log 文件
可以通过命令: node --prof-process *.log > profile.txt (生成文件, 然后主要看这里,看主要的耗时)
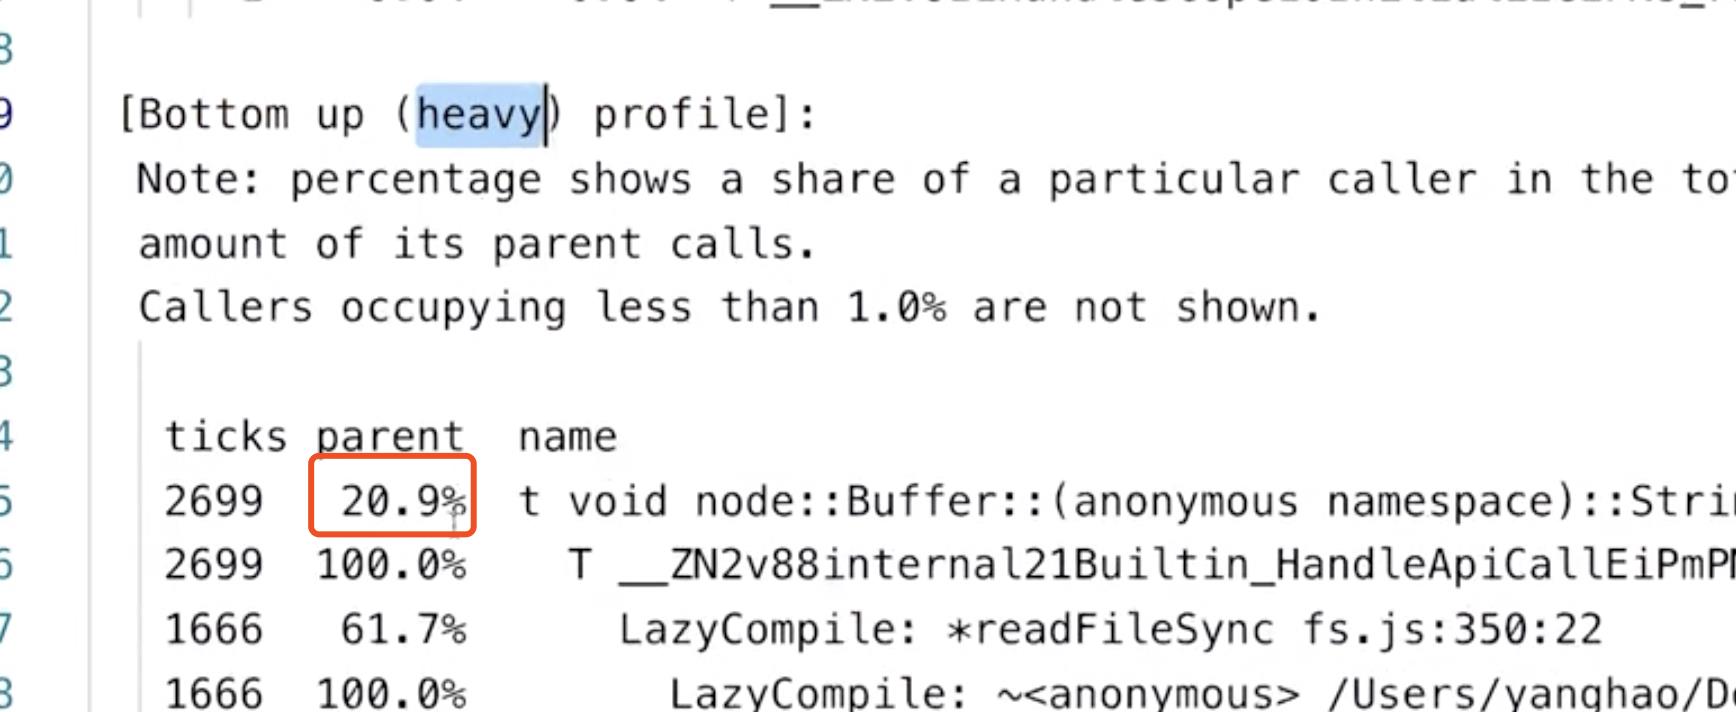
2⃣️ Chrome devtool (eg. node --inspect-brk app.js)
chrome://inspect 进入
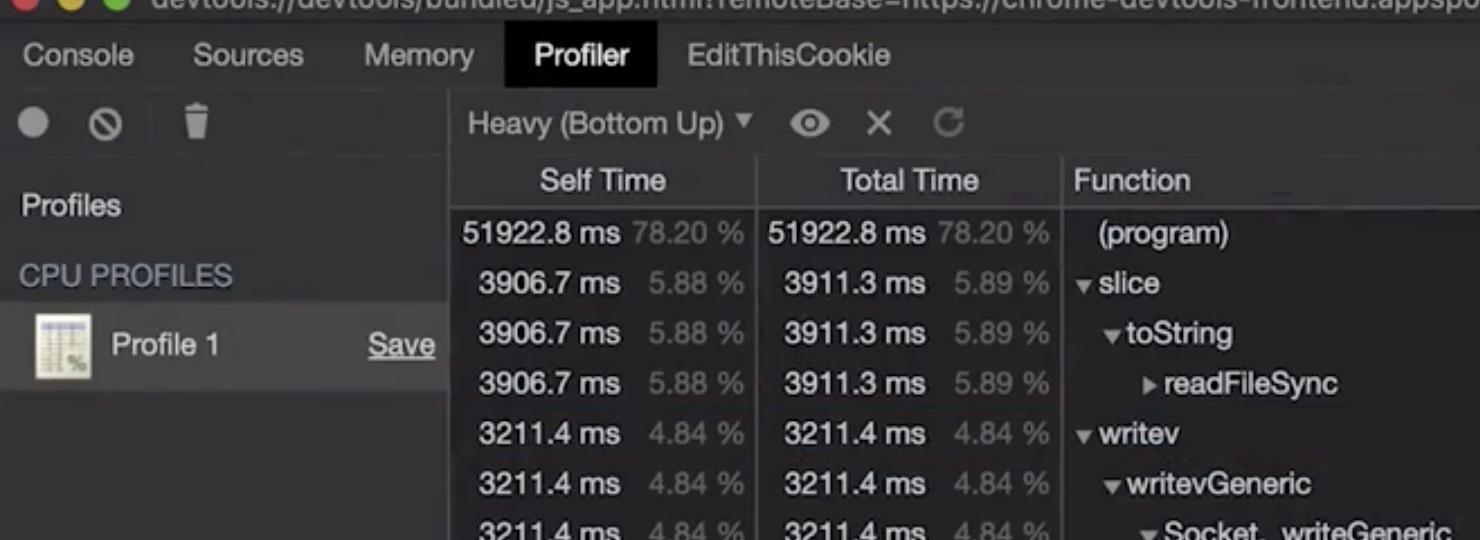
3⃣️ Clinic.js
4⃣️ 内存分析,可以点击Memory

这个就是你所占有的内存总量
6. 石头剪刀布游戏
1⃣️ process.argv

可以获取到用户输入的指令参数
2⃣️ module.exports 和 exports的区别
#lib.js

exports.a = \'hello world\';

module.exports = function (){
  console.log(\'exports被重新赋值了,上面定义的属性获取不到\')
}

setTimeout(function(){
   console.log(exports); // {a: \'hello world\'}
}, 2000)


#index.js
const lib = require(\'./lib.js\'); // lib 是引用类型
console.log(lib); //[Function]

lib.b = \'我修改了对象\'
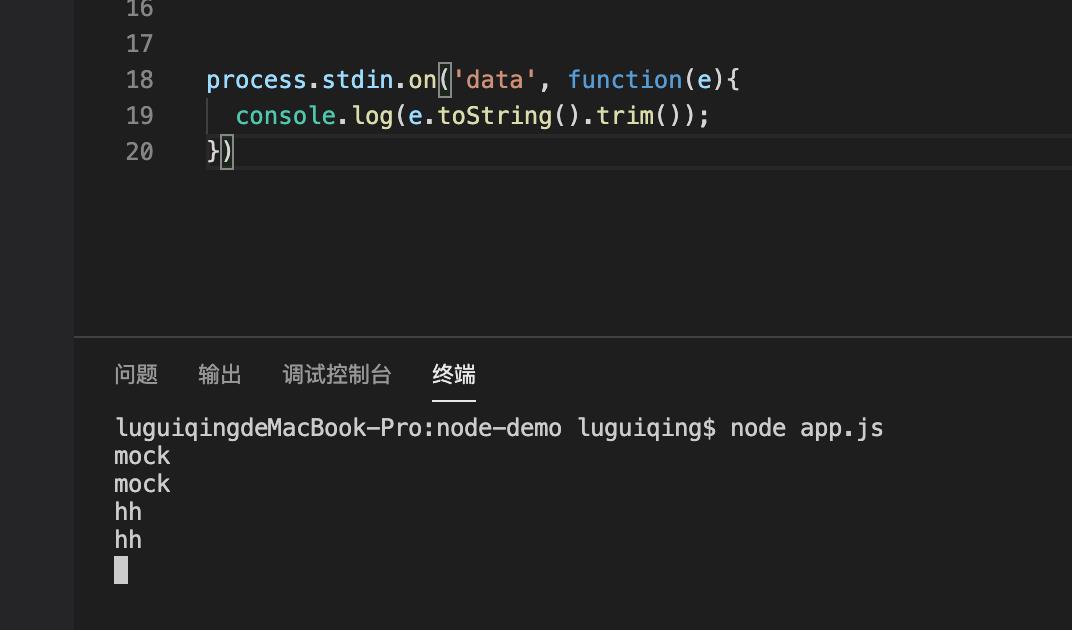
3⃣️ process.stdin
7. callback 为啥采用error-first 模式
/**
 * try catch只能抓到一个调用堆栈内,即一个事件循环里的错误
 */
// try {
    interview(function (err, res) {
        if (err) {
            console.log(\'cry\')
            return;
        }
        console.log(\'smile\')
    })

// } catch (e) {
//     console.log(\'cry\')
// }


function interview(callback) {

    setTimeout(() => {
        if (Math.random() > 0.2) {
            callback(null, \'success\')

        } else {
            // throw new Error(\'fail\');
            callback(new Error(\'fail\'))
        }

    }, 500)
}
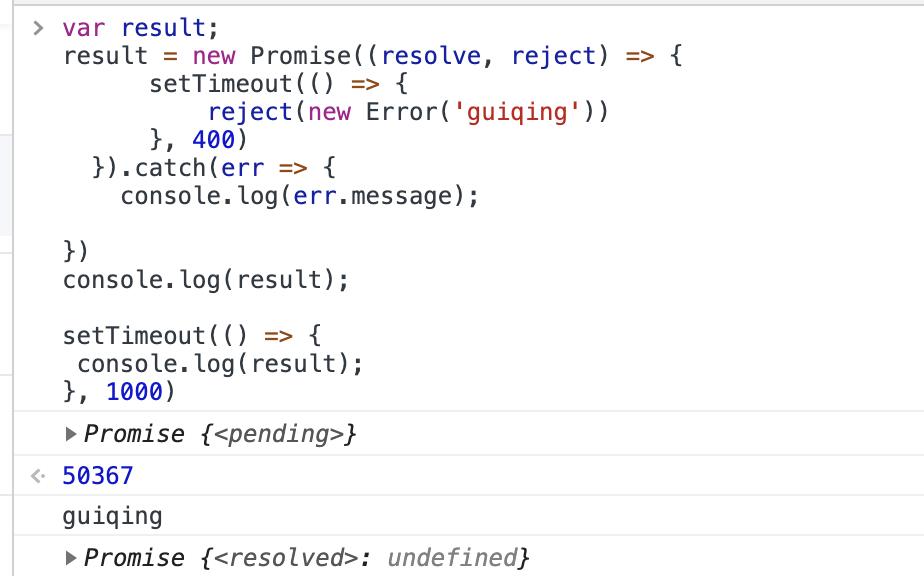
8. promise 的状态是和最后一个then或者catch相关,或者是then中的其他promise状态相关
9. koa的优势
1⃣️. 不绑定中间间,更简洁
2⃣️. 使用async/await实现中间件,有暂停的能力(await next());在异步的情况下也符合洋葱模型
10. 使用es6模版和vm作为渲染引擎
// template.js
const fs = require(\'fs\');
const vm = require(\'vm\');

const templateCache = {};

const templateContext = vm.createContext({
    include: function (name, data) {
        const template = templateCache[name] || createTemplate(name)
        return template(data);
    }
});

function createTemplate(templatePath) {

    templateCache[templatePath] = vm.runInContext(
        `(function (data) {
            with (data) {
                return \\`${fs.readFileSync(templatePath, \'utf-8\')}\\`
            }
        })`,
        templateContext
    );

    return templateCache[templatePath]
}

module.exports = createTemplate

// 使用 index.js
const template = require(\'./template\');
const detailTemplate = template(__dirname + \'/template/index.html\');
app.use(async (ctx) => {
ctx.status = 200;
ctx.body = detailTemplate(result);
})
渲染引擎模版要提供
1⃣️ include 子模版
2⃣️ 具备防止xss攻击,helper函数
11. graphQL: Facebook开发的实现API服务的库
比Restful的优势在于能够让前端有“自定义查询”数据的能力
koa-graphql(npm包)
12. 前后端同构
场景:服务端渲染,同时前端可以进行无刷新排序和分类等操作
难点:由于我们使用redux或者vuex; 所以数据方面比较难同构, react 可以用 next.js 进行服务端渲染
axios支持运行在浏览器和node.js
13. 子进程(child_process)和 工作线程(worker_threads)和集群(cluster)
# child_process.fork() 方法是 child_process.spawn(), 能和父进程进行通信
# index.js
const cp = require(\'child_process\');

const child_process_demo = cp.fork(__dirname + \'/child.js\');

child_process_demo.send(\'hello\');

#child.js
process.on(\'messaage\', function(str) {
   console.log(str);
   process.send(\'world\'); // process是全局变量, 且为当前子进程全局变量,所以只会接收到child_process_demo的消息
})
const cluster = require(\'cluster\');
const os = require(\'os\');

if (cluster.isMaster) {
    for(let i = 0; i < os.cpus().length / 2; i++) {
        cluster.fork();
    };
} else {
    require(\'./app.js\');
};

//子进程启动的时候也会执行这个文件,并且isMaster是false
// cluster 启动多个子进程,但是能监听同个端口是进行了处理的。
// 处理成类似server.listen({fd: 7});这里不太清楚没细究
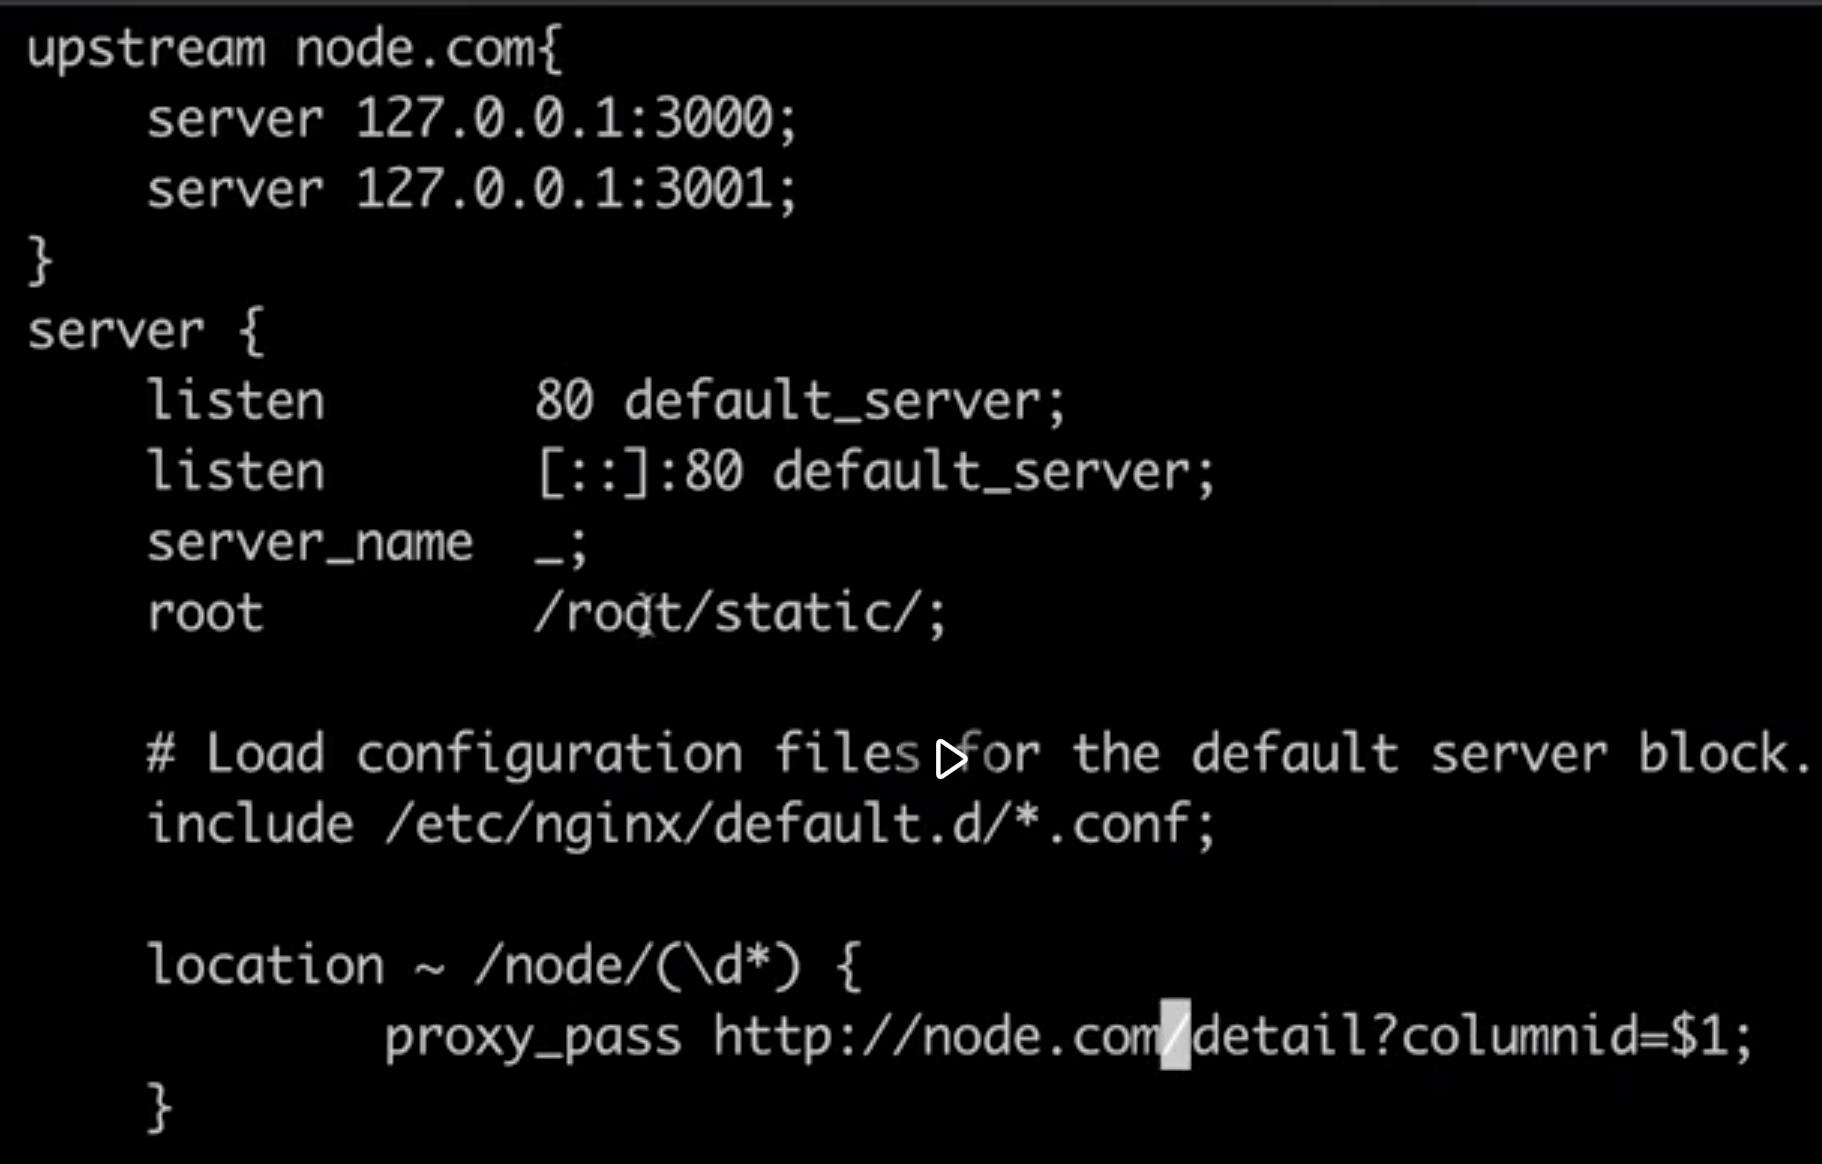
14. 反向代理和缓存服务 (nginx)
15. serverless (渐进式)
云函数(自行百度理解)
const fs = require(\'fs\');
const mkdirp = require(\'mkdirp\');
const webpack = require(\'webpack\');
const mfs = new (require(\'memory-fs\'));

module.exports = function (
    businessName,
    dataJSPath,
    templatePath
) {
    mkdirp.sync(__dirname + \'/../business/\' + businessName);

    fs
        .createReadStream(templatePath)
        .pipe(fs.createWriteStream(__dirname + \'/../business/\' + businessName + \'/template.tpl\'));

    const compileTask = webpack({
        mode: \'development\',
        devtool: false,
        target: \'node\',

        entry: dataJSPath,

        module: {
            rules: [
                { test: /.proto$/, use: \'text-loader\' }
            ]
        },

        output: {
            path: "/whatever",
            filename: "data.js"
        }
    });

    compileTask.outputFileSystem = mfs; // 这里可以借鉴,将webpack打包出来的文件先存在内存

    compileTask.run(function(err) {
        if (err) { return }
        const content = mfs.readFileSync(\'/whatever/data.js\')
        fs.writeFileSync(__dirname + \'/../business/\' + businessName + \'/data.js\', content);
    })
}
以上是关于node.js开发实战的主要内容,如果未能解决你的问题,请参考以下文章