Spring集成web环境-基本三层架构环境搭建
Posted bfhonor
tags:
篇首语:本文由小常识网(cha138.com)小编为大家整理,主要介绍了Spring集成web环境-基本三层架构环境搭建相关的知识,希望对你有一定的参考价值。
Spring集成web环境-基本三层架构环境搭建
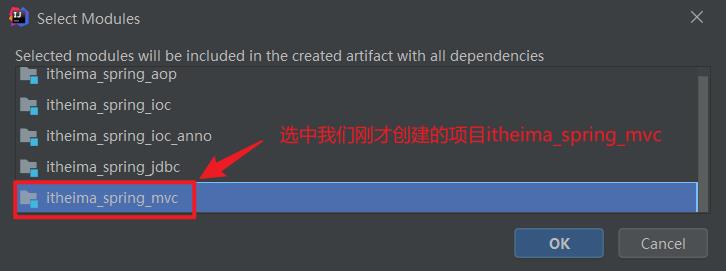
- 创建一个Spring项目文件itheima_spring_mvc,具体创建步骤可查看上一篇博客Spring课程工程构建
- 在pom.xml文件中,导入相关的坐标
<?xml version="1.0" encoding="UTF-8"?>
<project xmlns="http://maven.apache.org/POM/4.0.0"
         xmlns:xsi="http://www.w3.org/2001/XMLSchema-instance"
         xsi:schemaLocation="http://maven.apache.org/POM/4.0.0 http://maven.apache.org/xsd/maven-4.0.0.xsd">
    <modelVersion>4.0.0</modelVersion>

    <groupId>com.itheima</groupId>
    <artifactId>itheima_spring_mvc</artifactId>
    <version>1.0-SNAPSHOT</version>

    <properties>
        <maven.compiler.source>11</maven.compiler.source>
        <maven.compiler.target>11</maven.compiler.target>
    </properties>

    <dependencies>
        <dependency>
            <groupId>org.springframework</groupId>
            <artifactId>spring-test</artifactId>
            <version>5.2.8.RELEASE</version>
        </dependency>
        <dependency>
            <groupId>junit</groupId>
            <artifactId>junit</artifactId>
            <version>4.13</version>
            <scope>test</scope>
        </dependency>

        <dependency>
            <groupId>javax.servlet</groupId>
            <artifactId>javax.servlet-api</artifactId>
            <version>4.0.1</version>
            <scope>provided</scope>
        </dependency>
        <dependency>
            <groupId>javax.servlet.jsp</groupId>
            <artifactId>javax.servlet.jsp-api</artifactId>
            <version>2.2.1</version>
            <scope>provided</scope>
        </dependency>
        <dependency>
            <groupId>org.springframework</groupId>
            <artifactId>spring-context</artifactId>
            <version>5.2.8.RELEASE</version>
        </dependency>
    </dependencies>

</project>
- 在
src/main/java目录里面创建com.itheima.dao和com.itheima.service包; - 在
com.itheima.dao包里面创建UserDao接口文件和impl包,并且在impl包里面创建实现类UserDaoImpl
package com.itheima.dao;

public interface UserDao
    public void save();
package com.itheima.dao.impl;
import com.itheima.dao.UserDao;

public class UserDaoImpl implements UserDao
    public void save()
        System.out.println("save running...");
- 在
com.itheima.service包里面创建UserService接口文件和impl包,并且在impl包里面创建实现类UserServiceImpl
package com.itheima.service;

public interface UserService
    public void save();
package com.itheima.service.impl;
import com.itheima.dao.UserDao;
import com.itheima.service.UserService;
public class UserServiceImpl implements UserService

    private UserDao userDao;
    public void setUserDao(UserDao userDao)
        this.userDao=userDao;

    public void save()
        userDao.save();
- 在
src\\main\\resource文件里面创建applicationContext.xml文件,在里面配置Dao和service
<?xml version="1.0" encoding="UTF-8"?>
<beans xmlns="http://www.springframework.org/schema/beans"
       xmlns:context="http://www.springframework.org/schema/context"
       xmlns:xsi="http://www.w3.org/2001/XMLSchema-instance"
       xsi:schemaLocation="
       http://www.springframework.org/schema/beans http://www.springframework.org/schema/beans/spring-beans.xsd
       http://www.springframework.org/schema/context http://www.springframework.org/schema/context/spring-context.xsd
">

    <!--配置Dao-->
    <bean id="userDao" class="com.itheima.dao.impl.UserDaoImpl"></bean>

    <!--配置service-->
    <bean id="userService" class="com.itheima.service.impl.UserServiceImpl">
        <property name="userDao" ref="userDao"/>
    </bean>
</beans>
- 在
src\\main\\java里面创建com.itheima.web包,并且在此包下面创建UserServlet文件
package com.itheima.web;

import com.itheima.service.UserService;
import org.springframework.context.ApplicationContext;
import org.springframework.context.support.ClassPathXmlApplicationContext;

import javax.servlet.ServletException;
import javax.servlet.http.HttpServlet;
import javax.servlet.http.HttpServletRequest;
import javax.servlet.http.HttpServletResponse;
import java.io.IOException;

public class UserServlet extends HttpServlet
    @Override
    protected void doGet(HttpServletRequest req, HttpServletResponse resp) throws ServletException, IOException
        ApplicationContext app = new ClassPathXmlApplicationContext("applicationContext.xml");
        UserService userService = app.getBean(UserService.class);
        userService.save();
- 在
src/main/webapp/WEB-INF/web.xml文件中进行配置
<?xml version="1.0" encoding="UTF-8"?>
<web-app xmlns="http://xmlns.jcp.org/xml/ns/javaee"
         xmlns:xsi="http://www.w3.org/2001/XMLSchema-instance"
         xsi:schemaLocation="http://xmlns.jcp.org/xml/ns/javaee http://xmlns.jcp.org/xml/ns/javaee/web-app_4_0.xsd"
         version="4.0">

    <servlet>
        <servlet-name>UserServlet</servlet-name>
        <servlet-class>com.itheima.web.UserServlet</servlet-class>
    </servlet>
    <servlet-mapping>
        <servlet-name>UserServlet</servlet-name>
        <url-pattern>/userServlet</url-pattern>
    </servlet-mapping>

</web-app>
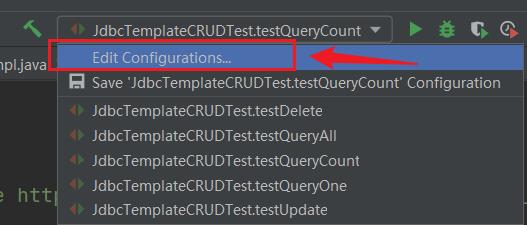
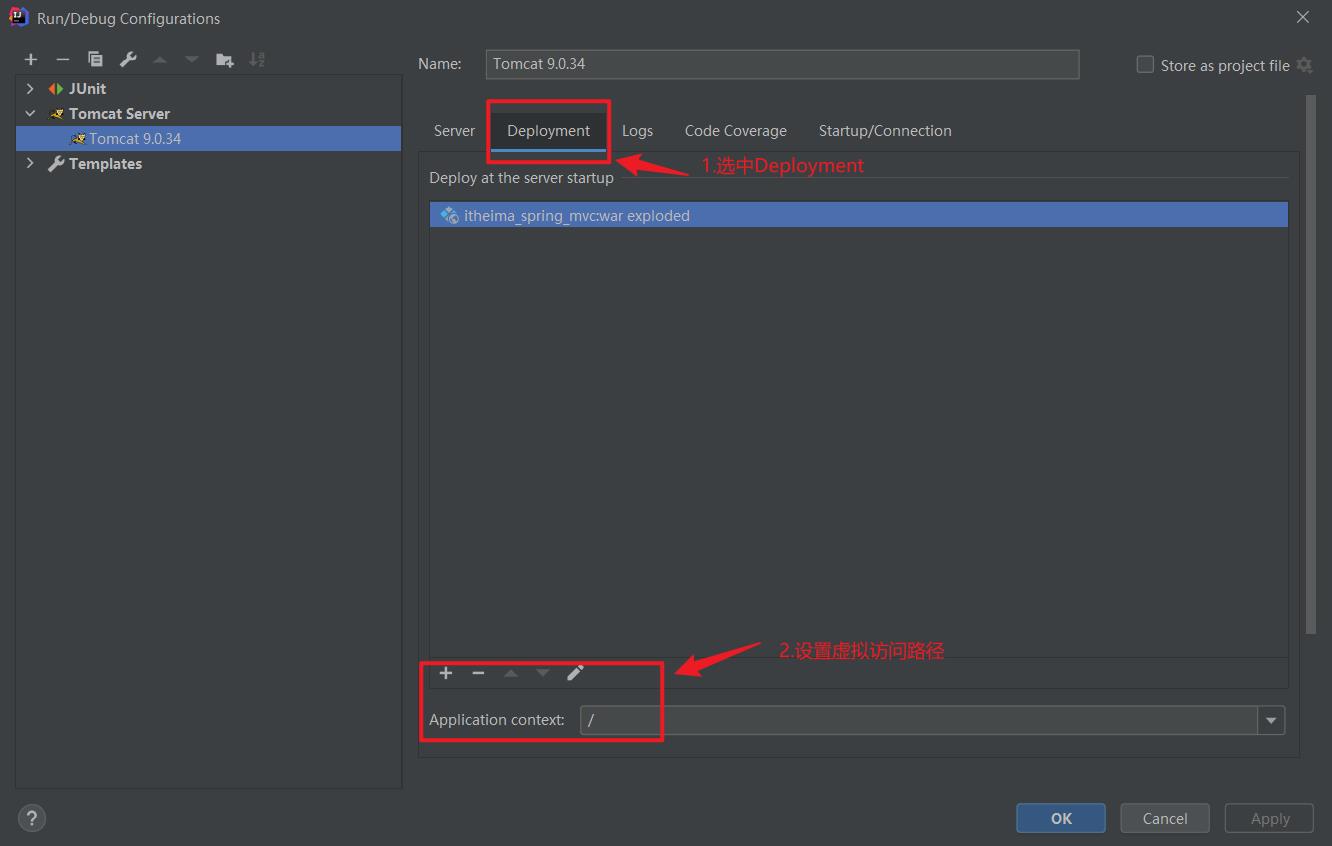
- 配置tomcat环境,点击打开
Edit Configurations..
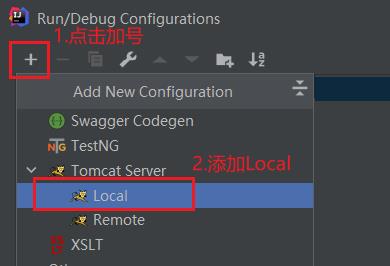
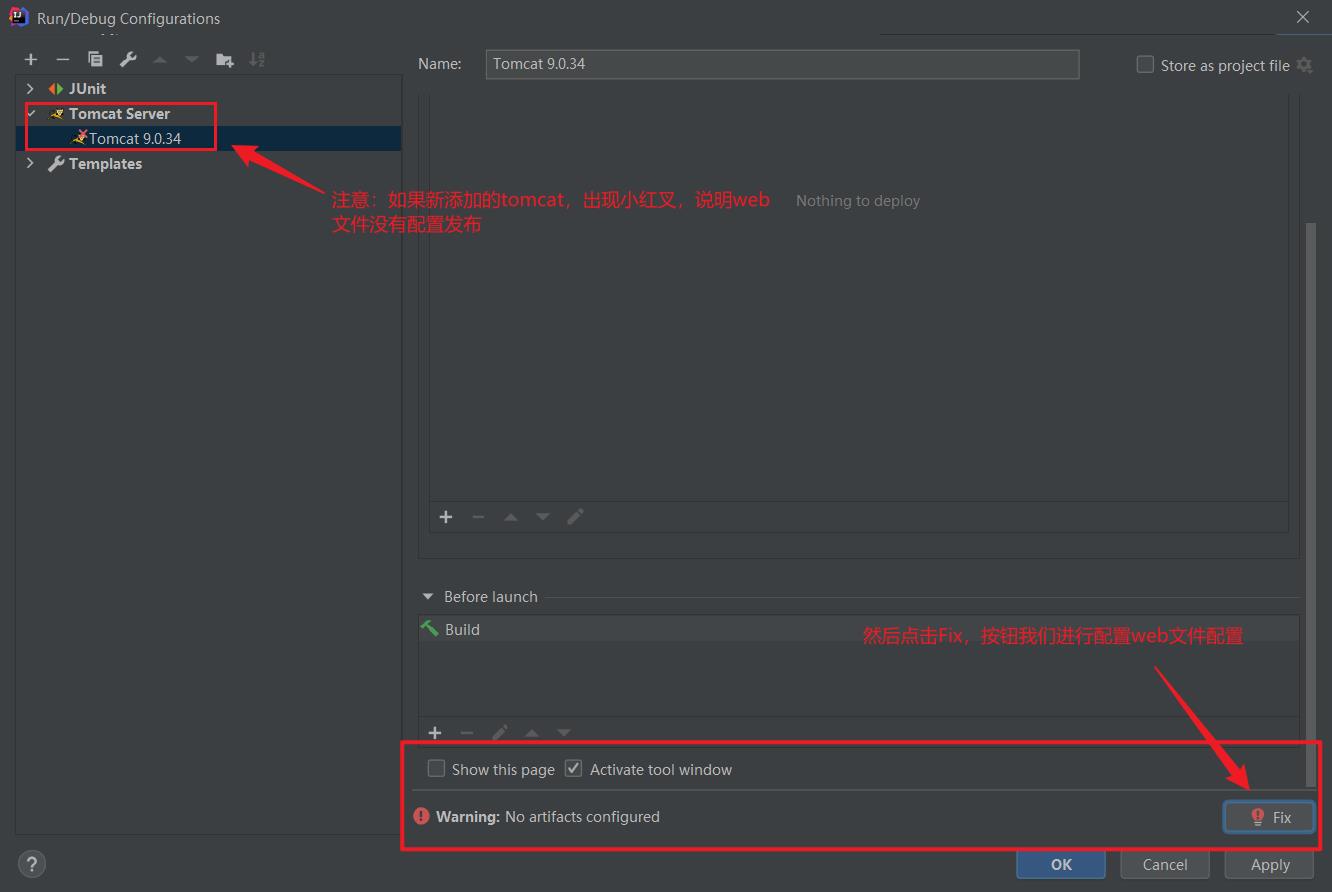
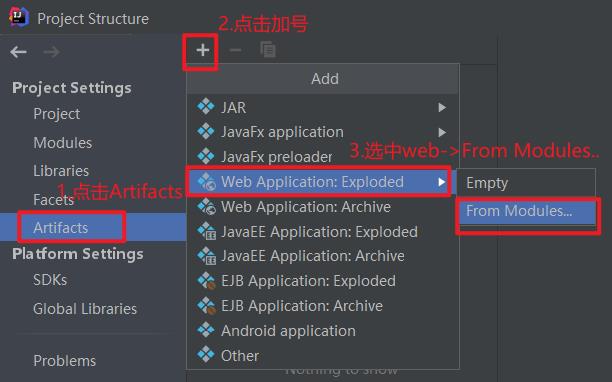
- 出现tomcat问题,可以参考此处;倘若没有问题,此处可跳过。
- 最后点击apply,关闭页面即可。
- 设置虚拟访问路径
- 启动tomcat服务器,在浏览器地址栏访问
http://localhost:8080/userServlet,此时控制台出现运行结果。
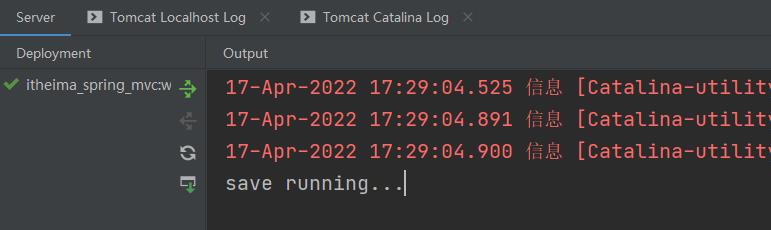
- 控制台出现
save running...,证明了我们在访问时候表示web层调用业务层,业务层调dao层,最终在dao层里面进行代码的输出。
以上是关于Spring集成web环境-基本三层架构环境搭建的主要内容,如果未能解决你的问题,请参考以下文章