消息序列化工具-protobuf介绍及安装使用技巧
Posted halazi100
tags:
篇首语:本文由小常识网(cha138.com)小编为大家整理,主要介绍了消息序列化工具-protobuf介绍及安装使用技巧相关的知识,希望对你有一定的参考价值。
简介
protobuf是google团队开发的用于高效存储和读取结构化数据的工具。
xml、json也可以用来存储此类结构化数据,但是使用protobuf表示的数据能更加高效,并且将数据压缩得更小,大约是json格式的1/10,xml格式的1/20。
以下介绍基于protobuf 2.6版本
定义message结构
protobuf将一种结构称为一个message类型,对应C/C++中的struct;
我们以电话簿中的数据为例。
struct Person
	string name;
	int32 id;
	string email;
	list<int32> samples;
;
对应到protobuf的定义如下:
message Person
  required string name = 1;
  required int32 id = 2; [default = 0]
  optional string email = 3;
  repeated int32 samples = 4 [packed=true];
其中Person是message这种结构的名称,name、id、email是其中的Field,每个Field保存着一种数据类型,=后面的1、2、3是Filed对应的id。
id在1-15之间编码只需要占一个字节,包括Filed数据类型和Filed对应数字id,在16-2047之间编码需要占两个字节,所以最常用的数据对应id要尽量小一些。
Field最前面的required,optional,repeated是这个Filed的规则,分别表示该数据结构中这个Filed有且只有1个,可以是0个或1个,可以是0个或任意个。
- required: 必须设置它的值
- optional: 可以设置,也可以不设置它的值
- repeated: 可以认为是动态分配的数组
google工程师认为使用required危害更大,他们更喜欢使用optional, repeated.
optional后面可以加default默认值,如果不加,数据类型的默认为0,字符串类型的默认为空串。repeated后面加[packed=true]会使用新的更高效的编码方式。
注意:使用required规则的时候要谨慎,因为以后结构若发生更改,这个Filed若被删除将可能导致兼容性的问题。
保留Filed和保留Filed number
每个Filed对应唯一的数字id,但是如果该结构在之后的版本中某个Filed删除了,为了保持向前兼容性,需要将一些id或名称设置为保留的,即不能被用来定义新的Field
如
message Person
  reserved 2, 15, 9 to 11;
  reserved "samples", "email";
引用其它message类
在同一个文件中,可以直接引用定义过的message类型。
在同一个项目中,可以用import来导入其它message类型。如 import “OnstarInterfaceandroid.proto”;
也可以在一个message类型中嵌套定义其它的message类型。
message扩展
如果要import的 proto 中有如下定义
message Person
  // ...
  extensions 100 to 199;
在另一个文件中,import 这个proto之后,可以对Person这个message进行扩展。
extend Person
  optional int32 bar = 126;
枚举类型
比如电话号码,只有移动电话、家庭电话、工作电话三种类型,因此枚举作为选项,枚举类型的默认值为第一项。
在上面的例子中在个人message中加入电话号码这个Filed。如果枚举类型中有不同的名字对应相同的数字id,需要加入option allow_alias = true这一项,否则会报错。
枚举类型中也有reserverd Filed和number,定义和message中一样。
message Person
  required string name = 1;
  required int32 id = 2;
  optional string email = 3;

  enum PhoneType
    //allow_alias = true;
    MOBILE = 0;
    HOME = 1;
    WORK = 2;


  message PhoneNumber
    required string number = 1;
    optional PhoneType type = 2 [default = HOME];


  repeated PhoneNumber phones = 4;
枚举定义之后,在生成源代码时会在编解码的接口中检查有效性
数据类型对应关系
在使用规则创建proto类型的数据结构文件之后,会将其转化成对应编程语言中的头文件或者类定义。
proto中的数据类型和c++,Python中的数据类型对应规则如下:
.proto C++ Python 介绍
- double double float
- float float float
- int32 int32 int 可变长编码,对负数效率不高
- int64 int64 int/long
- uint32 uint32 int/long
- uint64 uint64 int/long
- sint32 int32 int 可变长编码,对负数效率较高
- sint64 int64 int/long
- fixed32 uint32 int/long 32位定长编码
- fixed64 uint64 int/long
- sfixed32 int32 int
- sfixed64 int64 int/long
- bool bool bool
- string string str/unicode UTF-8编码或者7-ASCII编码
- bytes string str
由此可知,proto类型和C++类型几乎完全一致;
编码规则
protobuf有一套高效的数据编码规则。
可变长整数编码
每个字节有8bits,其中第一个bit是most significant bit(msb),0表示结束,1表示还要读接下来的字节。
对message中每个Filed来说,需要编码它的数据类型、对应id以及具体数据。
数据类型有以下6种,可以用3个bits表示。每个整数编码用最后3个bits表示数据类型。所以,对应id在1~15之间的Filed,可以用1个字节编码数据类型、对应id。
Type Meaning Used For
- 0 Varint int32, int64, uint32, uint64, sint32, sint64, bool, enum
- 1 64-bit fixed64, sfixed64, double
- 2 Length-delimited string, bytes, embedded messages, packed repeated fields
- 3 Start group groups (deprecated)
- 4 End group groups (deprecated)
- 5 32-bit fixed32, sfixed32, float
(id + 数据类型) + 数值
比如对于下面这个例子来说,如果给a赋值150,那么最终得到的编码是什么呢?
message Test
  optional int32 a = 1;
首先数据类型编码是000,因此id和它联合起来的编码是00001000.
然后值150的编码是1 0010110,采用小端序交换位置,即0010110 0000001,前面补1后面补0,即10010110 00000001,即96 01,
加上最前面的数据类型编码字节,总的编码为08 96 01。
有符号整数编码
如果用int32来保存一个负数,结果总是有10个字节长度,被看做是一个非常大的无符号整数。
使用有符号类型会更高效。它使用一种ZigZag的方式进行编码。即0还是0,-1编码成1,1编码成2,-2编码成3这种形式。
也就是说,对于sint32来说,n编码成 (n << 1) ^ (n >> 31),注意到第二个移位是算法移位。
定长编码
定长编码是比较简单的情况。
常用API, 可以直接查看生成的代码中的 .h 文件
protoc为message的每个required字段和optional字段都定义了以下几个函数(不限于这几个):
TypeName xxx() const; //获取字段的值
bool has_xxx(); //判断是否设值
void set_xxx(const TypeName&); //设值
void clear_xxx(); //使其变为默认值
为每个repeated字段定义了以下几个:
TypeName* add_xxx(); //增加结点, 然后需要拿到结构体指针后对成员进行赋值操作;
TypeName xxx(int) const; //获取指定序号的结点,类似于C++的"[]"运算符
TypeName* mutable_xxx(int); //类似于上一个,但是获取的是指针
int xxx_size(); //获取结点的数量
下面几个是常用的序列化函数:
bool SerializeToOstream(std::ostream * output) const; //输出到输出流中
bool SerializeToString(string * output) const; //输出到string
bool SerializeToArray(void * data, int size) const; //输出到字节流,可以通过ByteSize方法计算存储空间后使用new申请一块内存给data;
与之对应的反序列化函数:
bool ParseFromIstream(std::istream * input); //从输入流解析
bool ParseFromString(const string & data); //从string解析
bool ParseFromArray(const void * data, int size); //从字节流解析,size为buffer的size
其他常用的函数:
bool IsInitialized(); //检查是否所有required字段都被设值
size_t ByteSize() const; //获取二进制字节序列的大小
对嵌套message成员提供的函数:
bool has_xxx()
void set_has_xxx()
void clear_has_xxx()
void clear_xxx()
const TypeName& xxx() const //前面几个和上面介绍的一致
TypeName* mutable_xxx() //会自动new一块内存并返回,然后拿到结构体指针后对成员进行赋值操作;
TypeName* release_xxx()
void set_allocated_xxx(TypeName* xxx) //传入的参数需要自己手动new一块内存,和mutable_xxx()有所区别;
参考如下
inline ::RadioInterfaceTBox::RadioInfo* RadioTxCommunicationSyncNotify::mutable_radiobasicinfo()
  set_has_radiobasicinfo();
  if (radiobasicinfo_ == NULL) radiobasicinfo_ = new ::RadioInterfaceTBox::RadioInfo;
  return radiobasicinfo_;

inline void RadioTxCommunicationSyncNotify::set_allocated_radiobasicinfo(::RadioInterfaceTBox::RadioInfo* radiobasicinfo)
  delete radiobasicinfo_;
  radiobasicinfo_ = radiobasicinfo;
  if (radiobasicinfo)  set_has_radiobasicinfo();  else  clear_has_radiobasicinfo();
安装protobuf包
官方地址:https://github.com/google/protobuf/blob/master/src/README.md
首先官方下载源码并解压
以ubuntu安装为例
$ sudo apt-get install autoconf automake libtool curl make g++ unzip

$ sudo ./autogen.sh
$ sudo ./configure
$ sudo make -j8
$ sudo make check
$ sudo sudo make install
$ sudo sudo ldconfig #refresh shared library cache.
实例演示
首先,定义下面的test.proto文件
message Info
    required string name = 1;
    optional int32   age = 2;
message是protobuf中定义的数据结构;
- reuqied关键字表示这个参数必须包含在消息体中(如果用optional关键字来定义这个参数,那表示该参数可以缺省)
- string是参数Info的数据类型
- name是参数名称
=1表示name是该消息体的第1个参数
定义proto文件之后需要用protobuf提供的编译工具将proto文件编译成不同语言的源码,此处使用C++。
protoc -I=./ --cpp_out=./ test.proto
将会生成两个文件, test.pb.h 和test.pb.cc;按照C++习惯我们把test.pb.cc文件更名为test.pb.cpp
编写C++源代码进行测试
/* helloproto.cpp */
#include <stdio.h>
#include <iostream>
#include <iomanip>
#include <string>
#include "test.pb.h"
using namespace std;

int main()
	int length = 0;
	/* 首先设置各字段的value,然后序列化 */
	Info *pinfo = new Info();
	pinfo->set_name("testname");
	pinfo->set_age(655384);
	cout << "info.name=" << pinfo->name() << ", age=" << hex << pinfo->age() << endl;
	length = pinfo->ByteSize();
	uint8_t *buf = new uint8_t[length];
	pinfo->SerializeToArray(buf, length); /* 序列化 */

	for (int i = 0; i < length; i++)

		printf("%02X(%c) ", buf[i], buf[i]);
		/* cout << hex << buf[i] << " "; */

	cout << endl;

	/* 首先解序列化,然后获取各字段的value; */
	Info *pinfo2 = new Info();
	pinfo2->ParseFromArray(buf, length);
	cout << pinfo2->name() << endl;
	cout << pinfo2->age()  << endl;

	delete buf;
	delete pinfo;
	delete pinfo2;
	return 0;
编译
首先确定libprotobuf.so的位置
$ which protoc
#/usr/local/bin/protoc

$ sudo find /usr/ -name libprotobuf.so
#/usr/local/lib/libprotobuf.so
添加连接选项-L 路径 -lprotobuf
$ g++ helloproto.cpp test.pb.cpp -L /usr/local/lib/ -lprotobuf -pthread -o helloproto
$ ./helloproto
参考资料
https://developers.google.com/protocol-buffers/docs/cpptutorial
https://www.jianshu.com/p/419efe983cb2
Protobuf安装使用以及实例介绍
0. 前言
Protocol Buffer是一个跨语言、跨平台、可扩展的用于序列化和结构化数据的工具,常用于用于通信协议,数据存储等。值得注意的是,protobuf是以二进制来存储数据的。相对于JSON和XML具有以下优点:
- 1,简洁
- 2,
体积小:消息大小只需要XML的1/10 ~ 1/3; - 3,
速度快:解析速度比XML快20 ~ 100倍; - 4,json\\xml都是基于文本格式,protobuf是二进制格式;
- 5,更好的兼容性,Protobuf设计的一个原则就是要能够很好的支持向下或向上兼容。

Protobuf 有两个大的版本:proto2 和 proto3,类似于python 的 2.x 和 3.x 版本,如果是新接触的话,同样建议直接入手 proto3 版本。proto3 相对 proto2 而言,支持更多的语言(Ruby、C#等)、删除了一些复杂的语法和特性、引入了更多的约定等。
protobuf 是用来对数据进行序列化和反序列化。
- 序列化 (Serialization):将数据结构或对象转换成二进制串的过程。
- 反序列化(Deserialization):将在序列化过程中所生成的二进制串转换成数据结构或者对象的过程。
参考资料如下:
- protobu下载地址:https://github.com/protocolbuffers/protobuf
- 官网:https://developers.google.com/protocol-buffers/
1. 安装
- 安装依赖项
sudo apt-get install autoconf automake libtool curl make g++ unzip
- 下载并生成配置脚本
git clone https://github.com/protocolbuffers/protobuf.git
cd protobuf
git submodule update --init --recursive
./autogen.sh
- 安装
 ./configure
 make
 make check
 sudo make install
 sudo ldconfig
- 测试
protoc -h
2. ProtoBuf数据类型
下面只展示了C++的数据类型。其它语言的类型大同小异,详情可以查阅官方。
| proto文件消息类型 | C++ 类型 | 说明 |
|---|---|---|
| double | double 双精度浮点型 | |
| float | float | 单精度浮点型 |
| int32 | int32 | 使用可变长编码方式,负数时不够高效,应该使用sint32 |
| int64 | int64 | 同上 |
| uint32 | uint32 | 使用可变长编码方式 |
| uint64 | uint64 | 同上 |
| sint32 | int32 | 使用可变长编码方式,有符号的整型值,负数编码时比通常的int32高效 |
| sint64 | sint64 | 同上 |
| fixed32 | uint32 | 总是4个字节,如果数值总是比2^28大的话,这个类型会比uint32高效 |
| fixed64 | uint64 | 总是8个字节,如果数值总是比2^56大的话,这个类型会比uint64高效 |
| sfixed32 | int32 | 总是4个字节 |
| sfixed64 | int64 | 总是8个字节 |
| bool | bool | |
| string | string | 一个字符串必须是utf-8编码或者7-bit的ascii编码的文本 |
| bytes | string | 可能包含任意顺序的字节数据 |
2. 一个简单例子
2.1 proto文件格式讲解
我们先来看一个简单例子:simple.proto
syntax = "proto3";

package tutorial;

message SearchRequest {
  string query = 1;
  int32 page_number = 2;
  int32 result_per_page = 3;
}
-
第一行指定
protobuf的版本,这里是以proto3格式定义。还可以指定为proto2。如果没有指定,默认以proto2格式定义。新版的proto必须指定是proto2还是proto3。 -
.proto 文件以一个 package 声明开始,这个声明是为了防止不同项目之间的命名冲突。
类似于C++中的命名空间。 -
每一个字段都要求编码标识号,且
唯一。 -
它定义了一个message类型: SearchRequest, 它包含三个字段(field):query、page_number、result_per_page
-
message会被编译成不同的编程语言的相应对象,比如
C++中的class、Go中的struct等。 -
字段前面可以添加修饰,比如required、optional和repeated等。
- required:必须提供字段值,否则对应的消息会被认为是“未初始化的”。
- optional:字段值指定与否都可以。如果没有指定一个 optional 的字段值,它就会使用默认值。
- repeated:字段会重复 N 次,类似于动态数组。
2.2 proto文件运行
在当前的目录下执行:
protoc -I=. -I/usr/local/include --cpp_out=. simple.proto
可以将这个proto编译成C++的代码,因为这里我们使用了C++输出格式。go_out用来生成GO代码,java_out产生Java代码,python_out产生python代码,类似地还有csharp_out、objc_out、ruby_out、php_out等参数。
生成的代码我们指定放在本地文件夹中(–cpp_out=.)。这里用.来表示本地文件夹。
会生成simple.pb.cc和simple.pb.h文件,如下图所示:
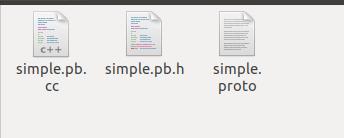
- simple.pb.cc:生成类的头文件
- simple.pb.cc:类的实现
3. proto函数解释
3.1 生成的函数
以string password = 3;为例:
- clear_password:清空设置
- password:获得该字段
- set_password:设置该字段
- mutable_password:返回指向该字段的一个指针
- has_password:是否set过
3.2 标准消息函数(Standard Message Methods)
bool IsInitialized() const; //检查是否全部的required字段都被置(set)了值。

void CopyFrom(const Person& from); //用外部消息的值,覆写调用者消息内部的值。

void Clear();	//将所有项复位到空状态(empty state)。

int ByteSize() const;	//消息字节大小
3.3 关于 Debug 的 API
string DebugString() const;	//将消息内容以可读的方式输出

string ShortDebugString() const; //功能类似于,DebugString(),输出时会有较少的空白

string Utf8DebugString() const; //Like DebugString(), but do not escape UTF-8 byte sequences.

void PrintDebugString() const;	//Convenience function useful in GDB. Prints DebugString() to stdout.
3.4序列化与反序列化
bool SerializeToString(string* output) const; //将消息序列化并储存在指定的string中。注意里面的内容是二进制的,而不是文本;我们只是使用string作为一个很方便的容器。

bool ParseFromString(const string& data); //从给定的string解析消息。

bool SerializeToArray(void * data, int size) const	//将消息序列化至数组

bool ParseFromArray(const void * data, int size)	//从数组解析消息

bool SerializeToOstream(ostream* output) const; //将消息写入到给定的C++ ostream中。

bool ParseFromIstream(istream* input); //从给定的C++ istream解析消息。
4. 简单的序列化与反序列化实例
4.1 写project.proto并编译出cc和h文件
//指定版本 使用protobuf3
syntax = "proto3";

message Account {
	//账号
	uint64 ID = 1;
	//名字
	string name = 2;
	//密码
	string password = 3;
}
编译出pb.cc和pb.h文件
protoc -I=. -I/usr/local/include --cpp_out=. project.proto
4.2 序列化与反序列化使用
- demo.cpp文件:
#include <iostream>
#include <string>
#include "project.pb.h"

int main()
{
	Account account;
	account.set_id(1000);
	account.set_name("name");
	account.set_password("password");

	//序列化
	std::string s = account.SerializeAsString();
	if(s.size() == 0) {
		std::cout << "error in SerializeAsString" << std::endl;
	}
	Account nAccount;
    //反序列化
	if(nAccount.ParseFromString(s)) {
		std::cout << nAccount.id() << std::endl;
		std::cout << nAccount.name() << std::endl;
		std::cout << nAccount.password() << std::endl;
	} else {
		std::cout << "error in ParseFromString" << std::endl;
	}
	return 0;
}
- 编译:
g++ demo.cpp project.pb.cc -lprotobuf -o main
- 运行
./main
- 输出:
1000
name
password
5. 稍复杂的使用
5.1 student.proto文件与编译
syntax = "proto2";

package tutorial;
message Student{
        required uint64 id = 1;
        required string name =2;
        optional string email = 3;

        enum PhoneType {
                MOBILE = 0;
                HOME = 1;
        }
        message PhoneNumber {
            required string number = 1;
            optional PhoneType type = 2 [default = HOME];
        }
        repeated PhoneNumber phone = 4;
}
- 编译proto文件:
protoc -I=. -I/usr/local/include --cpp_out=. student.proto
5.2 使用
- test.cpp文件
//test.cpp
#include <iostream>
#include <string>
#include "student.pb.h"
using namespace std;
int main(int argc, char* argv[]){
GOOGLE_PROTOBUF_VERIFY_VERSION;
tutorial::Student student;
//给消息类Student对象student赋值
student.set_id(201421031059);
*student.mutable_name()="dablelv";
student.set_email("dablelv@tencent.com");
//增加一个号码对象
tutorial::Student::PhoneNumber* phone_number = student.add_phone();
phone_number->set_number("15813354925");
phone_number->set_type(tutorial::Student::MOBILE);
//再增加一个号码对象
tutorial::Student::PhoneNumber* phone_number1 = student.add_phone();
phone_number1->set_number("0564-4762652");
phone_number1->set_type(tutorial::Student::HOME);
//对消息对象student序列化到string容器
string serializedStr;
student.SerializeToString(&serializedStr);
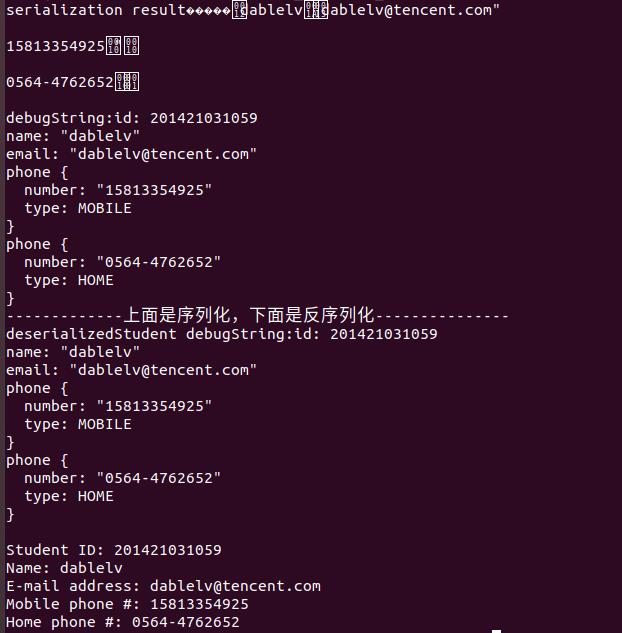
cout<<"serialization result:"<<serializedStr<<endl; //序列化后的字符串内容是二进制内容,非可打印字符,预计输出乱码
cout<<endl<<"debugString:"<<student.DebugString();
/*----------------上面是序列化,下面是反序列化-----------------------*/
//解析序列化后的消息对象,即反序列化
tutorial::Student deserializedStudent;
if(!deserializedStudent.ParseFromString(serializedStr)){
cerr << "Failed to parse student." << endl;
return -1;
}
cout<<"-------------上面是序列化,下面是反序列化---------------"<<endl;
//打印解析后的student消息对象
cout<<"deserializedStudent debugString:"<<deserializedStudent.DebugString();
cout <<endl<<"Student ID: " << deserializedStudent.id() << endl;
cout <<"Name: " << deserializedStudent.name() << endl;
if (deserializedStudent.has_email()){
cout << "E-mail address: " << deserializedStudent.email() << endl;
}
for (int j = 0; j < deserializedStudent.phone_size(); j++){
const tutorial::Student::PhoneNumber& phone_number = deserializedStudent.phone(j);
switch (phone_number.type()) {
case tutorial::Student::MOBILE:
cout << "Mobile phone #: ";
break;
case tutorial::Student::HOME:
cout << "Home phone #: ";
break;
}
cout <<phone_number.number()<<endl;
}
google::protobuf::ShutdownProtobufLibrary();
}
- 编译
g++ test.cpp student.pb.cc -lprotobuf -o main
- 执行与输出:
./main
输出结果:
以上是关于消息序列化工具-protobuf介绍及安装使用技巧的主要内容,如果未能解决你的问题,请参考以下文章