js分析 猫_眼_电_影 字体文件 @font-face
Posted my8100
tags:
篇首语:本文由小常识网(cha138.com)小编为大家整理,主要介绍了js分析 猫_眼_电_影 字体文件 @font-face相关的知识,希望对你有一定的参考价值。
0. 参考
https://developer.mozilla.org/zh-CN/docs/Web/CSS/@font-face
这是一个叫做@font-face 的CSS @规则 ,它允许网页开发者为其网页指定在线字体。 通过这种作者自备字体的方式,@font-face 可以消除对用户电脑字体的依赖。
汽车之家字体反爬破解实践 https://zhuanlan.zhihu.com/p/32087297
猫眼破解数字反爬获取实时票房 https://zhuanlan.zhihu.com/p/33112359
1. 页面表现

1.1 Ctrl+u 查看网页源代码

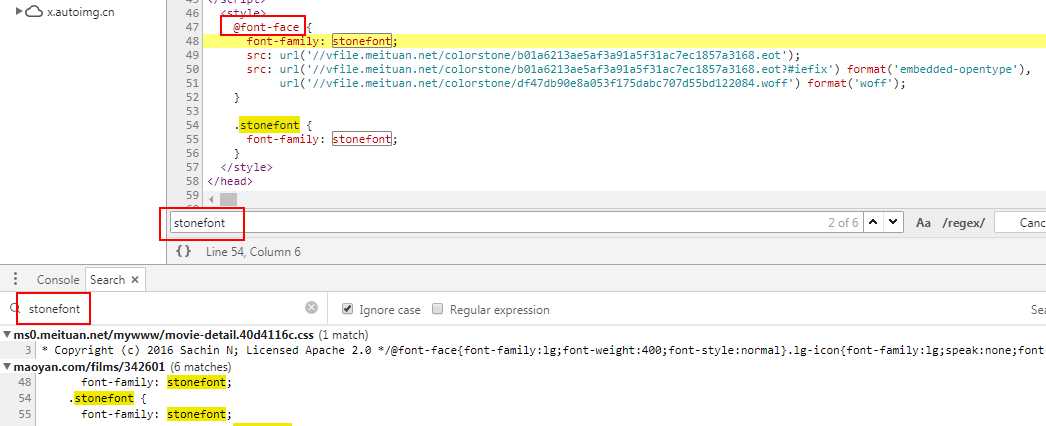
1.2 全局搜索 class name ‘stonefont‘ 发现使用了 @font-face
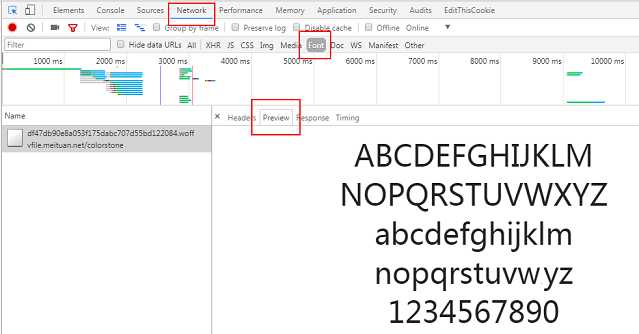
1.3 Network 面板出现请求字体文件
2. 问题分析
2.1 下载字体文件,转换格式
https://github.com/hanikesn/woff2otf
(py3) G:\\>python woff2otf.py df47db90e8a053f175dabc707d55bd122084.woff df47db90e8a053f175dabc707d55bd122084.otf
2.2 使用FontCreator软件打开字体文件
http://www.high-logic.com/font-editor/fontcreator.html
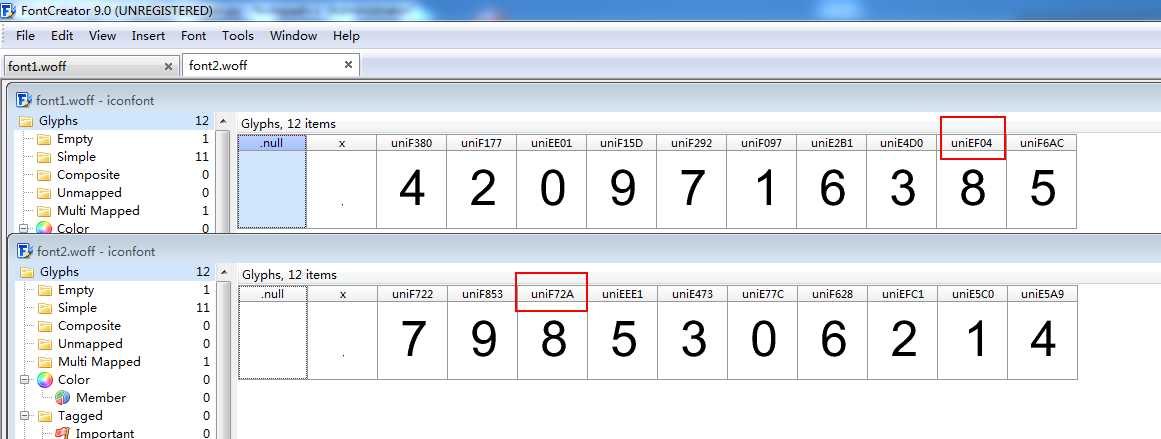
下图可见字符8的上方编号uniEF04与网页源代码  存在对应关系
新标签打开相同的页面,硬性刷新可见字体文件名称发生变化,另存字体文件为 font2.woff, 使用软件打开可见字符8的上方编号发生变化,即每次解析网页需要同时下载相应的字体文件。
2.3 使用 fontTools 库转换格式
pip install fontTools
from fontTools.ttLib import TTFont
font1 = TTFont(‘font1.woff‘)
font1.saveXML(‘font1.xml‘)

font2 = TTFont(‘font2.woff‘)
font2.saveXML(‘font2.xml‘)
2.4 解读 xml 文件
2.4.1 name 列表
name 对应的 id 没有实际意义
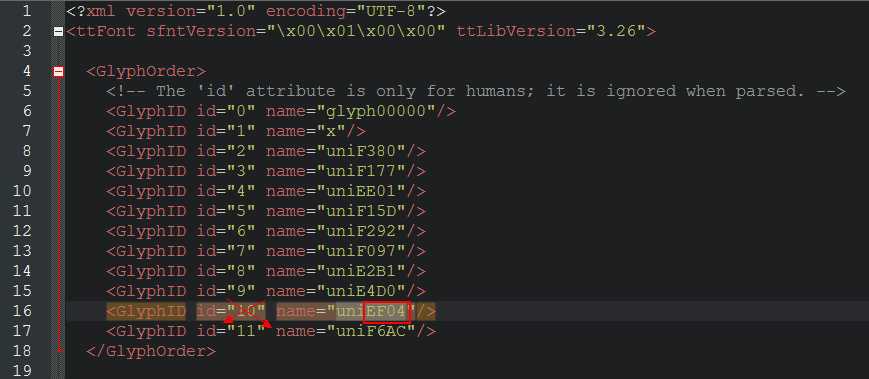
2.4.2 搜索 ‘EF04’ 可见具体某个字符的 字形定义
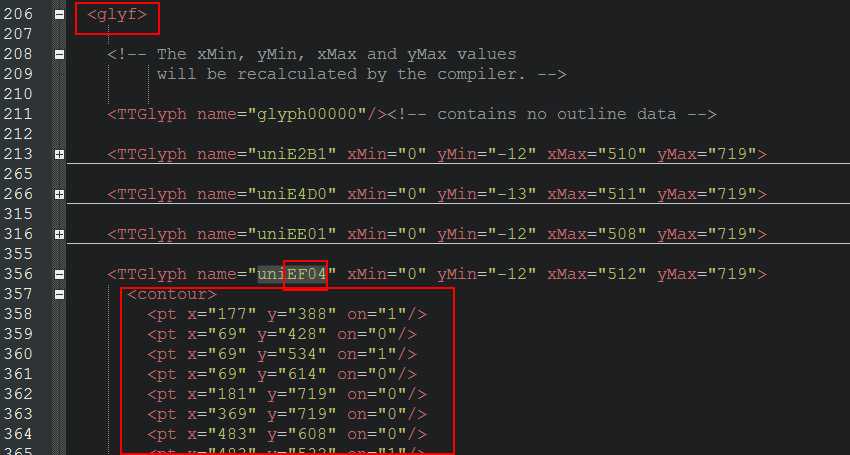
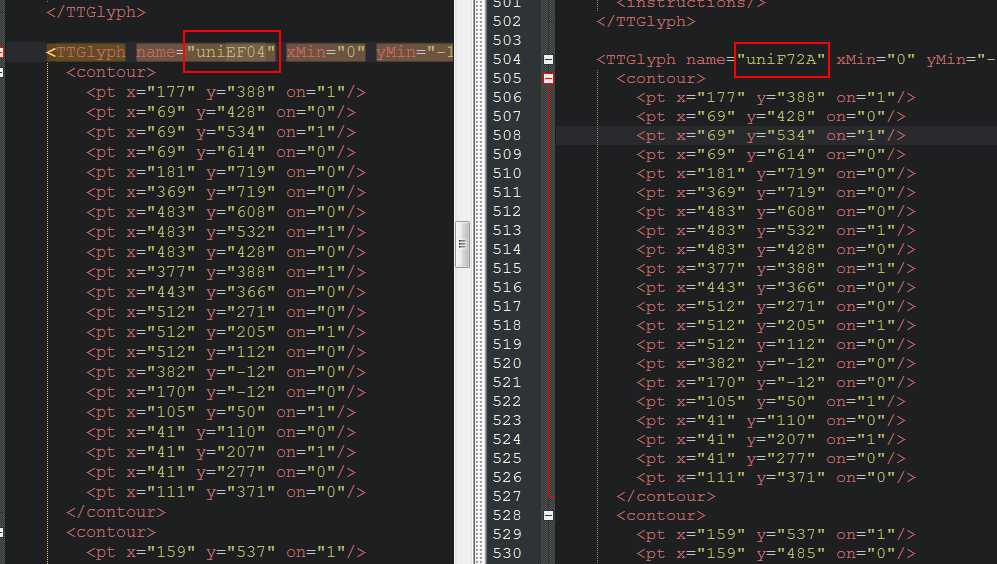
2.4.3 两个字体文件对 字符8 的 字形定义 保持一致
font1.woff 字符8 >>> name1 >>> 字形定义 == 字形定义 <<< name2 <<< 字符8 font2.woff
2.5 fontTools 读取 name 列表
In [26]: font1[‘glyf‘].keys()
Out[26]: dict_keys([‘glyph00000‘, ‘x‘, ‘uniF380‘, ‘uniF177‘, ‘uniEE01‘, ‘uniF15D‘, ‘uniF292‘, ‘uniF097‘, ‘uniE2B1‘, ‘uniE4D0‘, ‘uniEF04‘, ‘uniF6AC‘])

In [27]: font2[‘glyf‘].keys()
Out[27]: dict_keys([‘glyph00000‘, ‘x‘, ‘uniF722‘, ‘uniF853‘, ‘uniF72A‘, ‘uniEEE1‘, ‘uniE473‘, ‘uniE77C‘, ‘uniF628‘, ‘uniEFC1‘, ‘uniE5C0‘, ‘uniE5A9‘])
2.6 fontTools 比较不同字体文件的 字形定义
In [38]: font1_8 = font1[‘glyf‘][‘uniEF04‘]

In [39]: font2_8 = font2[‘glyf‘][‘uniF72A‘]

In [40]: font1_8?
Type:        Glyph
String form: <fontTools.ttLib.tables._g_l_y_f.Glyph object at 0x000000000787CE80>
File:        e:\\programdata\\anaconda3\\envs\\py3\\lib\\site-packages\\fonttools\\ttlib\\tables\\_g_l_y_f.py
Docstring:   <no docstring>

In [41]: font1_8 == font2_8
Out[41]: True

In [47]: font1_4 = font1[‘glyf‘][‘uniF380‘]

In [48]: font2_7 = font2[‘glyf‘][‘uniF722‘]

In [49]: font1_4 == font2_7
Out[49]: False
3. 根据基准字体文件为新字体文件建立映射关系的代码实现
In [2]: from fontTools.ttLib import TTFont
   ...: font1 = TTFont(‘font1.woff‘)
   ...:
   ...: print(font1[‘glyf‘].keys())
   ...: keys = font1[‘glyf‘].keys()
   ...: values = list(‘ .4209716385‘)
   ...: # 构建基准 {name: num}
   ...: dict1 = dict((k,v) for k,v in zip(keys, values))
   ...: print(dict1)
   ...:
   ...:
   ...: font2 = TTFont(‘font2.woff‘)
   ...: dict2 = {}
   ...: for key in font2[‘glyf‘].keys():
   ...:     for k, v in dict1.items():
   ...:         # 通过比较 字形定义 填充新的name和num映射关系
   ...:         if font1[‘glyf‘][k] == font2[‘glyf‘][key]:
   ...:             dict2[key] = v.strip()
   ...:             break
   ...: print(dict2)
   ...:
   ...:
dict_keys([‘glyph00000‘, ‘x‘, ‘uniF380‘, ‘uniF177‘, ‘uniEE01‘, ‘uniF15D‘, ‘uniF292‘, ‘uniF097‘, ‘uniE2B1‘, ‘uniE4D0‘, ‘uniEF04‘, ‘uniF6AC‘])
{‘glyph00000‘: ‘ ‘, ‘x‘: ‘.‘, ‘uniF380‘: ‘4‘, ‘uniF177‘: ‘2‘, ‘uniEE01‘: ‘0‘, ‘uniF15D‘: ‘9‘, ‘uniF292‘: ‘7‘, ‘uniF097‘: ‘1‘, ‘uniE2B1‘: ‘6‘, ‘uniE4D0‘: ‘3‘, ‘uniEF04‘: ‘8‘, ‘uniF6AC‘: ‘5‘}
{‘glyph00000‘: ‘‘, ‘x‘: ‘.‘, ‘uniF722‘: ‘7‘, ‘uniF853‘: ‘9‘, ‘uniF72A‘: ‘8‘, ‘uniEEE1‘: ‘5‘, ‘uniE473‘: ‘3‘, ‘uniE77C‘: ‘0‘, ‘uniF628‘: ‘6‘, ‘uniEFC1‘: ‘2‘, ‘uniE5C0‘: ‘1‘, ‘uniE5A9‘: ‘4‘}
3.1 通过下图确认输出 dict2 的正确性

以上是关于js分析 猫_眼_电_影 字体文件 @font-face的主要内容,如果未能解决你的问题,请参考以下文章