uniapp小程序开发—— 组件封装之自定义轮播图
Posted 不苒
tags:
篇首语:本文由小常识网(cha138.com)小编为大家整理,主要介绍了uniapp小程序开发—— 组件封装之自定义轮播图相关的知识,希望对你有一定的参考价值。
文章目录
🍋前言:
本文主要展示小程序端封装轮播图组件,使用的是uniapp进行的开发,主要使用的是uniapp官网提供的
swiper组件,可以参考官方文档,查看一些相关API。效果图一睹为快:
话不多说直接上正文一起来学习一下封装轮播图组件吧!
🍍正文
1、首先了解swiper组件
滑块视图容器。
一般用于左右滑动或上下滑动,比如banner轮播图。
注意滑动切换和滚动的区别,滑动切换是一屏一屏的切换。
swiper下的每个swiper-item是一个滑动切换区域,不能停留在2个滑动区域之间。
1.1、小小的demo示例:
<template>
<view class="uni-margin-wrap">
    <swiper class="swiper" circular :indicator-dots="true" :autoplay="true" :interval="2000"
    :duration="500">
        <swiper-item>
        <view class="swiper-item uni-bg-red">A</view>
</swiper-item>
<swiper-item>
            <view class="swiper-item uni-bg-green">B</view>
</swiper-item>
<swiper-item>
                <view class="swiper-item uni-bg-blue">C</view>
</swiper-item>
</swiper>
</view>
</template>

<style>
.uni-margin-wrap
		width: 690rpx;
		width: 100%;

	.swiper
		height: 300rpx;

	.swiper-item
		display: block;
		height: 300rpx;
		line-height: 300rpx;
		text-align: center;

</style>
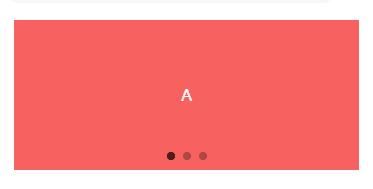
效果图如下:

1.2、自定义轮播图效果展示说明
我们要做的是:
轮播图底部颜色渐变
左下方包含对应图片的一行文字说明
指示点在右下方,选中颜色为白色,未选中为灰色
效果图如下:

2、完成自定义轮播图效果
我们先完成效果再去探讨如何封装成组件。如下示例代码展示了自定义轮播图的效果:
swiper常用属性介绍:
indicator-dots:轮播图正前方的小圆点(此案例没有使用官方提供的,是自定义的在右下角附近)autoplay:是否自动切换interval:图片轮播间隔此处为3秒duration:图片轮播动画时长 此处为0.5秒circular:是否开启无缝轮播(此处为到第三张图片后无缝播放第一张图片)
<template>
		<!-- 轮播图组件 -->
		<view class="px-3 py-2 ">
			<view class="position-relative">
				<swiper :autoplay="true" :interval="3000" :duration="500" circular style="height: 250rpx;"
					@change="changeIndicatorDots">
					<swiper-item v-for="(item,index) in swipers" :key="index">
						<image :src="item.src" mode="sapectFill" style="height:250rpx;width: 100%;" class="rounded-lg">
						</image>
					</swiper-item>
				</swiper>
				<view class="flex align-center text-white rounded-bottom-lg px-2 pb-1" style="position: absolute; bottom: 0; left: 0; right: 0;
						background-image: linear-gradient(to bottom,rgba(0,0,0,0),rgba(0,0,0,0.8));">
					<view style="width: 80%;" class="text-ellipsis">
						<!-- 获取当前指示点的位置,获取对应的title -->
						<text>swipers[current].title</text>
					</view>
					<view style="width: 20%;" class="flex align-center justify-end flex-shrink">
						<!-- 指示点选中当前图片为白色 未选中为灰色 -->
						<view v-for="(item,index) in swipers" :key="index" style="height: 16rpx;width: 16rpx ; "
							class="rounded-circle ml-1"
							:style="index===current?'background-color:rgba(255,255,255,1)':'background-color:rgba(255,255,255,0.5)'">
						</view>
					</view>
				</view>
			</view>
		</view>
	</view>
</template>

<script>
	export default
		data()
			return
				current: 0, // 标识当前选中的图片序列号
				swipers: [
					src: '/static/swiper/1.jpg',
					title: '自定义轮播图组件图片一'
				,
					src: '/static/swiper/2.jpg',
					title: '自定义轮播图组件图片二名字很长测试用'
				,
					src: '/static/swiper/3.jpg',
					title: '自定义轮播图组件图片三'
				]

		,
		onLoad()
		,
		methods:
           // changeIndicatorDots方法会在轮播的图片切换后调用,e.detail.current表示当前所在滑块的 index
			changeIndicatorDots(e)
				this.current = e.detail.current


</script>
示例代码中的class类中的类名样式是我已经在全局配置好的,由于篇幅比较长,之后的小程序文章也会经常使用,我已经上传到了CSDN资源(免费),点击链接跳转下载可查看相对应的样式。
3、组件封装——自定义轮播图
3.1、创建swiper-doc.vue组件

3.2、组件调用,封装完成
首先我们要清楚,我们封装的内容为我们自定义的部分,swiper滑块区域是不需要封装的是通用的,我们使用插槽站位。我们只需要将我们自定义的指示点、介绍文字、渐变模块封装即可。
示例代码如下:
swiper-doc.vue文件:
<template>
		<view class="position-relative">
			<!-- 轮播图组件不需要直接使用插槽 -->
			<slot></slot>
			<view class="flex align-center text-white rounded-bottom-lg px-2 pb-1" style="position: absolute; bottom: 0; left: 0; right: 0;
					background-image: linear-gradient(to bottom,rgba(0,0,0,0),rgba(0,0,0,0.8));">
				<view style="width: 80%;" class="text-ellipsis">
					<!-- 获取当前指示点的位置,获取对应的title -->
					<text>info[current].title</text>
				</view>
				<view style="width: 20%;" class="flex align-center justify-end flex-shrink">
					<!-- 指示点选中当前图片为白色 未选中为灰色 -->
					<view v-for="(item,index) in info" :key="index" style="height: 16rpx;width: 16rpx ; "
						class="rounded-circle ml-1"
						:style="index===current?'background-color:rgba(255,255,255,1)':'background-color:rgba(255,255,255,0.5)'">
					</view>
				</view>
			</view>
	</view>
</template>

<script>
	export default
		props:
			info:Array,
			current:
				type:Number,
				default:0


</script>
info表示我们所需的轮播图片数据;
current表示那个轮播图片的索引,用于获取title和指示点。
index.vue文件:
<view class="px-3 py-2 ">
			<swiperDot class="position-relative" :current="current" :info="swipers">
			<!--
					swiper常用属性介绍:
						indicator-dots:轮播图正前方的小圆点(此案例没有使用官方提供的,是自定义的在右下角附近)
						autoplay:是否自动切换
						interval:图片轮播间隔此处为3秒
						duration:图片轮播动画时长 此处为0.5秒
						circular:是否开启无缝轮播(此处为到第三张图片后无缝播放第一张图片)
				 -->
				<swiper :autoplay="true" :interval="3000" :duration="500" circular style="height: 250rpx;"
					@change="changeIndicatorDots">
					<swiper-item v-for="(item,index) in swipers" :key="index">
						<image :src="item.src" mode="sapectFill" style="height:250rpx;width: 100%;" class="rounded-lg">
						</image>
					</swiper-item>
				</swiper>
			</swiperDot>
</view>
<script>
   // 引入指示点组件,注册并使用
	import swiperDot from '@/components/comon/swiper-doc.vue'
	export default
		components:
			swiperDot
		,
		data()
			return
				current: 0, // 标识当前选中的图片序列号
				swipers: [
					src: '/static/swiper/1.jpg',
					title: '自定义轮播图组件图片一'
				,
					src: '/static/swiper/2.jpg',
					title: '自定义轮播图组件图片二名字很长测试用'
				,
					src: '/static/swiper/3.jpg',
					title: '自定义轮播图组件图片三'
				]

		,
		onLoad()

		,
		methods:
			// changeIndicatorDots方法会在轮播的图片切换后调用,e.detail.current表示当前所在滑块的 index
			changeIndicatorDots(e)
				this.current = e.detail.current


</script>
注意:文章案例中的swipers数组在实际开发中应该是从后端获取的,我们这里是自己直接定义的。
🎃专栏分享:
小程序项目实战专栏:《uniapp小程序开发》
前端面试专栏地址:《面试必看》
⏳ 名言警句:说能做的,做说过的 \\textcolorred 名言警句:说能做的,做说过的 名言警句:说能做的,做说过的
✨ 原创不易,还希望各位大佬支持一下 \\textcolorblue原创不易,还希望各位大佬支持一下 原创不易,还希望各位大佬支持一下
👍 点赞,你的认可是我创作的动力! \\textcolorgreen点赞,你的认可是我创作的动力! 点赞,你的认可是我创作的动力!
⭐️ 收藏,你的青睐是我努力的方向! \\textcolorgreen收藏,你的青睐是我努力的方向! 收藏,你的青睐是我努力的方向!
✏️ 评论,你的意见是我进步的财富! \\textcolorgreen评论,你的意见是我进步的财富! 评论,你的意见是我进步的财富!
逆战:微信小程序开发
一、常用组件
在上一个章节中讲解了封装请求数据的模块,在此处请求轮播图的数据
1.首页轮播图数据的请求以及渲染
1.1 轮播图数据的请求 pages/home/home.js
import { request } from './../../utils/index.js'
Page({

  /**
   * 页面的初始数据
   */
  data: {
    bannerlist: []
  },

  /**
   * 生命周期函数--监听页面加载
   */
  onLoad: function (options) {
    request('/api/pro/banner').then(data => {
      console.log(data)
      // 微信小程序修改数据的方式
      this.setData({
        bannerlist: data.data
      })
    })
  },
})
2 使用组件 - 视图容器 - swiper
滑块视图容器。其中只可放置swiper-item组件,否则会导致未定义的行为。
属性表如下
| 属性 | 类型 | 默认值 | 必填 | 说明 | 最低版本 |
|---|---|---|---|---|---|
| indicator-dots | boolean | false | 否 | 是否显示面板指示点 | 1.0.0 |
| indicator-color | color | rgba(0, 0, 0, .3) | 否 | 指示点颜色 | 1.1.0 |
| indicator-active-color | color | #000000 | 否 | 当前选中的指示点颜色 | 1.1.0 |
| autoplay | boolean | false | 否 | 是否自动切换 | 1.0.0 |
| current | number | 0 | 否 | 当前所在滑块的 index | 1.0.0 |
| interval | number | 5000 | 否 | 自动切换时间间隔 | 1.0.0 |
| duration | number | 500 | 否 | 滑动动画时长 | 1.0.0 |
| circular | boolean | false | 否 | 是否采用衔接滑动 | 1.0.0 |
| vertical | boolean | false | 否 | 滑动方向是否为纵向 | 1.0.0 |
| previous-margin | string | "0px" | 否 | 前边距,可用于露出前一项的一小部分,接受 px 和 rpx 值 | 1.9.0 |
| next-margin | string | "0px" | 否 | 后边距,可用于露出后一项的一小部分,接受 px 和 rpx 值 | 1.9.0 |
| display-multiple-items | number | 1 | 否 | 同时显示的滑块数量 | 1.9.0 |
| skip-hidden-item-layout | boolean | false | 否 | 是否跳过未显示的滑块布局,设为 true 可优化复杂情况下的滑动性能,但会丢失隐藏状态滑块的布局信息 | 1.9.0 |
| easing-function | string | "default" | 否 | 指定 swiper 切换缓动动画类型 | 2.6.5 |
| bindchange | eventhandle | 否 | current 改变时会触发 change 事件,event.detail = {current, source} | 1.0.0 | |
| bindtransition | eventhandle | 否 | swiper-item 的位置发生改变时会触发 transition 事件,event.detail = {dx: dx, dy: dy} | 2.4.3 | |
| bindanimationfinish | eventhandle | 否 | 动画结束时会触发 animationfinish 事件,event.detail 同上 | 1.9.0 |
在pages/home/home.wxml文件中输入如下代码查看效果
<!--pages/home/home.wxml-->
<swiper
  indicator-dots="{{true}}" autoplay="{{true}}" circular="{{true}}"
  duration="{{500}}">
  <block wx:for="{{bannerlist}}" wx:key="index">
    <swiper-item >
      <image src="{{'http://daxun.kuboy.top' + item}}"></image>
    </swiper-item>
  </block>
</swiper>
<prolist></prolist>
二、自定义组件 - 产品列表
1.自定义组件的布局
components/prolist/prolist.wxml
<view class="prolist">
  <view class="proitem">
    <view class="itemimg">
      <image class="img" src=""></image>
    </view>
    <view class="iteminfo">
      <view class="title">
        产品名称
      </view>
      <view class="price">
        ¥199
      </view>
    </view>
  </view>
</view>
2.自定义组件的样式
components/prolist/prolist.wxss
/* components/prolist/prolist.wxss */
.prolist .proitem{
  width: 100%;
  display: flex;
  height: 100px;
  box-sizing: border-box;
  border-bottom: 1px solid #ccc;
}

.prolist .proitem .itemimg{
  width: 100px;
  height: 100px;
  padding: 5px;
}

.prolist .proitem .itemimg .img{
  width: 90px;
  height: 90px;
  box-sizing: border-box;
  border: 1px solid #ccc;
}

.prolist .proitem .iteminfo {
  padding: 3px;
}

.prolist .proitem .iteminfo .title{
  font-size: 18px;
  font-weight: bold;
}

.prolist .proitem .iteminfo .price{
  font-size: 12px;
}
3.首页请求数据,并且传递给子组件
pages/home/home.js
import { request } from './../../utils/index.js'
Page({

  /**
   * 页面的初始数据
   */
  data: {
    prolist: []
  },

  /**
   * 生命周期函数--监听页面加载
   */
  onLoad: function (options) {
    request('/api/pro').then(data => {
      console.log(data)
      // 微信小程序修改数据的方式
      this.setData({
        prolist: data.data
      })
    })
  },
})
pages/home/home.wxml
<prolist prolist="{{prolist}}"></prolist>4.子组件接收数据
components/prolist/prolist.js
Component({
  /**
   * 组件的属性列表
   */
  properties: {
    prolist: Array
  },
})
5.子组件渲染数据
components/prolist/prolist.wxml
<view class="prolist">
  <view class="proitem" wx:for="{{prolist}}" wx:key="item.proid">
    <view class="itemimg">
      <image class="img" src="{{item.proimg}}"></image>
    </view>
    <view class="iteminfo">
      <view class="title">
        {{item.proname}}
      </view>
      <view class="price">
        ¥{{item.price}}
      </view>
    </view>
  </view>
</view>
三、实现下拉刷新上拉加载
1.开启首页的下拉刷新功能
pages/home/home.json
{
  "usingComponents": {
    "prolist": "/components/prolist/prolist"
  },
  "enablePullDownRefresh": true,
  "backgroundColor": "#efefef",
  "backgroundTextStyle": "dark"
}
2.完善相关的下拉刷新函数
pages/home/home.js
// pages/home/home.js
import { request } from './../../utils/index.js'
Page({

  /**
   * 页面的初始数据
   */
  data: {
    bannerlist: [],
    prolist: [],
    pageCode: 1 // 页码
  },

  /**
   * 生命周期函数--监听页面加载
   */
  onLoad: function (options) {
    request('/api/pro/banner').then(data => {
      console.log(data)
      this.setData({
        bannerlist: data.data
      })
    })

    request('/api/pro').then(data => {
      console.log(data)
      this.setData({
        prolist: data.data
      })
    })
  },

  /**
   * 页面相关事件处理函数--监听用户下拉动作
   */
  onPullDownRefresh: function () {
    request('/api/pro').then(data => {
      console.log(data)
      this.setData({
        prolist: data.data,
        pageCode: 1
      })
    })
  },

  /**
   * 页面上拉触底事件的处理函数
   */
  onReachBottom: function () {
    let num = this.data.pageCode;
    let prolist = this.data.prolist
    num++;
    console.log(num)
    request('/api/pro', {
      pageCode: num
    }).then(data => {
      // 此处注意临界值的变化 --  没有数据
      this.setData({
        prolist: [...prolist, ...data.data],
        pageCode: num
      })
    })
  }
})
上拉下拉测试即可
四、返回顶部功能实现
在首页中设置一个固定定位的按钮,然后绑定点击事件,绑定事件使用 bindtap,然后调用小程序提供的api即可返回
// pages/home/home.wxml
<view class="backtop" bindtap="backtop"> ↑ </view>

// pages/home/home.wxss
.backtop {
  position: fixed;
  bottom: 10px;
  right: 8px;
  border-radius: 50%;
  width: 30px;
  height: 30px;
  background-color: rgba(0, 0, 0, 0.5);
  font-size: 18px;
  text-align: center;
  line-height: 30px;
}

// pages/home/home.js
Page({
  /**
   * 自定义函数
   */
  backtop: function () {
    // 小程序api 的界面 - 滚动
    wx.pageScrollTo({
      scrollTop: 0,
      duration: 300
    })
  }
})
五、实现点击商品列表进入产品的详情页面
1.构建详情页面
app.json
"pages": [
  "pages/detail/detail"
],
2.声明式导航跳转
使用小程序 组件-导航-navigator
页面链接。
| 属性 | 类型 | 默认值 | 必填 | 说明 | 最低版本 |
|---|---|---|---|---|---|
| target | string | self | 否 | 在哪个目标上发生跳转,默认当前小程序 | 2.0.7 |
| url | string | 否 | 当前小程序内的跳转链接 | 1.0.0 | |
| open-type | string | navigate | 否 | 跳转方式 | 1.0.0 |
| delta | number | 1 | 否 | 当 open-type 为 ‘navigateBack‘ 时有效,表示回退的层数 | 1.0.0 |
| app-id | string | 否 | 当target="miniProgram"时有效,要打开的小程序 appId | 2.0.7 | |
| path | string | 否 | 当target="miniProgram"时有效,打开的页面路径,如果为空则打开首页 | 2.0.7 | |
| extra-data | object | 否 | 当target="miniProgram"时有效,需要传递给目标小程序的数据,目标小程序可在 App.onLaunch(),App.onShow() 中获取到这份数据。详情 | 2.0.7 | |
| version | string | release | 否 | 当target="miniProgram"时有效,要打开的小程序版本 | 2.0.7 |
| hover-class | string | navigator-hover | 否 | 指定点击时的样式类,当hover-class="none"时,没有点击态效果 | 1.0.0 |
| hover-stop-propagation | boolean | false | 否 | 指定是否阻止本节点的祖先节点出现点击态 | 1.5.0 |
| hover-start-time | number | 50 | 否 | 按住后多久出现点击态,单位毫秒 | 1.0.0 |
| hover-stay-time | number | 600 | 否 | 手指松开后点击态保留时间,单位毫秒 | 1.0.0 |
| bindsuccess | string | 否 | 当target="miniProgram"时有效,跳转小程序成功 | 2.0.7 | |
| bindfail | string | 否 | 当target="miniProgram"时有效,跳转小程序失败 | 2.0.7 | |
| bindcomplete | string | 否 | 当target="miniProgram"时有效,跳转小程序完成 | 2.0.7 |
open-type 的合法值 -- 在编程式导航中详细讲解
| 值 | 说明 | 最低版本 |
|---|---|---|
| navigate | 对应 wx.navigateTo 或 wx.navigateToMiniProgram 的功能 | |
| redirect | 对应 wx.redirectTo 的功能 | |
| switchTab | 对应 wx.switchTab 的功能 | |
| reLaunch | 对应 wx.reLaunch 的功能 | 1.1.0 |
| navigateBack | 对应 wx.navigateBack 的功能 | 1.1.0 |
| exit | 退出小程序,target="miniProgram"时生效 | 2.1.0 |
// components/prolist/prolist.wxml
<view class="prolist">
  <navigator url="{{'/pages/detail/detail?proid=' + item.proid}}" wx:for="{{prolist}}" wx:key="item.proid">
    <view class="proitem" >
      <view class="itemimg">
        <image class="img" src="{{item.proimg}}"></image>
      </view>
      <view class="iteminfo">
        <view class="title">
          {{item.proname}}
        </view>
        <view class="price">
          ¥{{item.price}}
        </view>
      </view>
    </view>
  </navigator>
</view>
3.详情页面接收数据并且渲染数据
// pages/detail/detail.js
import { request } from './../../utils/index.js';
Page({

  /**
   * 页面的初始数据
   */
  data: {
    proid: '',
    proname: '',
    proimg: ''
    price: 0
  },

  /**
   * 生命周期函数--监听页面加载
   */
  onLoad: function (options) {
    // options为接收的参数
    const { proid } = options
    request('/api/pro/detail?proid=' + proid).then(data => {
      console.log(data.data)
      const { proid, proname, price, proimg} = data.data
      this.setData({
        proid, proname, price, proimg
      })
    })
  }
})

// pages/detail/detail.wxml

<image src="{{proimg}}" style="width: 100px;height: 100px;"></image>
<view>{{proname}}</view>
<view>¥{{price}}</view>
点击不同的产品测试即可
4.编程式导航渲染
使用小程序提供的api实现编程式路由的跳转
wx.switchTab(Object object)
跳转到 tabBar 页面,并关闭其他所有非 tabBar 页面
wx.reLaunch(Object object)
关闭所有页面,打开到应用内的某个页面
wx.redirectTo(Object object)
关闭当前页面,跳转到应用内的某个页面。但是不允许跳转到 tabbar 页面
wx.navigateTo(Object object)
保留当前页面,跳转到应用内的某个页面。但是不能跳到 tabbar 页面。使用 wx.navigateBack 可以返回到原页面。小程序中页面栈最多十层
wx.navigateBack(Object object)
关闭当前页面,返回上一页面或多级页面。可通过 getCurrentPages 获取当前的页面栈,决定需要返回几层
小程序传递数据使用 data-params形式,可以在事件中根据event获取该参数
// components/prolist/prolist.wxml
<view class="prolist">
  <view class="proitem" bindtap="toDetail" data-proid="{{item.proid}}" wx:for="{{prolist}}" wx:key="item.proid">
    <view class="itemimg">
      <image class="img" src="{{item.proimg}}"></image>
    </view>
    <view class="iteminfo">
      <view class="title">
        {{item.proname}}
      </view>
      <view class="price">
        ¥{{item.price}}
      </view>
    </view>
  </view>
</view>

// components/prolist/prolist.js
Component({
  /**
   * 组件的属性列表
   */
  properties: {
    prolist: Array
  },

  /**
   * 组件的初始数据
   */
  data: {

  },

  /**
   * 组件的方法列表
   */
  methods: {
    toDetail (event) {
      const { proid } = event.currentTarget.dataset
      wx.navigateTo({
        url: '/pages/detail/detail?proid=' + proid
      })
    }
  }
})
六、使用第三方组件库
电商平台参考文档 (vantweapp)
Vant Weapp 是移动端 Vue 组件库 Vant 的小程序版本,两者基于相同的视觉规范,提供一致的 API 接口,助力开发者快速搭建小程序应用。
1.安装
# 通过 npm 安装
cnpm i @vant/weapp -S --production
2.构建 npm 包
打开微信开发者工具,点击 工具 -> 构建 npm,并勾选 使用 npm 模块 选项,构建完成后,即可引入组件
3.使用组件
在 app.json 中去除 "style": "v2"
小程序给新版基础组件强行加上了许多样式,难以去除,不关闭将造成样式混乱。
4.商品详情页使用业务组件 - GoodsAction 商品导航
参考链接 GoodsAction 商品导航
// pages/detail/detail

{
  "usingComponents": {
    "van-goods-action": "/miniprogram_npm/@vant/weapp/goods-action/index",
    "van-goods-action-icon": "/miniprogram_npm/@vant/weapp/goods-action-icon/index",
    "van-goods-action-button": "/miniprogram_npm/@vant/weapp/goods-action-button/index"
  }
}
特此声明:如需转载请注明出处,如有疑问请及时提出以便于改正,如有侵权,联系删除,谢谢
以上是关于uniapp小程序开发—— 组件封装之自定义轮播图的主要内容,如果未能解决你的问题,请参考以下文章
