angular2 + bootstrap +jquery 实例
Posted 划边逅
tags:
篇首语:本文由小常识网(cha138.com)小编为大家整理,主要介绍了angular2 + bootstrap +jquery 实例相关的知识,希望对你有一定的参考价值。
一、Create a project process:
1.use Angular CLI to create an Angular Project "demo":
need the commmand of "ng new demo" to produce demo project.
2.load the project to VSCode
click the File,select "Open Folder"
select import project "demo"

3.Configuration and install plugins in “demo” project
Use “npm install bootstrap@3” command to produce bootstrap@3.3.7(node_modules)
Use “npm install jquery” command to produce jquery(node_modules)
Use “npm install angular-in-memory-web-api” command to intall angular-in-memory-web-api
Use “npm install select2” command to install “select2”(node_modules)
E.g: install select2:

4. In the assets directory,add css, img, js three documents, the contents of the three documents are as follows:

5.Configuration angular-cli.json
Import:
1. "styles": [
"../node_modules/bootstrap/dist/css/bootstrap.min.css",
"../node_modules/select2/dist/css/select2.min.css",
]
2. "scripts": [
"../node_modules/jquery/dist/jquery.min.js",
"../node_modules/bootstrap/dist/js/bootstrap.min.js",
"../node_modules/select2/dist/js/select2.min.js",
]

6.Startup project
input the command "npm start" to startup project.

二、Define UI Interface and decorate UI Interface
1.Define UI interface in app.component.html:

2.In assets directory, css file into a “landing.css style”, img file into the relevant pictures, js file into a “landingLoadingScript.js” script. These things are used to decorate UI inferface.

3.Configuration angular-cli.json:
Import:
"styles": [
"assets/css/landing.css" ]
"scripts": [
"assets/js/landingLoadingScript.js" ]

4.Show UI inferface:
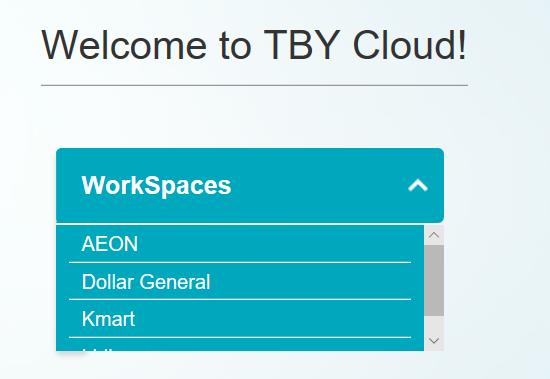
三、Get data from a mock server, the in-memory web API.
1. Define a class
1.new a file that name is “option.ts”.
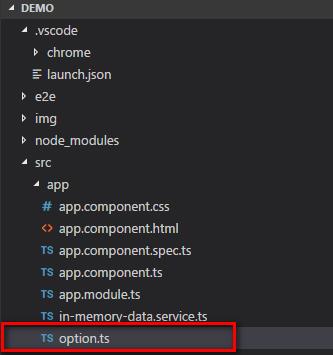
2.In “options.ts”, define a class “Option”

3.Import InMemoryWebApiModule and add it to the module\'s imports array and Import HttpClientModule and add it to the module\'s imports array.
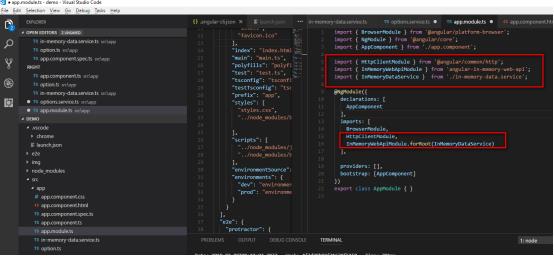
4.The forRoot () configuration method requires an instance of the InMemoryDataService class to populate the in-memory database with data.so,we need to define a InMemoryDataService class to initialize the data.

5.Get data from web api in app.component.ts:
(1) Import { Option } from ‘./option’ and import { HttpClient } from ‘@angular/common/http’ and import { OnInit } from ‘@angular/core’.

(2) Constructs an httpClient object:
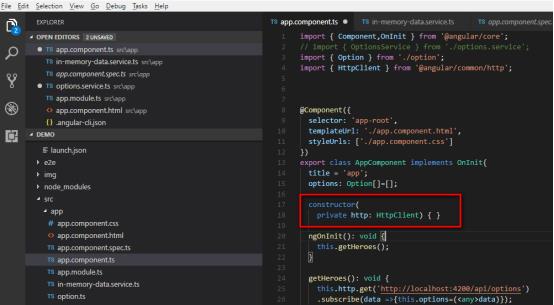
(3) AppComponent need to implement the angular ngOnInit lifecycle hook and implement “ngOnInit()” method. We\'ve written a logical “ngOnInit” method with fetch data. Angular will call it at the right time. We get the data from the emulation server by calling getHeroes (),and through the get () method to send the request and through subscribe() method to get the data to the parameters “options”.

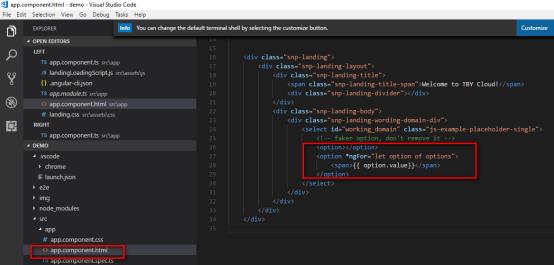
(4) Bind data to app.component.html with the options data in app.component.ts:use * ngFor to loop through the data in options:
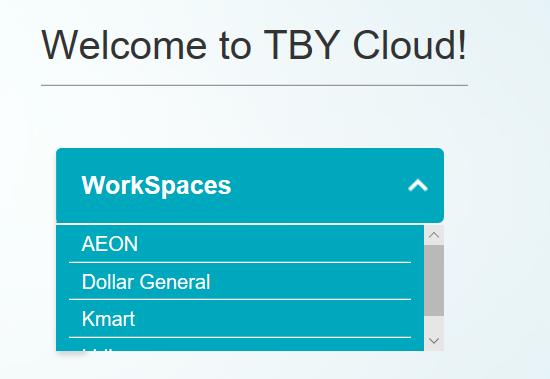
(4) Save, the browser will automatically refresh (provided you have executed the npm start command),The results shown:
以上是关于angular2 + bootstrap +jquery 实例的主要内容,如果未能解决你的问题,请参考以下文章