Javascript - ExtJs - 基本组件
Posted
tags:
篇首语:本文由小常识网(cha138.com)小编为大家整理,主要介绍了Javascript - ExtJs - 基本组件相关的知识,希望对你有一定的参考价值。
与JQuery一样,ExtJs也有一个文档加载完毕的事件。

Ext.onReady(function () {


});
基本组件(Basic components)
弹框组件
MessageBox
MessageBox是Ext函数的静态函数成员,它提供一些列的弹出框方法。
alert(title,suggest)
title是标题,suggest是提示信息,弹出一个确定对话框。

Ext.onReady(function () {
    Ext.MessageBox.alert("好吧,成功", "yahoo!ExtJs");
});
confirm(title,suggest,fn)
title是标题,suggest是提示信息,fn是回调函数,弹出确定与否对话框。

Ext.onReady(function () {
    Ext.MessageBox.confirm("测试", "怎么样?", function (e) {
        if (e == "yes") {
            Ext.MessageBox.alert("好吧,成功", "yahoo!ExtJs");
        }
        else {
        }
    });
});
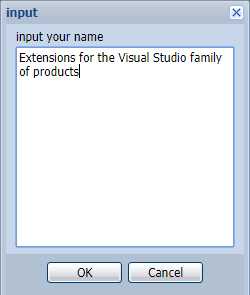
prompt(title,suggest,fn,obj,m|n)
title是标题,suggest是提示信息,fn是回调函数,m是布尔值或n是数字(用以指示是否多行或多行的行数),弹出输入框。

Ext.onReady(function () {
    Ext.MessageBox.prompt("input", "input your name",function (e,text) {
        if (e == "ok") {
            var value = text;
            Ext.MessageBox.alert("output","你输入的文字是:"+text);
        }
    }, null, 400);
});

show(options)
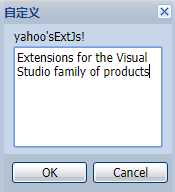
包含了所有弹框的功能,参数以Json格式指定。

Ext.onReady(function () {
    Ext.MessageBox.show({
        title: "自定义",
        msg: "yahoo‘sExtJs!",
        buttons: Ext.MessageBox.OKCANCEL,
        multiline:100
    });
});

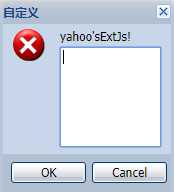
Ext.onReady(function () {
    Ext.MessageBox.show({
        title: "自定义",
        msg: "yahoo‘sExtJs!",
        buttons: Ext.MessageBox.OKCANCEL,
        multiline: 100,
        icon:Ext.MessageBox.ERROR
    });
});

Ext.onReady(function () {
    Ext.MessageBox.show({
        msg: "wait 5 seconds!",
        progress: true,
        progressText: "正在加载……",
        wait: true,
        width:300,
        waitConfig: {
            interval: 555,//间隔555毫秒进度条前进一次,总时长÷9
            duration: 5000,//经过5000毫秒后停止
            fn: function () {
                Ext.MessageBox.hide();
            }
        }
    });
});

面板组件
Panel()
Panel是构造函数,它作为Ext构造函数的成员,提供了在html元素里增加、设置面板的功能。
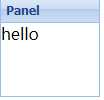
?.基本

<body style="background:black;">
    <div id="TestBox"></div>
</body>

<script type="text/javascript">
    Ext.onReady(function () {
        new Ext.Panel({
            renderTo: "TestBox",//呈现面板的html父元素的ID
            width: 400,
            height: 300,
            title: "Panel",
            html:"hello"
        });
    });
</script>

<div id="TestBox"></div>

<script type="text/javascript">
Ext.onReady(function () {
    new Ext.Panel({
        renderTo: "TestBox",//呈现面板的html父元素的ID
        width: 100,
        height: 100,
        title: "Panel",
        html: "hello",
        frame:true//渲染内容背景为面板底色
    });
});
</script>

?.滚动条
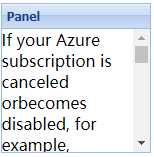

<div id="TestBox" style="width:300px;height:300px;margin:200px auto;"></div>

<script type="text/javascript">
    Ext.onReady(function () {
        var text = "If your Azure subscription is canceled or"+
                        "becomes disabled, for example, because"+
                        "the credit card used for payment expires, "+
                        "then any purchases with this Azure subscription will be deactivated"+
                        "on the 1st day of the next month. To continue using your Visual Studio"+
                        "Marketplace purchases, please keep your Azure subscription active and"+
                        "updated.For example, if you bought a Visual Studio Professional subscription, "+
                        "and you used an Azure subscription that becomes disabled, your Visual Studio"+
                        "Professional IDE will stop working on the 1st of the following month. This also applies"+
                        "to annual Visual Studio subscriptions that are paid in full for the year.";
        new Ext.Panel({
            renderTo: "TestBox",
            width: 150,
            height: 150,
            title: "Panel",
            html: text,
            autoScroll: true//html包含的文本超出区域时显示滚动条
        });
    });
</script>
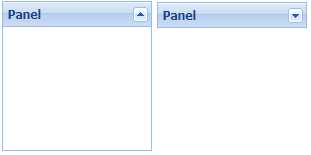
?.收拢和伸展

<script type="text/javascript">
    Ext.onReady(function () {
        new Ext.Panel({
            renderTo: "TestBox",
            width: 150,
            height: 150,
            title: "Panel",
            html: "",
            collapsible: true,//显示可收拢、展开的按钮
            titleCollapse:true//双击面板顶部可收拢、展开
        });
    });
</script>
?.拖动

<script type="text/javascript">
    Ext.onReady(function () {
        new Ext.Panel({
            renderTo: "TestBox",
            width: 150,
            height: 150,
            title: "Panel",
            html: "dragble!",
            draggable: {//配置拖动参数
                insertProxy: false,//拖动时不显示虚线
                onDrag: function (e) {//拖动时获取x和y坐标
                    var pel = this.proxy.getEl();
                    this.x = pel.getLeft(true);
                    this.y = pel.getTop(true);
                    var shadow = this.panel.getEl().shadow;
                    if (shadow != null) { shadow.hide(); }//隐藏拖动的阴影
                },
                endDrag: function (e) {//停止拖动时设置面板的x和y坐标
                    this.panel.setPosition(this.x,this.y)
                }
            },
            floating: true,//允许面板的绝对定位
            x: 100,//初始x坐标
            y:100
        });
    });
</script>
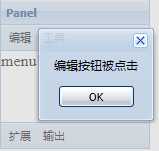
?.工具栏按钮和工具栏按钮事件

<script type="text/javascript">
    Ext.onReady(function () {
        new Ext.Panel({
            renderTo: "TestBox",
            width: 150,
            height: 150,
            title: "Panel",
            html: "menu!",
            tbar: [{ text: "编辑", handler: function () { Ext.MessageBox.alert("","编辑按钮被点击") } }, { text: "工具" }],//顶部菜单栏按钮 text指定按钮显示的文本 handler回调函数
            bbar: [{ text: "扩展" }, { text: "输出" }]//底部菜单栏按钮
        });
    });
</script>
?.右上角附加按钮
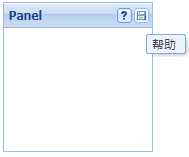
面板右上角可以有很多的按钮,提供按钮的ID就可以显示,以下实现了保存、帮助和关闭按钮,关闭按钮被关闭时回调了一个函数,注意该函数将当前面板关闭时用到了panel对象的变量,也即你得先声明这个变量而不是像上面的代码那样只new出一个panel类型的匿名对象。

<script type="text/javascript">
    Ext.onReady(function () {
        var panel=new Ext.Panel({
            renderTo: "TestBox",
            width: 150,
            height: 150,
            title: "Panel",
            html: "menu!",
            tools: [{ id: "save" }, { id: "help" }, { id: "close", handler: function () { panel.hide(); } }]//显示保存、帮助、关闭面板按钮 handler是按钮被点击时的回调函数
        });
    });
</script>


<script type="text/javascript">
    Ext.onReady(function () {
        Ext.QuickTips.init();//初始化提示
        var panel=new Ext.Panel({
            renderTo: "TestBox",//面板显示在哪个html元素里,提供该元素的ID
            width: 150,
            height: 150,
            title: "Panel",
            tools: [{id:"help",qtip:"帮助"}, {id:"save",qtip:"保存"}]//qtip:菜单提示
        });
    });
</script>
?.按钮图标
icon:图标地址、cls:"x-btn-icon"(这是常量,表示图标占满整个button)、tooltip:"按钮说明",注意,menu菜单同样可以设置这些属性。

<div id="TestBox" style="width:70px;height:20px;background:#D9D9D9;margin:200px auto;text-align:center;font-size:10px;"></div>

<script type="text/javascript">
    Ext.onReady(function () {
        Ext.QuickTips.init();//初始提示
        var tool = new Ext.Toolbar({ height: 25 });
        var config = {
            renderTo:"TestBox",
            width: 200, height: 300, title: "yahoo!",
            tbar: tool
        };
        //获取面板
        var Panel = new Ext.Panel(config);
        //获取面板的顶部工具栏
        var toolBar = Panel.getTopToolbar();
        //创建一个只有图标的按钮
        var icoBtn = new Ext.Toolbar.Button({ icon: "/image/timg.png", cls: "x-btn-icon", tooltip: "喝水" });
        //放进工具栏
        toolBar.add(icoBtn);
    });
</script>

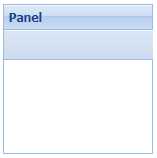
?.自定义工具栏

<script type="text/javascript">
    Ext.onReady(function () {
        var panel=new Ext.Panel({
            renderTo: "TestBox",//面板显示在哪个html元素里,提供该元素的ID
            width: 150,
            height: 150,
            title: "Panel",
            tbar: new Ext.Toolbar({//新建自定义工具栏
                width: 400,
                height:30
            })
        });
    });
</script>
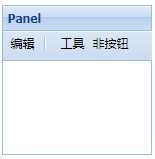
?.在自定义工具栏里添加按钮

<script type="text/javascript">
    Ext.onReady(function () {
        var panel=new Ext.Panel({
            renderTo: "TestBox",//面板显示在哪个html元素里,提供该元素的ID
            width: 150,
            height: 150,
            title: "Panel",
            tbar: new Ext.Toolbar({//新建工具栏
                width: 400,
                height:30
            })
        });
        var toolBar = panel.getTopToolbar();//获取面板的顶部工具栏(就是自定义的那个工具栏)
        toolBar.add(new Ext.Toolbar.Button({ text: "编辑" }));//在顶部工具栏添加按钮
        toolBar.add(new Ext.Toolbar.Separator());//在顶部工具栏添加按钮之间的分割线
        toolBar.add(new Ext.Toolbar.Spacer());//在顶部工具栏添加菜单按钮之间的空格
        toolBar.add(new Ext.Toolbar.Spacer());
        toolBar.add(new Ext.Toolbar.Spacer());
        toolBar.add(new Ext.Toolbar.Button({ text: "工具" }));
        toolBar.add(new Ext.Toolbar.TextItem({ text: "非按钮" }));
    });
</script>
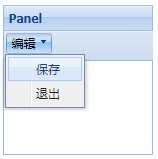
?.在按钮里添加菜单容器

<script type="text/javascript">
    Ext.onReady(function () {
        var panel=new Ext.Panel({
            renderTo: "TestBox",//面板显示在哪个html元素里,提供该元素的ID
            width: 150,
            height: 150,
            title: "Panel",
            tbar: new Ext.Toolbar({//新建工具栏
                width: 400,
                height:30
            })
        });
        var menu = new Ext.menu.Menu({//新建一组菜单容器并为菜单容器添加菜单
            items: [{text:"保存"}, {text:"退出"}]
        });
        var toolBar = panel.getTopToolbar();//获取面板的顶部工具栏
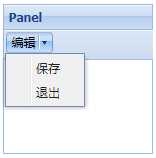
        toolBar.add(new Ext.Toolbar.Button({ text: "编辑", menu: menu }));//在顶部工具栏添加按钮、在按钮里添加菜单容器。除了Button还可以定义splitButton,样式如下图2
    });
</script>
?-1.菜单的的两种创建方式

<div id="TestBox" style="width:70px;height:20px;background:black;color:white;margin:200px auto;text-align:center;">文件(F)</div>

<script type="text/javascript">
Ext.onReady(function () {
    var div = Ext.get("TestBox");
    var menu = new Ext.menu.Menu();//新建菜单容器
    menu.add({ text: "保存" });//添加菜单
    menu.add({ text: "另存为" });

    div.on("click", function () {
        menu.show(div);//菜单显示在div里
    });
});
</script>

<script type="text/javascript">
Ext.onReady(function () {
    var div = Ext.get("TestBox");
    var menu = new Ext.menu.Menu({
        items: [{ text: "保存" }, { text: "另存为" }]
    });//新建菜单容器并添加菜单

    div.on("click", function () {
        menu.show(div);
    });
});
</script>

?-2.添加嵌套子菜单

<div id="TestBox" style="width:70px;height:20px;background:#D9D9D9;margin:200px auto;text-align:center;font-size:10px;">文件(F)</div>

<script type="text/javascript">
Ext.onReady(function () {
    var div = Ext.get("TestBox");
    var menu = new Ext.menu.Menu();
    menu.add({ text: "文件", menu: [{ text: "复制" }, { text: "粘贴" }] }, { text: "编辑", menu: [{ text: "复制" }, { text: "粘贴" }] });
    div.on("click", function () {
        menu.show(div);
    });
});
</script>
?-3.添加深层嵌套子菜单

<div id="TestBox" style="width:70px;height:20px;background:#D9D9D9;margin:200px auto;text-align:center;font-size:10px;">文件(F)</div>

<script type="text/javascript">
Ext.onReady(function () {
    var div = Ext.get("TestBox");
    var menu = new Ext.menu.Menu();
    menu.add({ text: "文件", menu: [{ text: "复制", menu: [{ text: "浅度复制" }, {text:"深度复制"}] }, { text: "粘贴" }] });
    div.on("click", function () {
        menu.show(div);
    });
});
</script>

?-4.添加纯文字

var menu = new Ext.menu.Menu();
menu.add({ text: "文件", menu: [{ text: "复制", menu: [{ text: "浅度复制" }, {text:"深度复制"}] }, { text: "粘贴" }] });
menu.add("非功能菜单的纯文字");

?-5.添加单选复选框

<div id="TestBox" style="width:70px;height:20px;background:#D9D9D9;margin:200px auto;text-align:center;font-size:10px;">文件(F)</div>

<script type="text/javascript">
Ext.onReady(function () {
    var div = Ext.get("TestBox");
    var menu = new Ext.menu.Menu();
    var checkBox1 = new Ext.menu.CheckItem({ text: "一号"/*,group:"随便设置几个字符"*/ });//单选就设置group 不设置group就是复选
    var checkBox2 = new Ext.menu.CheckItem({ text: "二号" });
    menu.add({ text: "字体设置", menu: [checkBox1, checkBox2] });
    div.on("click", function () {
        menu.show(div);
    });
});
</script>

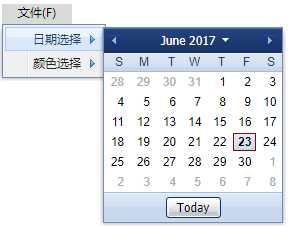
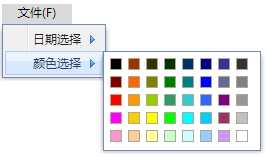
?-6.添加日期和颜色控件

<div id="TestBox" style="width:70px;height:20px;background:#D9D9D9;margin:200px auto;text-align:center;font-size:10px;">文件(F)</div>

<script type="text/javascript">
    Ext.onReady(function () {
        //ExtJs2.2的日历控件在chorme中会出现变形,这里重写该方法
        Ext.override(Ext.menu.DateMenu, {
        render : function() {
            Ext.menu.DateMenu.superclass.render.call(this);
            if (Ext.isGecko || Ext.isSafari || Ext.isChrome) {
                this.picker.el.dom.childNodes[0].style.width = ‘178px‘;
                this.picker.el.dom.style.width = ‘178px‘;
            }
        }
    });

    var div = Ext.get("TestBox");
    var menu = new Ext.menu.Menu();
    var dateMenu = new Ext.menu.DateMenu();//新建日历控件
    var colorMenu = new Ext.menu.ColorMenu();//新建颜色控件
    var menuObj1 = { text: "日期选择", menu: dateMenu };
    var menuObj2 = { text: "颜色选择", menu: colorMenu };
    menu.add(menuObj1);
    menu.add(menuObj2);
    div.on("click", function () {
        menu.show(div);
    });
});
</script>
?-7.菜单图标

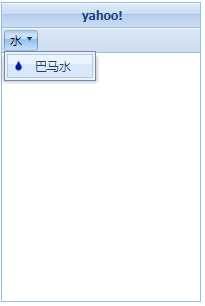
<script type="text/javascript">
    Ext.onReady(function () {
        var tool = new Ext.Toolbar({ height: 25 });
        var config = {
            renderTo:"TestBox",
            width: 200, height: 300, title: "yahoo!",
            tbar: tool
        };
        //创建菜单容器
        var icoMenu = new Ext.menu.Menu();
        //在容器里添加菜单
        icoMenu.add({ icon: "/image/timg.png", cls: "x-btn-icon", text : "巴马水" });
        //获取面板
        var Panel = new Ext.Panel(config);
        //获取面板的顶部工具栏
        var toolBar = Panel.getTopToolbar();
        //在工具栏创建按钮,把菜单容器放进按钮里
        var icoBtn = new Ext.Toolbar.Button({ text:"水",menu: icoMenu });
        //把按钮放进工具栏里
        toolBar.add(icoBtn);
    });
</script>
?.加载内容
可以通过contentEl和autoLoad两个属性分别设置面板加载当前页面某个区域的内容或其它页面的内容。

<body style="background:white;">
    <div id="TestBox" style="width:300px;height:300px;margin:400px auto;"></div>
    <font id="fontBox">ohpus!</font>
</body>

<script type="text/javascript">
    Ext.onReady(function () {
        var panel=new Ext.Panel({
            renderTo: "TestBox",//呈现面板的html父元素的ID
            width: 150,
            height: 150,
            title: "Panel",
            contentEl: "fontBox"//面板内容显示当前页面某个html元素,提供该元素的ID
       //autoLoad: "/Admin/AdminFriend.aspx",//面板内容显示其他页面的内容。
        });
    });
</script>
?.子面板

<script type="text/javascript">
    Ext.onReady(function () {
        var childConfig = createConfig(200, 50, "子面板", "Yahoo!");
        var childPanel = new Ext.Panel(childConfig);
        var fatherConfig = createConfig(500, 100, "父面板", "");
        fatherConfig["items"] = [childPanel];   //将子面板放进父面板
        var fatherPanel = new Ext.Panel(fatherConfig);
        fatherPanel.show();
    });

    function createConfig(width, height,title,html) {
        return {
            renderTo: "box",
            title: title,
            html: html,
            width: width,
            height: height
        }
    }
</script>

?.子面板填充父面板的内容区

<script type="text/javascript">
    Ext.onReady(function () {
        var childConfig = createConfig(200, 50, "子面板", "Yahoo!");
        var childPanel = new Ext.Panel(childConfig);
        var fatherConfig = createConfig(500, 100, "父面板", "");
        fatherConfig["items"] = [childPanel];
        fatherConfig["layout"] = "fit";//设为fit后,当前面板的子面板会填充整个主面板的内容区域,无视字面板设定的宽高。
        var fatherPanel = new Ext.Panel(fatherConfig);
        fatherPanel.show();
    });

    function createConfig(width, height,title,html) {
        return {
            renderTo: "box",
            title: title,
            html: html,
            width: width,
            height: height
        }
    }
</script>

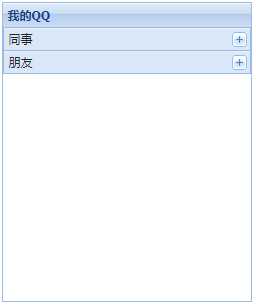
?.子面板可收拢、伸展。
如果要实现收拢、伸展,就不能显示的new子面板,只能如下设置。

<script type="text/javascript">
    Ext.onReady(function () {
        var fatherConfig = { renderTo: "box", width: 250, height: 300, title: "我的QQ" };
        fatherConfig["items"] = [{ title: "同事", collapsed: true }];//子面板可收拢、展开且默认首次显示为收拢状态
        fatherConfig["items"].push({ title: "朋友", collapsed: true });
        fatherConfig.layout = "accordion";
        var fatherPanel = new Ext.Panel(fatherConfig);
        fatherPanel.show();
    });
</script>
?.子面板切换(卡片模式)
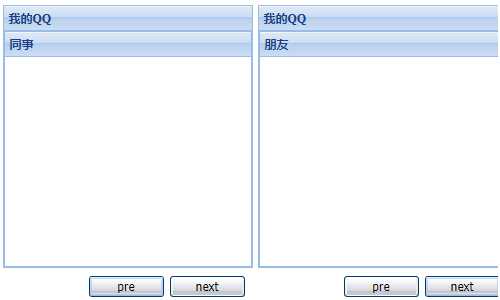
card布局的特点在于一次只显示一个面板,ExtJs提供了方法使你可以在一堆子面板间来回切换。安装软件通常会遇到“下一步”安装,这个布局就可以达到这种效果。

<script type="text/javascript">
    Ext.onReady(function () {
        var fatherConfig = { renderTo: "box", width: 250, height: 300, title: "我的QQ" };
        fatherConfig["layout"] = "card";//卡片模式,每次只显示一个子面板 需要指定activeItem
        fatherConfig["activeItem"] = 0;//默认显示第一个子面板
        fatherConfig["items"] = [new Ext.Panel({ title: "同事" }), new Ext.Panel({ title: "朋友" })];
        fatherConfig["buttons"] = [{ text: "pre", handler: changePage }, { text: "next", handler: changePage }];
        var fatherPanel = new Ext.Panel(fatherConfig);
        fatherPanel.show();

        //点击pre或next按钮时的侦听器
        function changePage(btn) {
            //fatherPanel.layout.activeItem.id:获取当前显示的子面板的编号 格式为:ext-comp-100x
            //x是数字,从1开始,多个子面板的编号是以x为基准,每添加一个子面板,x就+1 所以索引为0的子面板编号是      ext-comp-1001
            var index = Number(fatherPanel.layout.activeItem.id.substring(12));//从100后开始截取编号。(注意:如果不转成Number类型,加法运算会变成字符相连)
            //默认显示的子面板我设置为0,也即显示第一个子面板,所以当点击pre按钮后,就不应该显示它前面的子面板,因为它的索引就是0没有比它更靠前的子面板
            //它的编号是1,所以以此做判断。
            if (btn.text == "pre") {
                index =index<=1?1:--index;
            } else {
                index = index>=2?2:++index;//最多只有两个子面板
            }
            fatherPanel.layout.setActiveItem(‘ext-comp-100‘ + index);//切换要显示的子面板
        }
    });
</script>
卡片式布局需要特别注意,不要使用隐式的方式去创建子面板,请改为显示创建,把子面板显示的new出来,否则切换会失效,原因不明,我使用的是ExtJs2.2。
?.选项卡面板(TabPanel)
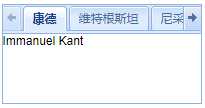
1.选项卡内容动态创建

<script type="text/javascript">
    Ext.onReady(function () {
        var config = {
            renderTo:"box",
            title: "Tab",
            width:200,
            height: 100,
            activeTab:0,//默认激活第一个tab页
            enableTabScroll: true//如果宽度不够panel显示则显示前后滚动按钮
        }
        config["items"] = [{ title: "康德",  html:"Immanuel Kant" }, { title: "维特根斯坦",html:"Ludwig Josef Johann Wittgenstein" }, { title: "尼采",  html:"Friedrich Wilhelm Nietzsche" }, { title: "罗素", html: "Bertrand Russell" }];//子面板
        //html可替换为contentEl:html元素ID
        var tabPanel = new Ext.TabPanel(config);
        tabPanel.show();
    });
</script>
2.选项卡内容来自页面元素

<div id="box" style="width:300px;height:300px;margin:200px auto;font:12px Arial;"></div>
<font class="x-hide-display" id="c1">Immanuel Kant</font>
<font class="x-hide-display" id="c2">Ludwig Josef Johann Wittgenstein</font>
<font class="x-hide-display" id="c3">Friedrich Wilhelm Nietzsche</font>
<font class="x-hide-display" id="c4">Bertrand Russell</font>

<script type="text/javascript">
    Ext.onReady(function () {
        var config = {
            renderTo:"box",
            title: "Tab",
            width:200,
            height: 100,
            activeTab:0,//默认激活第一个tab页
            enableTabScroll: true//如果宽度不够panel显示则显示前后滚动按钮
        }
        config["items"] = [{ title: "康德", contentEl: "c1" }, { title: "维特根斯坦", contentEl: "c2" }, { title: "尼采", contentEl: "c3" }, { title: "罗素", contentEl: "c4" }];//子面板
        //如果设置contentEl就必须将contentEl指定的html元素的class设为x-hide-display 否则该contentEl除了在选项卡里显示,它也会在选项卡外部显示
        var tabPanel = new Ext.TabPanel(config);
        tabPanel.show();
    });
</script>
3.自动扫描页面指定的div元素并转化为选项卡,div包含的文本自动转化为选项卡内容
自动扫描页面class为x-tab的div元素并自动将它们转化为tab选项卡,class为x-tab的div元素必须作为applyTo的子元素。

<div id="box" style="margin:200px auto;font:12px Arial;">
    <div class=‘x-tab‘ title=‘康德‘>Immanuel Kant</div>
    <div class=‘x-tab‘ title=‘维特根斯坦‘>Ludwig Josef Johann Wittgenstein</div>
    <div class=‘x-tab‘ title=‘尼采‘>Friedrich Wilhelm Nietzsche</div>
    <div class=‘x-tab‘ title=‘罗素‘>Bertrand Russell</div>
</div>

<script type="text/javascript">
    Ext.onReady(
        function () {
            var config = {
                width:240,
                height:40,
                applyTo: "box",//必须设applyTo而非renderTo
                autoTabs: true,//自动扫描页面中class为x-tab的div并将其转换为选项卡
                deferredRender: false,//选项卡不要进行延时渲染
                activeTab: 0//默认激活第一个tab页
            }
            var tabPanel = new Ext.TabPanel(config);
            tabPanel.show();
        }
    );
</script>
4.动态新增选项卡

<div id="box" style="width:300px;height:300px;margin:200px auto;font:12px Arial;"></div>

<script type="text/javascript">
    Ext.onReady(function () {
        var config = {
            renderTo:"box",
            title: "Tab",
            width:500,
            height: 100,
            activeTab:0,
            enableTabScroll: true
        }
        config["items"] = [{ title: "选项1", html: "内容1" }, { title: "选项2", html: "内容3" }, { title: "选项3", html: "内容3" }, { title: "选项4", html: "内容4" }];//添加子面板
        config["buttons"] = [{text:"add",handler:addTab}];//添加按钮和事件
        var tabPanel = new Ext.TabPanel(config);
        tabPanel.show();
        function addTab() {
            var index = tabPanel.items.length + 1;//新添加的tab选项卡的编号
            var config = {
                title: "选项" + index,
                html: "内容" + index,
                closable: true//默认可关闭这个选项卡
            }
            var newTab=tabPanel.add(config);//新增选项卡
            tabPanel.setActiveTab(newTab);//设置新增选项卡为选中状态
        }
    });
</script>

5.右键菜单
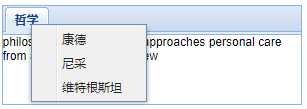
5-1.右键点击选项卡实现弹出右键菜单。

<script type="text/javascript">
    Ext.onReady(function () {
        var config = {
            renderTo:"box",
            title: "Tab",
            width:300,
            height: 100,
            activeTab:0,
            enableTabScroll: true
        }
        config["items"] = [{ title: "哲学", html: "philosophy is a brand that approaches personal care from a skin care point of view" }];//添加子面板
        config["listeners"] = { contextmenu: contextmenuFn };//侦听右键,右键被点击时触发contextmenuFn函数
        var tabPanel = new Ext.TabPanel(config);
        tabPanel.show();

        function contextmenuFn(fatherPanel, TabItem, e) {
            //fatherPanel:包含所有选项卡的父容器
            //TabItem:被右键点击的选项卡
            //e:MouseEvent对象
            var menuConfig = [{ text: "康德" }, { text: "尼采" }, {text:"维特根斯坦"}];
            var menu = new Ext.menu.Menu(menuConfig);
            menu.showAt(e.getPoint());//右键菜单显示在鼠标点击的位置
        }
    });
</script>
5-2.右键菜单功能的具体实现
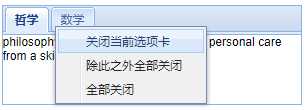
右键菜单是通过配置选项卡父容器的listeners属性实现的,为它提供contextmenu属性表示监视右键的点击行为,然后你在contextmenu指向的事件处理函数中可以动态创建出menu菜单,同时你还要为menu菜单的功能提供实现。无论如何,你都可以在这一系列的操作中获取到三个对象:fatherPanel:包含所有选项卡的父容器,tabItem:被右键点击的选项卡,e:MouseEvent对象。

<div id="box" style="width:300px;height:300px;margin:200px auto;font:12px Arial;"></div>

<script type="text/javascript">
    Ext.onReady(function () {
        var config = {
            renderTo:"box",
            title: "Tab",
            width:300,
            height: 100,
            activeTab:0,
            enableTabScroll: true
        }
        config["items"] = [{ title: "哲学", html: "philosophy is a brand that approaches personal care from a skin care point of view" }];//添加子面板
        config["items"].push({ title: "数学", html: "Practice math online with IXL. Our site offers thousands of online math practice……" });//添加子面板
        config["listeners"] = { contextmenu: contextmenuFn };//侦听右键,右键被点击时触发contextmenuFn函数
        var tabPanel = new Ext.TabPanel(config);
        tabPanel.show();

        //右键菜单的功能实现
        function contextmenuFn(fatherPanel, tabItem, e) {
            //fatherPanel:包含所有选项卡的父容器
            //tabItem:被右键点击的选项卡
            //e:MouseEvent对象
            //配置右键菜单时可提供handler事件侦听器,该侦听器可自动获得以上三个对象你可以在事件处理函数中访问它们用于实现具体的功能
            var menuConfig = [{ text: "关闭当前选项卡", handler: function () { removeWith("single");} }];
            menuConfig.push({ text: "除此之外全部关闭", handler: function () { removeWith("without"); } });
            menuConfig.push({ text: "全部关闭", handler: function () { removeWith("all"); } });
            var menu = new Ext.menu.Menu(menuConfig);
            menu.showAt(e.getPoint());//右键菜单显示在鼠标点击的位置
            //关闭功能的实现
            function removeWith(removeType) {
                function eachDelete() {
                    //迭代所有选项卡
                    fatherPanel.items.each(function (eachItem) {
                        if (removeType == "without") {
                            if (eachItem != tabItem) {
                                fatherPanel.remove(eachItem);
                            }
                        }
                        else {
                            fatherPanel.remove(eachItem);
                        }
                    });
                }
                switch (removeType) {
                    case "single": fatherPanel.remove(tabItem); return;
                    case "without":eachDelete(); return;
                    default: eachDelete(); return;
                }
            }
        }
    });
</script>
?.表单面板(formPanel)
1.文本框

<div id="box" style="width:300px;height:300px;margin:200px auto;font:12px Arial;"></div>

<script type="text/javascript">
    Ext.onReady(function () {
        //初始化提示信息
        new Ext.QuickTips.init();
        //配置表单
        var config = {
            renderTo:"box",
            title: "register",
            width:500,
            height: 300,
            labelSeparator: ":",//格式化分隔符
            labelAlign: "left",//对齐方式
            labelWidth:200,
            frame: true//内容区域背景色使用面板色
        }
        //配置表单字段
        var nameFieldConfig = {
            id:"user",
            fieldLabel: "账户",
            valiedateOnBlur: true,//失焦后开启验证
            validationDelay: 500,//提示信息延迟毫秒数
            allowBlank: false,//是否允许空值
            blankText: "此项不能为空",//空值时提示信息
            minLength: 6, minLengthText: "字符数至少6个",//最小长度和提示信息
            maxLength: 10, maxLengthText: "字符数最大10个",
            regex: /^[0-9]*$/, regexText: "不能有数字",//正则表达式
            msgTarget: "title"//提示信息样式为title样式(浏览器原始的浮动提示信息)
        }
        //创建表单字段
        var nameField = new Ext.form.TextField(nameFieldConfig);
        config["items"] = [nameField];
        var formPanel = new Ext.FormPanel(config);
        formPanel.show();
    });
</script>
2.数字文本框

<script type="text/javascript">
    Ext.onReady(function () {
        //初始化提示信息
        new Ext.QuickTips.init();
        //配置表单
        var config = {
            renderTo:"box",
            title: "register",
            width:500,
            height: 300,
            frame: true//内容区域背景色使用面板色
        }

        //配置表单的数字字段
        var numberFieldConfig = {
            id: "user",
            fieldLabel: "手机号",
            valiedateOnBlur: true,//失焦后开启验证
            allowDecimals: true,//是否允许小数
            allowNegative: true,//是否允许负数
            nanText: "必须是数字",//非数字时的提示信息 很难用 ,(注意:只要用户输入错误的字符都会被立即自动删除 提示信息几乎不会显示)
            msgTarget: "title"
            //decimalPrecision:2 精确到小数点后两位
        }

        var numberField = new Ext.form.NumberField(numberFieldConfig);//数字字段
        config["items"] = [numberField];
        var formPanel = new Ext.FormPanel(config);
        formPanel.show();
    });

    //提交按钮事件处理程序
    function submitFn(e) {
        Ext.MessageBox.alert("","输入的数据是:"+document.forms[0].elements["user"].value);
    }
</script>
3.多行文本框

<script type="text/javascript">
    Ext.onReady(function () {
        //初始化提示信息
        new Ext.QuickTips.init();
        //配置表单
        var config = {
            renderTo:"box",
            title: "register",
            width:500,
            height: 300,
            labelSeparator: ":",//格式化分隔符
            labelAlign: "left",//对齐方式
            labelWidth:200,
            frame: true//内容区域背景色使用面板色
        }

        //创建表单的备注字段
        var remarksConfig = {
            id: "remarks",
            fieldLabel: "备注",
            width:150,height:100
        }
        var remarksField = new Ext.form.TextArea(remarksConfig);
        config["items"] = [remarksField];
        var formPanel = new Ext.FormPanel(config);
        formPanel.show();
    });
</script>
4.按钮

<script type="text/javascript">
    Ext.onReady(function () {
        //配置表单
        var config = {
            renderTo:"box",
            title: "register",
            width:500,
            height: 300,
            frame: true//内容区域背景色使用面板色
        }
        config["items"] = [new Ext.form.TextField({ id:"user",fieldLabel: "用户" })];//同时创建一个字段,否则表单只有按钮则不会显示
        config["buttons"] = [{ text: "提交",handler:submitFn }];//表单按钮
        var formPanel = new Ext.FormPanel(config);
        formPanel.show();
    });

    //提交按钮事件处理程序
    function submitFn(e) {
        Ext.MessageBox.alert("","输入的数据是:"+document.forms[0].elements["user"].value);
    }
</script>
5.单选按钮
复选按钮的配置与单选按钮是一样的。

<script type="text/javascript">
    Ext.onReady(function () {
        //初始化提示信息
        new Ext.QuickTips.init();
        //配置表单
        var config = {
            renderTo:"box",
            title: "register",
            width:500,
            height: 300,
            frame: true//内容区域背景色使用面板色
        }

        //配置表单的单选按钮
        var radioBoxConfig1 = {
            name: "stu",
            boxLabel:"哲学"
        }

        var radioBoxConfig2 = {
            name: "stu",
            boxLabel: "数学"
        }

        //配置单选按钮组的标题
        var radioBoxLabelConfig = {
            text:"选择课程"
        }

        var radioBox1 = new Ext.form.Radio(radioBoxConfig1);
        var radioBox2 = new Ext.form.Radio(radioBoxConfig2);
        var radioBoxLabel = new Ext.form.Label(radioBoxLabelConfig);
        //使单选按钮组可以显示在一行上,这需要嵌套items,将单选对象全部扔进嵌套的items数组里去
        config["items"] = [{ layout: "column", width: 150, items: [radioBoxLabel,radioBox1, radioBox2] }];
        var formPanel = new Ext.FormPanel(config);
        formPanel.show();
    });

    //提交按钮事件处理程序
    function submitFn(e) {
        Ext.MessageBox.alert("","输入的数据是:"+document.forms[0].elements["user"].value);
    }
</script>
窗口组件
Window()
Window是构造函数,它作为Ext构造函数的成员,提供了在html元素里增加、设置窗口的功能。Window派生自Panel,所以一些配置属性是可以公用的。
show()
显示窗口
close()
关闭窗口
hide()
隐藏窗口。非关闭。
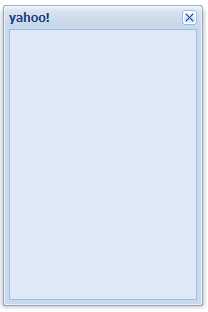
1.基本

<script type="text/javascript">
    Ext.onReady(function () {
        var config = { width: 200, height: 300, title: "yahoo!" };
        var userWindow=new Ext.Window(config);
        userWindow.show();
    });
</script>
2.最大化最小化

<script type="text/javascript">
    Ext.onReady(function () {
        var config = {
            width: 200, height: 300, title: "yahoo!",
            resizable: false,
            maximizable: true,//允许最大化
            minimizable: true,//允许最小化
            listeners: {//必须注册最小化事件
                minimize: function () {
                    this.collapse();
                }
            }
        };
        var userWindow=new Ext.Window(config);
        userWindow.show();
    });
</script>
更简单的设置最小化(再次点击可展开还原)

<script type="text/javascript">
    Ext.onReady(function () {
        var config = {
            width: 200, height: 300, title: "yahoo!",
            resizable: false,
            maximizable: true,//允许最大化
            collapsible:true//收拢展开比最小化好用
        };
        var userWindow=new Ext.Window(config);
        userWindow.show();
    });
</script>
3.拖动与改变尺寸

<script type="text/javascript">
    Ext.onReady(function () {
        var config = {
            width: 200, height: 300, title: "yahoo!",
            resizable: true,//允许改变尺寸 默认
            draggable: true//允许拖动 默认
        };
        var userWindow=new Ext.Window(config);
        userWindow.show();
    });
</script>
4.关闭或隐藏

<button id="Btn" type="button" style="margin:200px auto;">打开窗口</button>

<script type="text/javascript">
    Ext.onReady(function () {
        var config = {
            width: 200, height: 300, title: "yahoo!",
            closeAction:"hide"//hide:关闭窗口时只隐藏窗口而不是真的关闭 close:关闭
        };
        var userWindow=new Ext.Window(config);
        userWindow.show();

        //因为窗口关闭时只是hide窗口 所以还可以再次打开它
        Ext.get("Btn").on("click", function () {
            userWindow.show();
        });
    });
</script>
5.隐藏关闭按钮

closable:false
6.禁止拖动出客户区

constrain: true,//禁止拖动出客户区
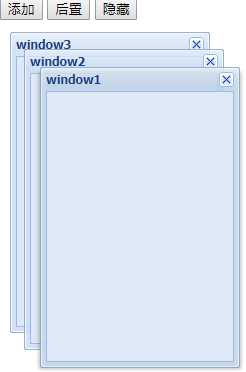
7.操作窗口组
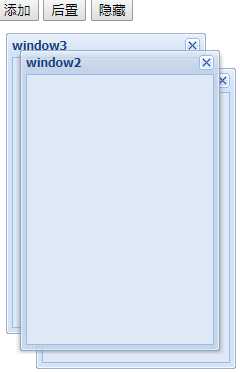
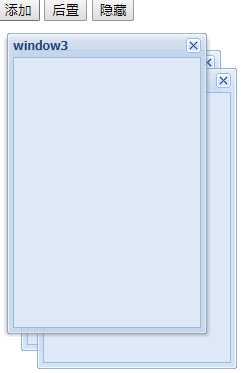
如果有多个window窗口需要统一管理,可以使用窗口组对象。

<button type="button" id="add">添加</button>
<button type="button" id="back">后置</button>
<button type="button" id="hide">隐藏</button>

<script type="text/javascript">
    var i = 0;
    var windowGroup = new Ext.WindowGroup();//创建窗口组。注意无PanelGroup。
    //添加
    function createWindow() {
        var config = {
            width: 200, height: 300, title: "window"+(++i),
            manager: windowGroup
        };
        var UserWindow = new Ext.Window(config);
        UserWindow.show();
    }
    //后置
    function sendToBack() {
        windowGroup.sendToBack(windowGroup.getActive());
    }

    //隐藏
    function hideAll() {
        windowGroup.hideAll();
    }

    Ext.onReady(function () {
        Ext.get("add").on("click", function () {
            createWindow();
        });

        Ext.get("back").on("click", function () {
            sendToBack();
        });

        Ext.get("hide").on("click", function () {
            hideAll();
        });
    });
</script>
以上是关于Javascript - ExtJs - 基本组件的主要内容,如果未能解决你的问题,请参考以下文章
Javascript - ExtJs - TabPanel组件
Javascript - ExtJs - TreePanel组件
