Vuejs入门基础笔记
Posted
tags:
篇首语:本文由小常识网(cha138.com)小编为大家整理,主要介绍了Vuejs入门基础笔记相关的知识,希望对你有一定的参考价值。
首先说明下
本文来自于学习慕课网:
vue.js入门基础的学习心得,体会,笔记。
1.从 .vue到页面
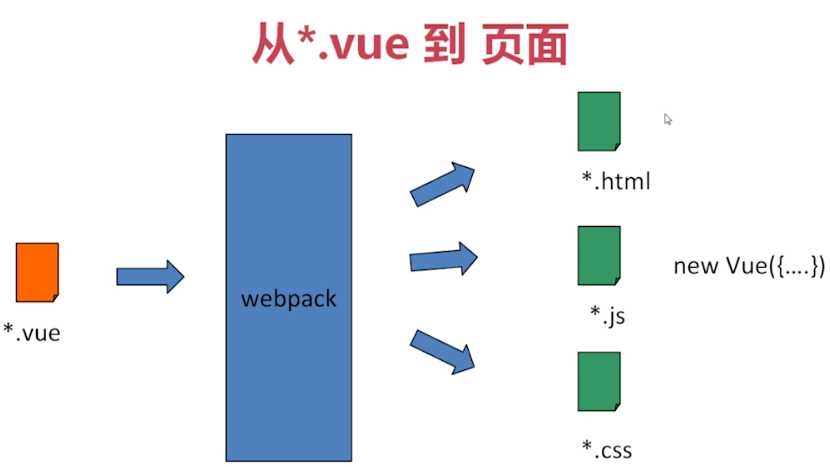
通过蓝色部分的脚手架工具我们实现vue的界面的展示。其中蓝色部分的技术细节我们可以不用关注。我们需要关注的是绿色部分的实现。
其中绿色部分的.js就是我们的数据层,也就是module模块。而html和css主要负责页面的元素展示以及css效果。
我们需要关注的,是如下图的三个部分,下图是vue的一个组件具体由哪三个部分组成:
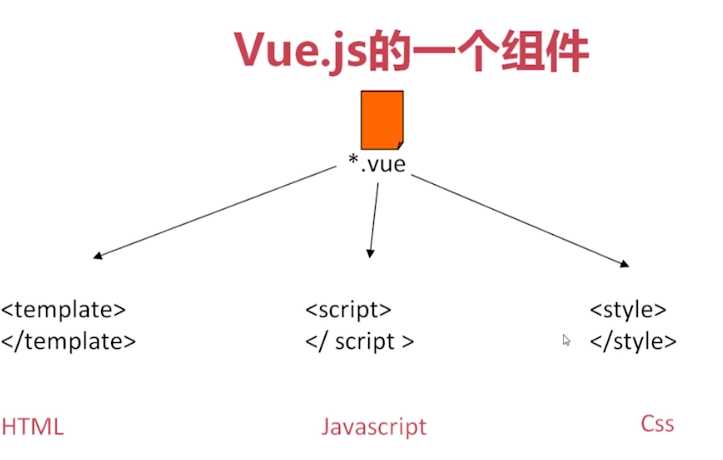
2.vue的一些重要的组件总结和示例:
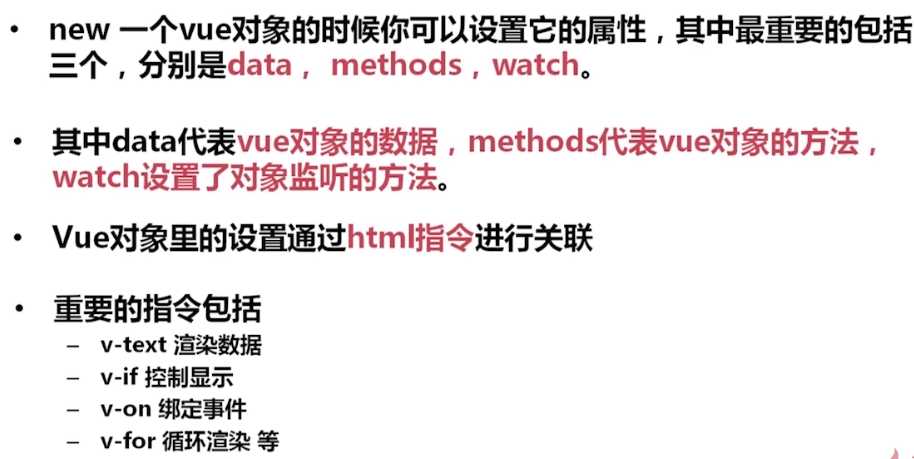
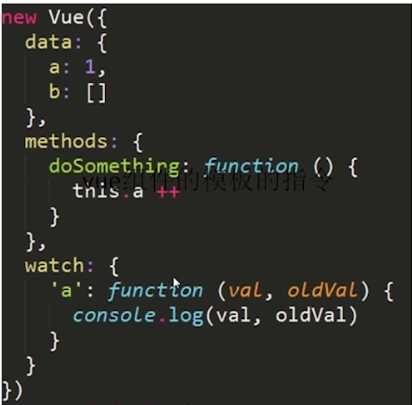
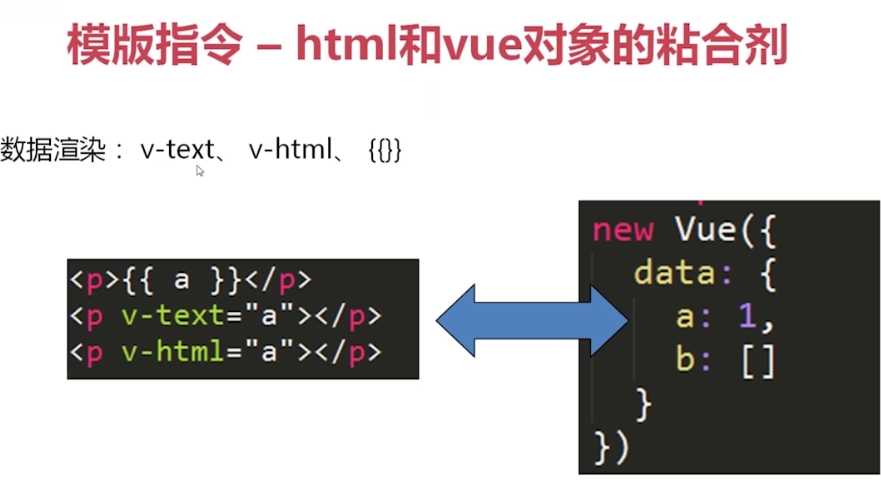
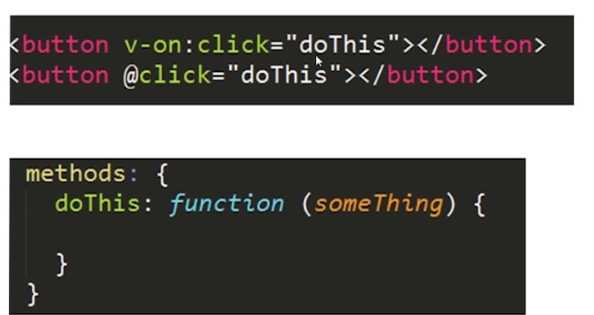
3.vue的基础框架
4.自己做一个基于vue的todolist项目
4.1搭建环境
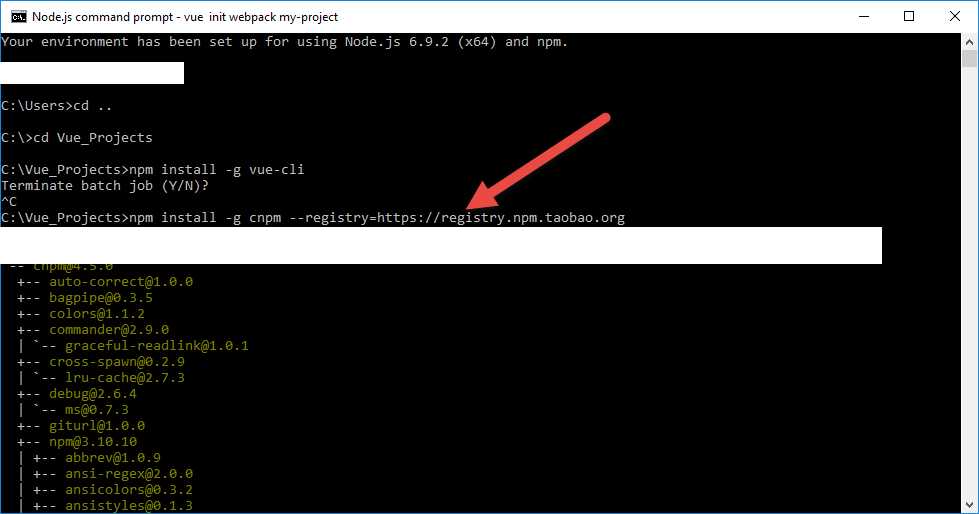
a.安装淘宝cnpm镜像
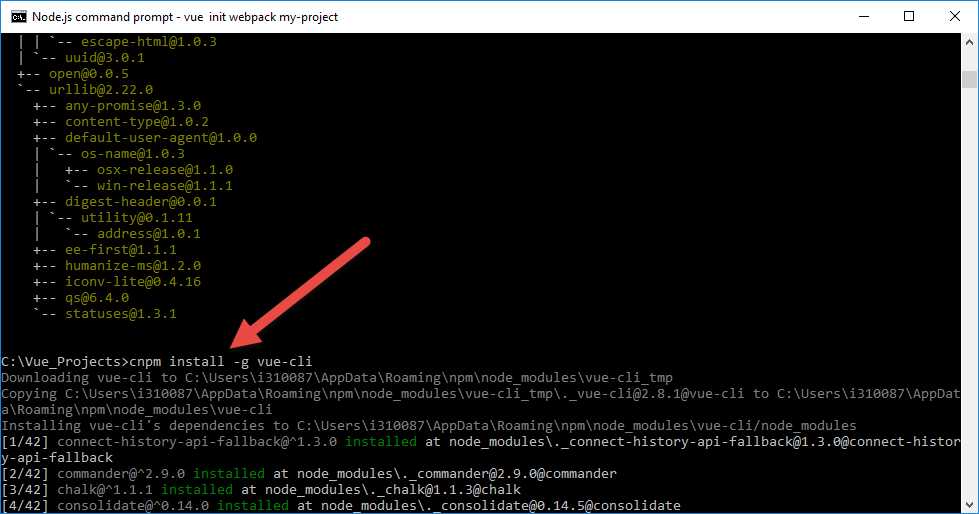
b.安装vue-cil
c.新建项目工程
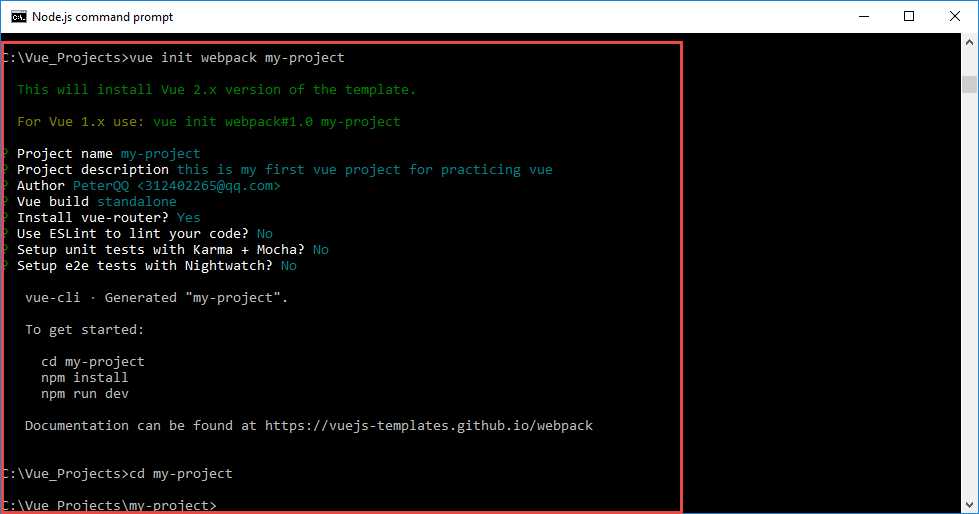
d.为项目工程安装依赖项
运行如下命令,安装package.json里面定义的需要的依赖项。

4.2开始开发我的第一个vue项目:toDolist
4.2.1 修改Hello.vue里面的 template模块的代码,实现view的部分
代码如下:
<template>
  <div class="hello">
    <h1>{{ title }}</h1>
    <input v-model="newItem" @keyup.enter="addNew"/>
    <ul>
        <li v-for="item in items" v-bind:class="{finished:item.isFinished}" v-on:click="toggleFinished(item)">
            {{item.lable}}
        </li>
    </ul>
  </div>
</template>
其中的
v-bind:class="{finished:item.isFinished}" 是实现点击列表子元素之后,在相应列表的子元素下实现有无下划线的css渲染。
v-on:click="toggleFinished(item)"是具体实现css的改变的函数。
<input v-model="newItem" @keyup.enter="addNew"/>实现了利用localstorage给列表实现了添加新的列表子元素。
这三个方法的实现都写在了<script>模块的methods部分
4.2.2 script部分实现代码的逻辑处理
代码如下:
<script>

import Store from ‘@/js/store‘
var initItems=Store.fetch();
//console.log(initItems);
export default {
  name: ‘hello‘,
  data :function() {
    return {
      title: ‘This is a toDoList.‘,
      items:initItems,
      newItem:‘‘
    }
  },
   watch:{
     items: {
      handler: function (items) {
            Store.save(items);
       },
      deep: true
    }
  },
  methods:{
    toggleFinished:function(item){
    item.isFinished=!item.isFinished;
    },
    addNew:function(){
        this.items.push({
          lable:this.newItem,
          isFinished:false
        });
        this.newItem="";
    }
  }

}
</script>
其中的
import Store from ‘@/js/store‘,我们是新建一个叫js的文件夹,文件夹里面新建一个store.js的文件。
然后store.js文件内部代码如下:(主要实现列表数据的提取和保存),利用了window.localStorage对象的相关方法。其中fetch方法是提取数据,save方法是保存数据。
const STORAGE_KEY = ‘todos-vuejs‘
export default {
    fetch() {
            if (JSON.parse(window.localStorage.getItem(STORAGE_KEY || ‘[]‘))) {
                return JSON.parse(window.localStorage.getItem(STORAGE_KEY))
            } else {
                var theItems = new Array();
                return theItems
            }

        },
        save(items) {
            window.localStorage.setItem(STORAGE_KEY, JSON.stringify(items));
        }
}
这里的Hello.vue里面的script模块中,我们也利用了watch这个属性,来检测items的变化,来实现实时的保存items。
v-model="newItem" 就和input输入的item,二者进行了绑定。
最后实现的效果如下图:

5 vue的组件划分
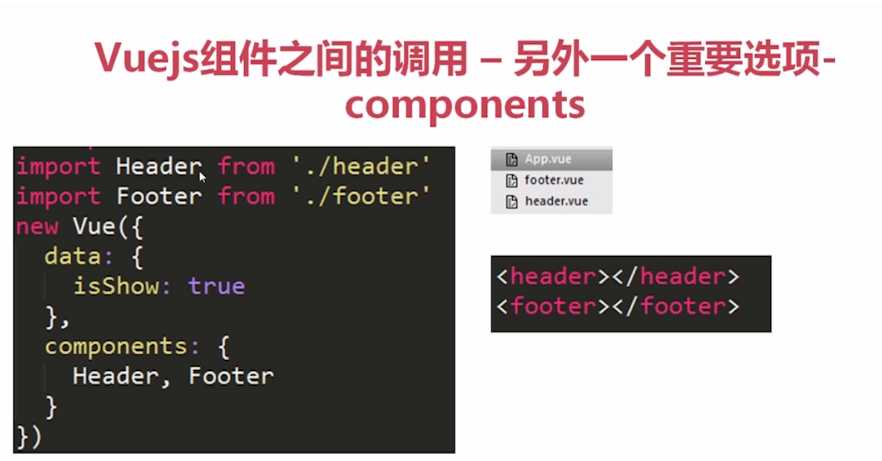
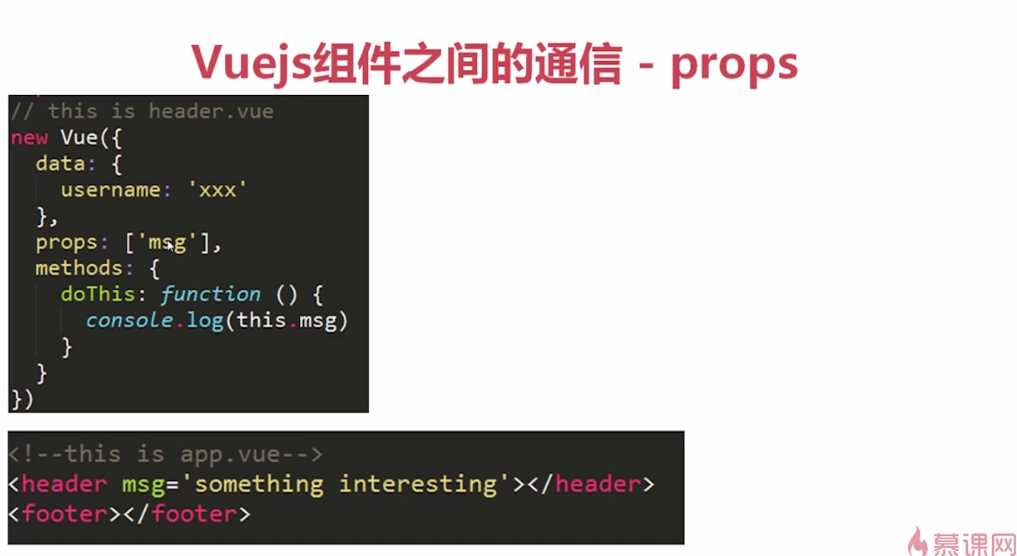
5.1父向子组件传参
在components文件夹下,新建componentA.vue,
需要注意的代码:
props:[‘msgFromFather‘],
 methods:{
    clickComponetA:function(){
    alert(this.msgFromFather);
    }
  }
 <button v-on:click="clickComponetA()">Click me!</button>
<h1>{{ msgFromFather }}</h1>
代码如下:
<template>
<div >
<h1>{{ title }}</h1>
<h1>{{ msgFromFather }}</h1>
<button v-on:click="clickComponetA()">Click me!</button>
</div>
</template>
<script>
export default {
name: ‘hello‘,
data :function() {
return {
title: ‘Hello from component A‘
}
},
watch:{
},
props:[‘msgFromFather‘],
methods:{
clickComponetA:function(){
alert(this.msgFromFather);
}
}
}
</script>
<!-- Add "scoped" attribute to limit CSS to this component only -->
<style scoped>
a {
color: #42b983;
}
</style>
修改App.vue,代码如下:
注意代码:
<component-a msgFromFather="Hi Son!"></component-a>
import componentA from ‘@/components/componentA‘
export default {
  name: ‘app‘,
  components:{componentA}
}
<template>
  <div id="app">
    <img src="./assets/logo.png">
    <router-view></router-view>
    <component-a msgFromFather="Hi Son!"></component-a>
  </div>
</template>

<script>
import componentA from ‘@/components/componentA‘
export default {
  name: ‘app‘,
  components:{componentA}
}
</script>

<style>
#app {
  font-family: ‘Avenir‘, Helvetica, Arial, sans-serif;
  -webkit-font-smoothing: antialiased;
  -moz-osx-font-smoothing: grayscale;
  text-align: center;
  color: #2c3e50;
  margin-top: 60px;
}
</style>
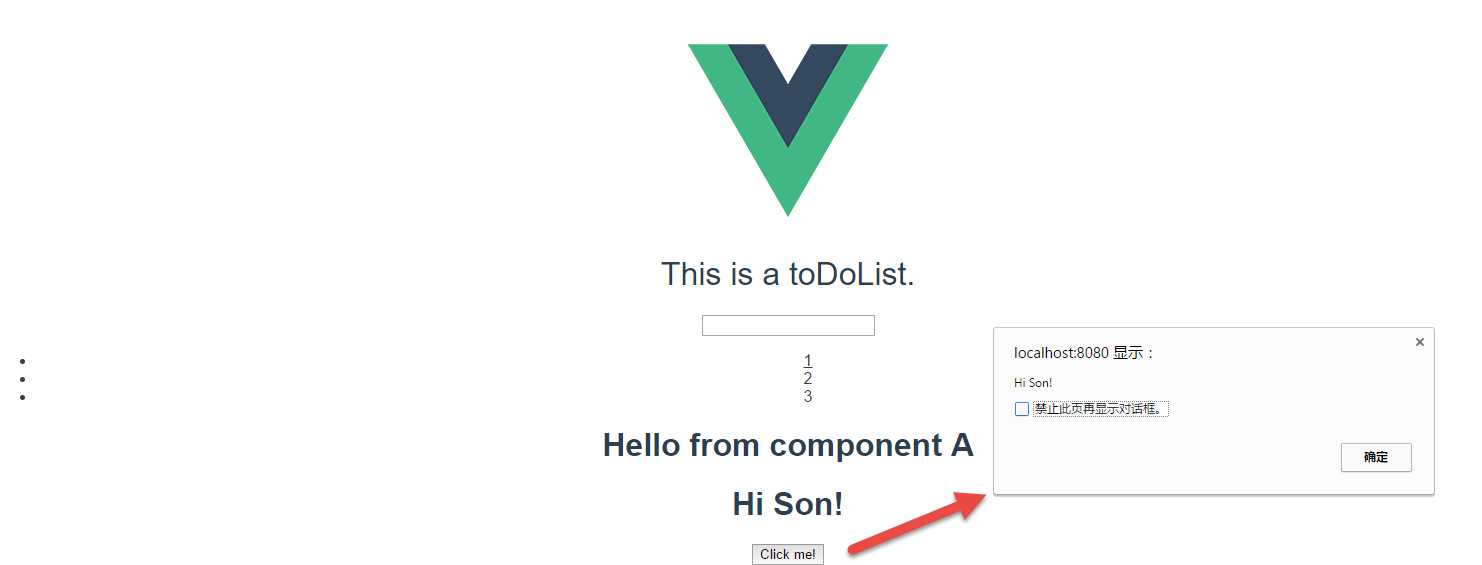
效果如下图:
5.2子向父组件传参
以上是关于Vuejs入门基础笔记的主要内容,如果未能解决你的问题,请参考以下文章