微服务架构整理-(十SpringCloud实战之Hystrix [3])
Posted 浦江之猿
tags:
篇首语:本文由小常识网(cha138.com)小编为大家整理,主要介绍了微服务架构整理-(十SpringCloud实战之Hystrix [3])相关的知识,希望对你有一定的参考价值。
SpringCloud实战之Hystrix [3]-看版监控
前言
当需要查看服务的状态时,不可能每都通过log来进行查看,Hystrix提供的表盘(Dashboard)功能主要用来监控服务的运行状态,通过它我们可以看到Hystrix的各项指标信息,从而快速发现问题进而采取措施。为了能够使用Hystrix 仪表盘功能,消费者需要配置/actuator/hystrix.stream接口,这样dashboard就可以监控此服务了。但根据微服架构的设计思想,Dashboard也需要单独设计成一个服务,供其他消费者使用,从而可以监控各消费者的状态。
搭建Dashboard服务
因为Dashboard也是一个服务,所以需要创建一个springboot项目来实现此服务。
创建springboot工程
创建一个普通的springboot工程,命名为Hystrix_Dashboard
添加依赖
<dependency>
    <groupId>org.springframework.cloud</groupId>
    <artifactId>spring-cloud-starter-netflix-hystrix-dashboard</artifactId>
    <version>2.2.10.RELEASE</version>
</dependency>
配置启动类
在启动类上@EnableHystrixDashboard注解
@SpringBootApplication
//配置dashboard
@EnableHystrixDashboard
public class HystrixDashboardApplication
	public static void main(String[] args)
		SpringApplication.run(HystrixDashboardApplication.class, args);
添加配置文件
配置文件中添加端口号以及proxy-stream-allow-list。
server:
  port: 9004 #端口
hystrix:
  dashboard:
    proxy-stream-allow-list: localhost
如果proxy-stream-allow-list不配的话,到时dashboard上会提示:Unable to connect to Command Metric Stream. 如下图所示:

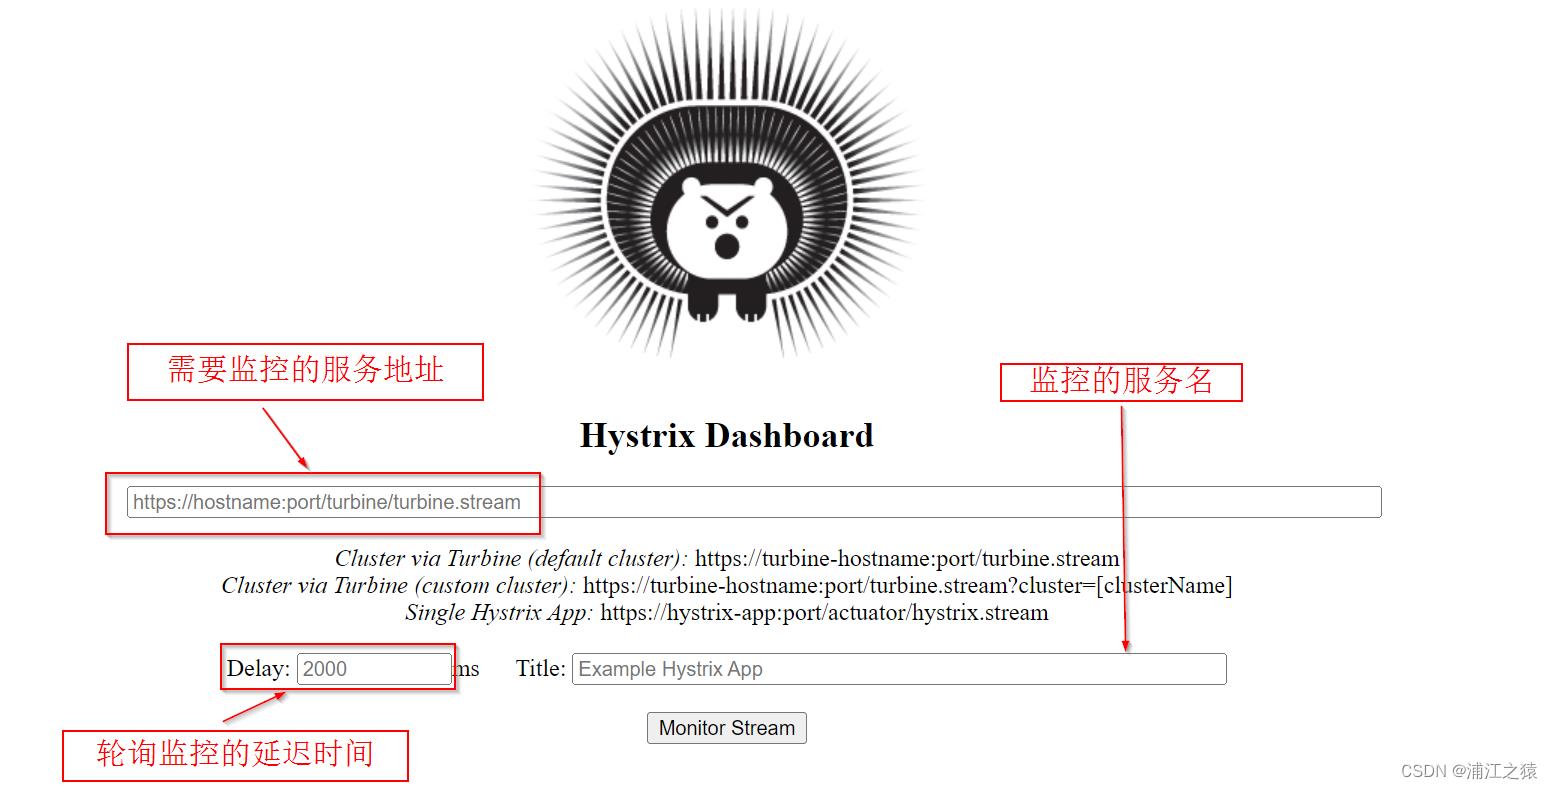
到这事个dashboard就搭建完了,启动之后在浏览器中输入地址:http://localhost:9004/hystrix,如下图所示:

引用Dashboard服务
使用搭建好的dashboard监控order_service,关键点是需要在order_service中添加**/actuator /hystrix.stream**访问点。步骤如下:
添加Hystrix依赖
        <dependency>
            <groupId>org.springframework.cloud</groupId>
            <artifactId>spring-cloud-starter-netflix-hystrix</artifactId>
            <version>2.2.10.RELEASE</version>
        </dependency>
添加springboot服务监控依赖
        <dependency>
            <groupId>org.springframework.boot</groupId>
            <artifactId>spring-boot-starter-actuator</artifactId>
        </dependency>
配置springboot监控接口的访问权限
这个是用来暴露 endpoints 的,由于 endpoints 中会包含很多敏感信息,除了 health 和 info 两个支持直接访问外,其他的默认不能直接访问。这里为了能看到显示结果, 所以都设成*(不设置成hystrix.stream了),表示都可以访问。
management:
  endpoints:
    web:
      exposure:
        include: '*'
结果
上述配置完成后就可以访问此接口:http://localhost:9002/actuator/hystrix.stream (结果如下)。当访问此接口时dashboard机制会自动监控那些加了熔断的接口。这里需要注意,在访问此接口前建议先访问一下加了熔断的接口,不然页面上会一直打印ping…

为了在dashboard上看到可视化的结果,需要将此接口配置到dashboard中。最终结果如果下:

总结
关于Hystrix的Dashboard就介绍完了,到这Hystrix的所有基础知识点就结束了。最后,希望本文能帮助大家,祝大家在IT之路上少走弯路,一路绿灯不堵车,测试一性通过,bug秒解!
源码下载
以上是关于微服务架构整理-(十SpringCloud实战之Hystrix [3])的主要内容,如果未能解决你的问题,请参考以下文章