2017-3-30 Js实现导航栏,选项卡,图片轮播的制作
Posted 青年a
tags:
篇首语:本文由小常识网(cha138.com)小编为大家整理,主要介绍了2017-3-30 Js实现导航栏,选项卡,图片轮播的制作相关的知识,希望对你有一定的参考价值。
(一)导航栏的制作
显示的效果:
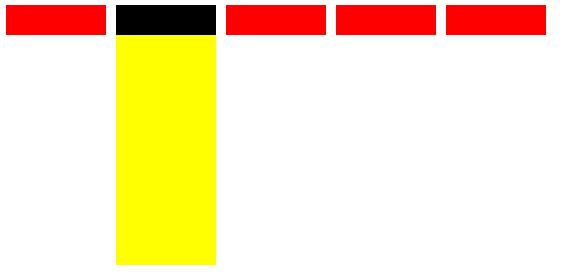
<!DOCTYPE html>
<html xmlns="http://www.w3.org/1999/xhtml">
<head>
    <meta http-equiv="Content-Type" content="text/html; charset=utf-8" />
    <title></title>
    <style type="text/css">
        .div1 {
            width: 100px;
            height: 30px;
            background-color: red;
            float: left;
            margin-right: 10px;
            position: relative;
        }

        .div2 {
            width: 100px;
            height: 230px;
            background-color: yellow;
            float: left;
            margin-right: 10px;
            position: absolute;
            top: 30px;
            display: none;
        }
    </style>
</head>
<body>
    <div class="div1" id="div_1">
        <div class="div2">
        </div>
    </div>
    <div class="div1" id="div_2">
        <div class="div2">
        </div>
    </div>
    <div class="div1" id="div_3">
        <div class="div2">
        </div>
    </div>
    <div class="div1" id="div_4">
        <div class="div2">
        </div>
    </div>
    <div class="div1" id="div_5">
        <div class="div2">
        </div>
    </div>

</body>
</html>
<script type="text/javascript">
    var a = document.getElementsByClassName(\'div1\');
    var b = document.getElementsByClassName(\'div2\');
    for (var i = 0; i < a.length; i++) {
        //鼠标移入
        a[i].index = i;//记录一个int类型的值,使div1和div2对应起来鼠标移入移除的时候显示相应的下拉菜单
        a[i].onmouseover = function () {
            a[this.index].style.backgroundColor = \'black\';//鼠标移入的时候div1变色
            b[this.index].style.display = \'block\';
        }

        //鼠标移除
        a[i].onmouseout = function () {
            a[this.index].style.backgroundColor = \'red\';//鼠标移除的时候div1恢复原来的颜色
            b[this.index].style.display = \'none\';
        }
    }
</script>
(二)选项卡的制作
点击导航栏,div中的内容发生变化,变化用数字代替
css样式:
.div1 {
    width:100px;
    height:30px;
    float:left;
    margin-right:10px;
    background-color:red;
}
.div2 {
    top:40px;
    background-color:blue;
    width:540px;
    height:300px;
    position:absolute;
    z-index:100;

}
js代码div内容:
<!DOCTYPE html>
<html xmlns="http://www.w3.org/1999/xhtml">
<head>
<meta http-equiv="Content-Type" content="text/html; charset=utf-8"/>
    <title></title>
    <link href="Css/Css3.css" rel="stylesheet" />
</head>
<body>
    <div class="div1" id="d1"></div>
    <div class="div1" id="d2"></div>
    <div class="div1" id="d3"></div>
    <div class="div1" id="d4"></div>
    <div class="div1" id="d5"></div>
    <div class="div2" id="da" style="z-index:101;">111</div>
    <div class="div2" id="db">222</div>
    <div class="div2" id="dc">333</div>
    <div class="div2" id="de">444</div>
    <div class="div2" id="df">555</div>
</body>
</html>
<script type="text/javascript">
    var a = document.getElementsByClassName(\'div1\');
    var b = document.getElementsByClassName(\'div2\');
    var count = 102;
    for (var i = 0; i < a.length; i++) {

        //鼠标移入
        a[i].onmouseover = function () {

            if (this.style.backgroundColor != \'black\') {//鼠标移入的时候只要不是黑色都变成黄色
                this.style.backgroundColor = \'yellow\';
            }

        }
        //鼠标移出
        a[i].onmouseout = function () {
            if (this.style.backgroundColor == \'yellow\') {
                this.style.backgroundColor = \'red\';
            }
        }
        //鼠标点击
        a[i].index = i;//用于计数比较的一定要放在点击事件的外面
        a[i].onclick = function () {

            for (var j = 0; j < a.length;j++){
                a[j].style.backgroundColor = \'red\';
            }
            this.style.backgroundColor = \'black\';


            //选项卡切换
            b[this.index].style.zIndex = count;
            count++;

        }


    }
</script>
(三)图片轮播
显示效果:

css样式表:
.div1 {
   width:730px;
   height:336px;
   position:relative;
   background-color:red;
}
    .div1 img {
        width:100%;
        height:100%;
        position:absolute;
        display:none;
    }
.but {
    width:40px;
    height:50px;
    background-color:#808080;
    z-index:1000;
    position:absolute;
    top:50%;
    margin-top:-25px;
    font-size:30px;
    line-height:50px;
    font-weight:bold;
    text-align:center;
    cursor:pointer;


}
js和内容:
<!DOCTYPE html>
<html xmlns="http://www.w3.org/1999/xhtml">
<head>
<meta http-equiv="Content-Type" content="text/html; charset=utf-8"/>
    <title></title>
    <link href="Css/Css4.css" rel="stylesheet" />
</head>
<body>
    <div class="div1" id="da">
        <img class="img" src="images/1_1.jpg" style="display:block"/>
        <img class="img" src="images/1_2.jpg" />
        <img class="img" src="images/1_3.jpg" />
        <img class="img" src="images/1_4.jpg" />
        <img class="img" src="images/1_5.jpg" />
        <img class="img" src="images/1_6.jpg" />

        <div class="but" id="but_left"><</div>
        <div class="but" id="but_right" style="right:0px;">></div>
    </div>
</body>
</html>
<script type="text/javascript">
    var images = document.getElementsByClassName(\'img\');
    var count = 0;

        //左滑动事件
        document.getElementById(\'but_left\').onclick = function () {
            for (var i = 0; i < images.length; i++) {
                images[i].style.display = \'none\';
            }
            count--;
            if (count <0) {
                count = images.length - 1;
            }
            images[count].style.display = \'block\';
        }

        //右滑动事件
        document.getElementById(\'but_right\').onclick = function () {
            for (var i = 0; i < images.length;i++){
                images[i].style.display = \'none\';
            }
            count++;
            if (count > (images.length - 1)) {
                count = 0;
            }
            images[count].style.display = \'block\';

        }


</script>
以上是关于2017-3-30 Js实现导航栏,选项卡,图片轮播的制作的主要内容,如果未能解决你的问题,请参考以下文章