Flutter 开发从 0 到 1布局与 ListView
Posted 吴小龙同學
tags:
篇首语:本文由小常识网(cha138.com)小编为大家整理,主要介绍了Flutter 开发从 0 到 1布局与 ListView相关的知识,希望对你有一定的参考价值。

上周日出去玩了,因此没时间写文章。我司加班到 11 点,第二天可以晚上班一个小时,加班到 12 点,可以晚上班两个小时,以此类推,为什么说这个,对的,加班第二天我没有多睡觉,而是起来抓紧时间写文章,好了,废话不多说,进入今天的主题。
布局
说到 android 布局,不是很难,会在对应的 xml 里布局,Flutter 里没有 xml,都在代码里写,给人感觉就很难,看下我们要实现的布局:
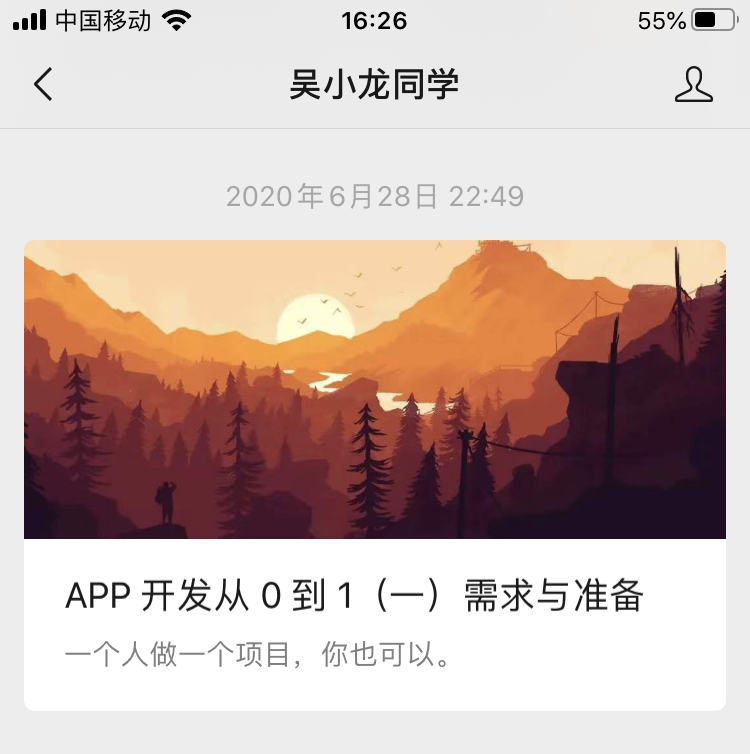
打开 PhotoShop,看下背景色 #ededed,日期字体颜色 #a6a6a6,标题字体颜色 #1b1b1b,摘要字体颜色 #808080。
公众号这是列表,我先将 item 搞定。看这布局都是线性布局,这要在之前,分分钟搞定,但 Flutter……好吧,Flutter 布局可没那么简单,我花了好几个小时才做好,期间遇到了不少困难。
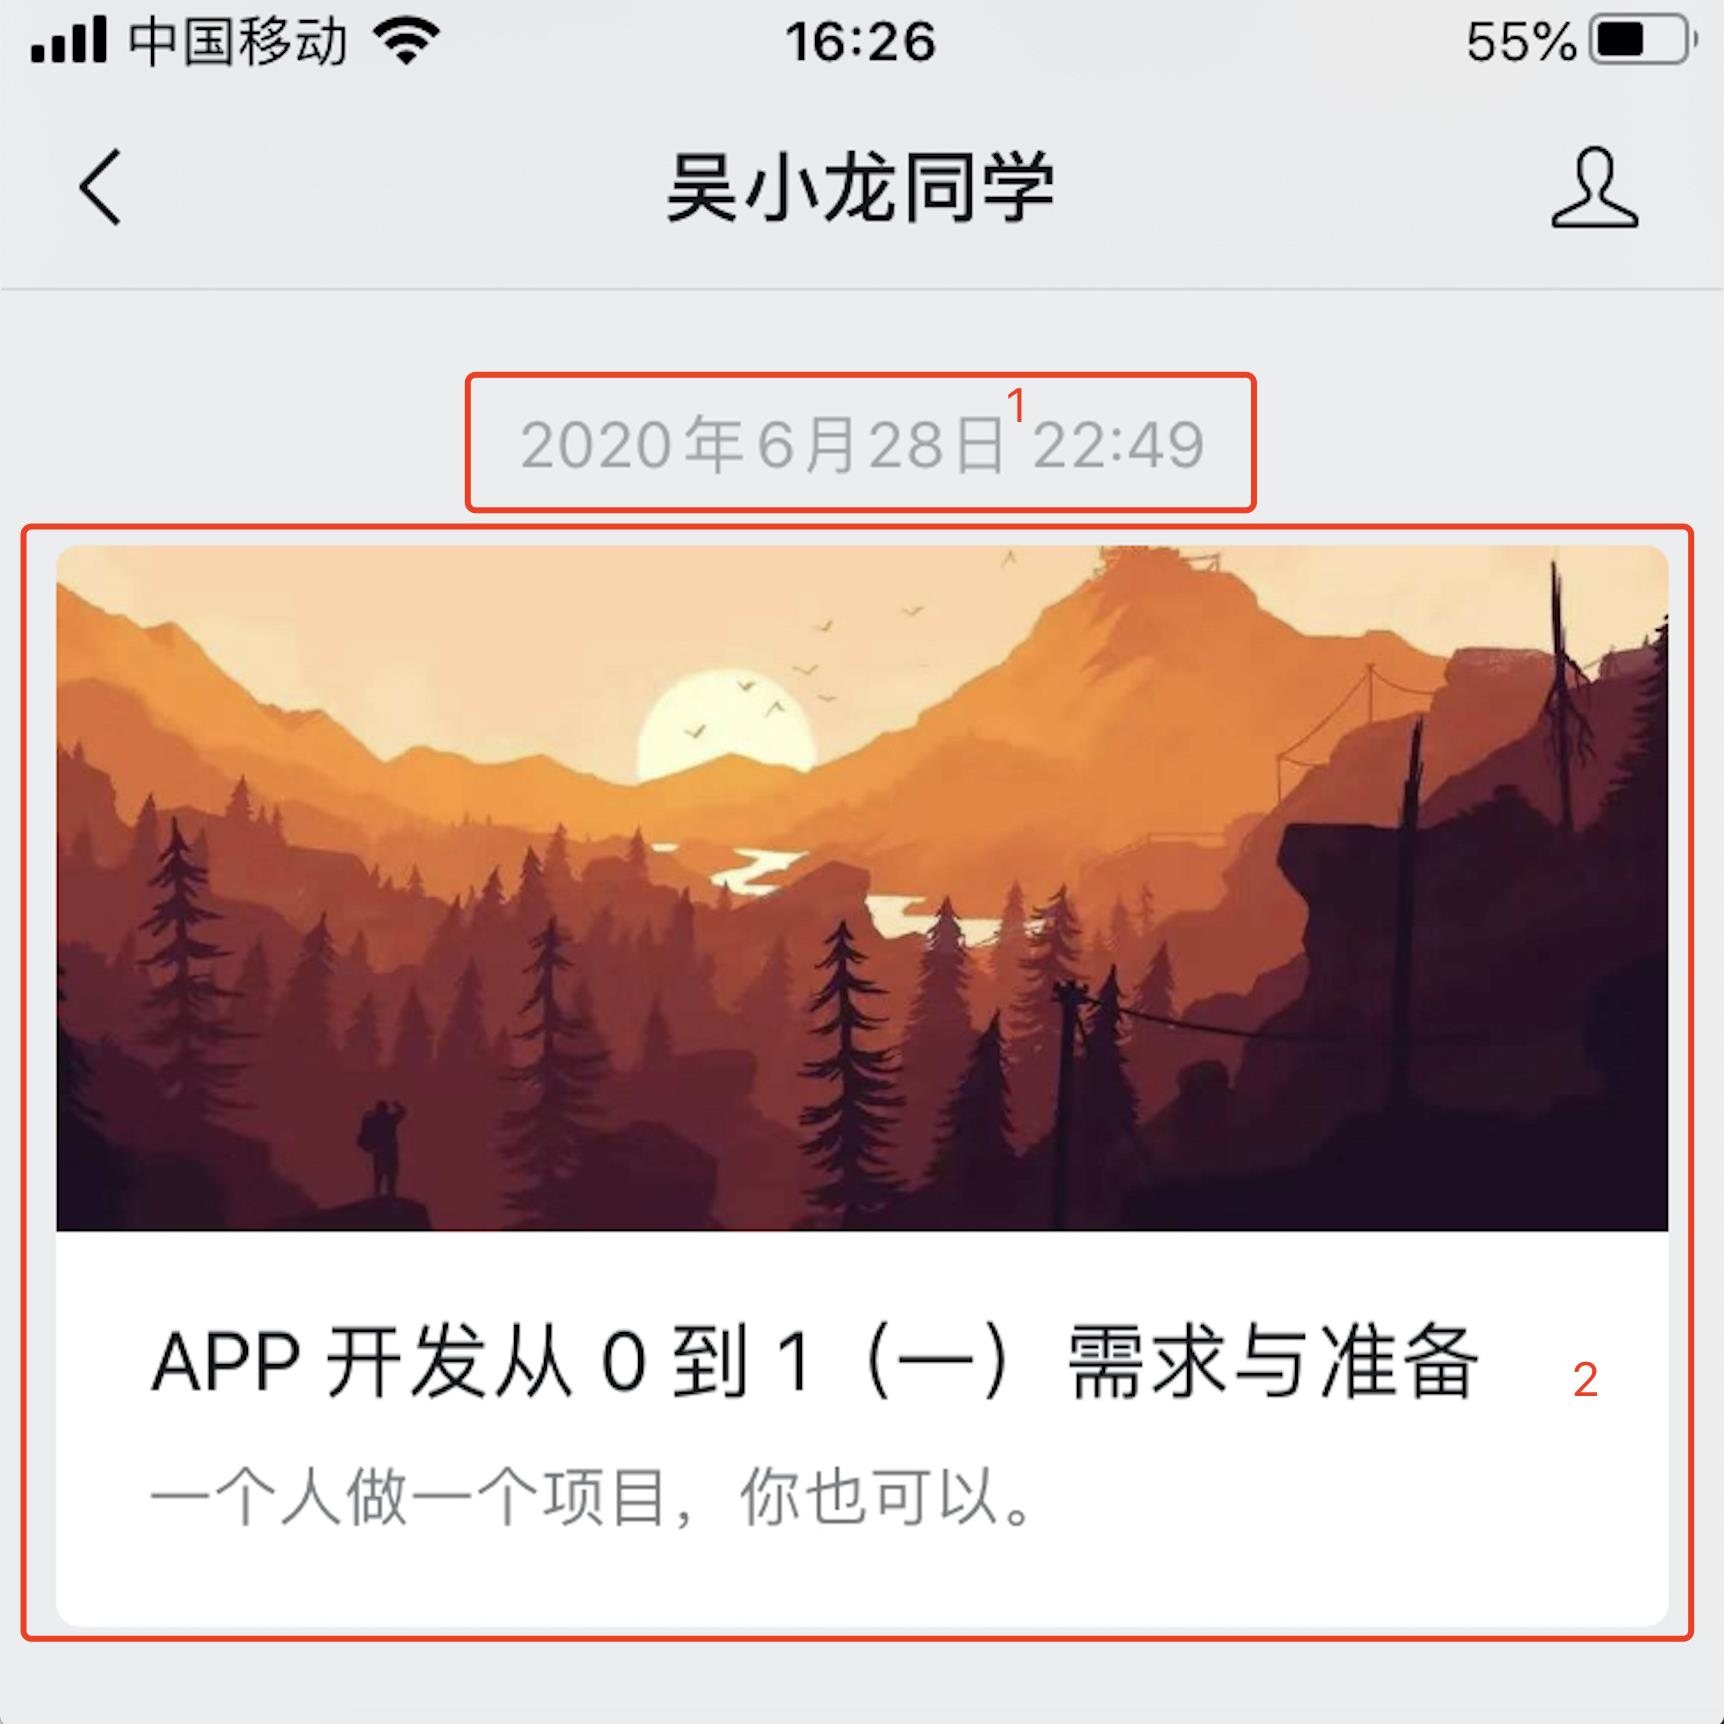
Flutter 也有横向 Row 布局和竖向 Column 布局,我本想分 1 和 2 两个部分,最外层竖向 Column 包含 1 和 2,2 本身是 Column,包含一个 image 和两个 text,直接使用 Column 可以完成,当我需要设置 2 里面白色的背景色,发现 Column 根本没有背景色属性,于是把 2 最外层改造成 Container。
使用 Container 没有问题,布局也很快实现了,接下来是实现四角的圆角效果。
Container 有 decoration,可以实现圆角,我遇到了两个问题:
1、当 shape: BoxShape.circle 时不能设置 borderRadius ,会异常
异常信息:‘shape != BoxShape.circle ||borderRadius == null’: is not true.
2、使用 BoxDecoration
Container 不能使用 color,会报错:
Cannot provide both a color and a decoration
To provide both, use “decoration: BoxDecoration(color: color)”.
以为这样就实现了圆角,不,不会那么顺利的,发现图片根本没有圆角效果,这和之前 Java 实现方式不一样,最外层都实现了圆角,对里面的布局(图片)居然没有生效,最后只好把布局实现如下:
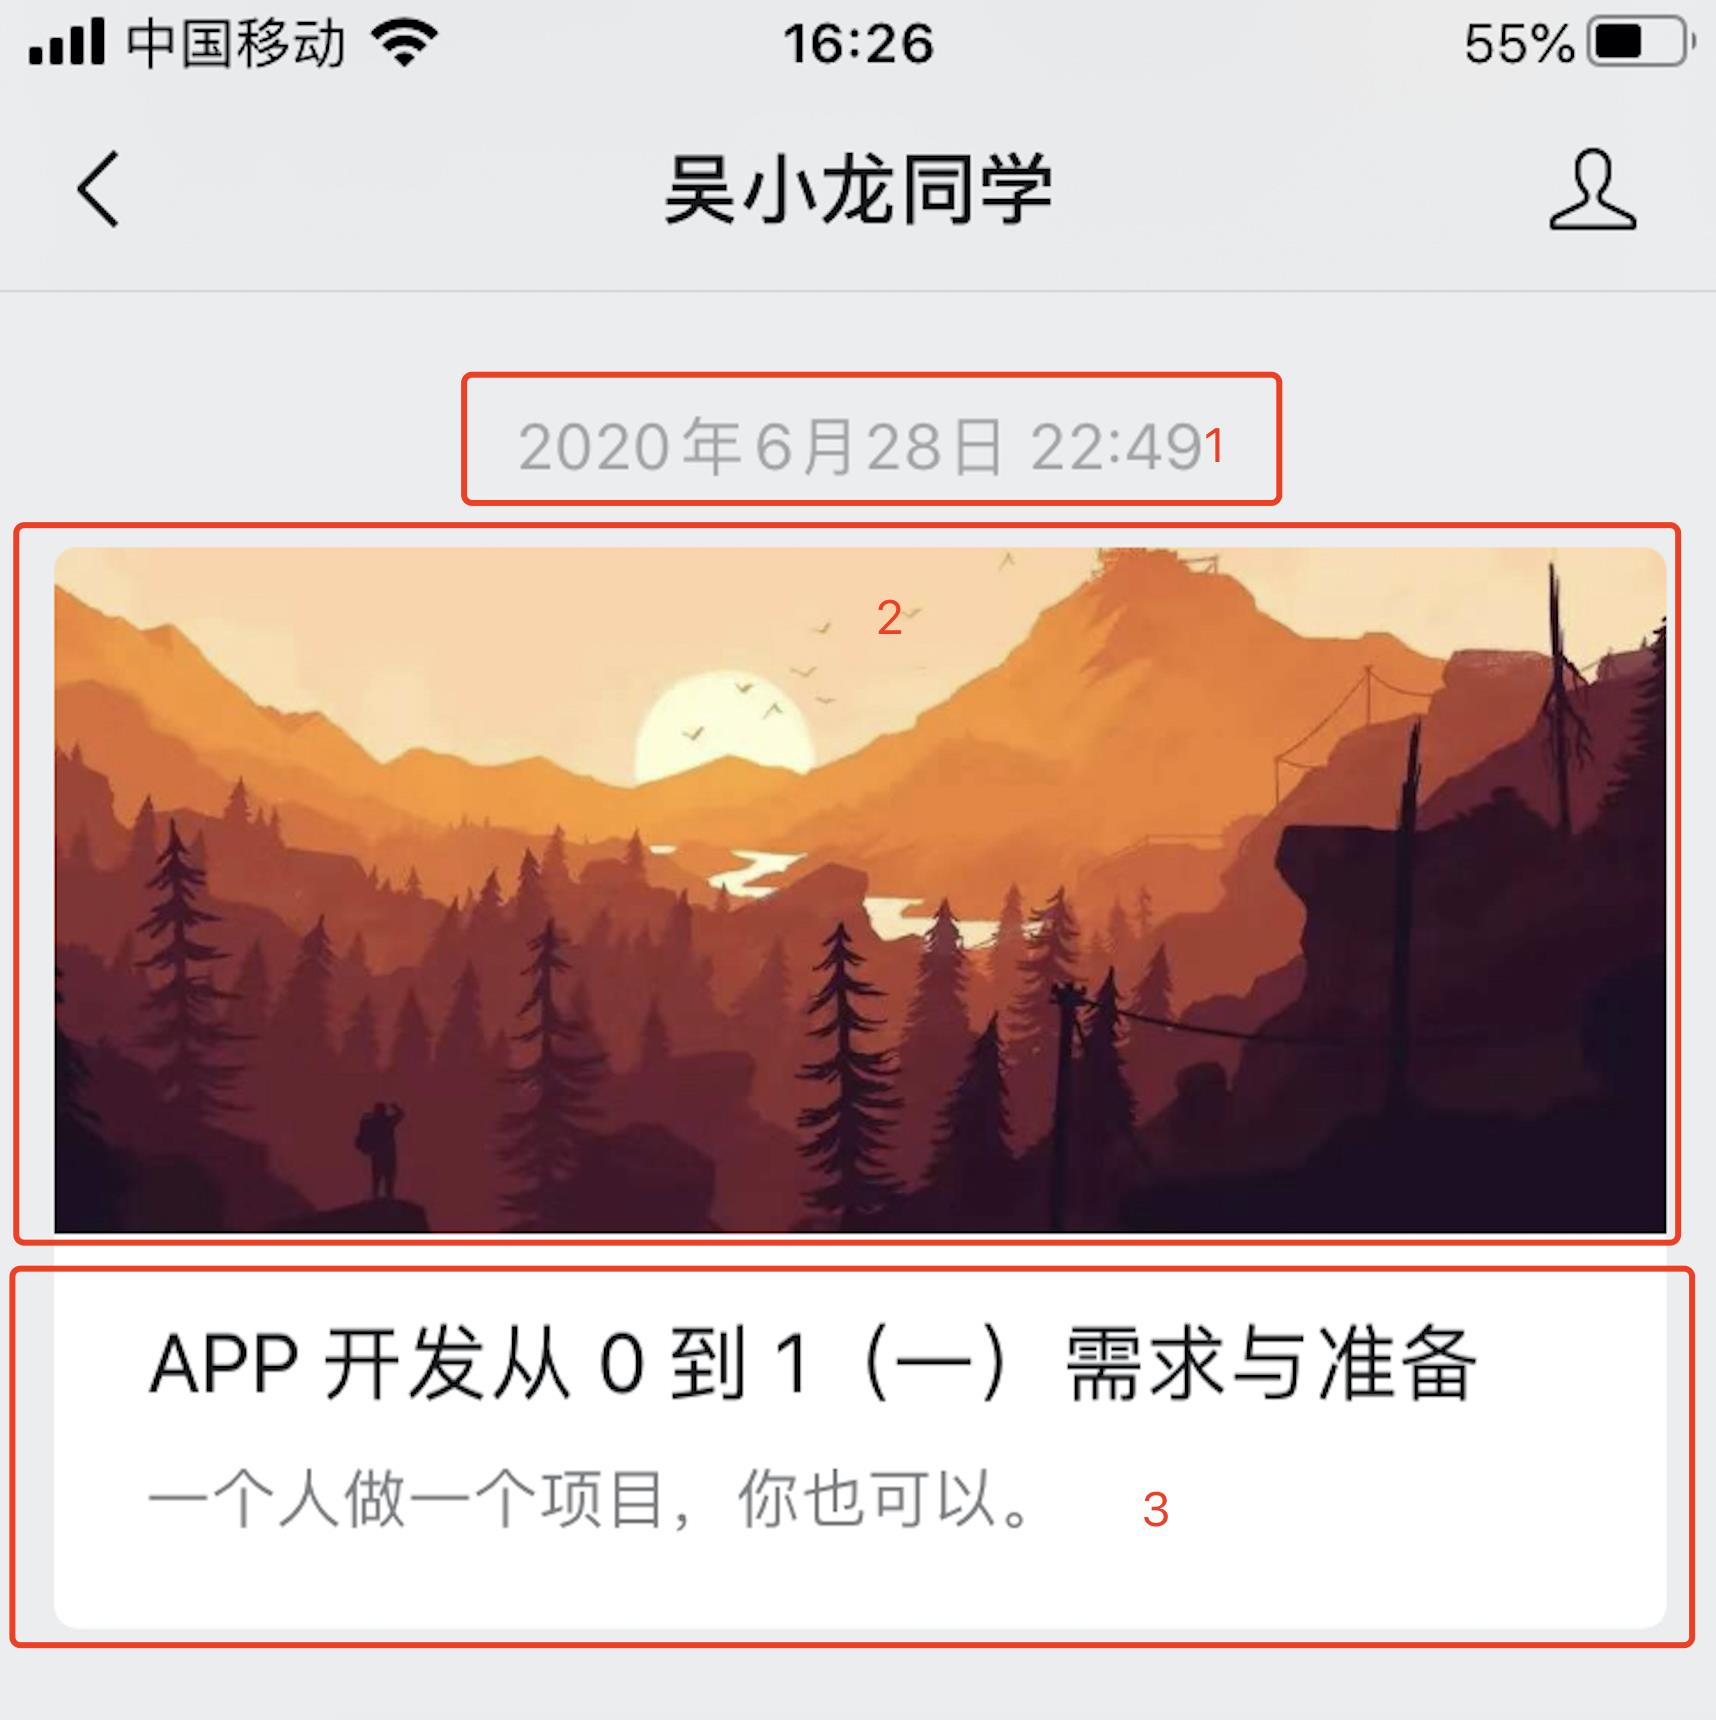
分成 1、2、3 部分,3 还是 Container,2 和 3 圆角效果只对上下部分分别实现,完整代码如下:
blogItem()
    var date = new Padding(
        padding: const EdgeInsets.only(
          top: 20.0,
          left: 10.0,
          right: 10.0,
        ),
        child: new Text(
          '2020年6月28日 22:49',
          textAlign: TextAlign.center,
          style: TextStyle(color: ColorCommon.dateColor, fontSize: 18),
        ));

    var cover = new Padding(
        padding: const EdgeInsets.only(
          top: 10.0,
          left: 10.0,
          right: 10.0,
        ),
        child: new ClipRRect(
            borderRadius: BorderRadius.only(
                topLeft: Radius.circular(10.0),
                topRight: Radius.circular(10.0)),
            child: new Image.network(
              'http://pic1.win4000.com/wallpaper/2020-04-21/5e9e676001e20.jpg',
            )));

    var title = new Text(
      'APP 开发从 0 到 1(一)需求与准备',
      style: TextStyle(color: ColorCommon.titleColor, fontSize: 22),
    );

    var summary = new Padding(
        padding: const EdgeInsets.only(
          top: 5.0,
        ),
        child: new Text('一个人做一个项目,你也可以。',
            textAlign: TextAlign.left,
            style: TextStyle(color: ColorCommon.summaryColor, fontSize: 18)));

    var titleSummary = new Container(
      padding: const EdgeInsets.all(10.0),
      alignment: Alignment.topLeft,
      decoration: new BoxDecoration(
        color: Colors.white,
        borderRadius: BorderRadius.only(
            bottomLeft: Radius.circular(10.0),
            bottomRight: Radius.circular(10.0)),
        shape: BoxShape.rectangle,
      ),
      margin: const EdgeInsets.only(left: 10, right: 10.0),
      child: Column(
        crossAxisAlignment: CrossAxisAlignment.start,
        mainAxisSize: MainAxisSize.min,
        children: <Widget>[title, summary],
      ),
    );

    var blogItem = new Column(
      children: <Widget>[date, cover, titleSummary, date, cover, titleSummary],
    );

    return blogItem;
实际效果如下:
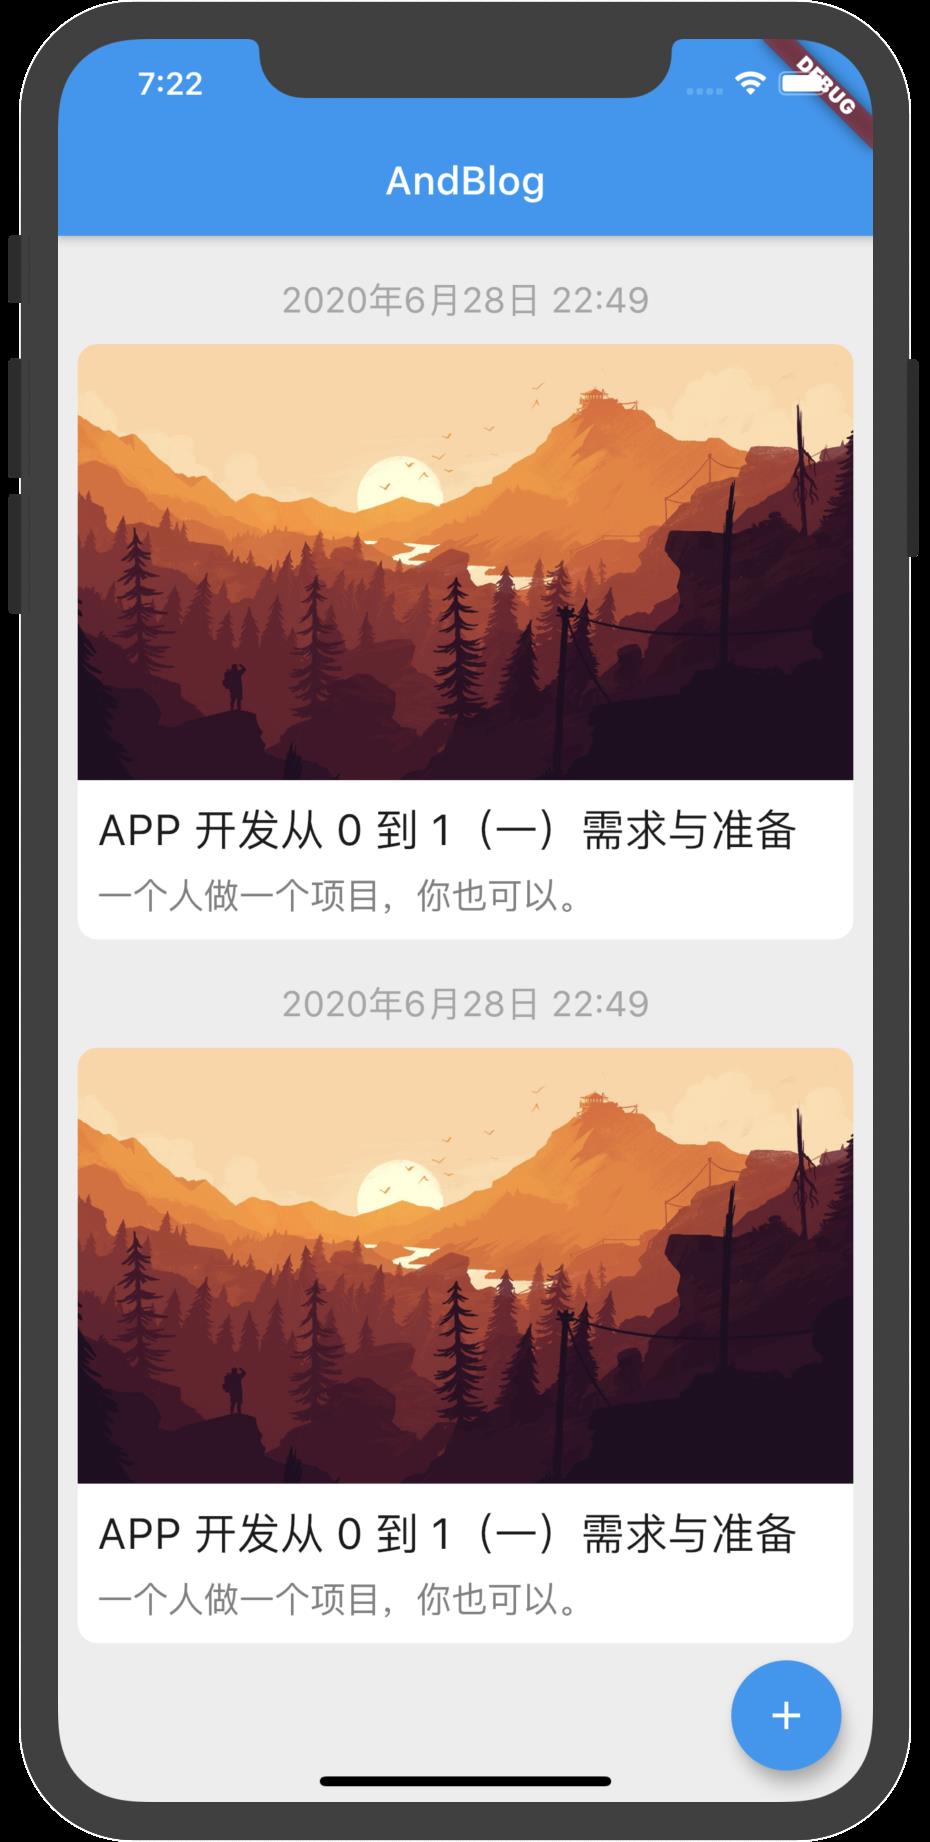
好了,关于 Flutter 布局就讲到这里,我只是针对这个项目所需要的去实现,Flutter 布局的东西还有很多,其属性让人眼花撩乱,可以去官网一个个去仔细学习和实践。
ListView
blogItem 写好了,完成了大头,接下来就要填充真实的数据,在《APP 开发从 0 到 1(二)框架与网络》,有说到网络请求,其中有提到 setstate() 方法,调用这个方法会回调 build 方法,这样我们可以在 build 方法加个判断,先加载 Progress,待网络数据请求完,再显示 ListView,代码如下:
@override
  Widget build(BuildContext context)
    var content;
    if (blogList.isEmpty)
      content = new Center(
        // 可选参数 child:
        child: new CircularProgressIndicator(),
      );
     else
      content = new ListView(children: blogItem());


    return Scaffold(
      backgroundColor: ColorCommon.backgroundColor,
      appBar: AppBar(
        title: Text('AndBlog'),
      ),
      body: content,
      floatingActionButton: FloatingActionButton(
        tooltip: 'Increment',
        child: Icon(Icons.add),
      ), // This trailing comma makes auto-formatting nicer for build methods.
    );


blogItem()
    List<Widget> widgets = [];
    for (int i = 0; i < blogList.length; i++)
      Blog blog = blogList[i];
      var date = new Padding(
          padding: const EdgeInsets.only(
            top: 20.0,
            left: 10.0,
            right: 10.0,
          ),
          child: new Text(
            // 填充真实数据
            blog.date,
            textAlign: TextAlign.center,
            style: TextStyle(color: ColorCommon.dateColor, fontSize: 18),
          ));

      //……

      var blogItem = new Column(
        children: <Widget>[
          date,
          cover,
          titleSummary,
        ],
      );
      widgets.add(blogItem);

    return widgets;
这样 ListView 也完成了,接下来需要完成的是 ListView 加载更多。

以上是关于Flutter 开发从 0 到 1布局与 ListView的主要内容,如果未能解决你的问题,请参考以下文章