Windows下使用Nexus搭建Maven私服
Posted kelelipeng
tags:
篇首语:本文由小常识网(cha138.com)小编为大家整理,主要介绍了Windows下使用Nexus搭建Maven私服相关的知识,希望对你有一定的参考价值。
A http://www.pianshen.com/article/249363068/
nexus3安装与配置
B https://www.cnblogs.com/hujunzheng/p/9807646.html
下载与安装
- 下载地址:https://www.sonatype.com/download-oss-sonatype

- 安装:这里直接安装成Windows服务
- 将下载后的压缩文件解压到自己想要的位置。

- 使用管理员方式进入cmd,进入到D:\\Nexus\\nexus-3.14.0-04\\bin。
安装:nexus.exe /install Nexus
启动:nexus.exe /start Nexus
停止:nexus.exe /stop Nexus
卸载:nexus.exe /uninstall Nexus
Nexus:为自定义Windows服务名称。
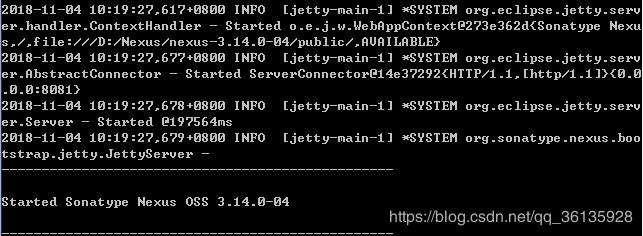
- 如果不想安装成Windows服务,可以使用命令 nexus.exe /run。如下,启动成功。
- 修改一些配置。D:\\Nexus\\nexus-3.14.0-04\\bin\\nexus.vmoptions
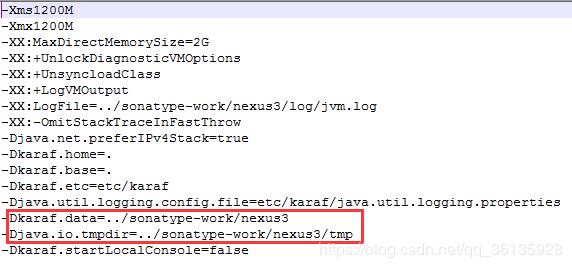
D:\\Nexus\\nexus-3.14.0-04\\etc\\nexus-default.properties
- 访问和修改admin密码。
URL:http://localhost:8888/
用户名/密码:admin/admin123
修改密码时第一次要验证身份,输入之前的密码,即admin123

- 界面认识

Maven配置
- settings.xml配置
- 指定本地仓库位置
<localRepository>E:/ApacheMavenRepository</localRepository>
- 1
- 配置Nexus认证信息,**注意:**文件使用utf-8保存,不然可能会在eclipse中出现无法解析
<server>
		<id>nexus-releases</id>
		<username>admin</username>
		<password>admin1234</password>
	</server>
	<server>
		<id>nexus-snapshots</id>
		<username>admin</username>
		<password>admin1234</password>
	</server>
- 1
- 2
- 3
- 4
- 5
- 6
- 7
- 8
- 9
- 10
- 配置镜像,让所有的Maven请求都走私服
<mirror>
      <id>nexus</id>
      <mirrorOf>*</mirrorOf>
      <name>all maven</name>
      <url>http://localhost:8888/repository/maven-public/</url>
    </mirror>
- 1
- 2
- 3
- 4
- 5
- 6
- 配置仓库和插件仓库,开启快照版本支持。其中id均为central,会覆盖超级pom中央仓库的配置,与url无关紧要,所以url随意。因为所有的请求都会通过镜像访问私服地址。
<profile>
        <id>nexus</id>
		<repositories>
			<repository>
				<id>central</id>
				<url>http://central</url>
				<releases>
					<enabled>true</enabled>
				</releases>
				<snapshots>
					<enabled>true</enabled>
				</snapshots>
			</repository>
		</repositories>
		<pluginRepositories>
			<pluginRepository>
			  <id>central</id>
			  <url>http://central</url>
			  <releases>
				<enabled>true</enabled>
			  </releases>
			  <snapshots>
				<enabled>true</enabled>
			  </snapshots>
			</pluginRepository>
		</pluginRepositories>
	</profile>
- 1
- 2
- 3
- 4
- 5
- 6
- 7
- 8
- 9
- 10
- 11
- 12
- 13
- 14
- 15
- 16
- 17
- 18
- 19
- 20
- 21
- 22
- 23
- 24
- 25
- 26
- 27
- 激活profile
<activeProfiles>
    <activeProfile>nexus</activeProfile>
  </activeProfiles>
- 1
- 2
- 3
通过Eclipse上传jar到Nexus私服
- 配置项目pom,上传到快照宿主仓库中。
<distributionManagement>
		<repository>
			<id>nexus-snapshots</id>
			<name>nexus snapshots repository</name>
			<url>http://localhost:8888/repository/maven-snapshots/</url>
		</repository>
	</distributionManagement>
- 1
- 2
- 3
- 4
- 5
- 6
- 7
- 发布
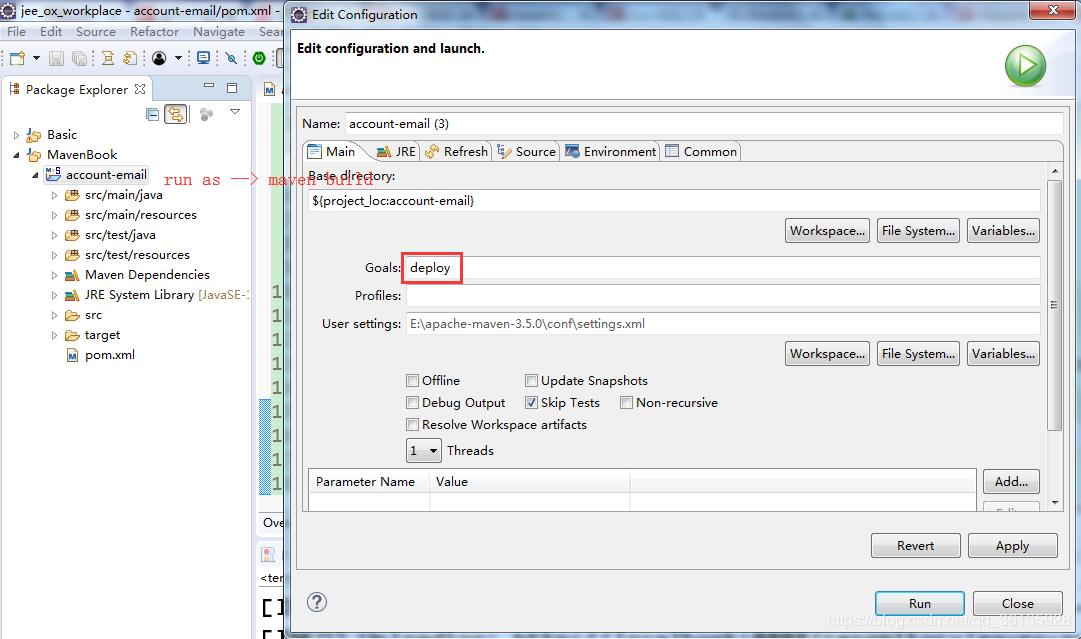
注意:这里可能出现一个编译错误:就是需要jre而不是java。如果出现这个错误请做如下处理。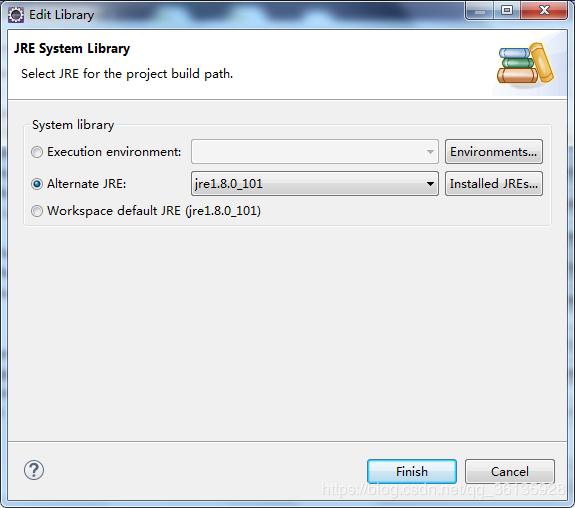
- 私服中查看结果
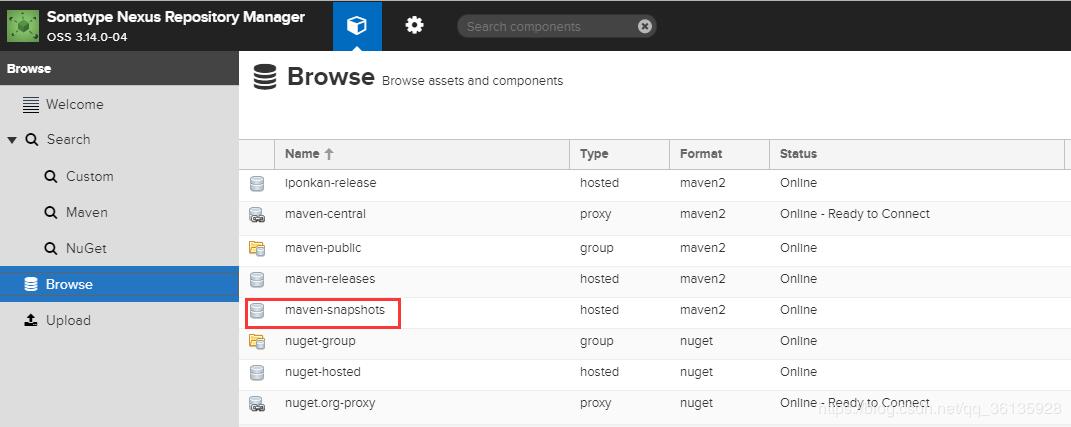
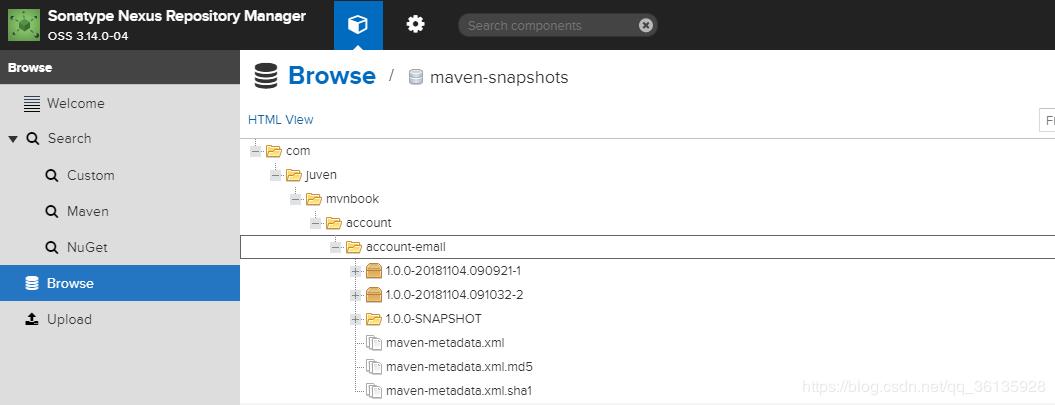
- 删除上传到私服中的jar
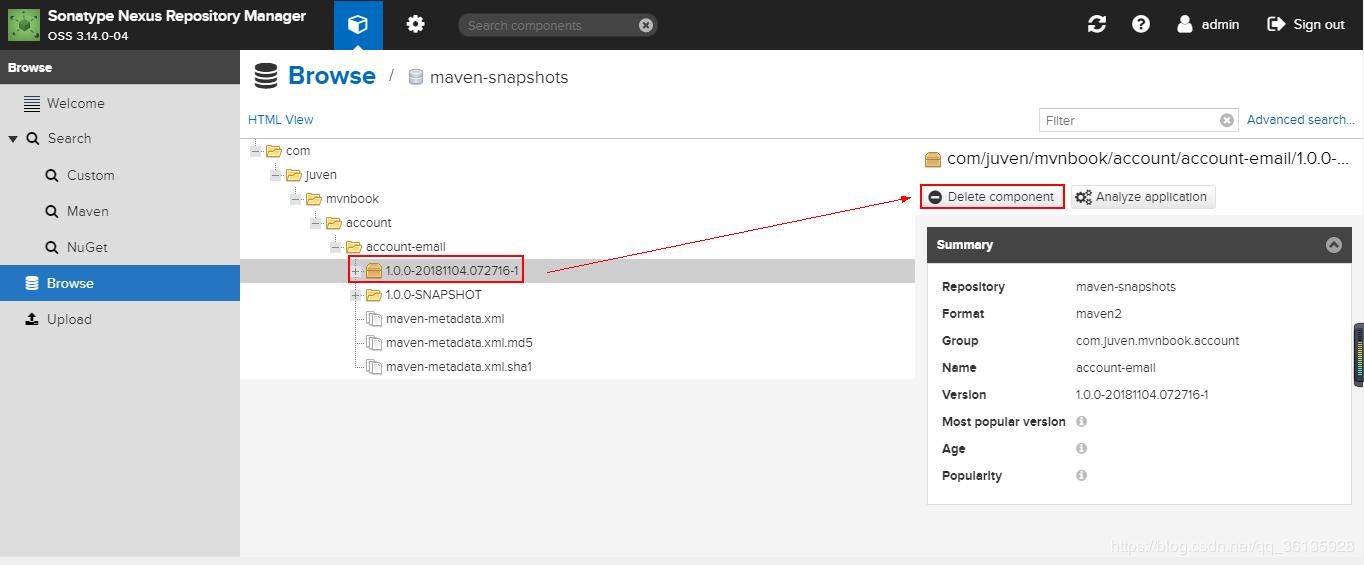
通过Nexus界面上传oracle jdbc驱动到私服中
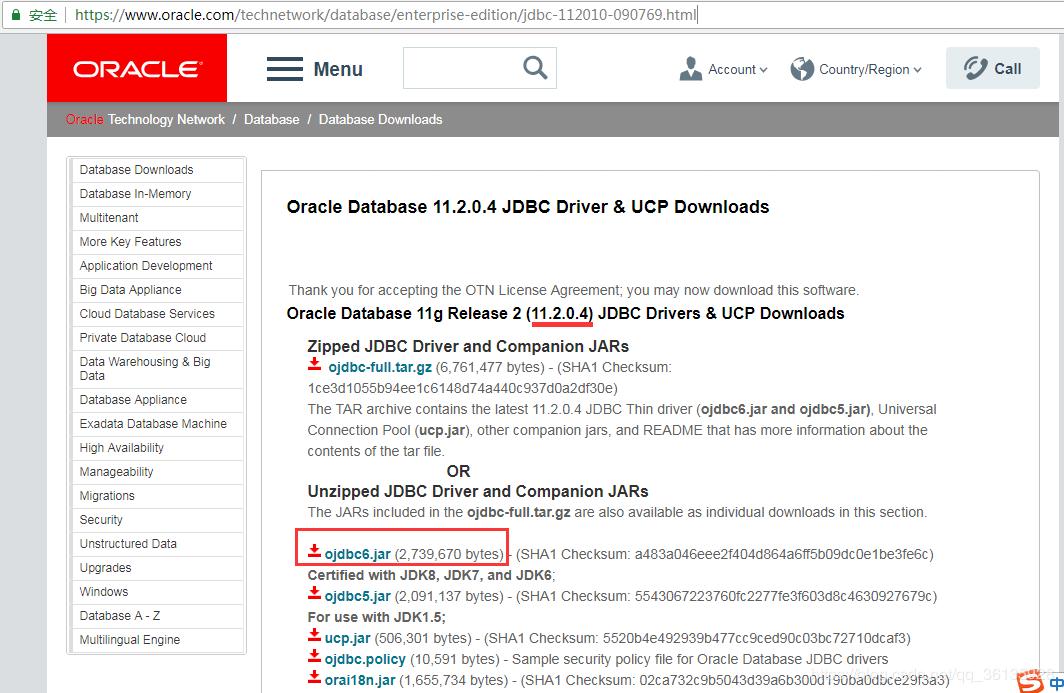
- 下载oracle jdbc驱动:https://www.oracle.com/technetwork/database/enterprise-edition/jdbc-112010-090769.html
- 界面上传
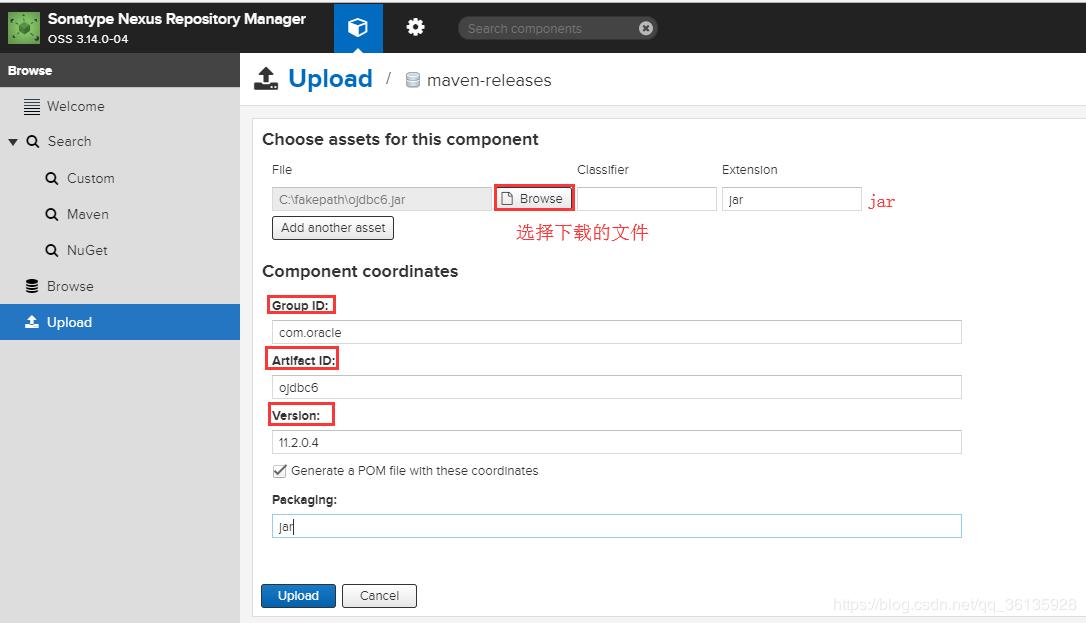
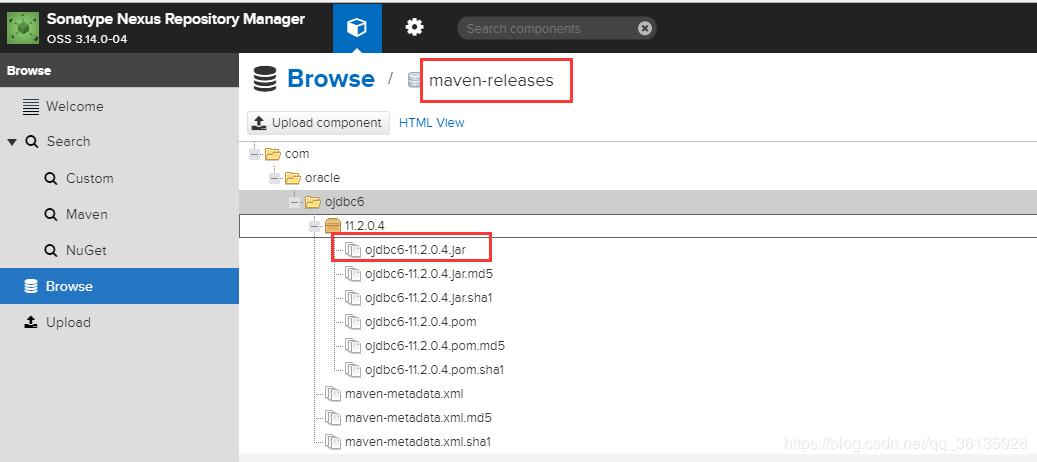
- 查看上传结果,具体在项目中可以通过以上gav使用。
通过命令上传oralce jdbc驱动
mvn deploy:deploy-file -DgroupId=com.oracle -DartifactId=ojdbc6 -Dversion=11.2.0.4 -Dpackaging=jar -Dfile=D:\\迅雷下载\\ojdbc6.jar -Durl=http://localhost:8888/repository/maven-releases/ -DrepositoryId=maven-releases
- 1
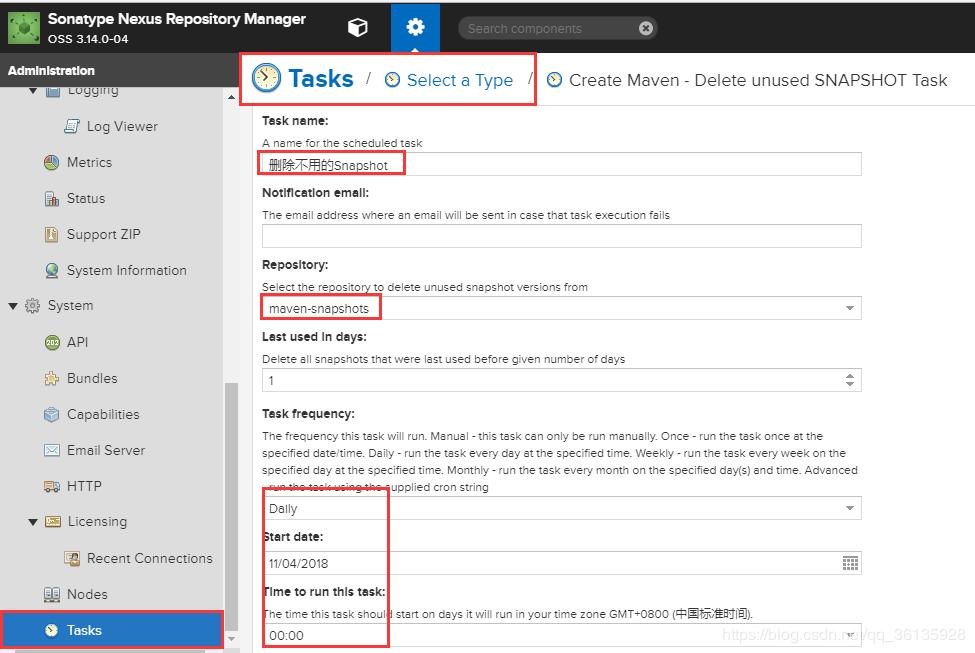
创建定时任务清理无用的Snapshot的jar
以上是关于Windows下使用Nexus搭建Maven私服的主要内容,如果未能解决你的问题,请参考以下文章
