maven的安装与项目的创建
Posted 蔡小菜i
tags:
篇首语:本文由小常识网(cha138.com)小编为大家整理,主要介绍了maven的安装与项目的创建相关的知识,希望对你有一定的参考价值。
maven最新版本3.6.3的下载
链接:https://pan.baidu.com/s/12LPKkiE0x_Aq4S8qUnYa6g
提取码:7njx
下载完成解压后可以进行环境变量的配置。
1。新建一个MAVEN_HOME的变量名。

2。找到Path,新建一个%MAVEN_HOME%\\bin的变量即可。
3。打开DOS窗口,输入mvn -v 显示如下内容则配置成功。

4。自定义配置本地jar仓库的的位置。
找到解压的maven包的conf目录,找到settings.xml文件,默认为 ${user.home}/.m2/repository (表示系统盘下的用户目录为.m2/repository的本地仓库 ),可以不必修改。由于不习惯装在系统盘,所有将其做了更改:
并且将镜像换成了阿里的(下载更快),完整setting.xml文件如下:
<?xml version="1.0" encoding="UTF-8"?>

<settings xmlns="http://maven.apache.org/SETTINGS/1.0.0"
xmlns:xsi="http://www.w3.org/2001/XMLSchema-instance"
xsi:schemaLocation="http://maven.apache.org/SETTINGS/1.0.0 http://maven.apache.org/xsd/settings-1.0.0.xsd">

    <localRepository>D:\\maven\\maven_repository</localRepository>
    <pluginGroups></pluginGroups>
    <proxies></proxies>


    <mirrors>
         <!-- 镜像库 -->
        <mirror>
            <id>alimaven</id>
            <name>aliyun maven</name>
            <url>http://maven.aliyun.com/nexus/content/groups/public/</url>
            <mirrorOf>central</mirrorOf>
        </mirror>
    </mirrors>


  <profiles>
    <profile>
      <id>nexus</id>
      <repositories>
        <repository>
            <id>aliyun-repo</id>
            <url>http://maven.aliyun.com/nexus/content/groups/public/</url>
            <releases><enabled>true</enabled></releases>
            <snapshots><enabled>true</enabled></snapshots>
        </repository>

        <repository>
            <id>repo1</id>
            <url>https://repo1.maven.org/maven2/</url>
            <releases><enabled>true</enabled></releases>
            <snapshots><enabled>true</enabled></snapshots>
        </repository>
      </repositories>
       <!-- 注意:以下配置用于指定Maven插件的仓库,不能省略,否则可能出现无法加载Maven插件的问题 -->
      <pluginRepositories>

        <pluginRepository>
          <id>aliyun-plugin</id>
          <url>http://maven.aliyun.com/nexus/content/groups/public/</url>
          <releases><enabled>true</enabled></releases>
          <snapshots><enabled>true</enabled></snapshots>
        </pluginRepository>
        <pluginRepository>
          <id>repo1-plugin</id>
          <url>https://repo1.maven.org/maven2/</url>
          <releases><enabled>true</enabled></releases>
          <snapshots><enabled>true</enabled></snapshots>
        </pluginRepository>
      </pluginRepositories>
    </profile>

  </profiles>

  <activeProfiles>
    <activeProfile>nexus</activeProfile>
  </activeProfiles>
</settings>
遇到的问题:
打开DOS窗口,输入mvn -v 显示如下:

解决:
我的JAVA_HOME变量下,有两个JDK的变量值
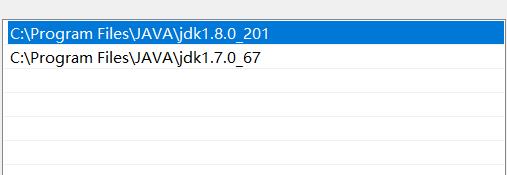
删除其中一个即可成功;并且JAVA_HOME下的变量值后面不可以有 " ; " 符号,否则仍然会出现上面的问题。因为maven是由java写的,他的运行需要依赖于java虚拟机。JAVA_HOME这一步也是非常关键得。
![]()
创建一个项目:
1.在IDEA上搭建环境
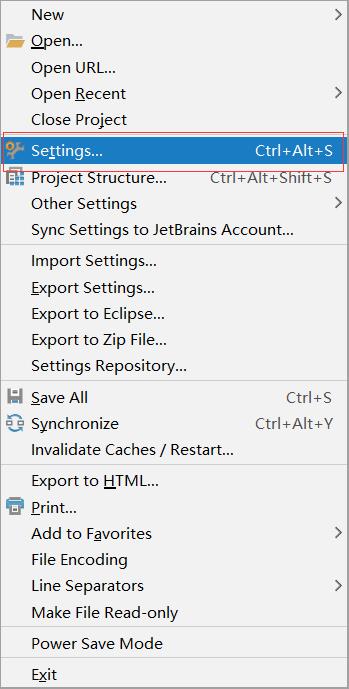
找到Maven

最好再配置下Runner,防止么有网络时不可以创建maven项目。(-DarchetypeCatalog=internal)

点击OK即可。
2.创建
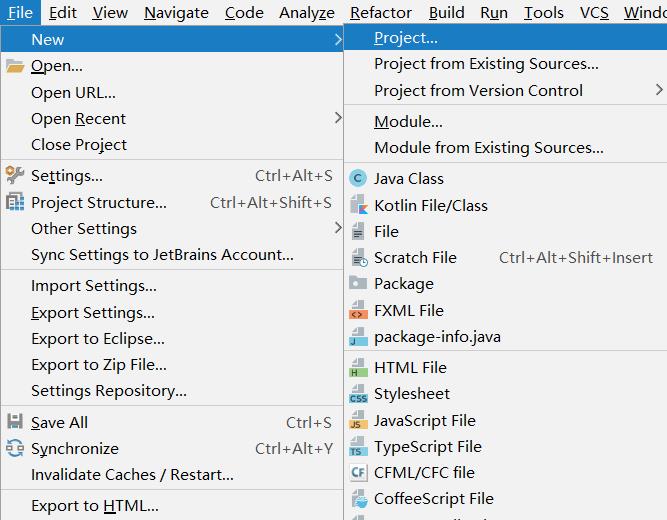
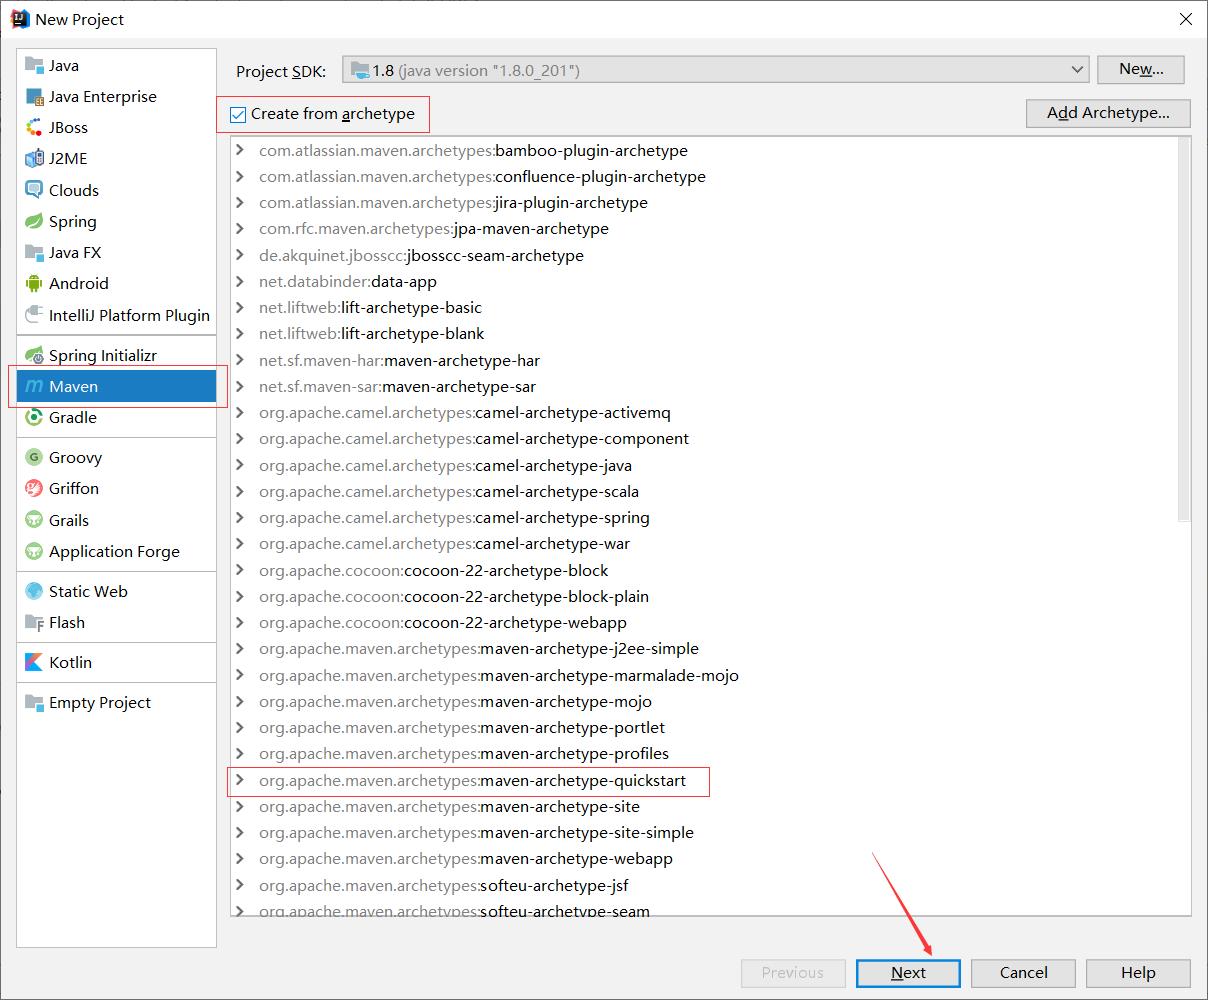
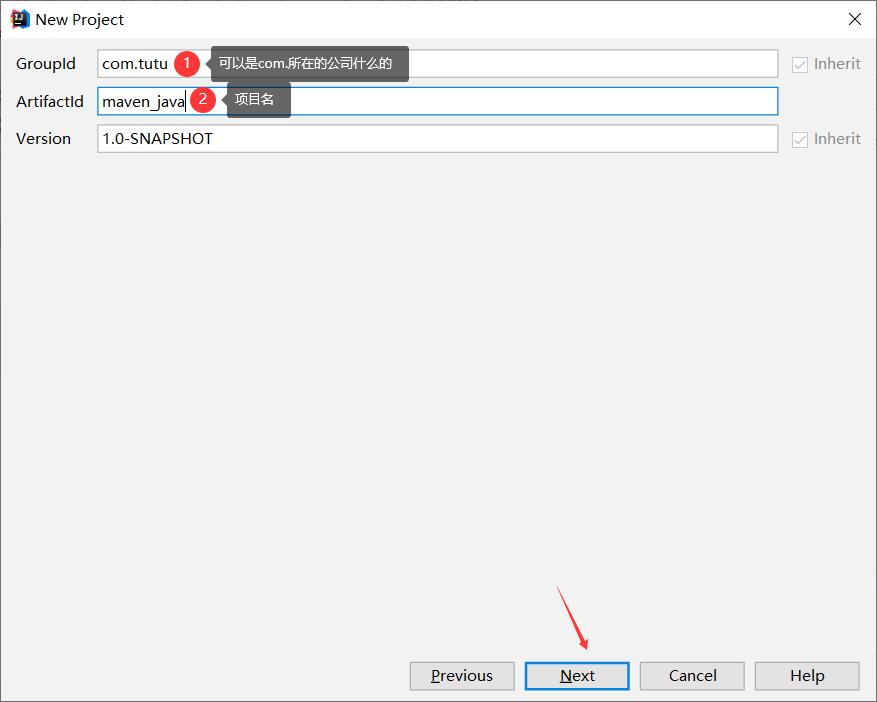
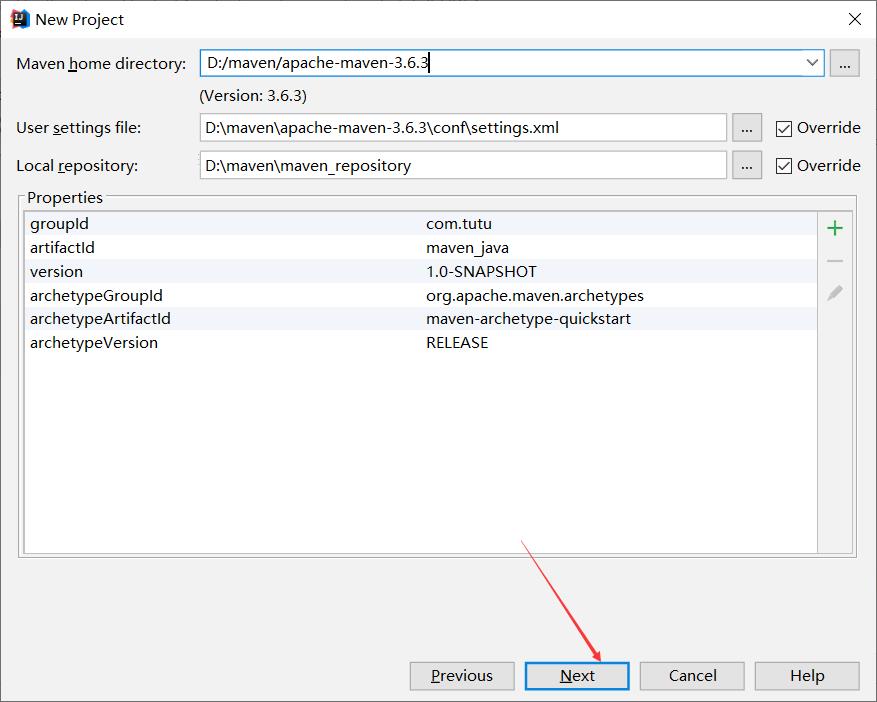
检查配置信息么有问题直接下一步。
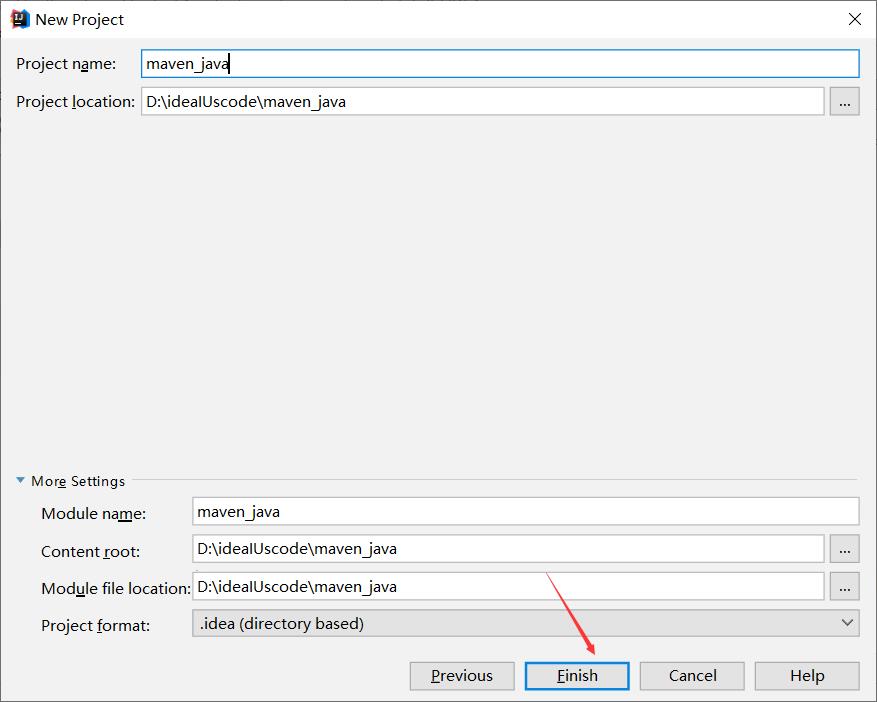
即可创建完成。(选择如下,让其自动导包),如果是第一次创建,会比较慢。


可以找到其中的App.java,尝试运行。

如果是如上图无法运行,则进行如下操作便可以运行。(test文件同)
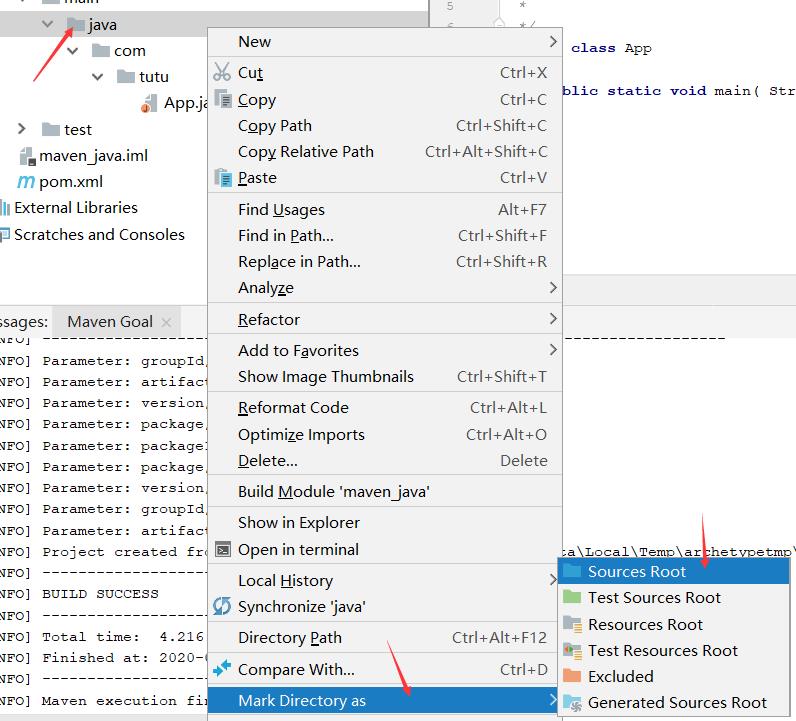
以上是关于maven的安装与项目的创建的主要内容,如果未能解决你的问题,请参考以下文章