SpringBoot创建maven多模块项目
Posted 醉东风
tags:
篇首语:本文由小常识网(cha138.com)小编为大家整理,主要介绍了SpringBoot创建maven多模块项目相关的知识,希望对你有一定的参考价值。
SpringBoot创建maven多模块项目
项目结构
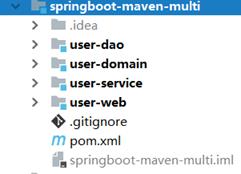
该项目名称为springboot-maven-multi,由springboot-maven-multi、user-dao、user-domain、user-service、user-web个模块组成,其中springboot-maven-multi模块是其他模块的父模块。
第一步:新建springboot-maven-multi项目
File -> New -> Project -> Spring Initializr
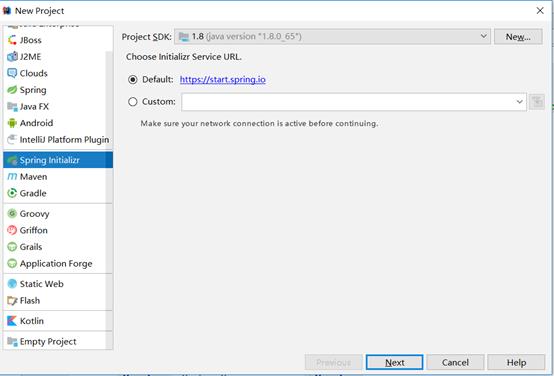
如下图:输入Group、Artifact等信息,Type选择Maven Pom
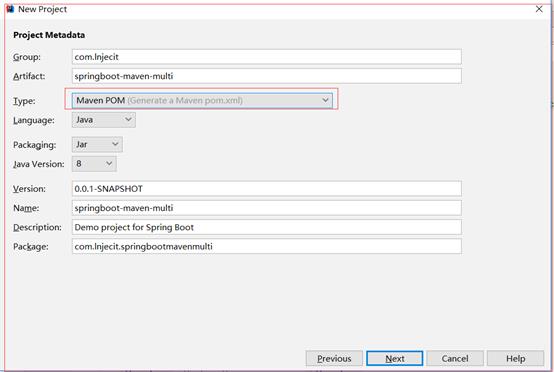
然后一直点击Next,最后Finish即可。
最后项目生成后结构只有一个pom.xml文件,无src目录,如下图
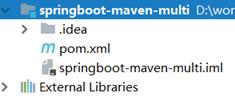
第二步:新建user-domain、user-dao、user-service、user-web模块
如:新建user-domain模块
File -> New -Module -> Maven
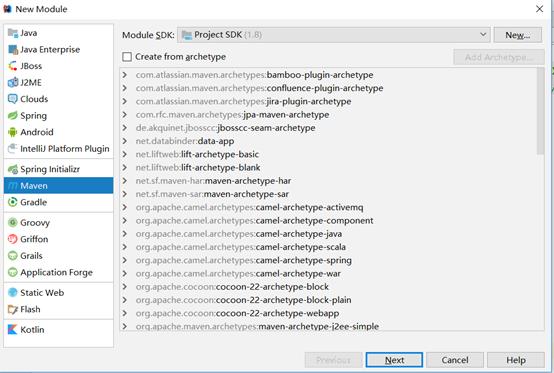
在下图的Artifact中输入 user-domain
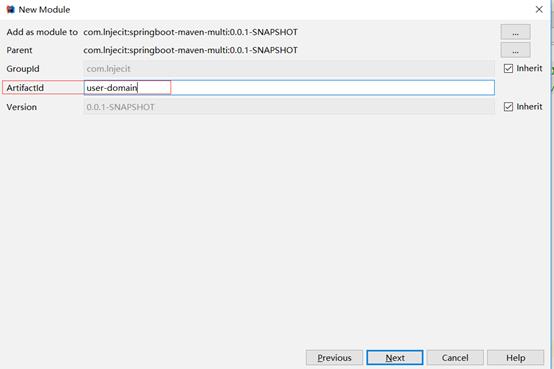
设置模块名称和保存路径
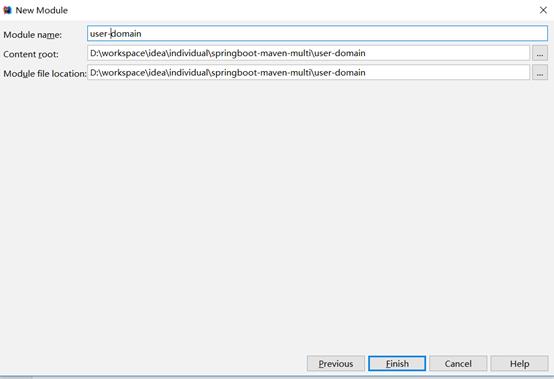
点击Finish即可。
user-dao、user-service、user-web模块新建步骤也相同,只需修改模块名称即可。
第三步:编写user-domain模块代码
创建User实体类
package com.lnjecit.domain;

/**
 * @author lnj
 * createTime 2018-11-03 10:06
 **/
public class User {
    private Long id;
    private String name;
    private String password;

    public Long getId() {
        return id;
    }

    public void setId(Long id) {
        this.id = id;
    }

    public String getName() {
        return name;
    }

    public void setName(String name) {
        this.name = name;
    }

    public String getPassword() {
        return password;
    }

    public void setPassword(String password) {
        this.password = password;
    }
}
第四步:编写user-dao模块代码
创建UserDao类(此处只是演示创建多模块,所以没有连接数据库),user-dao模块依赖于user-domain模块,所以需在pom.xml文件中引入user-domain依赖
package com.lnjecit.dao;

import com.lnjecit.domain.User;
import org.springframework.stereotype.Component;

import java.util.ArrayList;
import java.util.List;

/**
 * @author lnj
 * createTime 2018-11-03 9:59
 **/
@Component
public class UserDao {
    public List<User> query() {
        List<User> list = new ArrayList<>();
        User user = new User();
        user.setId(1L);
        user.setName("lnj");
        user.setPassword("123456");
        list.add(user);
        return list;
    }
}
第五步:编写user-service模块代码
创建UserService类,user-service模块依赖于user-dao和user-domain模块,所以需在pom.xml文件中引入user-dao和user-domain依赖
package com.lnjecit.service;

import com.lnjecit.dao.UserDao;
import com.lnjecit.domain.User;
import org.springframework.beans.factory.annotation.Autowired;
import org.springframework.stereotype.Service;

import java.util.List;

/**
 * @author lnj
 * createTime 2018-11-03 10:01
 **/
@Service
public class UserService {

    @Autowired
    UserDao userDao;

    public List<User> query() {
        return userDao.query();
    }

}
第六步:编写user-web模块代码
创建UserController类,user-web模块依赖于user-service和user-domain模块,所以需在pom.xml文件中引入user-service和user-domain依赖
package com.lnjecit.controller;

import com.lnjecit.domain.User;
import com.lnjecit.service.UserService;
import org.springframework.beans.factory.annotation.Autowired;
import org.springframework.web.bind.annotation.GetMapping;
import org.springframework.web.bind.annotation.RequestMapping;
import org.springframework.web.bind.annotation.RestController;

import java.util.List;

/**
 * @author lnj
 * createTime 2018-11-03 10:12
 **/
@RequestMapping("/user")
@RestController
public class UserController {

    @Autowired
    private UserService userService;

    @GetMapping("/list")
    public List<User> list() {
        return userService.query();
    }
}
创建UserApplication启动类
package com.lnjecit;

import org.springframework.boot.SpringApplication;
import org.springframework.boot.autoconfigure.SpringBootApplication;

/**
 * @author lnj
 * createTime 2018-11-03 10:15
 **/
@SpringBootApplication
public class UserApplication {
    public static void main(String[] args) {
        SpringApplication.run(UserApplication.class, args);
    }
}
第七步:修改pom.xml文件
修改最外层pom.xml文件,完整pom.xml文件如下:
<?xml version="1.0" encoding="UTF-8"?>
<project xmlns:xsi="http://www.w3.org/2001/XMLSchema-instance"
         xmlns="http://maven.apache.org/POM/4.0.0"
         xsi:schemaLocation="http://maven.apache.org/POM/4.0.0 http://maven.apache.org/xsd/maven-4.0.0.xsd">
    <modelVersion>4.0.0</modelVersion>

    <groupId>com.lnjecit</groupId>
    <artifactId>springboot-maven-multi</artifactId>
    <packaging>pom</packaging>
    <version>1.0-SNAPSHOT</version>

    <modules>
        <module>user-web</module>
        <module>user-service</module>
        <module>user-dao</module>
        <module>user-domain</module>
    </modules>

    <parent>
        <groupId>org.springframework.boot</groupId>
        <artifactId>spring-boot-starter-parent</artifactId>
        <version>1.5.8.RELEASE</version>
        <relativePath/> <!-- lookup parent from repository -->
    </parent>


    <properties>
        <project.build.sourceEncoding>UTF-8</project.build.sourceEncoding>
        <project.reporting.outputEncoding>UTF-8</project.reporting.outputEncoding>
        <java.version>1.8</java.version>
    </properties>

    <dependencies>
        <dependency>
            <groupId>org.springframework.boot</groupId>
            <artifactId>spring-boot-starter-web</artifactId>
        </dependency>

        <dependency>
            <groupId>org.springframework.boot</groupId>
            <artifactId>spring-boot-starter-test</artifactId>
            <scope>test</scope>
        </dependency>
    </dependencies>


    <build>
        <plugins>
            <plugin>
                <groupId>org.springframework.boot</groupId>
                <artifactId>spring-boot-maven-plugin</artifactId>
                <version>1.3.0.RELEASE</version>
                <configuration><!-- 指定该Main Class为全局的唯一入口 -->
                    <mainClass>com.lnjecit.UserApplication</mainClass>
                    <layout>ZIP</layout>
                </configuration>
                <executions>
                    <execution>
                        <goals>
                            <goal>repackage</goal><!--可以把依赖的包都打包到生成的Jar包中-->
                        </goals>
                        <!--可以生成不含依赖包的不可执行Jar包-->
                        <!-- configuration>
                          <classifier>exec</classifier>
                        </configuration> -->
                    </execution>
                </executions>
            </plugin>
        </plugins>
    </build>

</project>
需注意的是spring-boot-maven-plugin插件版主需重写且指定为1.3.0.RELEASE,我试过指定其它版本,测试没通过,原因没找到,还有就是需指定启动类
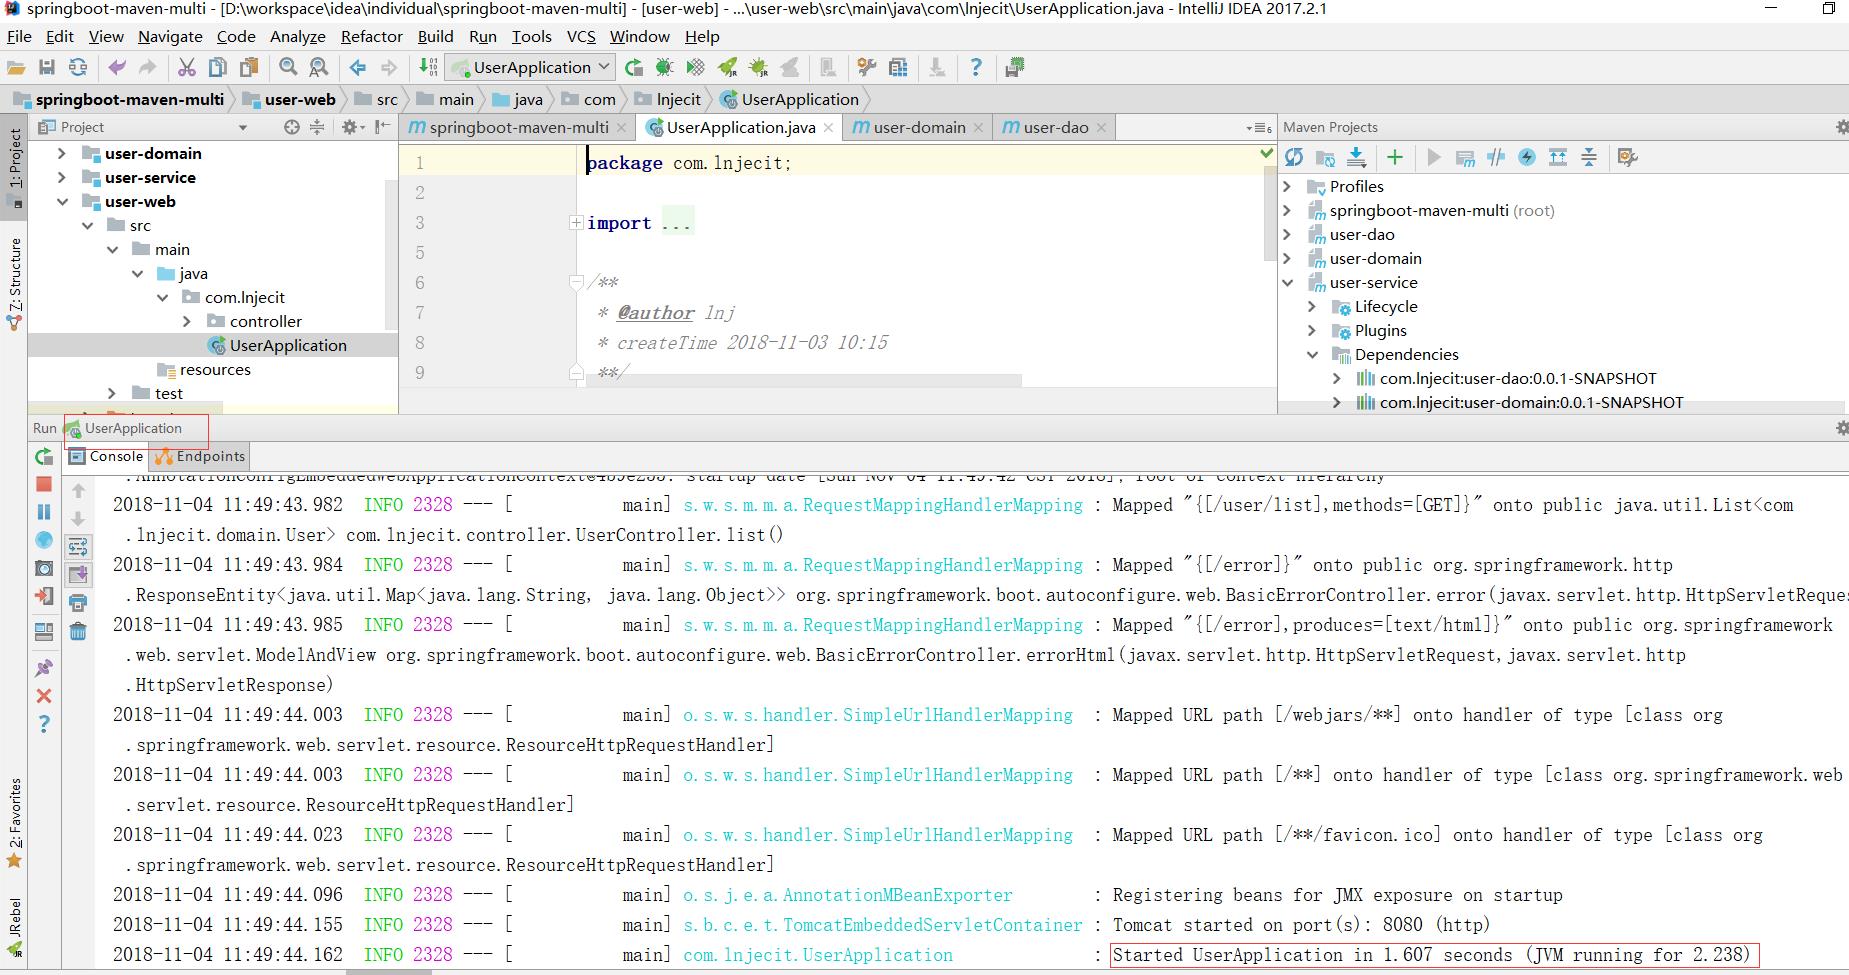
第八步:启动user-web项目
运行UserApplication类,启动成功
第九步:打包测试
在项目更目录下,点击右键 -> Run Maven -> clean package -Dmaven.test.skip=true
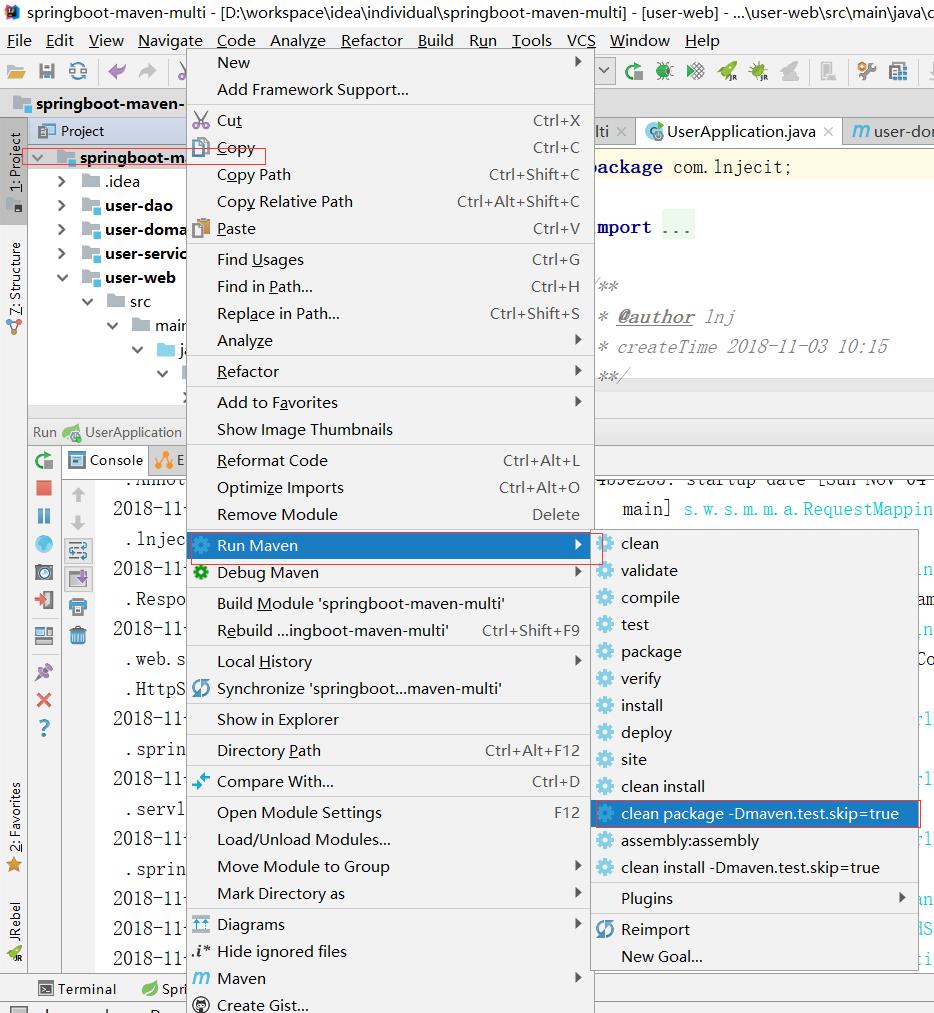
打包成功
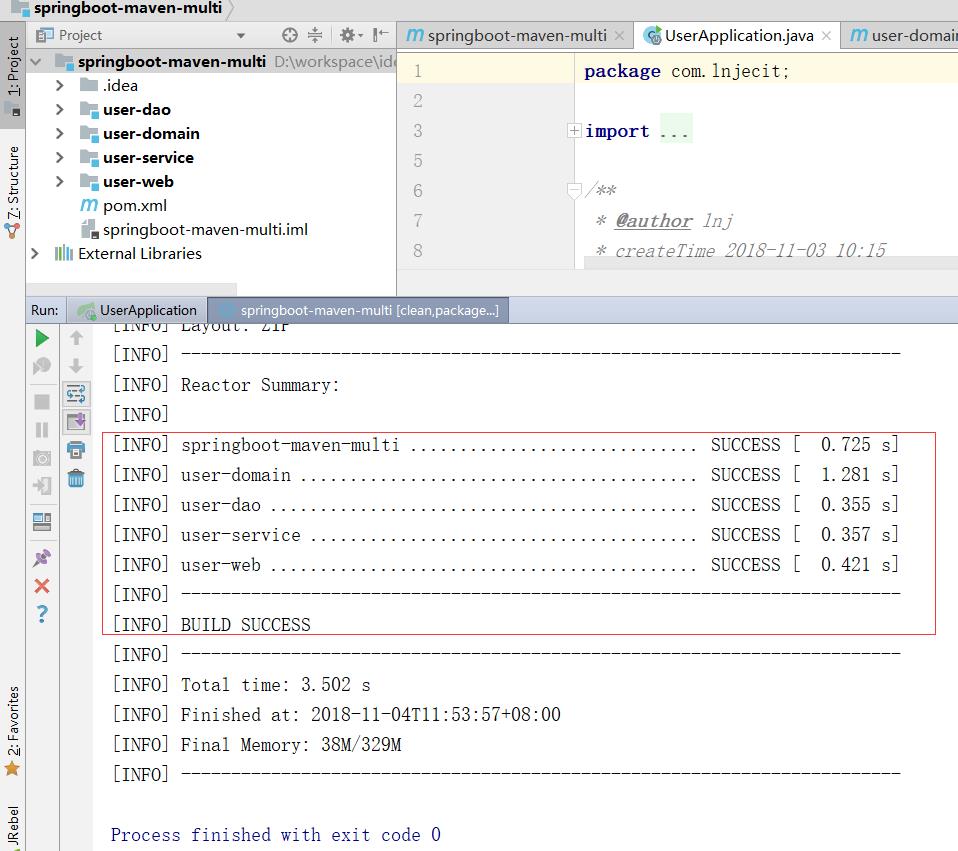
注意一定要选择项目根目录下执行打包命令,否则会提示打包不成功。
项目地址
https://github.com/linj6/springboot-maven-multi.git
参考资料
https://blog.csdn.net/Message_lx/article/details/54632947
以上是关于SpringBoot创建maven多模块项目的主要内容,如果未能解决你的问题,请参考以下文章
SpringBoot+Maven多模块项目(创建依赖打包可执行jar包部署测试)完整流程