springboot Thymeleaf 整合
Posted 自由港
tags:
篇首语:本文由小常识网(cha138.com)小编为大家整理,主要介绍了springboot Thymeleaf 整合相关的知识,希望对你有一定的参考价值。
Thymeleaf是一个Java模板引擎开发库,可以处理和生成html、XML、javascript、CSS和文本,在Web和非Web环境下都可以正常工作。
Thymeleaf可以跟Spring boot很好的集成。
整合步骤
1.修改pom.xml
增加下面代码片段:
<dependency>
            <groupId>org.springframework.boot</groupId>
            <artifactId>spring-boot-starter-thymeleaf</artifactId>
        </dependency>
2.修改 application.yml 配置
spring:
  thymeleaf:
    mode: HTML5
    encoding: utf-8
    content-type: text/html
    classpath: /templates/*.html
模版位置在:
resources/templates 目录下面

3.编写模版文件
<!DOCTYPE html>
<html xmlns:th="http://www.thymeleaf.org">
<head>
<meta charset="UTF-8" />
<title>Insert title here</title>
<link  th:href="@{/my.css}" rel="stylesheet" />
</head>
<body>
  <h2>用户列表</h2>
  <div>
         <span th:text="${user.name}"></span>-
         <span th:text="${user.address}"></span>
   </div>
</body>
</html>
使用样式表文件:
样式表文件目录在:

4.控制器代码
@RequestMapping("/userDetail")
    public ModelAndView userDetail() {
        User user=new User();
        user.setName(this.name);
        user.setAddress(this.address);
        ModelAndView mv=new ModelAndView();
        mv.setViewName("/sys/user");
        mv.addObject("user", user);
        return mv;
    }
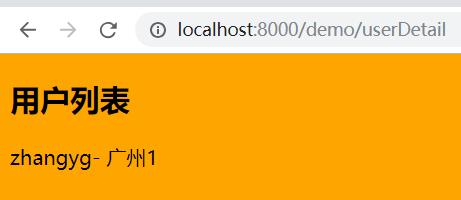
5.效果

以上是关于springboot Thymeleaf 整合的主要内容,如果未能解决你的问题,请参考以下文章