Maven 私服搭建
Posted guoxulong
tags:
篇首语:本文由小常识网(cha138.com)小编为大家整理,主要介绍了Maven 私服搭建相关的知识,希望对你有一定的参考价值。
由于公司研发环境物理隔绝,所以自己搭建了一个 maven 私服,以下是自己搭建私服过程中的一个记录。
1.准备Maven私服相关文件
1.1 从 sonatype 官网 下载 nexus 安装包
1.2 下载 maven 索引文件 http://repo1.maven.org/maven2/.index/
直接复制以下地址:
http://repo.maven.apache.org/maven2/.index/nexus-maven-repository-index.gz
http://repo.maven.apache.org/maven2/.index/nexus-maven-repository-index.properties

1.3 下载索引解压文件 indexer-cli-5.1.1.jar
http://central.maven.org/maven2/org/apache/maven/indexer/indexer-cli/5.1.1/indexer-cli-5.1.1.jar
2. 安装 nexus
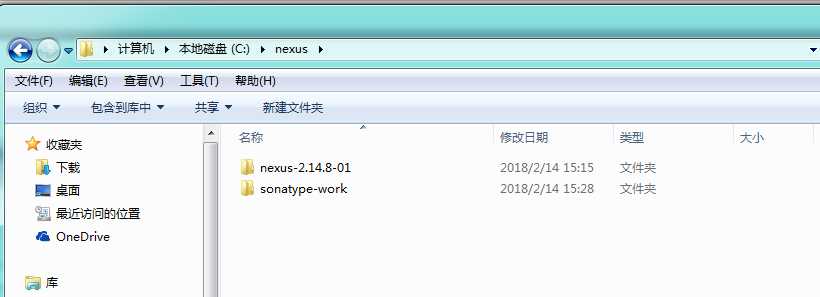
2.1 将步骤 1.1 下载的 nexus 文件拷贝到任意磁盘目录,并解压,如下图:
2.2 根据操作系统版本打开 nexus 执行目录,例如 windows7 x64,如下图:
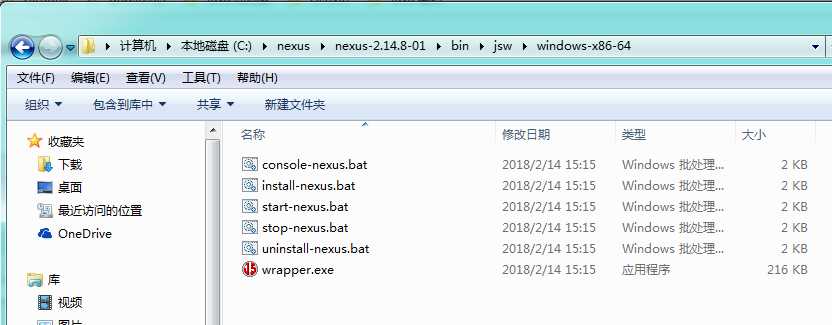
2.3 nexus 提供两种方式,console-nexus.bat 通过命令行启动, install-nexus.bat 将 nexus 安装为 windows系统服务,建议服务器采用windows服务的方式,安装结果如下图:

3. 更新索引
3.1 由于私服搭建到互联网隔离环境,所以通过解压索引的方式进行安装,将下载好的文件放到同一个目录
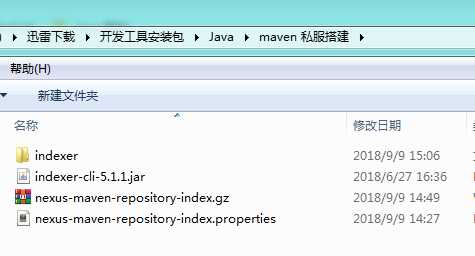
3.2 打开 windows 命令行,运行命令: java -jar indexer-cli-5.1.1.jar -u nexus-maven-repository-index.gz -d indexer,运行结果如下图:

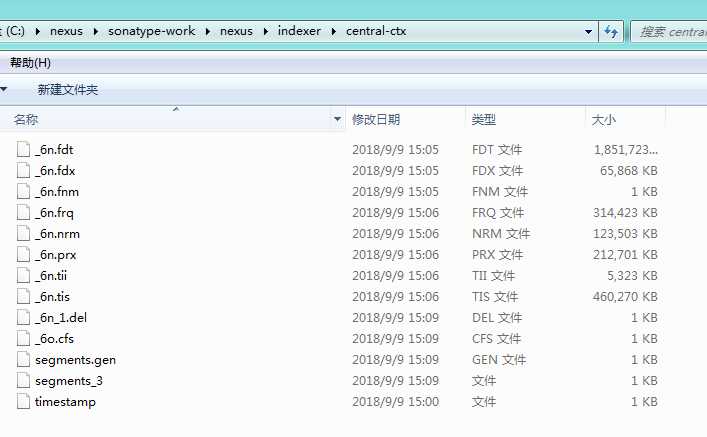
3.3 打开 nexus 工作目录, nexussonatype-work exusindexercentral-ctx ,删除目录下已有的文件
3.4 将步骤 3.2 解压后的索引文件拷贝到nexus工作目录
3.5 启动 nexus 服务,打开浏览器输入地址: http://localhost:8081/nexus/ ,点击右上角 Log In ,输入用户名:admin ,密码: admin123, 点击左侧 Repositories
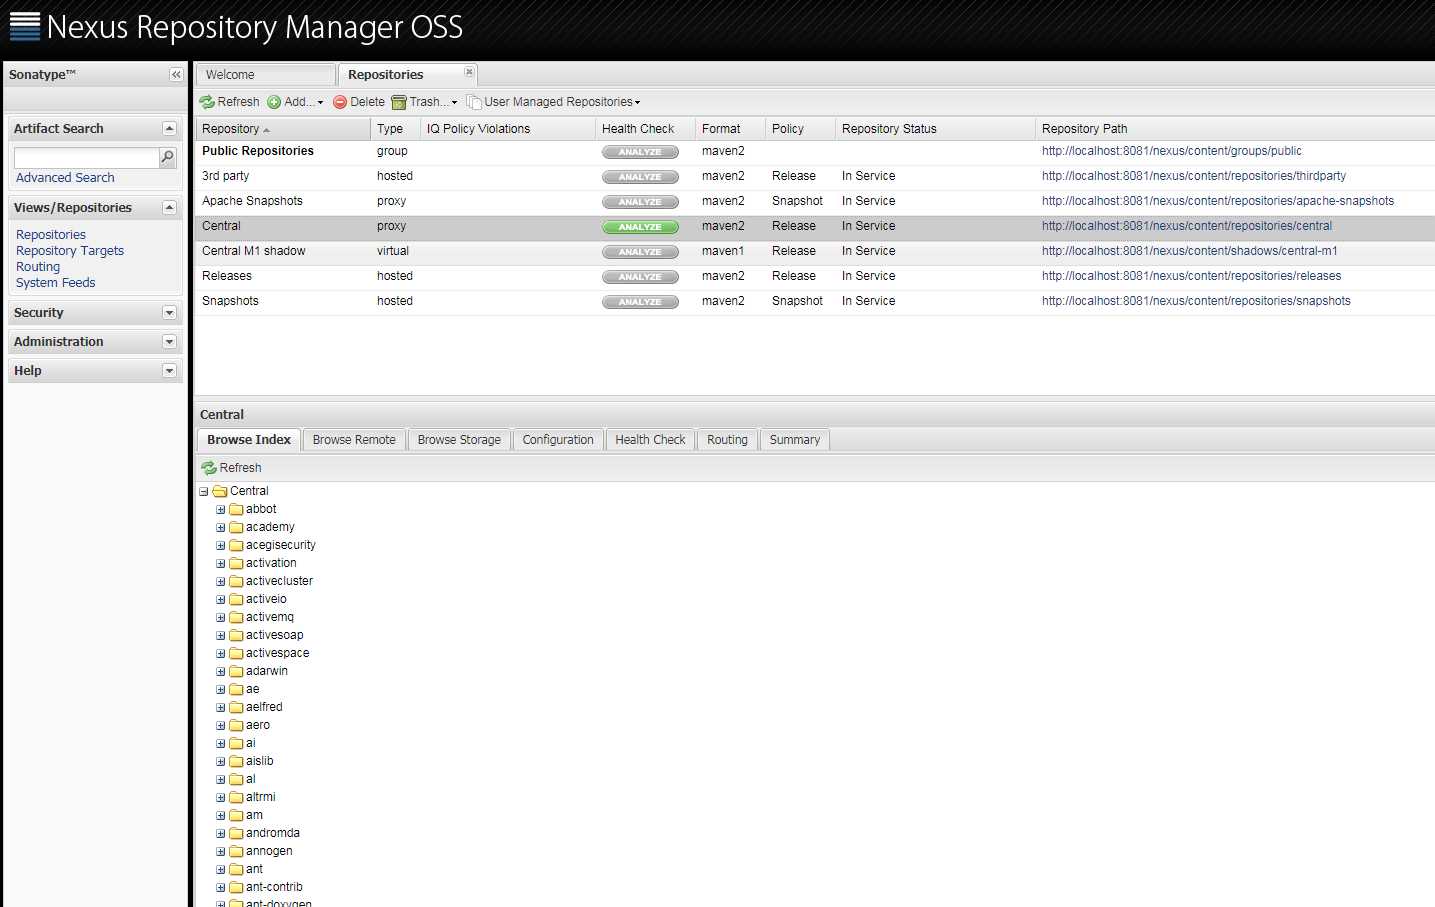
4. 修改 Maven 镜像配置
4.1 Maven 安装配置请移步 https://www.cnblogs.com/guoxulong/articles/9537212.html
4.2 打开maven目录,在 conf 文件夹下找到 settings.xml, 右键编辑,查找 mirrors 节点,添加如下内容
<mirror>
    <id>nexus-aliyun</id>
    <name>Nexus aliyun</name>
    <url>http://localhost:8081/nexus/content/groups/public/</url>
    <mirrorOf>central</mirrorOf>
  </mirror>
5. 私服搭建完成,有问题欢迎大家指正,谢谢。
以上是关于Maven 私服搭建的主要内容,如果未能解决你的问题,请参考以下文章