`
- ...
### 2.表达式使用
#### 2.1 表达式概要
##### 2.1.1 简单表达式
变量表达式:${...}
选择变量表达式:*{...}
消息表达式:#{...}
链接表达式:@{...}
片段表达:~{...}
##### 2.1.2 数据的类型
文字:‘one text‘, ‘Another one!‘,…
数字文字:0, 34, 3.0, 12.3,…
布尔文字:true, false
NULL文字:null
文字标记:one, sometext, main,…
##### 2.1.3 文本操作
字符串拼接:+
字面替换:|The name is ${name}|
##### 2.1.4 算术运算
二进制运算符:+, -, *, /, %
减号(一元运算符):-
##### 2.1.5 布尔运算
二进制运算符:and, or
布尔否定(一元运算符):!, false
##### 2.1.6 条件运算符
比较值:>, <, >=, <=
相等判断: ==, !=
##### 2.1.7 条件判断
如果-然后:(if) ? (then)
如果-然后-否则:(if) ? (then) : (else)
违约:(value) ?: (defaultvalue)
所有以上这些表达式都可以组合和嵌套,例如:
> ‘User is of type ‘ + (${user.isAdmin()} ? ‘Administrator‘ : (${user.type} ?: ‘Unknown‘))
#### 2.2 表达式使用实例
##### 2.2.1 变量表达式 ${...}
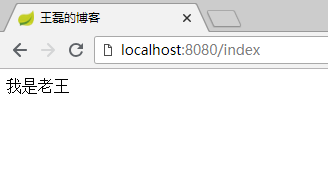
变量表达式的使用,我们前面的代码已经见到了,$是我们平常开发中最常用的表达式,用于把后台Java类的动态数据,映射到页面,例如:
Java代码:
```java
public ModelAndView index() {
ModelAndView modelAndView = new ModelAndView("/cat");
modelAndView.addObject("data", "我是老王");
return modelAndView;
}
```
HTML代码:
```
王磊的博客
```
最终效果:
##### 2.2.2 选择表达式 *{...}
选择表达式相当于选择了一个对象,在使用的时候不在需要这个对象的前缀,直接使用属性的key进行内容展示,代码如下:
```html
```
最终效果:
```
iMac 7999.0 2018-08-10 14:03:51
```
**总结:** *{price} = ${goods.price}只是省去了“goods.”前缀,效果都是一样的。
##### 2.2.3 链接表达式 @{...}
用于转换url,代码如下:
```
链接
```
最终呈现的效果:
`
链接 `
链接表达式,可以传递参数,用逗号分隔。
服务器根相对路径:@{~/path/to/something}
##### 2.2.4 文本操作
文本操作分为两个:文本拼加、文本替换
**文本拼加:**
```html
```
**文本替换:**
文本替换的语法:|内容${tag}|
```html
```
##### 2.2.5 三元表达式
>
##### 2.2.6 双括号作用
```html
...
...
```
结果:
```html
1234567890
1,234,567,890
```
##### 2.2.7 嵌入文本标签
虽然标准的标签几乎可以满足所有的业务场景,但某些情况我们更喜欢直接写入HTML文本,例如:
```
Hello, [[${name}]]
```
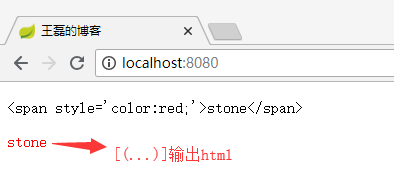
嵌入文本有两种写法“[[...]]”和“[(...)]”,分别的作用就像th:text 和 th:utext 一样,例如:
```
[[${name}]]
[(${name})]
```
看到的效果是这样的:
#### 2.3 表达式对象概述
表达式里面的对象可以帮助我们处理要展示的内容,比如表达式的工具类dates可以格式化时间,这些内置类的熟练使用,可以让我们使用Thymeleaf的效率提高很多。
##### 2.3.1 表达式基本对象
- `#ctx`: 操作当前上下文.
- `#vars:` 操作上下文变量.
- `#request`: (仅适用于Web项目) `HttpServletRequest`对象.
- `#response`: (仅适用于Web项目) `HttpServletResponse` 对象.
- `#session`: (仅适用于Web项目) `HttpSession` 对象.
- `#servletContext`: (仅适用于Web项目) `ServletContext` 对象.
##### 2.3.2 表达式实用工具类
- `#execInfo`: 操作模板的工具类,包含了一些模板信息,比如:`${#execInfo.templateName}` .
- `#uris`: url处理的工具
- `#conversions`: methods for executing the configured *conversion service* (if any).
- `#dates`: 方法来源于 `java.util.Date` 对象,用于处理时间,比如:格式化.
- `#calendars`: 类似于 `#dates`, 但是来自于 `java.util.Calendar` 对象.
- `#numbers`: 用于格式化数字.
- `#strings`: methods for `String` objects: contains, startsWith, prepending/appending, etc.
- `#objects`: 普通的object对象方法.
- `#bools`: 判断bool类型的工具.
- `#arrays`: 数组操作工具.
- `#lists`: 列表操作数据.
- `#sets`: Set操作工具.
- `#maps`: Map操作工具.
- `#aggregates`: 操作数组或集合的工具.
每个类中的具体方法,点击查看:https://www.thymeleaf.org/doc/tutorials/3.0/usingthymeleaf.html#appendix-b-expression-utility-objects
### 3.IDEA设置Thymeleaf自动补全
先上效果图:
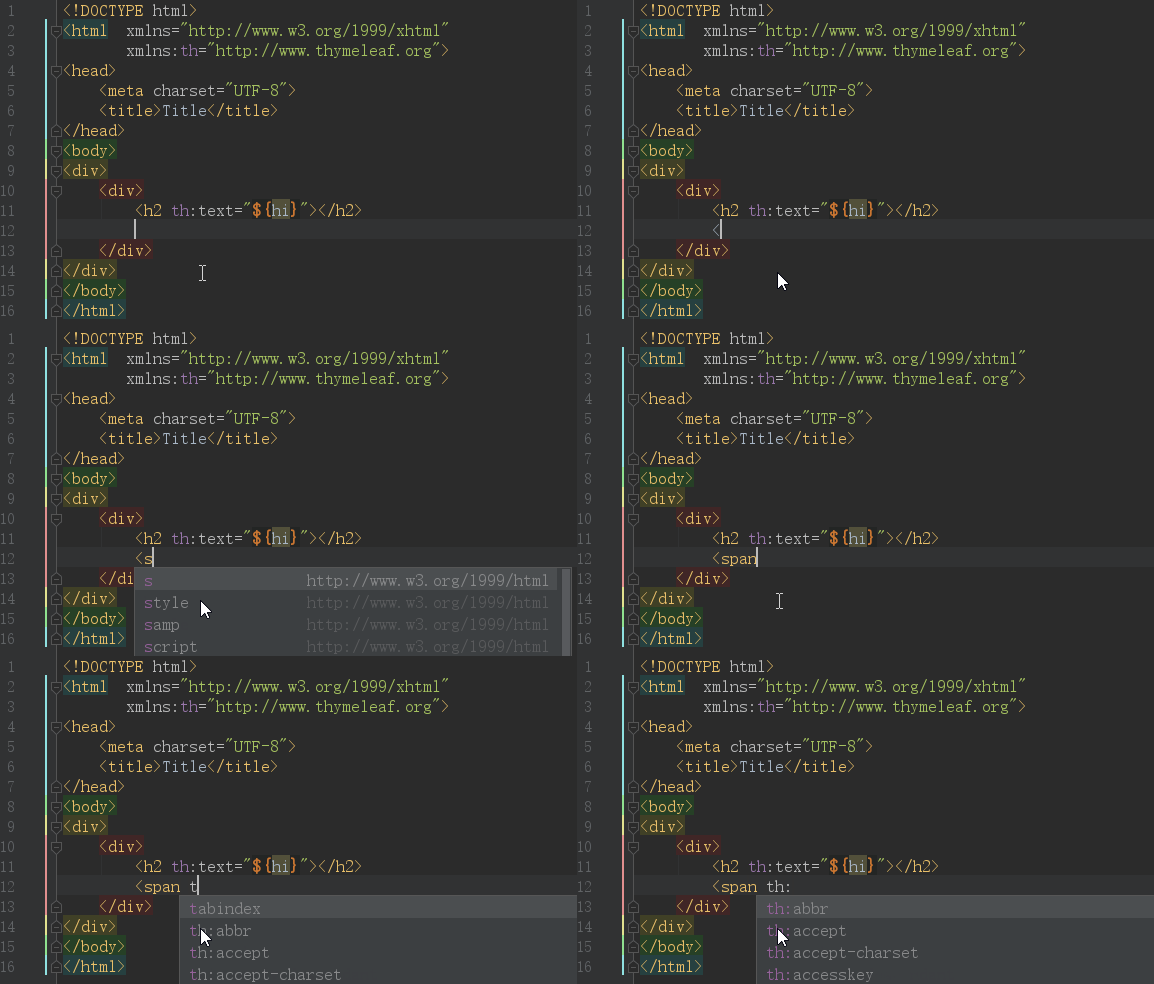
IDEA默认是开启了Thymeleaf 插件支持的,如果不放心需要验证,请访问:https://www.jetbrains.com/help/idea/2018.2/thymeleaf.html
但仅仅是配置上面的效果,依然是无法正常使用的,原因是你要在html中声明 Thymeleaf 命名空间 `xmlns:th="http://www.thymeleaf.org"` ,完整代码如下:
```html
Title
```
其中关键的代码是:
> xmlns:th="http://www.thymeleaf.org"
这样当你在代码输入“th:”的时候就会看到 Thymeleaf 的所有标签了。
## 三、Spring Boot 集成 Thymeleaf
### 3.1 开发环境
- Spring Boot 2.0.4
- Thymeleaf 3.0.9
- Jdk 8
- Windows 10
- IDEA 2018.2
在正式集成Thymeleaf引擎之前,先来看下目录结构如图:
### 3.2 Spring MVC目录结构
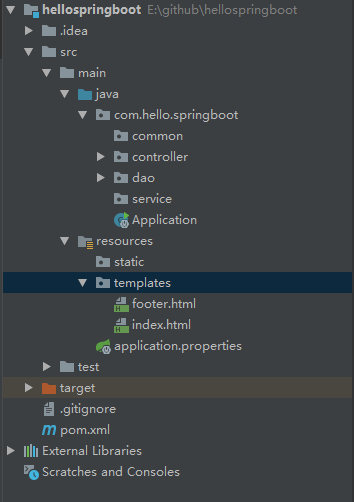
除去包名,我们来解释一下这些目录代表的含义:
- common 通用公共类
- controller 控制器类
- dao 数据交互类
- service 业务逻辑处理类
- Application.java 启动文件
- resources 静态文件存储文件夹
- resources/templates 所有的Thymeleaf目录存放目录
- resources/application.properties 全局配置类
- pom.xml Maven 配置文件
### 3.3 Spring Boot 集成 Thymeleaf 分为四步:
1. pom.xml 添加 Thymeleaf 模板引擎
2. application.properties 配置 Thymeleaf 信息
3. 创建controller类,编写代码
4. 创建模板,编写html代码
接下来我们具体分别来看具体的步骤。
#### 3.3.1 pom.xml 添加 Thymeleaf 模板引擎
```
org.springframework.boot
spring-boot-starter-thymeleaf
```
#### 3.3.2 application.properties 配置 Thymeleaf 信息
```
# 启用缓存:建议生产开启
spring.thymeleaf.cache=false
# 建议模版是否存在
spring.thymeleaf.check-template-location=true
# Content-Type 值
spring.thymeleaf.servlet.content-type=text/html
# 是否启用
spring.thymeleaf.enabled=true
# 模版编码
spring.thymeleaf.encoding=utf-8
# 应该从解析中排除的视图名称列表(用逗号分隔)
spring.thymeleaf.excluded-view-names=
# 模版模式
spring.thymeleaf.mode=HTML5
# 模版存放路径
spring.thymeleaf.prefix=classpath:/templates/
# 模版后缀
spring.thymeleaf.suffix=.html
```
##### Thymeleaf常用配置说明
| 配置项 | 类型 | 默认值 | 建议值 | 说明 |
| :------| :-----: | :-----:| :-----:| :------|
| spring.thymeleaf.enabled | bool | true | 默认 | 是否启用 |
| spring.thymeleaf.mode | String | HTML | 默认 | 模板类型,可以设置为HTML5 |
| spring.thymeleaf.cache | bool | true | 默认 | 是否启用缓存,生成环境建议设置为true |
| spring.thymeleaf.prefix | String | classpath:/templates/ | 默认 | 模版存放路径 |
| spring.thymeleaf.suffix | String | .html | 默认 | 模版后缀 |
| spring.thymeleaf.servlet.content-type | String | text/html | 默认 | Content-Type 值 |
| spring.thymeleaf.encoding | String | - | utf-8 | 模版编码 |
#### 3.3.3 创建controller类,编写代码
我们在controller文件夹创建index.java,代码如下:
```java
package com.hello.springboot.controller;
import org.springframework.stereotype.Controller;
import org.springframework.web.bind.annotation.RequestMapping;
import org.springframework.web.servlet.ModelAndView;
@Controller
@RequestMapping("/")
public class Index {
@RequestMapping("/")
public ModelAndView index() {
ModelAndView modelAndView = new ModelAndView("/index");
modelAndView.addObject("name", "王磊的博客");
return modelAndView;
}
}
```
关键代码解读:
1. @ResponseBody注解:如果使用该注解,返回结果会直接输出,而不是使用模板引擎渲染
2. 使用ModelAndView对象,指定视图名&添加视图对象
#### 3.3.4 创建模板,编写html代码
我们在resources/templates下创建index.html,代码如下:
```html
王磊的博客
```
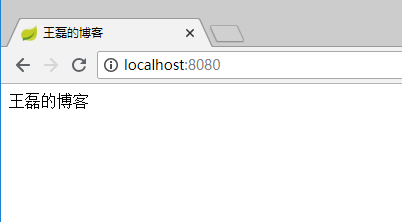
启动调试,在浏览器输入:http://localhost:8080/
效果如下:
相关代码GitHub:https://github.com/vipstone/springboot-example.git
## 四、参考资料
thymeleaf官方文档 Thymeleaf :https://www.thymeleaf.org/doc/tutorials/3.0/usingthymeleaf.html
thymeleaf官方文档 Spring + Thymeleaf :https://www.thymeleaf.org/doc/tutorials/3.0/thymeleafspring.html