微信支付商户号和API密钥是啥 它们有啥用处
Posted
tags:
篇首语:本文由小常识网(cha138.com)小编为大家整理,主要介绍了微信支付商户号和API密钥是啥 它们有啥用处相关的知识,希望对你有一定的参考价值。
微信商户号是在商户申请提交微信支付后得到的一个唯一的商户编号,我们在申请微信支付活动时向微信提交的就是这个商户号,也是商户登录支付后台的账户号。API密钥是在支付管理,api管理,密钥管理里面查找和设置的,这个相当于商户的支付钥匙,只有在支付后台查到,所以商户也不要轻易把他告诉别人或者放在其他公众的地方。当你对接第三方平台的时候可能对方会要求你提供。 参考技术A微信商户号是在商户申请提交微信支付后得到的一个唯一的商户编号。
API密钥是在支付管理,api管理,密钥管理里面查找和设置的,这个相当于商户的支付钥匙。
微信商户号又叫微信商户ID他是由纯数字组成,只要是认证的服务号申请获取了微信支付商户就会有这个ID号,他是微信公众号商户申请微信支付后,由微信支付分配的商户收款账号。它的参数名:mch_id。
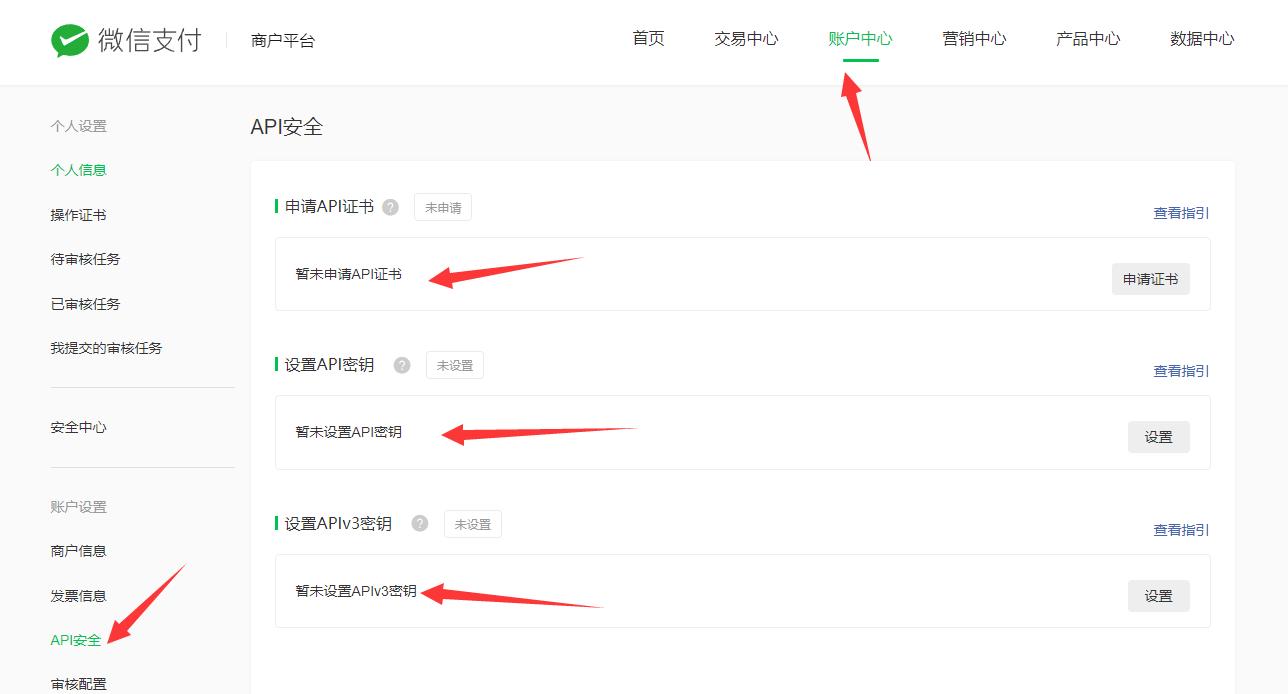
API密钥是交易过程生成签名的密钥,仅保留在商户系统和微信支付后台,不会在网络中传播。商户妥善保管该Key,切勿在网络中传输,不能在其他客户端中存储,保证key不会被泄漏。商户可根据邮件提示登录微信商户平台进行设置。也可按一下路径设置:微信商户平台(pay.weixin.qq.com)-->账户设置-->API安全-->密钥设置。
微信APP支付-Android+springboot搭建后端
这篇教程将详细的介绍如何实现微信APP支付,分为Android移动端开发和springboot后端开发,有一些在开发过程中遇到的坑将会被标注,解决方案也会给出。
一、准备工作
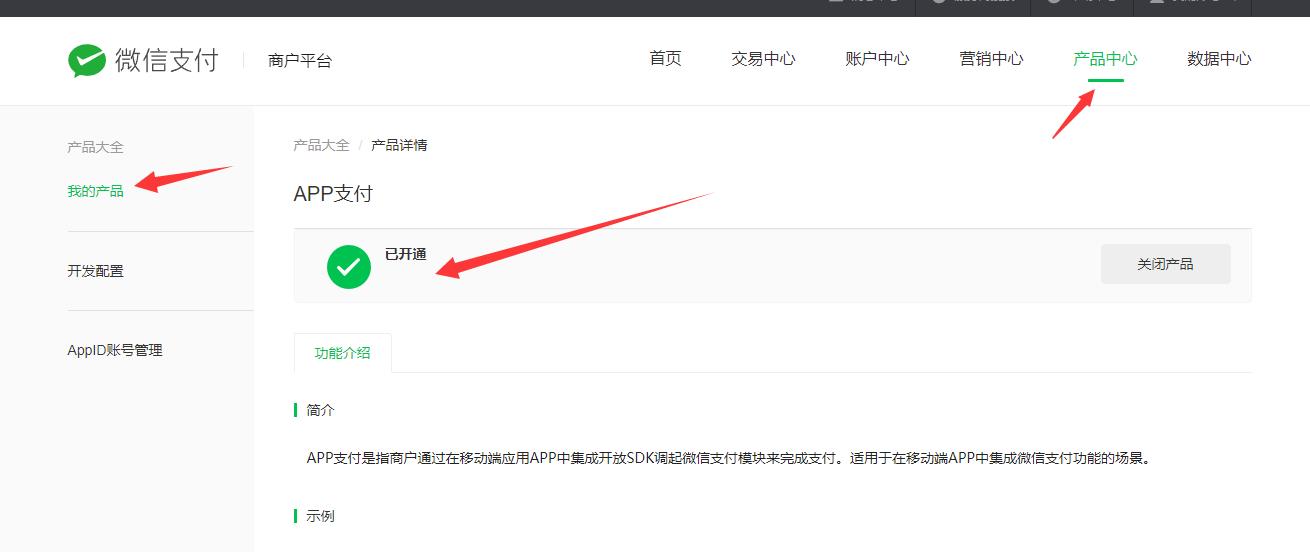
准备工作就是获取必要的参数,注册微信商户平台和微信开放平台分别获取到商户号和APPID,并且在微信商户平台申请API证书、设置API密钥、设置APIv3密钥等

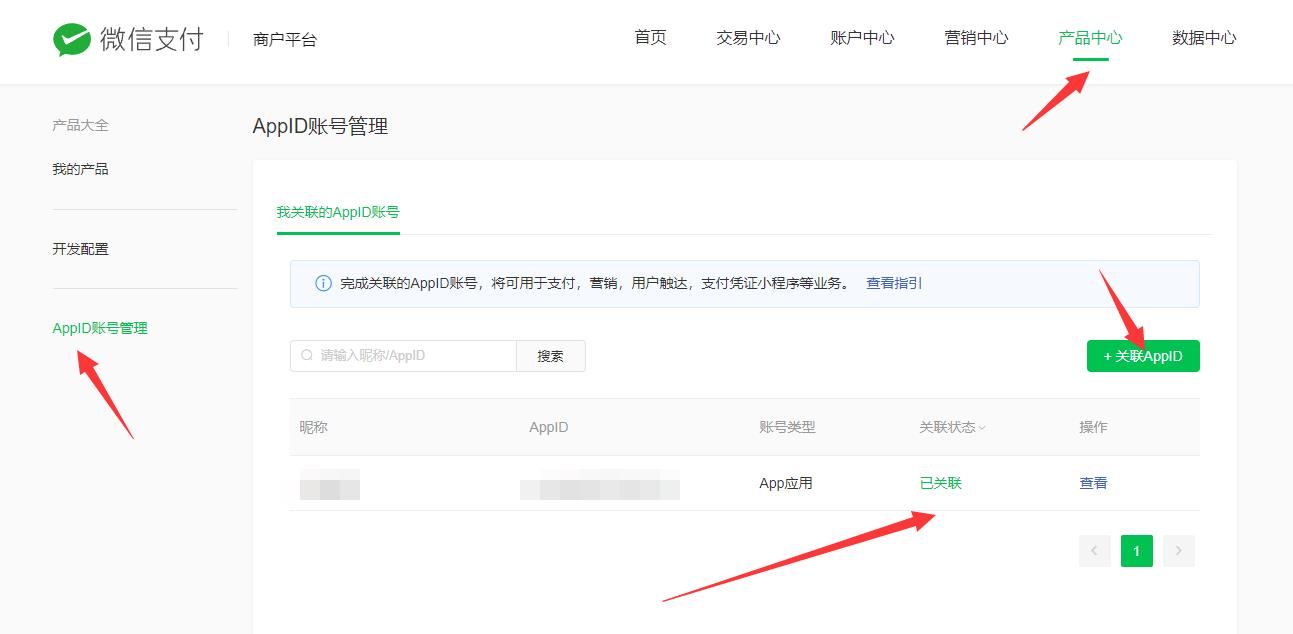
这些工作在公司里会有相关人员做好,将参数给出,直接拿来用即可。准备工作就是比较繁琐,而且微信开发者认证需要300元。做完相关工作后,一定要查看权限是否申请到,微信商户平台是否关联APPID等。由于这些东西全是我一个人做,所以对流程比较了解。
二、Springboot后端开发
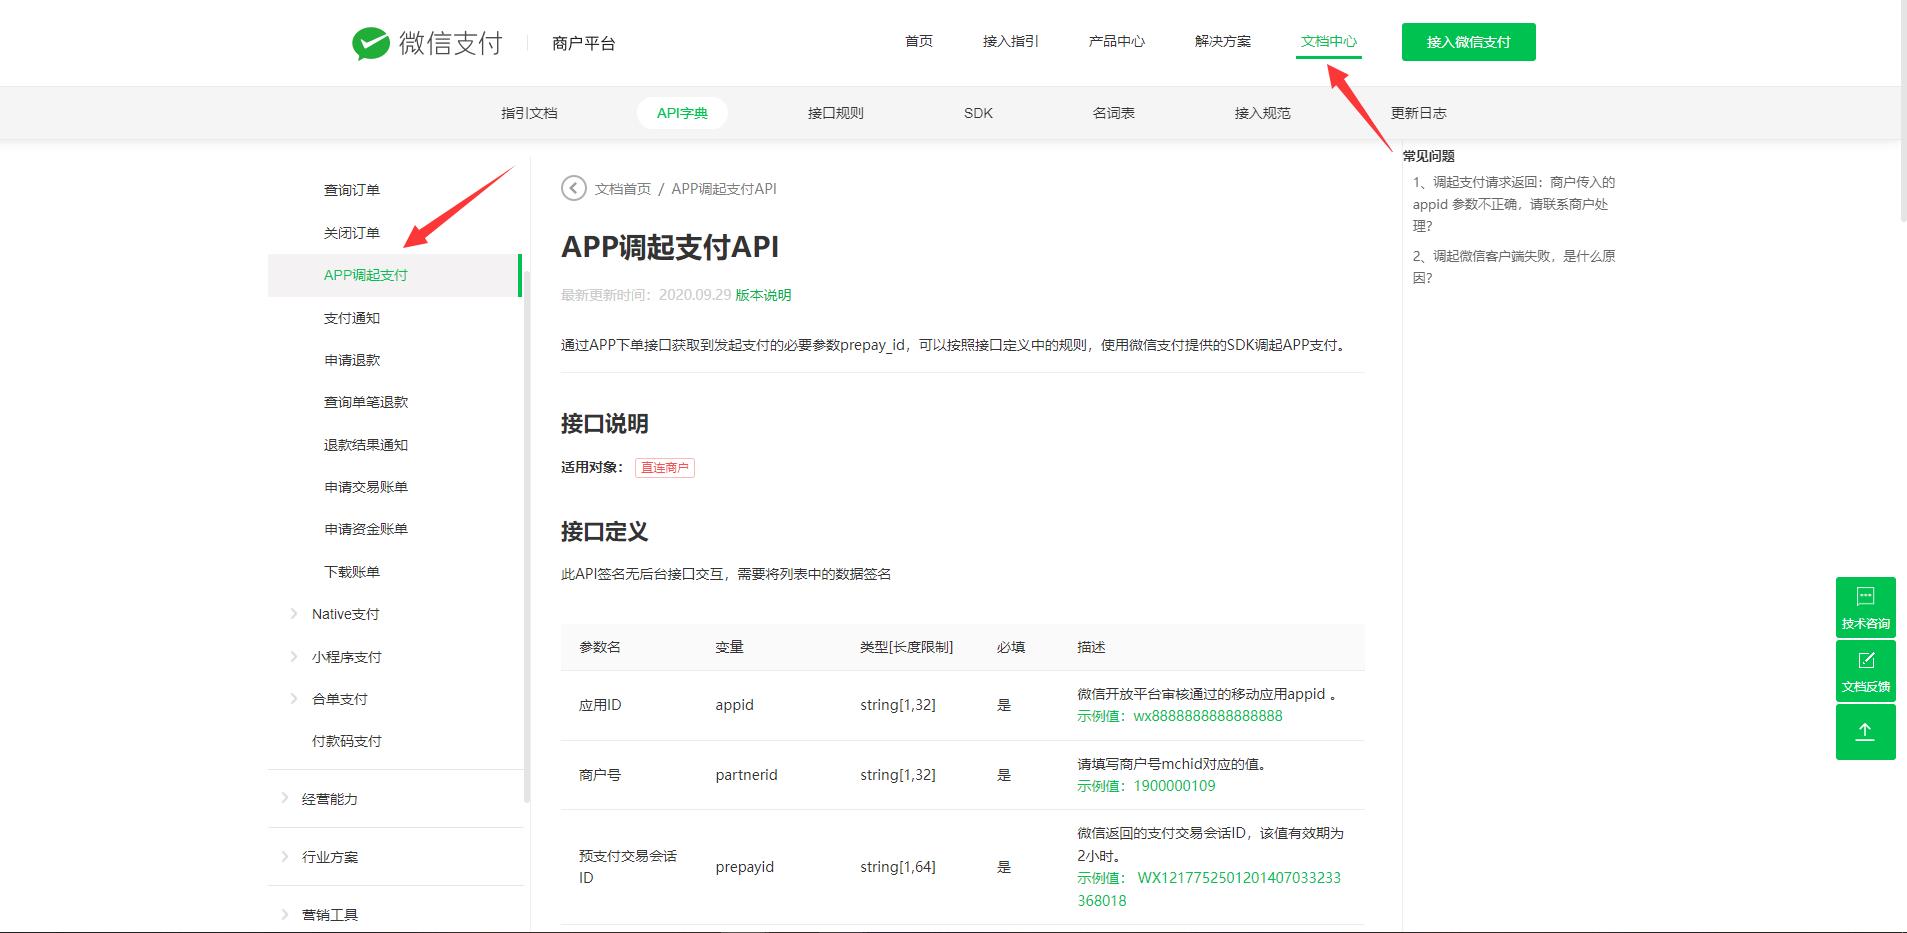
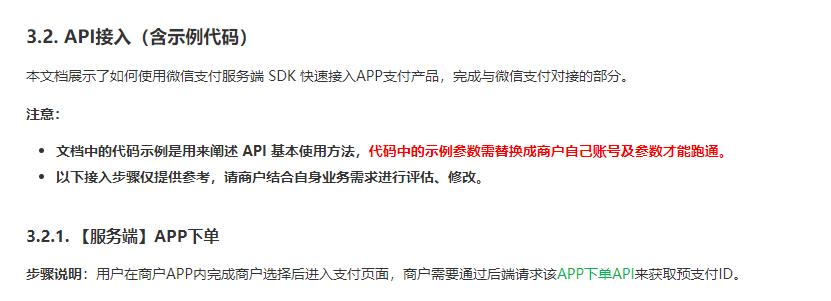
先介绍一下微信支付的后端开发,微信APP支付开发与支付宝支付不一样,所以在这边需要将后端搭建好。打开微信支付的文档中心,我们主要根据官方给的提示按照步骤操作就可以了。这里我们就仅展示APP下单。
1、创建项目
主要的目录结构如下。包含了配置类,工具类等。包名 com.atguigu.paymentdemo(借鉴了网课)

2、配置文件application.yml和wxpay.properties
application.yml
server:
  port: 8090 #服务端口

spring:
  application:
    name: payment-demo #应用的名字

  jackson:
    date-format: yyyy-MM-dd HH:mm:ss
    time-zone: GMT+8

  datasource:
    driver-class-name: com.mysql.jdbc.Driver
    url: jdbc:mysql://ip:3310/payment_demo?serverTimezone=GMT%2B8&characterEncoding=utf-8&useSSL=false
    username: 用户名
    password: 密码

mybatis-plus:
  configuration: #sql日志
    log-impl: org.apache.ibatis.logging.stdout.StdOutImpl
  mapper-locations: classpath:com/atguigu/paymentdemo/mapper/xml/*.xml

logging:
  level:
    root: info
wxpay.properties
# 微信支付相关参数
# 商户号
wxpay.mch-id=商户号写自己的
# 商户API证书序列号
wxpay.mch-serial-no=写自己的
# 商户私钥文件
wxpay.private-key-path=apiclient_key.pem
# APIv3密钥
wxpay.api-v3-key=写自己的
# API密钥
wxpay.api-key=写自己的
# APPID
wxpay.appid=写自己的
# 微信服务器地址
wxpay.domain=https://api.mch.weixin.qq.com
# 接收结果通知地址
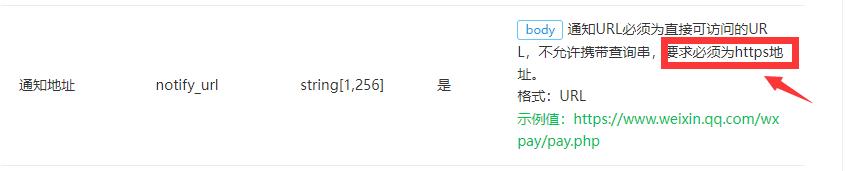
wxpay.notify-domain=https://ip或者域名
注意:
- 这里需要注意将上面的参数改为自己申请到的数据(商户号、序列号、秘钥等等),逐个修改就可以
- 这里将申请到的商户私钥文件apiclient_key.pem放在了根目录下
- 接受回调的通知地址wxpay.notify-domain这里需要注意一下,官方文档说必须为https地址,所以这里我们就使用一个内网穿透工具生成一个HTTPS地址。请自行查看ngrok这个工具。公司里应该都会给的。
3、配置文件pom.xml
pom.xml
<!--Swagger-->
        <dependency>
            <groupId>io.springfox</groupId>
            <artifactId>springfox-swagger2</artifactId>
            <version>2.7.0</version>
        </dependency>
        <!--Swagger ui-->
        <dependency>
            <groupId>io.springfox</groupId>
            <artifactId>springfox-swagger-ui</artifactId>
            <version>2.7.0</version>
        </dependency>
        <!--lombok-->
        <dependency>
            <groupId>org.projectlombok</groupId>
            <artifactId>lombok</artifactId>
        </dependency>
        <!--mysql 驱动-->
        <dependency>
            <groupId>mysql</groupId>
            <artifactId>mysql-connector-java</artifactId>
            <version>5.1.47</version>
        </dependency>
        <!--MyBatis-Plus:是MyBatis的增强-->
        <dependency>
            <groupId>com.baomidou</groupId>
            <artifactId>mybatis-plus-boot-starter</artifactId>
            <version>3.3.1</version>
        </dependency>
        <!-- 代码生成器配置 -->
        <dependency>
            <groupId>org.apache.velocity</groupId>
            <artifactId>velocity-engine-core</artifactId>
            <version>2.0</version>
        </dependency>
        <dependency>
            <groupId>com.baomidou</groupId>
            <artifactId>mybatis-plus-generator</artifactId>
            <version>3.4.1</version>
        </dependency>
        <!-- 生成自定义配置的元数据信息 -->
        <dependency>
            <groupId>org.springframework.boot</groupId>
            <artifactId>spring-boot-configuration-processor</artifactId>
            <optional>true</optional>
        </dependency>
        <!--微信支付SDK-->
        <dependency>
            <groupId>com.github.wechatpay-apiv3</groupId>
            <artifactId>wechatpay-apache-httpclient</artifactId>
            <version>0.3.0</version>
        </dependency>
        <!--json处理器-->
        <dependency>
            <groupId>com.google.code.gson</groupId>
            <artifactId>gson</artifactId>
        </dependency>
        <!--网络请求-->
        <!-- https://mvnrepository.com/artifact/com.squareup.okhttp3/okhttp -->
        <dependency>
            <groupId>com.squareup.okhttp3</groupId>
            <artifactId>okhttp</artifactId>
            <version>4.9.3</version>
        </dependency>
由于项目打包时会将mapper目录下xml文件漏掉,所以我们在application.yml文件下配置了classpath:com/atguigu/paymentdemo/mapper/xml/.xml,同时在pom文件下的build下加入下面代码就可以了,这样就会在打包时将java目录中的.xml文件也进行打包。
    <build>
        <!-- 项目打包时会将java目录中的*.xml文件也进行打包 -->
        <resources>
            <resource>
                <directory>src/main/java</directory>
                <includes>
                    <include>**/*.xml</include>
                </includes>
                <filtering>false</filtering>
            </resource>
        </resources>
    </build>
为了让读者更好的复现这些功能,下面尽可能的将用到的代码都放在文章里。
4、vo包
这个目录主要是生成两个文件,使用swagger测试时查看响应码以及收到消息。
ResultCode
public interface ResultCode

    public static Integer SUCCESS = 20000;//成功

    public static Integer ERROR = 20001;//失败
R
@Data
@Accessors(chain = true)
public class R
    @ApiModelProperty(value = "是否成功")
    private Boolean success;
    @ApiModelProperty(value = "返回码")
    private Integer code;
    @ApiModelProperty(value = "返回消息")
    private String message;
    @ApiModelProperty(value = "返回数据")
    private Map<String, Object> data = new HashMap<String, Object>();
    //构造方法私有化
    private R()
    //链式编程
    //成功静态方法
    public static R ok()
        R r = new R();
        r.setSuccess(true);
        r.setCode(ResultCode.SUCCESS);
        r.setMessage("成功");
        return r;

    //失败静态方法
    public static R error()
        R r = new R();
        r.setSuccess(false);
        r.setCode(ResultCode.ERROR);
        r.setMessage("失败");
        return r;

    public R success(Boolean success)
        this.setSuccess(success);
        return this;

    public R message(String message)
        this.setMessage(message);
        return this;

    public R code(Integer code)
        this.setCode(code);
        return this;

    public R data(String key, Object value)
        this.data.put(key, value);
        return this;

    public R data(Map<String, Object> map)
        this.setData(map);
        return this;
5、config包
这个目录主要是配置信息,配置Swagger、MyBatisPlus以及WxPay微信支付的参数
Swagger2Config
@Configuration
@EnableSwagger2
public class Swagger2Config
    @Bean
    public Docket docket()
        return new Docket(DocumentationType.SWAGGER_2)
                .apiInfo(new ApiInfoBuilder().title("微信支付案例接口文档").build());
MyBatisPlusConfig
@Configuration
@MapperScan("com.atguigu.paymentdemo.mapper")
@EnableTransactionManagement //启用事务管理
public class MyBatisPlusConfig
WxPayConfig
这个文件就是读取到wxpay.properties的信息
@Configuration
@PropertySource("classpath:wxpay.properties") //读取配置文件
@ConfigurationProperties(prefix="wxpay") //读取wxpay节点
@Data //使用set方法将wxpay节点中的值填充到当前类的属性中
@Slf4j
public class WxPayConfig
    // 商户号
    private String mchId;
    // 商户API证书序列号
    private String mchSerialNo;
    // 商户私钥文件
    private String privateKeyPath;
    // APIv3密钥
    private String apiV3Key;
    // API密钥
    private String apiKey;
    // APPID
    private String appid;
    // 微信服务器地址
    private String domain;
    // 接收结果通知地址
    private String notifyDomain;
    /**
     * 获取商户的私钥文件
     * @param filename
     * @return
     */
    public PrivateKey getPrivateKey(String filename)

        try
            return PemUtil.loadPrivateKey(new FileInputStream(filename));
         catch (FileNotFoundException e)
            throw new RuntimeException("私钥文件不存在", e);


    /**
     * 获取签名验证器
     * @return
     */
    @Bean
    public ScheduledUpdateCertificatesVerifier getVerifier()
        log.info("获取签名验证器");
        //获取商户私钥
        PrivateKey privateKey = getPrivateKey(privateKeyPath);
        //私钥签名对象
        PrivateKeySigner privateKeySigner = new PrivateKeySigner(mchSerialNo, privateKey);
        //身份认证对象
        WechatPay2Credentials wechatPay2Credentials = new WechatPay2Credentials(mchId, privateKeySigner);
        // 使用定时更新的签名验证器,不需要传入证书
        ScheduledUpdateCertificatesVerifier verifier = new ScheduledUpdateCertificatesVerifier(
                wechatPay2Credentials,
                apiV3Key.getBytes(StandardCharsets.UTF_8));
        return verifier;

    /**
     * 获取http请求对象
     * @param verifier
     * @return
     */
    @Bean(name = "wxPayClient")
    public CloseableHttpClient getWxPayClient(ScheduledUpdateCertificatesVerifier verifier)
        log.info("获取httpClient");
        //获取商户私钥
        PrivateKey privateKey = getPrivateKey(privateKeyPath);
        WechatPayHttpClientBuilder builder = WechatPayHttpClientBuilder.create()
                .withMerchant(mchId, mchSerialNo, privateKey)
                .withValidator(new WechatPay2Validator(verifier));
        // ... 接下来,你仍然可以通过builder设置各种参数,来配置你的HttpClient
        // 通过WechatPayHttpClientBuilder构造的HttpClient,会自动的处理签名和验签,并进行证书自动更新
        CloseableHttpClient httpClient = builder.build();
        return httpClient;

    /**
     * 获取HttpClient,无需进行应答签名验证,跳过验签的流程
     */
    @Bean(name = "wxPayNoSignClient")
    public CloseableHttpClient getWxPayNoSignClient()
        //获取商户私钥
        PrivateKey privateKey = getPrivateKey(privateKeyPath);
        //用于构造HttpClient
        WechatPayHttpClientBuilder builder = WechatPayHttpClientBuilder.create()
                //设置商户信息
                .withMerchant(mchId, mchSerialNo, privateKey)
                //无需进行签名验证、通过withValidator((response) -> true)实现
                .withValidator((response) -> true);
        // 通过WechatPayHttpClientBuilder构造的HttpClient,会自动的处理签名和验签,并进行证书自动更新
        CloseableHttpClient httpClient = builder.build();
        log.info("== getWxPayNoSignClient END ==");
        return httpClient;
6、enums包
这个主要是定义微信支付的提供的地址,将其设置为枚举型,进行拼接就可以组装成URL地址
WxApiType
@AllArgsConstructor
@Getter
public enum WxApiType

	/**
	 * APP下单
	 */
	APP_PAY("/v3/pay/transactions/app"),
	/**
	 * 类型
	 */
	private final String type;
WxNotifyType
@AllArgsConstructor
@Getter
public enum WxNotifyType
	/**
	 * APP支付通知
	 */
	APP_NOTIFY("/api/wx-pay/app/notify"),
	/**
	 * 类型
	 */
	private final String type;
OrderStatus
@AllArgsConstructor
@Getter
public enum OrderStatus
    /**
     * 未支付
     */
    NOTPAY("未支付"),
    /**
     * 支付成功
     */
    SUCCESS("支付成功"),
    /**
     * 已关闭
     */
    CLOSED("超时已关闭"),
    /**
     * 已取消
     */
    CANCEL("用户已取消"),
    /**
     * 退款中
     */
    REFUND_PROCESSING("退款中"),
    /**
     * 已退款
     */
    REFUND_SUCCESS("已退款"),
    /**
     * 退款异常
     */
    REFUND_ABNORMAL("退款异常");
    /**
     * 类型
     */
    private final String type;
PayType
@AllArgsConstructor
@Getter
public enum PayType
    /**
     * 微信
     */
    WXPAY("微信"),
    /**
     * 支付宝
     */
    ALIPAY("支付宝");
    /**
     * 类型
     */
    private final String type;
7、util工具包
HttpClientUtils
/**
* http请求客户端
*/
public class HttpClientUtils
private String url;
private Map<String, String> param;
private int statusCode;
private String content;
private String xmlParam;
private boolean isHttps;
public boolean isHttps()
return isHttps;
public void setHttps(boolean isHttps)
this.isHttps = isHttps;
public String getXmlParam()
return xmlParam;
public void setXmlParam(String xmlParam)
this.xmlParam = xmlParam;
public HttpClientUtils(String url, Map以上是关于微信支付商户号和API密钥是啥 它们有啥用处的主要内容,如果未能解决你的问题,请参考以下文章