Spring学习总结五——SpringIOC容器五
Posted 格物致知
tags:
篇首语:本文由小常识网(cha138.com)小编为大家整理,主要介绍了Spring学习总结五——SpringIOC容器五相关的知识,希望对你有一定的参考价值。
一:spring组件扫描
可以使用注解的方式,代替在xml配置文件配置bean,可以减少配置文件的书写,只需要在spring容器配置
文件中配置<context:component-scan base-package="com.hlcui.*"/>
但是不是只有扫描,所在包以及子包下的类都会被扫描进去,而是只有类上面标记注解的才会被扫描进spring容器
常见注解:
@Component 通用注解, 一般情况下不确定属于那一层时使用,它仅仅是将类对象扫描到spring容器中
@Repository 持久层注解,放在dao那一层
@Service 业务层注解,放在service那一层
@Controller 控制车注解,放在控制层
下面示例演示:
1:新建TestBean类,在类上面添加注解 @Component
 1 /**
 2  *
 3  */
 4 package com.hlcui.dao;
 5
 6 import org.springframework.stereotype.Component;
 7
 8 /**
 9  * @author Administrator
10  *
11  */
12 @Component
13 public class TestBean {
14     public TestBean() {
15         System.out.println("实例化bean...");
16     }
17
18     public void execute() {
19         System.out.println("执行bean处理...");
20     }
21 }
2:在配置文件中添加
1 <!-- 组件扫描 -->
2     <context:component-scan base-package="com.hlcui"/>
3:测试方法
1 @Test
2     /**测试组件扫描*/
3     public void testTestBean(){
4         ApplicationContext ac = getApplicationContext();
5         TestBean tb = ac.getBean("testBean", TestBean.class);
6         tb.execute();
7     }

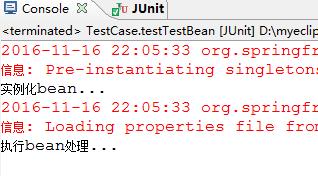
通过结果可以看出bean对象被扫描进了spring容器!
二:控制bean的实例化
1:创建ExampleBean1类,并且在类上面添加注解标记@Component
/**
 *
 */
package com.hlcui.dao;
import org.springframework.stereotype.Component;

/**
 * @author Administrator
 *
 */
@Component
public class ExampleBean1 {
    public ExampleBean1() {
        System.out.println("实例化ExampleBean1...");
    }
}
2:运行测试方法
1 @Test
2     /**测试组件扫描模式下控制bean的实例化*/
3     public void testExampleBean1(){
4         ApplicationContext ac = getApplicationContext();
5         ExampleBean1 tb1 = ac.getBean("exampleBean1", ExampleBean1.class);
6         ExampleBean1 tb2 = ac.getBean("exampleBean1",ExampleBean1.class);
7         System.out.println(tb1 == tb2);
8     }

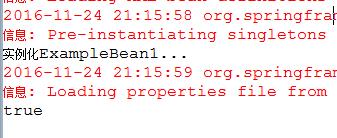
根据结果可以看出默认情况下,是单例模式,虽然调用两次,但是是同一个对象!
3:在类上面添加@Scope("prototype")注解,然后在运行测试方法

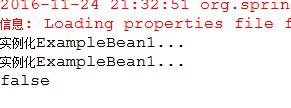
可以看出创建了两个对象!
如果在将@Scope修改为singleton时,那么又会是单例模式了。
3:初始化和销毁对象
@postConstruct和@preDestroy两个注解,它们的作用就相当于在配置文件的bean元素中
添加init-method方法和destroy-method方法
 1 /**
 2  *
 3  */
 4 package com.hlcui.dao;
 5 import javax.annotation.PostConstruct;
 6 import javax.annotation.PreDestroy;
 7
 8 import org.springframework.context.annotation.Scope;
 9 import org.springframework.stereotype.Component;
10
11 /**
12  * @author Administrator
13  *
14  */
15 @Component
16 @Scope("prototype")
17 public class ExampleBean1 {
18
19     public ExampleBean1() {
20         System.out.println("实例化ExampleBean1...");
21     }
22
23     @PostConstruct
24     public void init(){
25         System.out.println("初始化ExampleBean1...");
26     }
27
28     @PreDestroy
29     public void destroy(){
30         System.out.println("销毁ExampleBean1...");
31     }
32 }
以上是关于Spring学习总结五——SpringIOC容器五的主要内容,如果未能解决你的问题,请参考以下文章