前言
我们知道项目的监控是尤为重要的,但是我们如果用jdk 自带的jconsole 和jvisualvm 的话会非常繁琐,且界面不是很友好。之前我们使用了spring boot 项目,但是都没有对项目有一个很好的监控。在spring 家族中有 spring-boot-admin 可以很好的帮我们起到监控微服务项目的作用。
spring-boot-admin 是一个针对 Spring Boot 的 Actuator 接口进行 UI 美化封装的监控工具,它可以在列表中浏览所有被监控 spring-boot 项目的基本信息、详细的 Health 信息、内存信息、JVM 信息、垃圾回收信息、各种配置信息(比如数据源、缓存列表和命中率)等,还可以直接修改 logger 的 level。
spring-boot-admin 分为服务端和客户端。服务端是一个单独的微服务,用来查看监控的项目的运行情况,客户端是我们一个个的微服务项目。所以要想让我们的项目被服务端监控到,就需要将我们的服务注册到服务端去。
好了,我们来动手试试吧。
admin-server
我们先来搭建spring-boot-admin 的服务端,上面说了服务端是一个单独的项目。所以我们创建一个新的springboot 项目。创建好后,我们做一下修改。
pom.xml
在pom 文件中,我们引入 如下依赖
<?xml version="1.0" encoding="UTF-8"?>
<project xmlns="http://maven.apache.org/POM/4.0.0" xmlns:xsi="http://www.w3.org/2001/XMLSchema-instance"
         xsi:schemaLocation="http://maven.apache.org/POM/4.0.0 https://maven.apache.org/xsd/maven-4.0.0.xsd">
    <modelVersion>4.0.0</modelVersion>
    <parent>
        <groupId>org.springframework.boot</groupId>
        <artifactId>spring-boot-starter-parent</artifactId>
        <version>2.2.2.RELEASE</version>
        <relativePath/> <!-- lookup parent from repository -->
    </parent>
    <groupId>com.quellanan</groupId>
    <artifactId>springbootadmin</artifactId>
    <version>0.0.1-SNAPSHOT</version>
    <name>springbootadmin</name>
    <description>springbootadmin project for Spring Boot</description>

    <properties>
        <java.version>1.8</java.version>
        <spring-boot-admin.version>2.2.1</spring-boot-admin.version>
    </properties>

    <dependencies>

        <dependency>
            <groupId>org.springframework.boot</groupId>
            <artifactId>spring-boot-starter-web</artifactId>
        </dependency>

        <dependency>
            <groupId>de.codecentric</groupId>
            <artifactId>spring-boot-admin-starter-server</artifactId>
        </dependency>

        <dependency>
            <groupId>org.springframework.boot</groupId>
            <artifactId>spring-boot-starter-security</artifactId>
        </dependency>

    </dependencies>

    <dependencyManagement>
        <dependencies>
            <dependency>
                <groupId>de.codecentric</groupId>
                <artifactId>spring-boot-admin-dependencies</artifactId>
                <version>${spring-boot-admin.version}</version>
                <type>pom</type>
                <scope>import</scope>
            </dependency>
        </dependencies>
    </dependencyManagement>

    <build>
        <plugins>
            <plugin>
                <groupId>org.springframework.boot</groupId>
                <artifactId>spring-boot-maven-plugin</artifactId>
            </plugin>
        </plugins>
    </build>
</project>
上面是我整个的pom 文件,可以看到我引入了web 、admin-starter-server、security。
如果考虑其他的,可以只引用admin-starter-server 就可以实现效果。
启动类
在我们的启动类上加入@EnableAdminServer 注解,如果不加的话,项目可以正常启动,但是看不到任何东西。@EnableAdminServer 注解的作用就是启动监控。
@SpringBootApplication
@EnableAdminServer
public class SpringbootadminApplication {
    public static void main(String[] args) {
        SpringApplication.run(SpringbootadminApplication.class, args);
    }
}
配置 security
这样配置好之后,就可以启动项目啦,但是我们这里先不启动,因为上一节我们学习了,spring-boot-security .这里我们将它用起来。
我们前面已经引入了 security ,接下来,我们在application中增加配置
spring.security.user.name=admin
spring.security.user.password=123456
表示这个用户才能访问。另外我们创建一个 SecurityConfig 类 继承 WebSecurityConfigurerAdapter 重写 configure(HttpSecurity http) 方法。代码如下:
@Configuration
public class SecurityConfig extends WebSecurityConfigurerAdapter {
    @Override
    protected void configure(HttpSecurity http) throws Exception {
        SavedRequestAwareAuthenticationSuccessHandler successHandler
                = new SavedRequestAwareAuthenticationSuccessHandler();
        successHandler.setTargetUrlParameter("redirectTo");
        successHandler.setDefaultTargetUrl("/");
        http.authorizeRequests()
                .antMatchers("/assets/**").permitAll()
                .antMatchers("/login").permitAll()
                .anyRequest().authenticated().and()
                .formLogin().loginPage("/login")
                .successHandler(successHandler).and()
                .logout().logoutUrl("/logout").and()
                .httpBasic().and()
                .csrf()
                .csrfTokenRepository(CookieCsrfTokenRepository.withHttpOnlyFalse())
                .ignoringAntMatchers(
                        "/instances",
                        "/actuator/**"
                );
    }
}
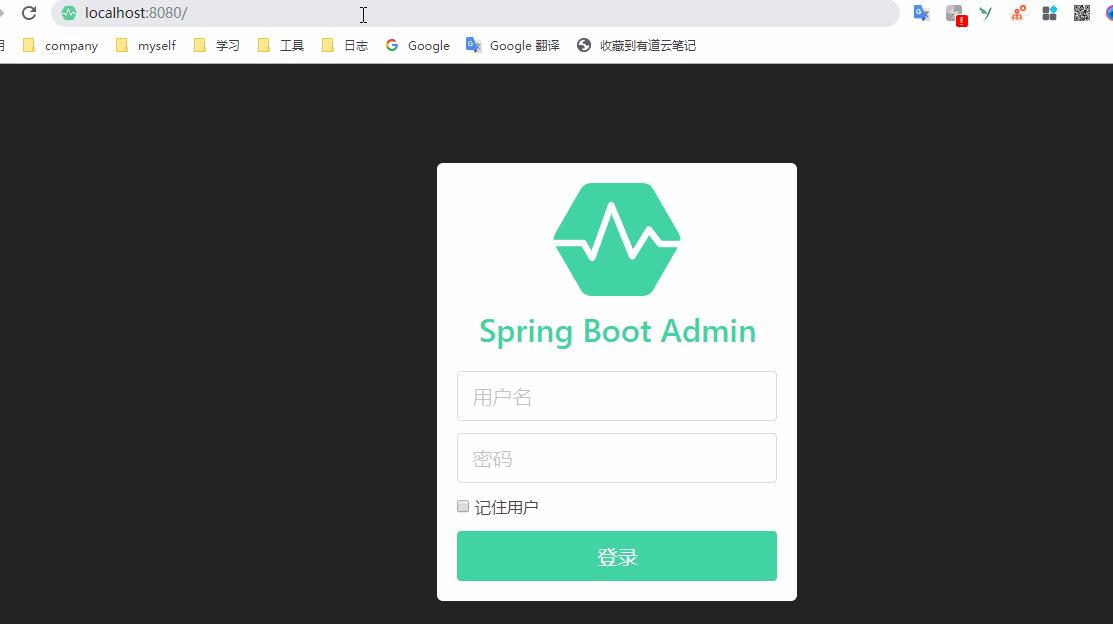
现在我们启动一下项目看看。启动项目后输入
http://localhost:8080
会跳转到 登录界面,进入主页现在是什么都没有的。
admin-client
到此我们服务端的配置就已经可以了,现在我们来配置一下客户端,我们随便找一个Springboot 项目,或者自己创建一个新的项目都可以。
pom.xml
我们先在pom 文件中加入admin-client 依赖,注意这里的版本需要和server 的版本一致。
		<dependency>
            <groupId>de.codecentric</groupId>
            <artifactId>spring-boot-admin-starter-client</artifactId>
            <version>2.2.1</version>
        </dependency>
application.properties
然后我们在 application.properties 文件中加入如下配置。
spring.boot.admin.client.url=http://localhost:8080
management.endpoints.web.exposure.include=*
spring.application.name=sdwlzlapp-file
spring.boot.admin.client.username=admin
spring.boot.admin.client.password=123456
spring.boot.admin.client.url 指向我们服务端的项目接口路径。
management.endpoints.web.exposure.include 表示将所有端口都暴露出来,可以被监控到。
spring.application.name 表示改项目在spring-boot-admin 上的的显示名称。
spring.boot.admin.client.username 和password 就是设置的用户名和密码了,这里需要注意的是,如果admin-server 中没有集成 security 的话,不用配置用户名和密码也可以注册进去,在服务端可以监控到,但如果admin-server 集成了security,就需要保证client 中配置的用户名和server 中配置的用户名密码保持一致。
测试
配置了上面这些,就就可以将项目注册到admin-server 中啦,我们启动一下项目。
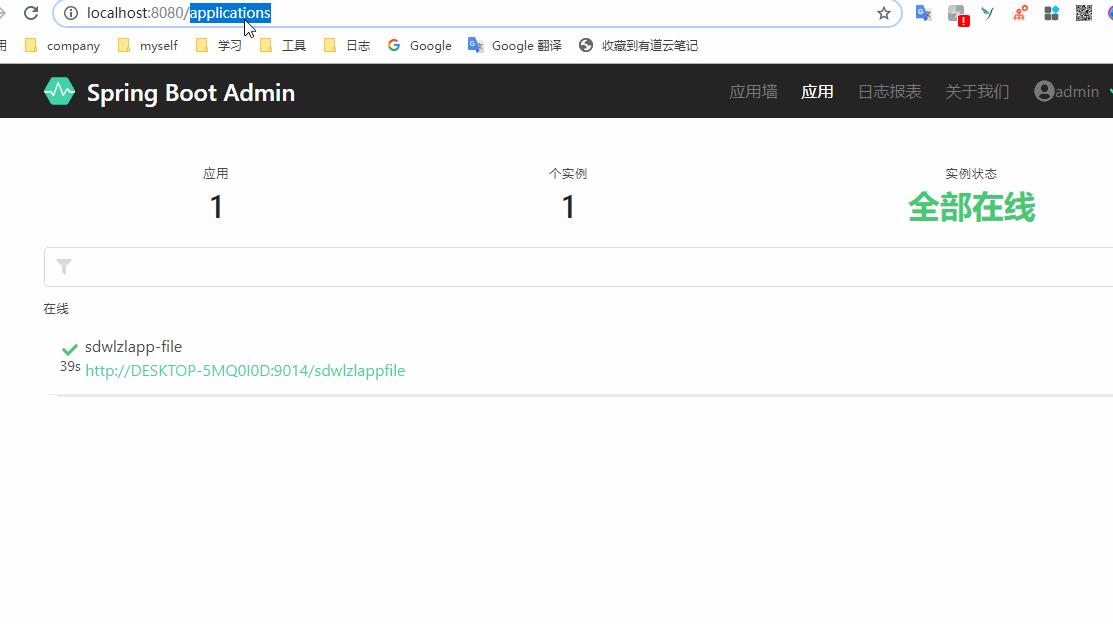
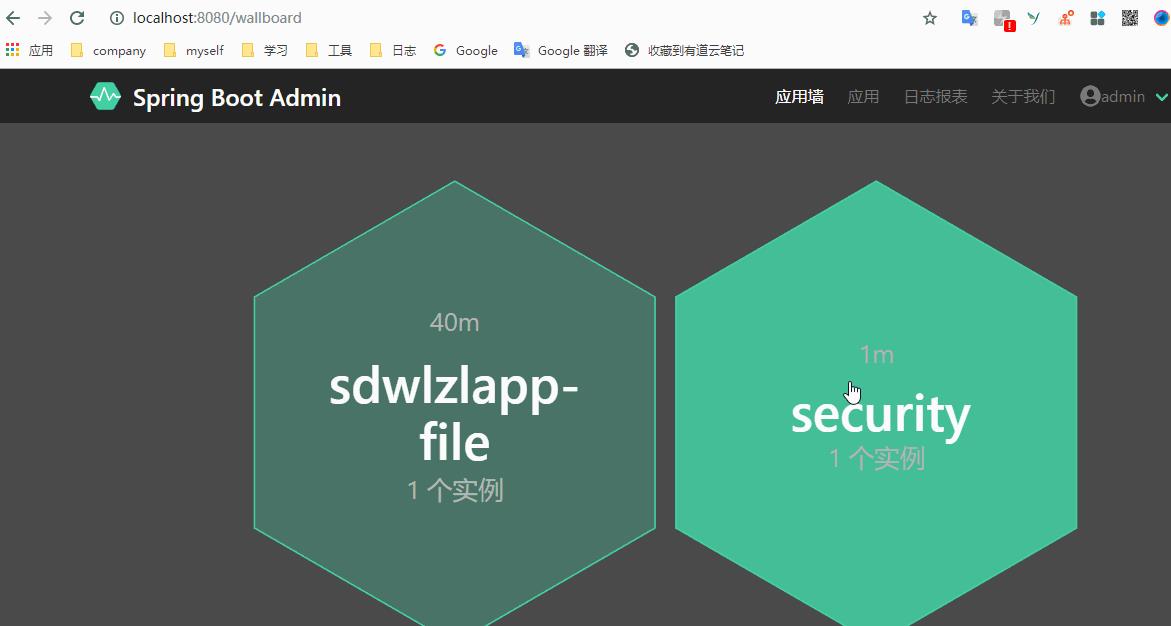
现在还有一个问题,如果我们项目本身就集成的安全框架,比如security ,没有登录的话不能访问接口,那这样的项目怎么被admin-server 监控到呢?比如就我们上节将的security 的demo ,我们注册进来,虽然监控到了,但是是一个失败的状态。
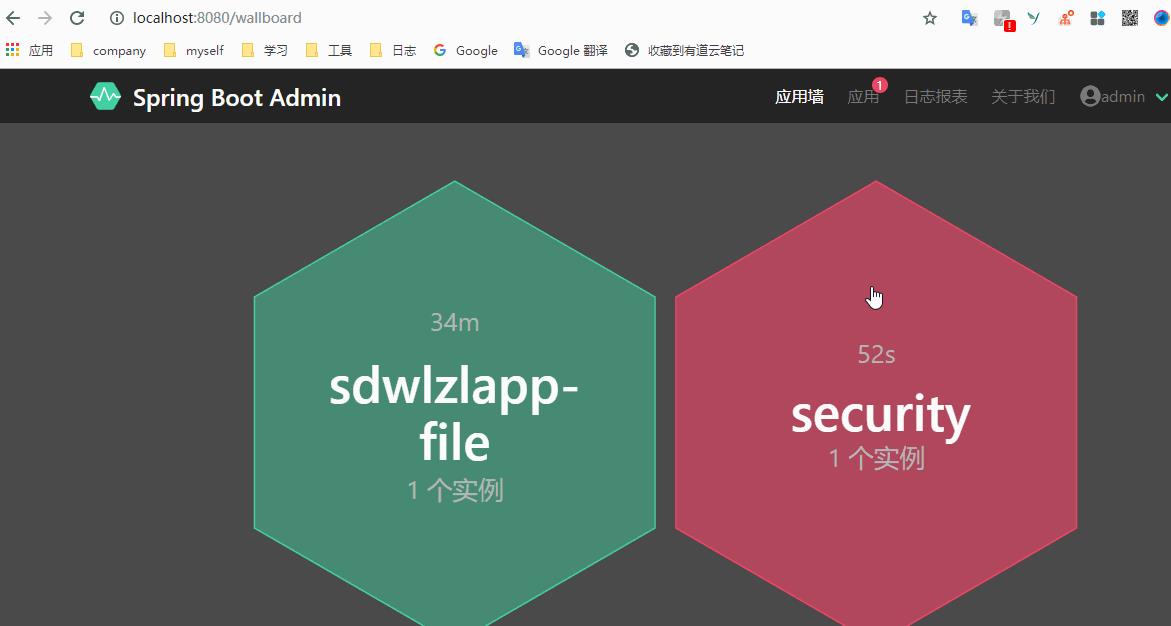
可以看到,不难发现问题,那就是监控的接口也被项目本身拦截了,所以才导致是失败的状态,那要怎么修改了呢,其实也好处理,将这几个接口放开就可以了。我们在项目的SecurityConfig 类中configure(HttpSecurity http)加上
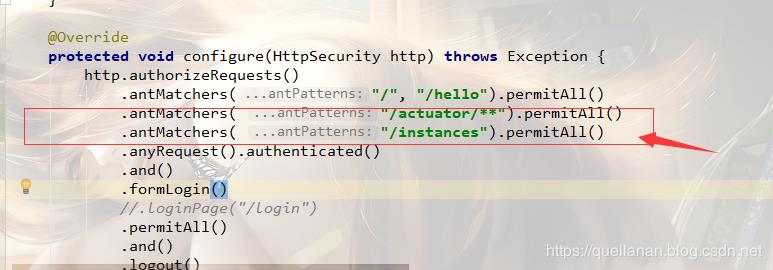
代码如下:
@Override
    protected void configure(HttpSecurity http) throws Exception {
        http.authorizeRequests()
            .antMatchers("/", "/hello").permitAll()
            .antMatchers( "/actuator/**").permitAll()
            .antMatchers( "/instances").permitAll()
            .anyRequest().authenticated()
            .and()
            .formLogin()
            //.loginPage("/login")
            .permitAll()
            .and()
            .logout()
            .permitAll();
    }
这样我们重启项目,就发现可以监控成功了。
番外
到此为止,我们也算是将spring-boot-admin的大致功能演示了下。
代码上传到github:
https://github.com/QuellanAn/springbootadmin
后续加油♡
欢迎大家关注个人公众号 "程序员爱酸奶"
分享各种学习资料,包含java,linux,大数据等。资料包含视频文档以及源码,同时分享本人及投递的优质技术博文。
如果大家喜欢记得关注和分享哟❤
