Spring cloud微服务安全实战-3-9API安全机制之审计日志_batch
Posted 青春是课桌下风干的鼻屎,是借了不还的直尺。
tags:
篇首语:本文由小常识网(cha138.com)小编为大家整理,主要介绍了Spring cloud微服务安全实战-3-9API安全机制之审计日志_batch相关的知识,希望对你有一定的参考价值。
首先说一下审计日志的处理。审计日志处理的位置,应该是在认证之后,授权之前。因为只有你在认证之后,你才能知道这个请求到底是谁发出来的,谁在做这个事情。在这个授权之前,这样的话那些被拒绝掉的请求。在响应的时候你才可以把他记下来。
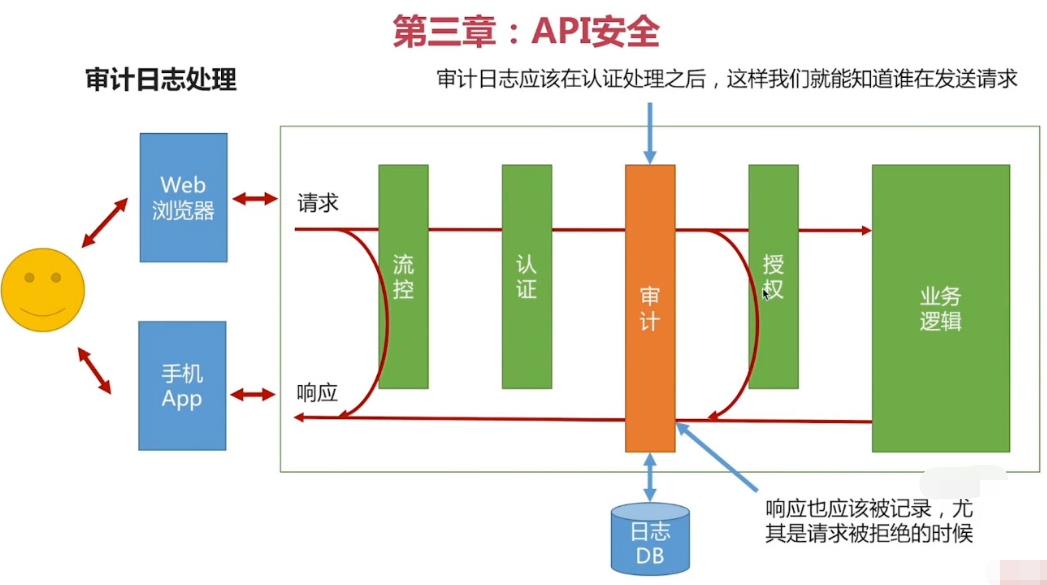
日志一定要持久化,可以把它存到数据库里,也可以把它写到文件里。
怎么保证过滤器按照顺序执行的,我们在做流控和认证的过滤器的时候,实际上,并没有指定的顺序。那么现在到底是流控先执行 还是认证先执行?
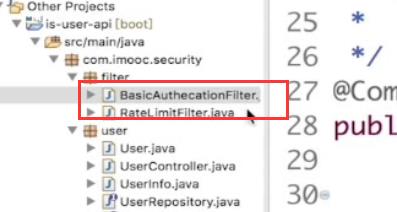
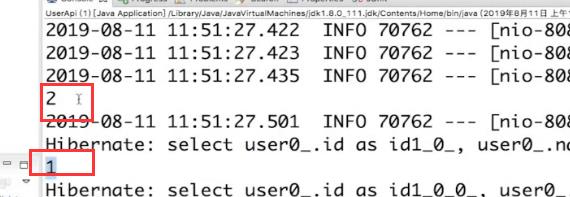
在流控的Filter RateLimitFilter先打印一个1

BasicAuthecationFilter:在认证的Filter里面 我们再打一个2

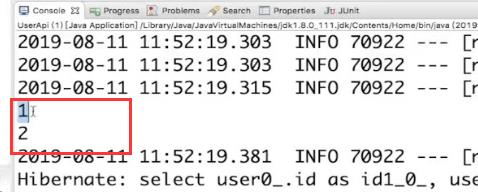
发送请求 发现先输出了2 后输出了1。说明先走的认证 再走的流控
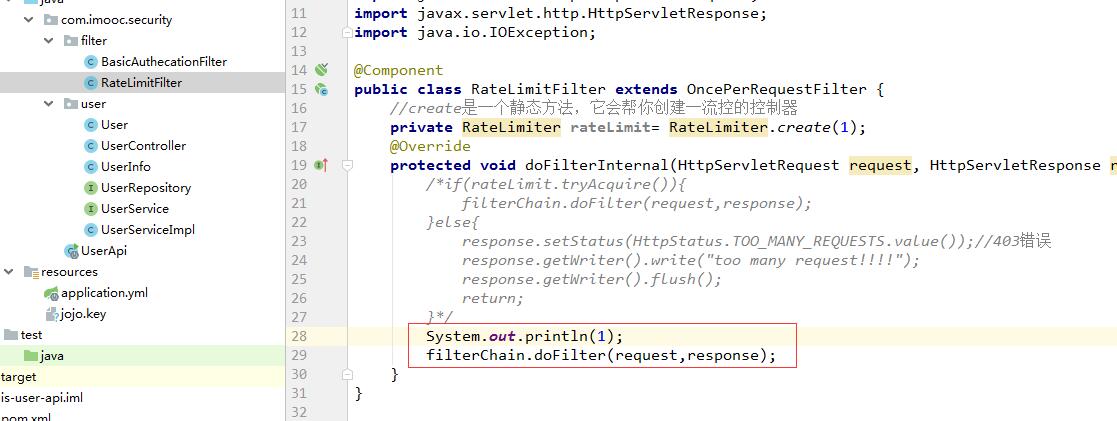
注意事项:
输出后,记得执行:filterChain.doFilter(request,response); 让代码继续往下走。下面是我在IDEA里面的截图
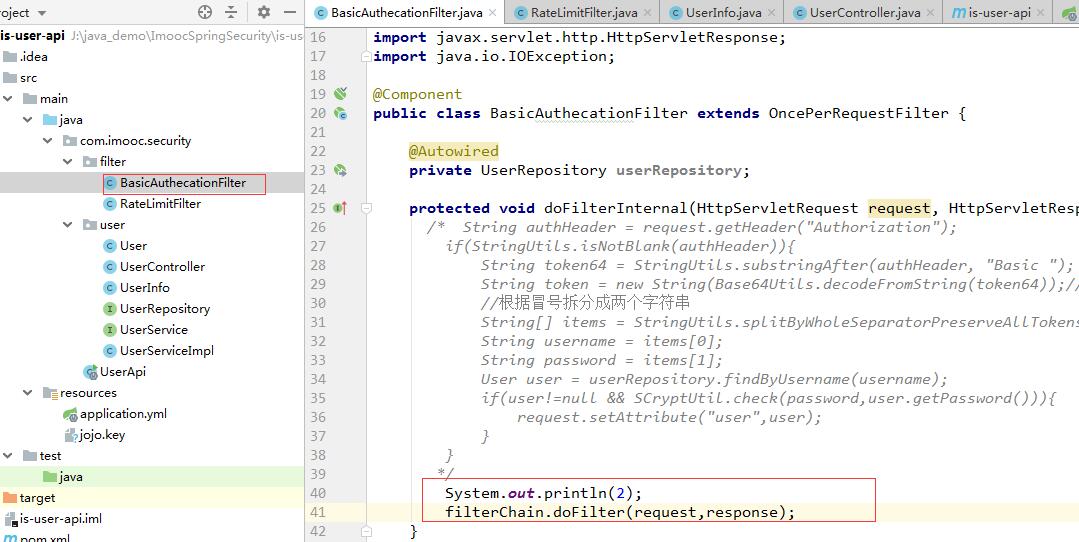
调整Filter的执行顺序

认证在第二个 就写个@Order(2)
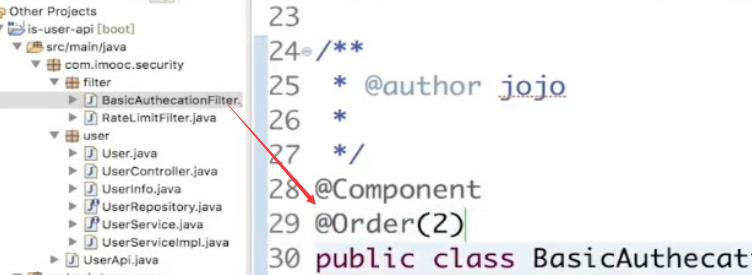
重启服务进行测试
审计日志-简单实现
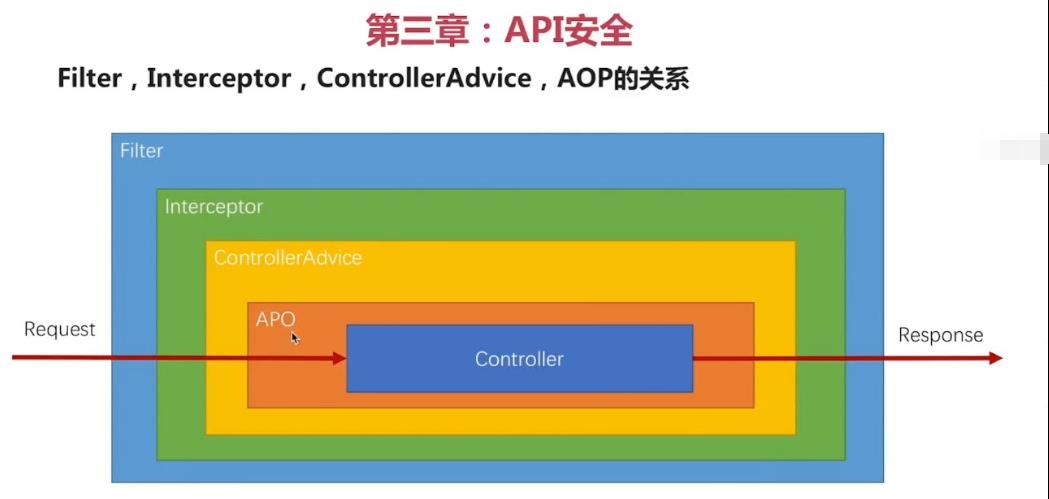
审计日志不能用filter来做了。因为审计日志我们要做两个动作。第一个是在请求进来后,我们要做一个动作。然后在请求出去之后,要把这个日志更新一下,所以进和出都要做事。如果只在请求进来记录 实际上不知道最终这个请求最终是成功了还是失败了。这样这个日志记录不完整。
如果用Filter来做,它只有一个doFilterInternal这么个方法,它是标准的Filter方法的实现,并没有明确的区分在请求进来执行还是请求出去的时候执行。
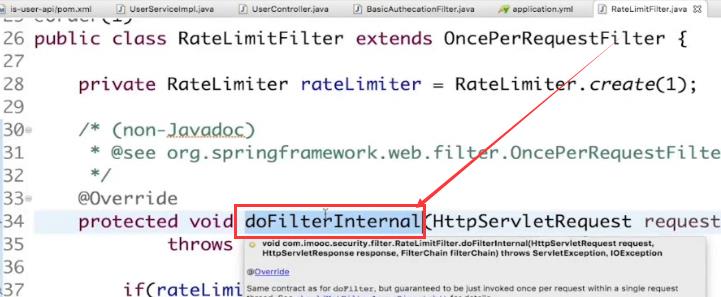
我们使用SpringBoot提供的Interceptor。
ControllerAdvice一般是用来做全局的异常处理。
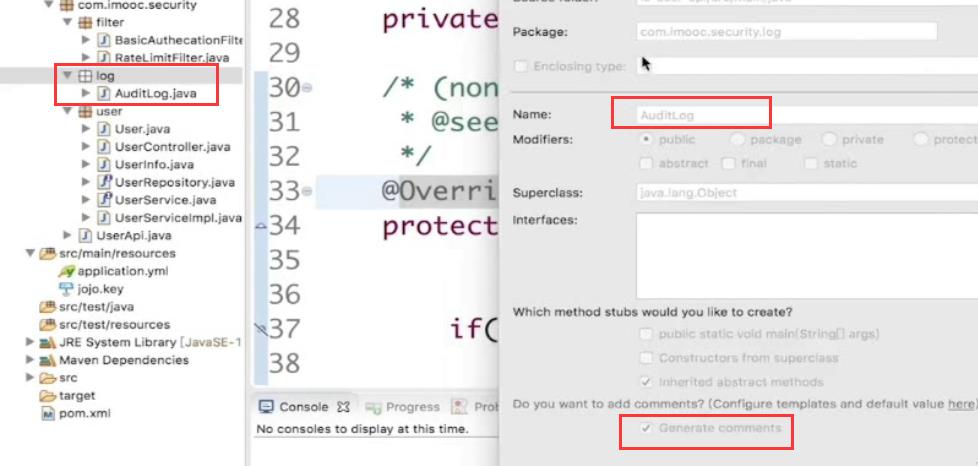
新建审计日志类
AuditLog
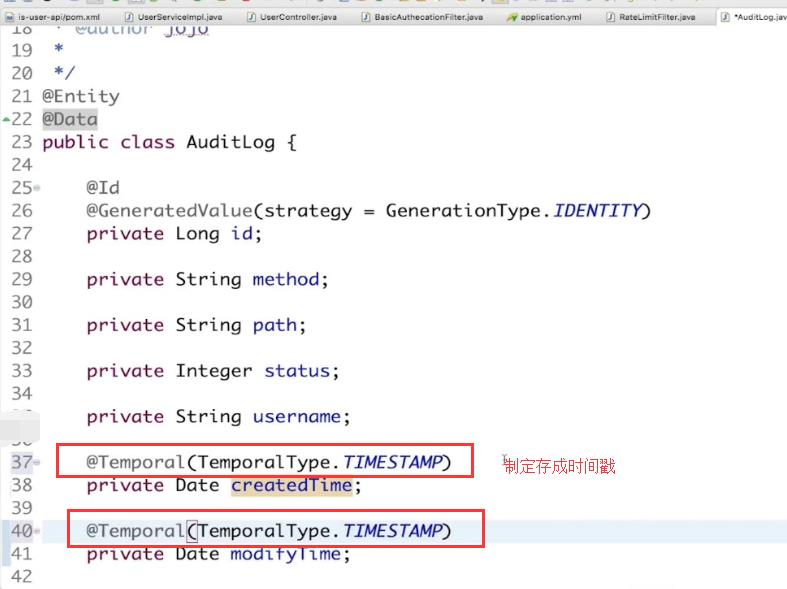
指定createTime和modifyTime存成时间戳 。
注意:@Temporal和TemporalType.TIMESTAMP都是import javax.persistence.包下的。
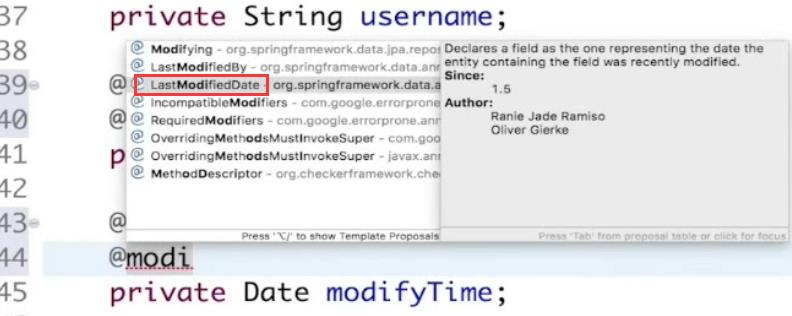
加上@CreateDate和@LastModifiedDate这两个注解,我们在使用Repository的save方法的时候,它会自动判断你是创建还是修改并给这两个日期赋值。

org.springframework.data.annotation.LastModifiedDate包下的
package com.imooc.security.log;


import lombok.Data;
import org.springframework.data.annotation.CreatedDate;
import org.springframework.data.annotation.LastModifiedDate;
import org.springframework.data.jpa.domain.support.AuditingEntityListener;

import javax.persistence.*;
import java.util.Date;

@Entity
@Data
@EntityListeners(AuditingEntityListener.class)
public class AuditLog {
    @Id
    @GeneratedValue(strategy = GenerationType.IDENTITY)
    private Long id;

    private String method;

    private String path;

    private Integer status;

    private String username;
    @Temporal(TemporalType.TIMESTAMP)
    @CreatedDate
    private Date createdTime;
    @Temporal(TemporalType.TIMESTAMP)
    @LastModifiedDate
    private Date modifyTime;
}
审计日志Repository
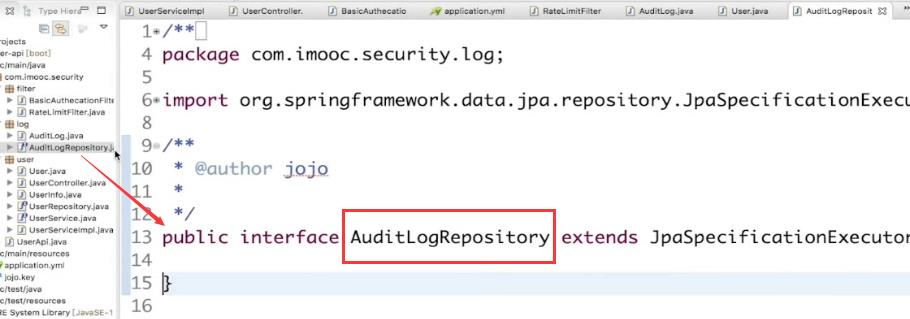

IDEA里面截图

package com.imooc.security.log;

import org.springframework.data.jpa.repository.JpaSpecificationExecutor;
import org.springframework.data.repository.CrudRepository;

public interface AuditLogRepository extends JpaSpecificationExecutor<AuditLog>, CrudRepository<AuditLog,Long> {

}
创建Interceptor
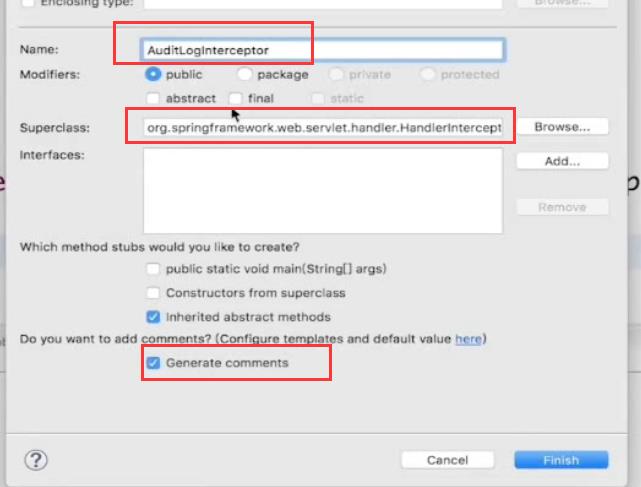
继承的是,HandlerInterceptorAdpater 处理之前和处理之后,主要是要实现这两个方法。

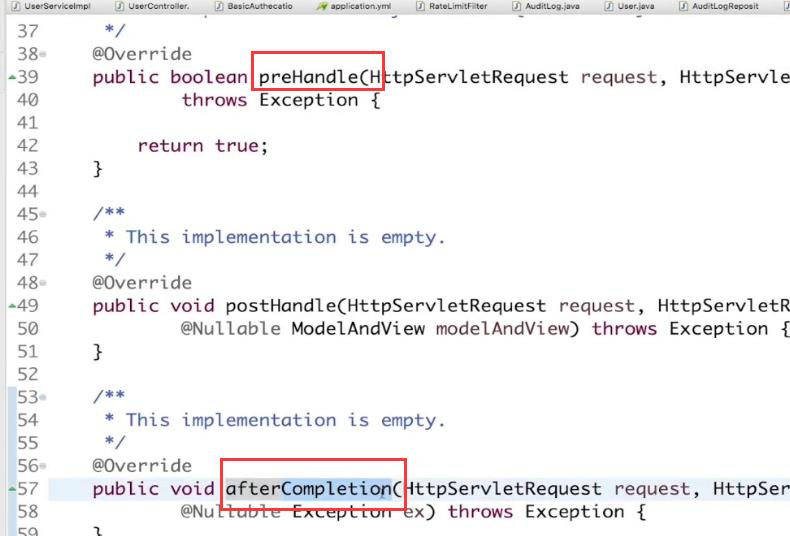
这里只需要preHandler和afterCompetion这两个方法即可。其他的方法删除。
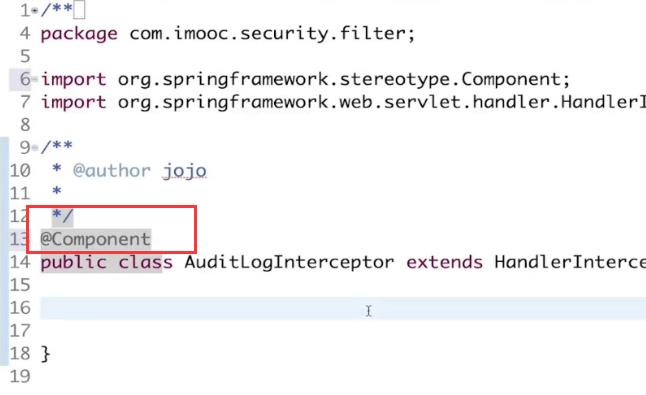
声明成一个Spring组件,使用@Component注解。
注入AuditLogRepository
@Autowired
private AuditLogRepository auditLogRepository;
最终返回true、返回false 的请求就不会被执行。
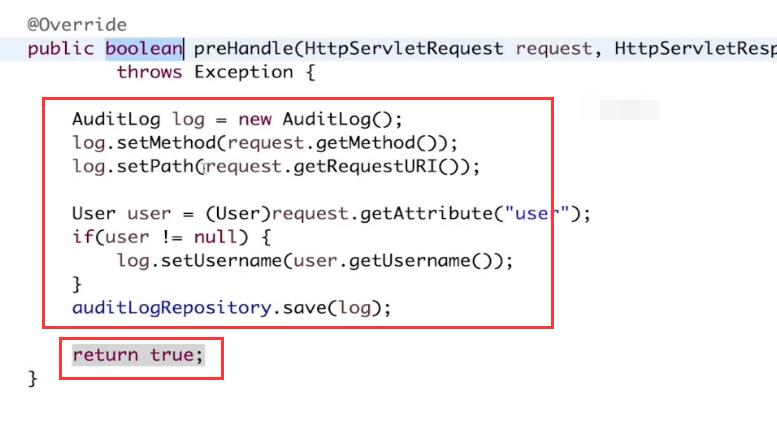
因为下面要用,所以这里,设置id。
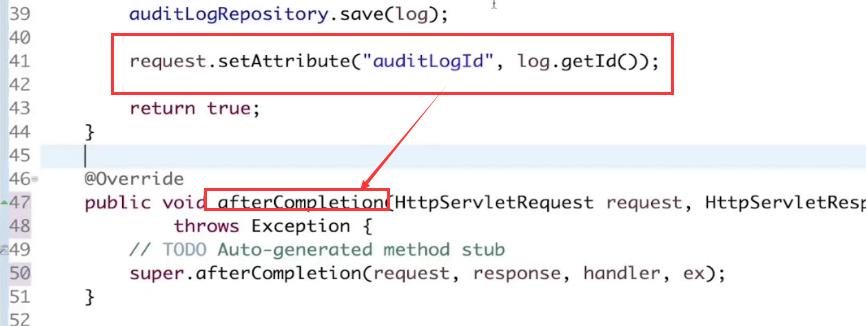
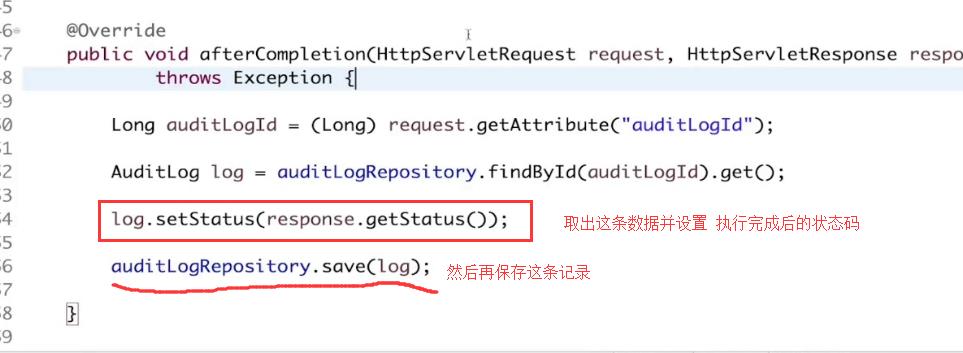
afterCompletion 不管成功还是失败,都会去调用
 、
、
package com.imooc.security.log;

import com.imooc.security.user.User;
import org.springframework.beans.factory.annotation.Autowired;
import org.springframework.web.servlet.ModelAndView;
import org.springframework.web.servlet.handler.HandlerInterceptorAdapter;

import javax.servlet.http.HttpServletRequest;
import javax.servlet.http.HttpServletResponse;
import java.util.Optional;

public class AuditLogInterceptor extends HandlerInterceptorAdapter {

    @Autowired
    private AuditLogRepository auditLogRepository;
    @Override
    public boolean preHandle(HttpServletRequest request, HttpServletResponse response, Object handler) throws Exception {
        AuditLog log=new AuditLog();
        log.setMethod(request.getMethod());
        log.setPath(request.getRequestURI());

        User user=(User)request.getAttribute("user");
        if(user!=null){
            log.setUsername(user.getUsername());
        }
        auditLogRepository.save(log);
        //下面要用 所以这里加一个attribute的属性
        request.setAttribute("auditLogId",log.getId());
        return true;
    }

    @Override
    public void afterCompletion(HttpServletRequest request, HttpServletResponse response, Object handler, Exception ex) throws Exception {
        Long auditLogId = (Long) request.getAttribute("auditLogId");

        AuditLog log = auditLogRepository.findById(auditLogId).get();
        log.setStatus(response.getStatus());
        auditLogRepository.save(log);

    }
}
让拦截器作用,还需做一些配置
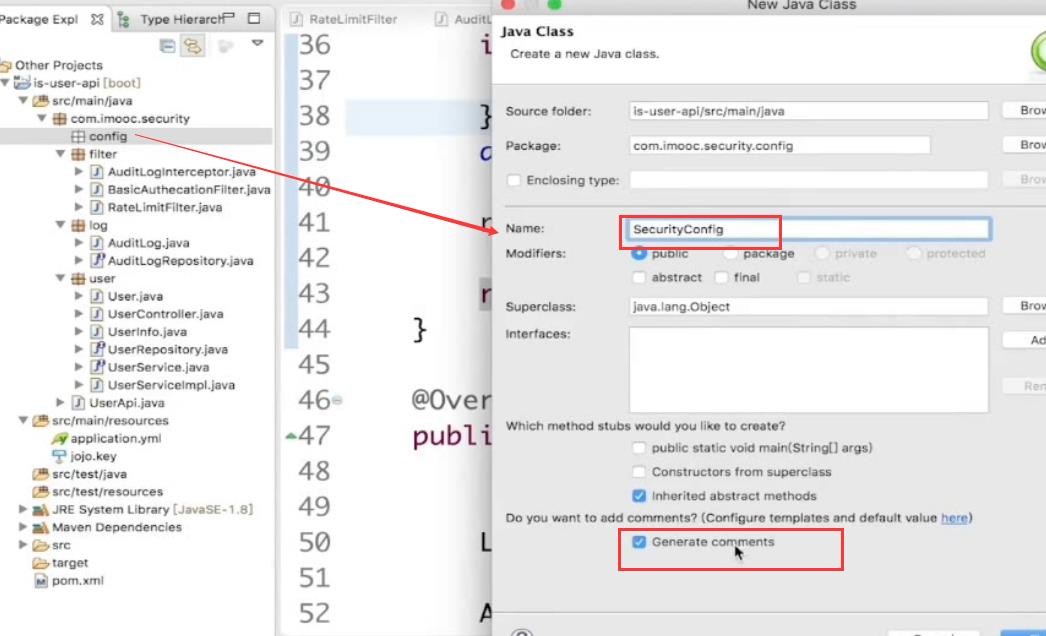
要实现接口WebMvcConfigurer
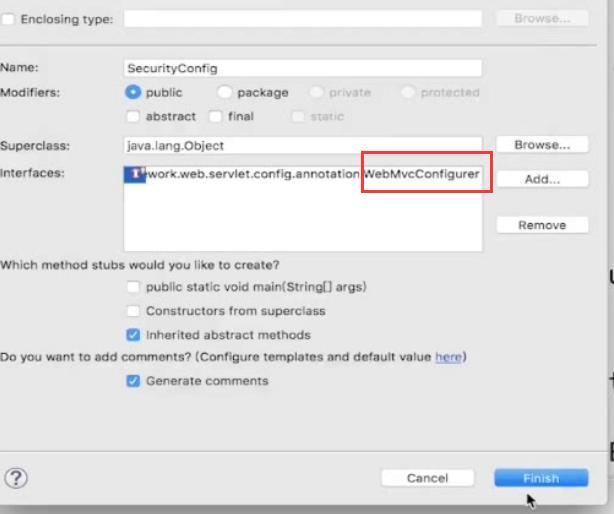
注入auditLogInterceptor,然后加入到Spring里面。 拦截去是根据添加的来执行的 先add的就先执行。
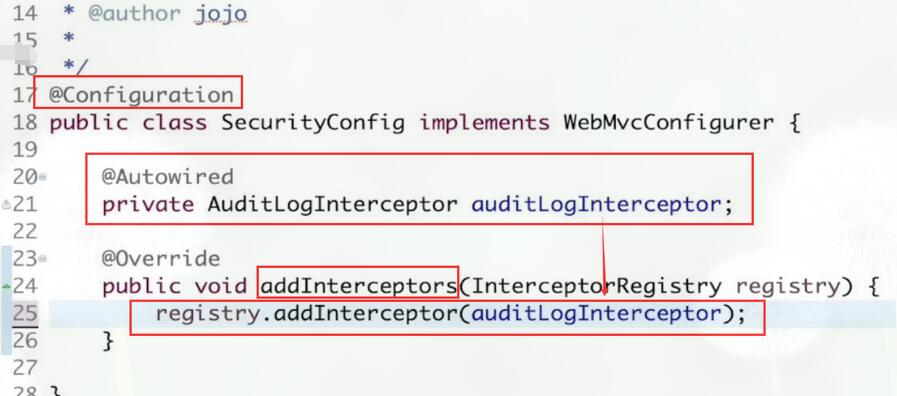
还可以指定拦截器,只针对某些请求有效。这里我们不配置的话就是针对所有的请求,都走这个拦截器。

JPA有一个自动支持审计的功能

这个是个总开关,把JPA的审计打开。@EnableJpaAuditing
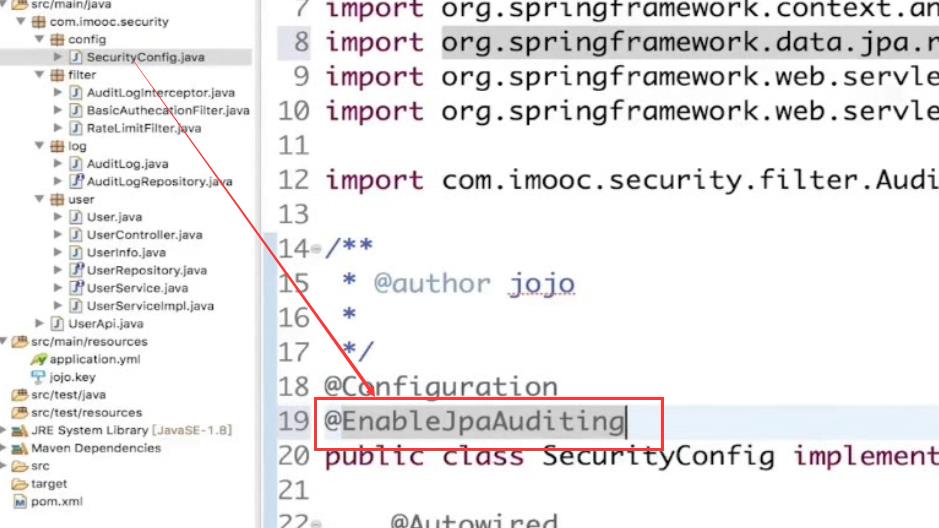
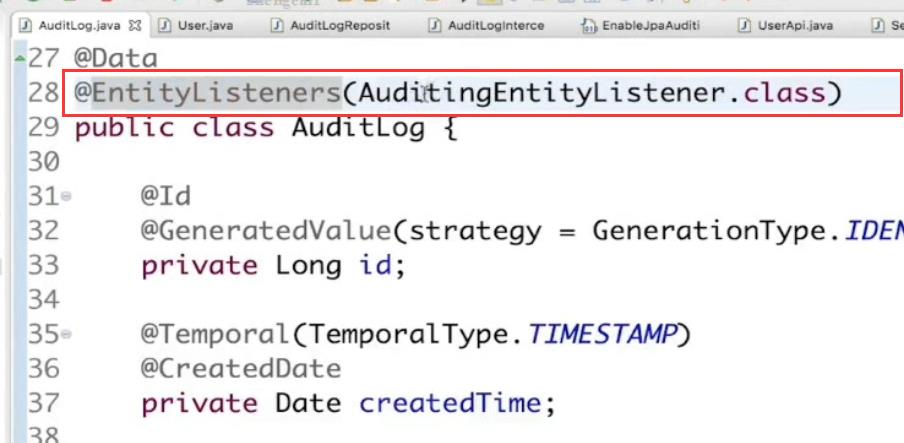
然后在需要做审计的类上面加上注解@EntityListeners(AuditingEntityListener.class) 把兼容器注入进来。
自己遇到的错误
上面报了一堆的错误,


错误都不是很明显,比较明显的错误最下面的这个错误。
Caused by: org.hibernate.AnnotationException: No identifier specified for entity: com.imooc.security.log.AuditLog

百度搜索出来错误。Caused by: org.hibernate.AnnotationException: No identifier specified for entity
No identifier specified for entity:没有给实体设置唯一的标识
实体类没有唯一的标识,说明我们的这个@Id注解没有起作用。@Id不是这个org.springframework.data.annotation.Id包下的。
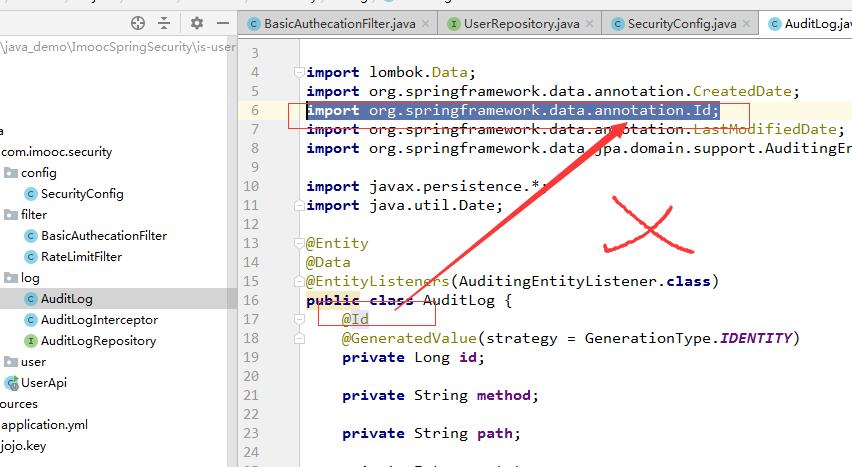
@Id应该是这个包下的 javax.persistence
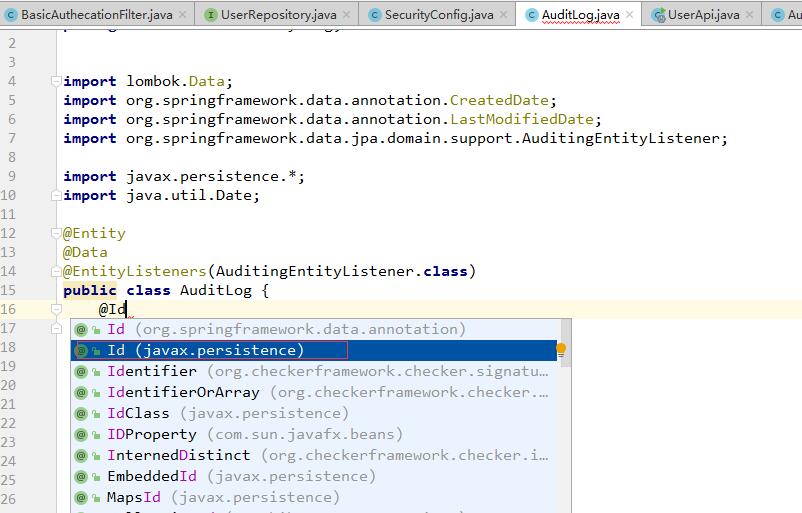
修改完成,顺利启动,。控制台也输出了。创建表的sql语句

Hibernate: create table audit_log (id bigint not null auto_increment, created_time datetime, method varchar(255), modify_time datetime, path varchar(255), status integer, username varchar(255), primary key (id)) engine=InnoDB
数据库内看到创建好的表

运行测试
输出的日志里面,输出了创建表的语句

访问一个id为13的 再访问id为12的。id为12的编号用户在数据库内是不存在的

创建时间和修改时间 都是JPA自动帮我们填上的

错误的请求 id为12的用户在数据库内是不存在的,先保存一个200的记录,又保存了一个500的记录。这是Spring默认的一个处理机制。有了异常后跳到一个error的路径上。错误的页面的状态码是500.这个跳转 实际上是不利于我们分析问题的

处理配置
创建一个ErrorHandler
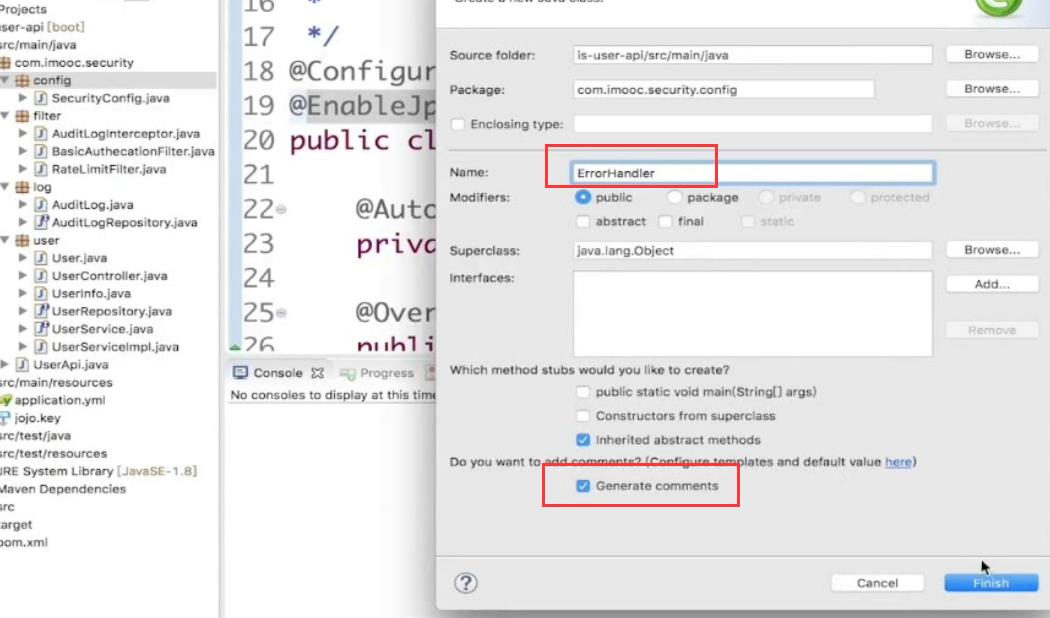
这里我们用到了 Controller的增强。Advice。 由这里来接管我们的错误处理,不再走Spring默认的处理、
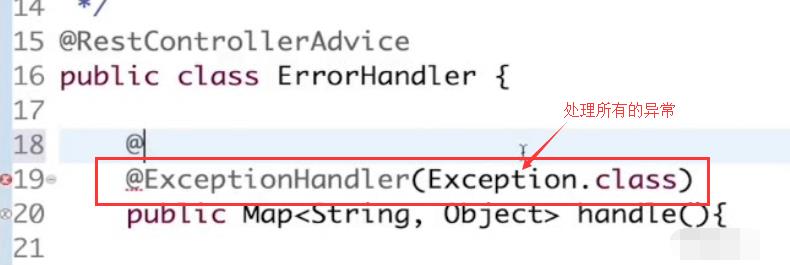
一旦报错就把状态改成500内部服务器错误。

把错误信息和当前时间 返回回去。这样我就有了一个公共的异常处理类。
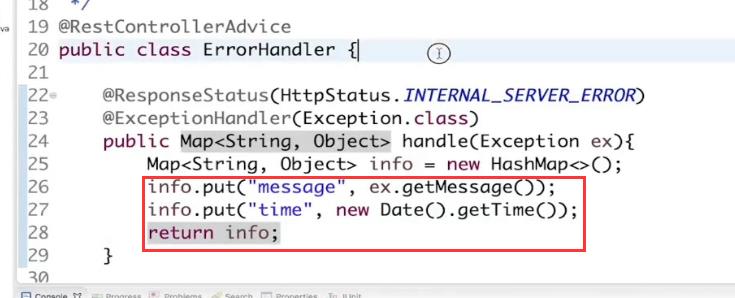
package com.imooc.security.config;

import org.springframework.http.HttpStatus;
import org.springframework.web.bind.annotation.ControllerAdvice;
import org.springframework.web.bind.annotation.ExceptionHandler;
import org.springframework.web.bind.annotation.ResponseStatus;

import java.util.Date;
import java.util.HashMap;
import java.util.Map;

@ControllerAdvice
public class ErrorHandler {

    @ResponseStatus(HttpStatus.INTERNAL_SERVER_ERROR)
    @ExceptionHandler(Exception.class)
    public Map<String,Object> handle(Exception ex){
        Map<String,Object> info=new HashMap<>();
        info.put("message",ex.getMessage());
        info.put("item",new Date().getTime());
        return  info;
    }
}
再次运行程序测试。

这次的信息。,是time和message。这是我们自己在异常类里面定义的两个字段、。

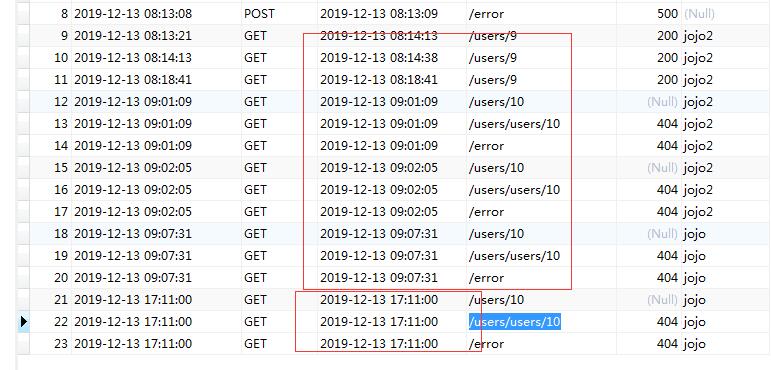
这次把请求错误记录了下来 并且一条记录。

审计-username
审计的时候记录当前用户是谁。
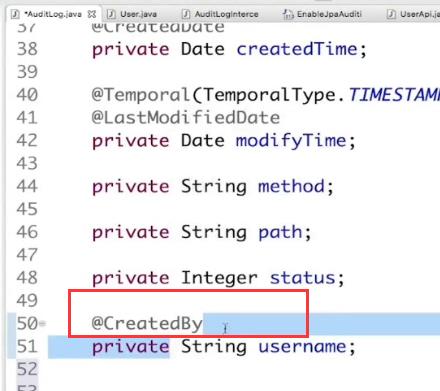
创建人
最后修改人
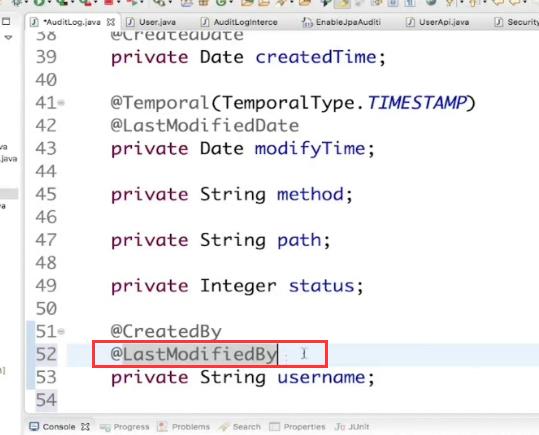
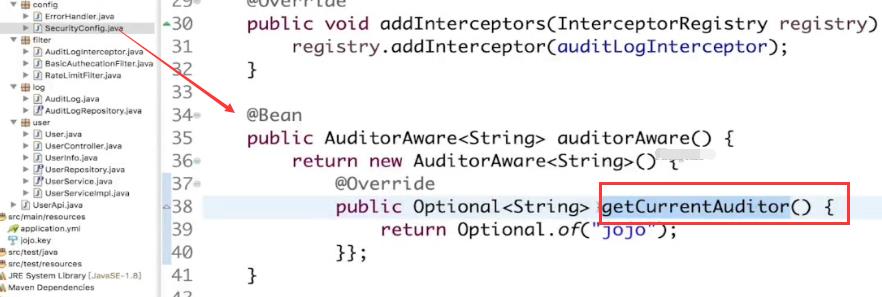
单写一个注解是不够的,还需要一个Bean来帮它知道当前的用户是谁。
用@Bean注解,然后返回一个AuditorAware的泛型 里面是String类型。然后里面写一个匿名的实现。
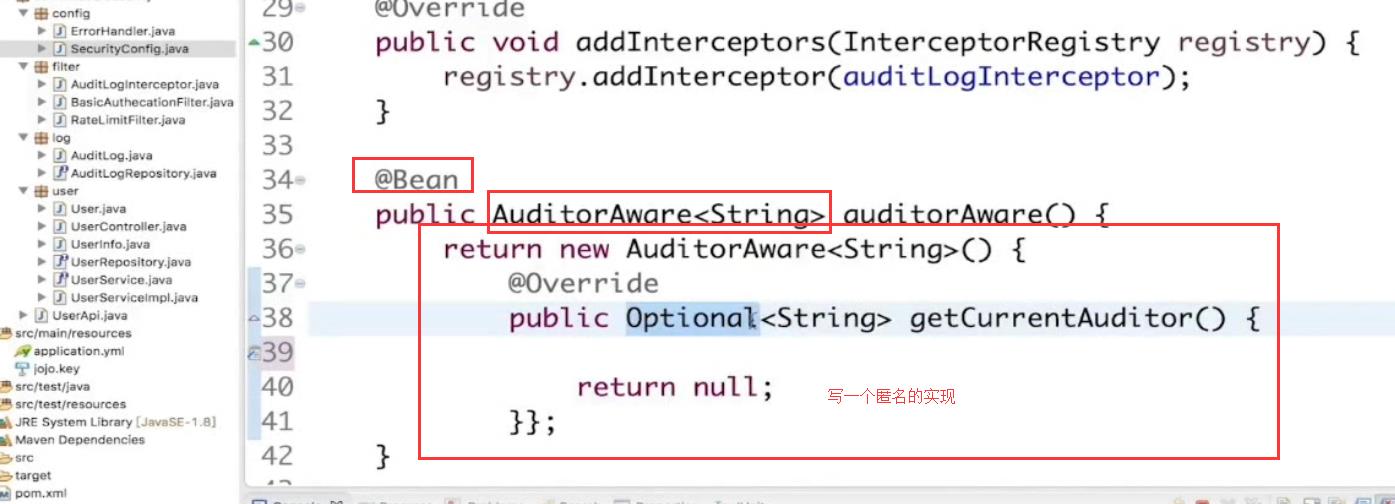
这样就拿到了一个AuditorAware。 日常开发中是把用户信息存储在Redis中的。这里为了简单的实现。
这里方法会告诉JPA当前的用户是谁。用户是谁具体的逻辑要自己去实现。这里只是简单的写死了是jojo

然后过滤器的这段。拿到用户的请求这段代码就不再需要了。
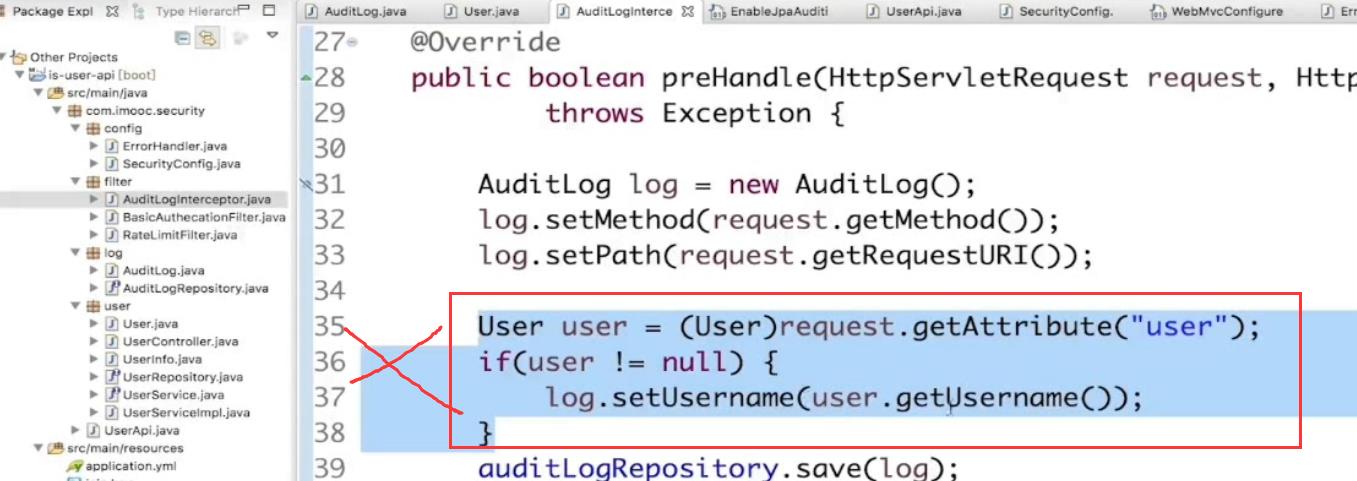
直接save就可以了
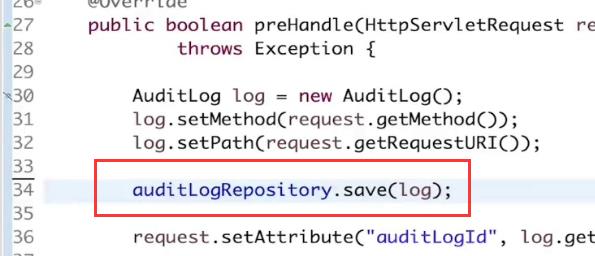
save的时候看到类上有@CreateBy的注解

就会调用这个Bean类的getCurrentAuditor方法,。然后拿到返回来的String。把它设置到username上。
运行测试
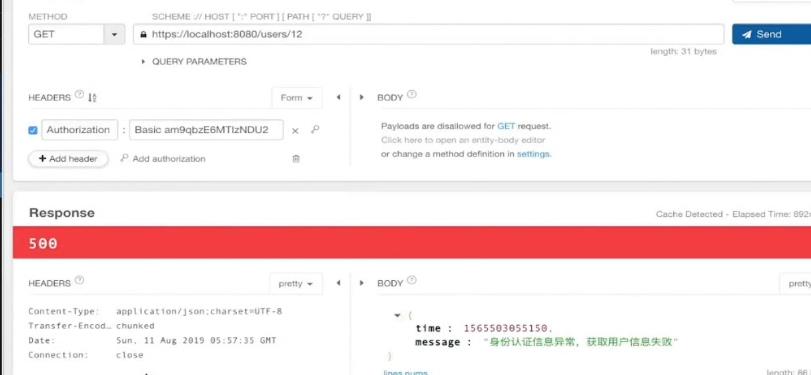
username就是写死的值。

以上就是JPA对审计的支持,。
mysql时间晚8个小时的问题
主要是链接字符串的时区的问题
https://blog.csdn.net/qq784515681/article/details/79658979
结束
以上是关于Spring cloud微服务安全实战-3-9API安全机制之审计日志_batch的主要内容,如果未能解决你的问题,请参考以下文章
Spring Cloud微服务安全实战_6-1_微服务之间的通讯安全之概述
Spring cloud微服务安全实战-4-4 OAuth2协议与微服务安全