3SpringBoot+Mybatis整合------主键回填
Posted 零度微笑
tags:
篇首语:本文由小常识网(cha138.com)小编为大家整理,主要介绍了3SpringBoot+Mybatis整合------主键回填相关的知识,希望对你有一定的参考价值。
开发工具:STS
代码下载链接:https://github.com/theIndoorTrain/SpringBoot_Mybatis01/tree/d68efe51774fc4d96e5c6870786eb3f1a1a5b629
前言:
当我们插入一个一对一、一对多、多对多的关系数据时,往往需要分表插入,那么我们可能需要获取自动生成的主键用于后面的插入操作,因此今天来介绍下mybatis里的主键回填。
一、代码实现:
1.数据操作层接口mapper:

 1 package com.xm.mapper;
 2
 3 import java.util.List;
 4
 5 import com.xm.pojo.Student;
 6
 7 public interface StudentMapper {
 8
 9     /**
10      * 根据id查询
11      * @param id
12      * @return
13      */
14     public Student getById(Integer id);
15
16     /**
17      * 查询全部
18      * @return
19      */
20     public List<Student> list();
21
22     /**
23      * 插入
24      * @param student
25      */
26     public int insert(Student student);
27     /**
28      * 主键回填的插入
29      * @param student
30      * @return
31      */
32     public int insertToId(Student student);
33
34     /**
35      * 根据student的id修改
36      * @param student
37      */
38     public void update(Student student);
39
40     /**
41      * 根据id删除
42      * @param id
43      */
44     public void delete(Integer id);
45
46
47 }
2.关系映射xml:

 1 <?xml version="1.0" encoding="UTF-8" ?>
 2 <!DOCTYPE mapper PUBLIC "-//mybatis.org//DTD Mapper 3.0//EN" "http://mybatis.org/dtd/mybatis-3-mapper.dtd" >
 3 <mapper namespace="com.xm.mapper.StudentMapper">
 4
 5     <!-- 根据id查询 -->
 6     <select id="getById" parameterType="int" resultType="student">
 7     select * from student where id=#{id}
 8     </select>
 9     <!-- 查询所有 -->
10     <select id="list" parameterType="int" resultType="student">
11     select * from student
12     </select>
13
14     <!-- 插入一个学生 -->
15     <insert id="insert" parameterType="student">
16     insert into student(name) values(#{name})
17     </insert>
18     <!-- 主键回填的插入 -->
19     <insert id="insertToId" parameterType="student" useGeneratedKeys="true" keyProperty="id">
20     insert into student(name) values(#{name})
21     </insert>
22
23     <!-- 根据id修改学生信息 -->
24     <update id="update" parameterType="student">
25     update student set name=#{name} where id=#{id}
26     </update>
27
28     <!-- 根据id删除学生 -->
29     <delete id="delete" parameterType="int">
30     delete  from student where id=#{id}
31     </delete>
32 </mapper>
3.测试类:

 1 package com.xm;
 2
 3 import org.junit.Test;
 4 import org.junit.runner.RunWith;
 5 import org.springframework.beans.factory.annotation.Autowired;
 6 import org.springframework.boot.test.context.SpringBootTest;
 7 import org.springframework.test.context.junit4.SpringRunner;
 8
 9 import com.xm.mapper.StudentMapper;
10 import com.xm.pojo.Student;
11
12 @RunWith(SpringRunner.class)
13 @SpringBootTest
14 public class StudentTest {
15     @Autowired
16     private StudentMapper studentMapper;
17
18     @Test
19     public void insertStudent() {
20         Student student = new Student();
21         student.setName("张大萨");
22         int a= studentMapper.insert(student);
23         System.out.println(a);
24         System.out.println(student.getId());
25
26         a= studentMapper.insertToId(student);
27         System.out.println(a);
28         System.out.println(student.getId());
29
30     }
31
32
33 }
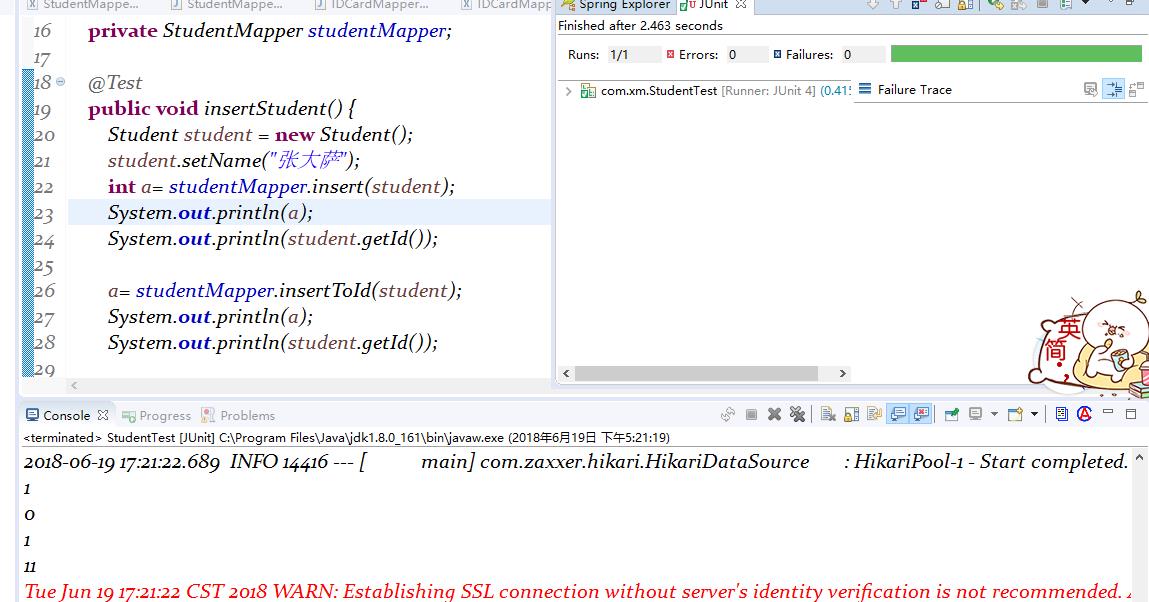
二、测试结果:
主键自动补充到student中,无需另外获取

2018-06-19
以上是关于3SpringBoot+Mybatis整合------主键回填的主要内容,如果未能解决你的问题,请参考以下文章
