springboot入门_ActiveMq
Posted allen-wl
tags:
篇首语:本文由小常识网(cha138.com)小编为大家整理,主要介绍了springboot入门_ActiveMq相关的知识,希望对你有一定的参考价值。
ActiveMq是apache的一个消息队列,在应用程序中主要被用来实现程序的解耦和异步执行,它主要有2中消息模型,一对一的队列模型和一对多的订阅模型,此处我们不做过多的解释了,不清楚的朋友可以去ActiveMq官网了解。本文主要记录下在springboot中使用activemq.
springboot提供了spring-boot-starter-activemq来对activemq做支持,所以在项目中我们需要引入spring-boot-starter-activemq依赖
首先我们创建springboot工程,并添加相应的依赖,pom.xml如下:
 1 <dependencies>
 2       <dependency>
 3         <groupId>org.springframework.boot</groupId>
 4         <artifactId>spring-boot-starter</artifactId>
 5         <version>1.5.10.RELEASE</version>
 6     </dependency>
 7
 8     <dependency>
 9         <groupId>org.springframework.boot</groupId>
10         <artifactId>spring-boot-starter-test</artifactId>
11         <version>1.5.10.RELEASE</version>
12         <scope>test</scope>
13     </dependency>
14
15     <!-- activemq依赖 -->
16     <dependency>
17         <groupId>org.springframework.boot</groupId>
18         <artifactId>spring-boot-starter-activemq</artifactId>
19         <version>1.5.10.RELEASE</version>
20     </dependency>
21
22     <dependency>
23       <groupId>junit</groupId>
24       <artifactId>junit</artifactId>
25       <version>4.12</version>
26       <scope>test</scope>
27     </dependency>
28   </dependencies>
下来我们需要和ActiveMq服务其进行连接,在application.properties添加MQ服务器配置信息,如下:
1 spring.activemq.broker-url=tcp://192.168.1.109:61616
2 spring.activemq.user=admin
3 spring.activemq.password=admin
4
5 # 消息类型 默认值为false,  false:queue true:topic
6 #spring.jms.pub-sub-domain=true
下来就是发送和接收消息了,springboot提供了JmsTemplate供我们发送消息,
 1 @Service
 2 public class CustomJmsTemplate {
 3
 4     @Autowired
 5     private JmsTemplate jmsTemplate;
 6
 7     private int count = 0;
 8
 9     /**
10      * 发送队列消息
11      * @param destinationName 队列名称
12      * @param content 消息内容
13      */
14     public void sendQueueMessage(String destinationName, String content){
15         jmsTemplate.convertAndSend(destinationName, content);
16     }
17
18     @JmsListener(destination = "active_mq")
19     public void processMessage(String content) {
20         count++;
21         System.out.println("队列消费者1 接收到第   "+count+" 个消息,内容:"+content);
22     }
23
24 }
使用jmsTemplate的convertAndSend方法我们可以向指定队列发送消息,消息接收放可以使用监听器@JmsListener(destination = "active_mq") 对指定队列(destination )进行监听,有消息时进行处理,至此我们就完成了发送和接收消息。写个测试方法测试消息的发送和接收
 1 @RunWith(SpringRunner.class)
 2 @SpringBootTest
 3 public class CustomJmsTemplateTest {
 4
 5     @Autowired
 6     private CustomJmsTemplate customJmsTemplate;
 7
 8     @Test
 9     public void sendQueueMessageTest() throws InterruptedException{
10         for(int i=0;i<10;i++){
11             String text = "测试使用activemq发送第"+i+"消息";
12             System.out.println(text);
13             customJmsTemplate.sendQueueMessage("active_mq", text);
14             Thread.sleep(2000);//发送后暂停2秒以便观察消费者接收消息
15         }
16     }
17
18 }
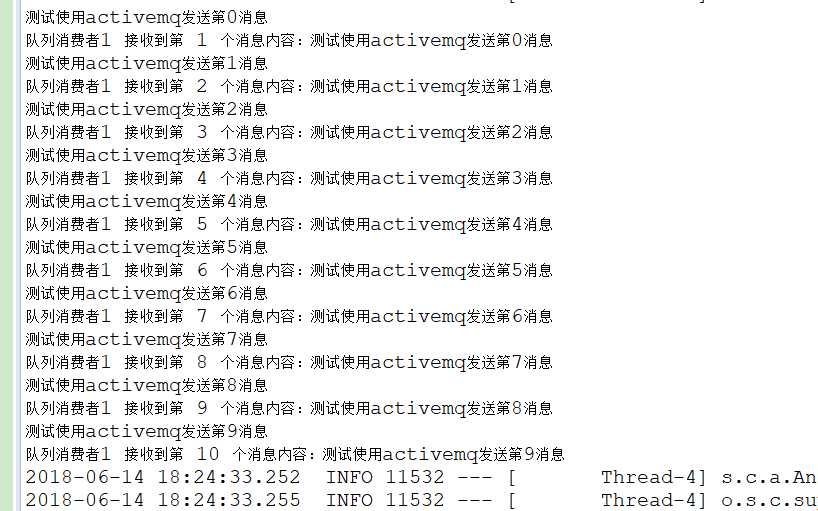
执行测试方法后可以看到执行结果

这样我们就实现了发送一对一的队列消息,如果我们想发送一对多的订阅消息怎么办呢?我们需要将配置文件中的spring.jms.pub-sub-domain设置为true,用来说明当前发送的是订阅消息,默认值为false,代表是队列消息。spring.jms.pub-sub-domain=true,队列消息只能有一个消费者,订阅消息可以有多个消费者,写个方法发送订阅消息:
/**
     * 发送订阅消息
     * @param destinationName 消息目标地址
     * @param message 消息内容
     */
    public void sendTopicMessage(String destinationName, String message){
        jmsTemplate.convertAndSend(destinationName, message);
    }
多个订阅消息的消费者,即多个监听器同时监听一个消息
1 @JmsListener(destination = "active_mq_topic")
2     public void processMessage1(String content) {
3         System.out.println("消费者1 接收到消息内容:"+content);
4     }
5
6     @JmsListener(destination = "active_mq_topic")
7     public void processMessage2(String content) {
8         System.out.println("消费者2 接收到消息内容:"+content);
9     }
测试发送topic消息
1 @Test
2     public void sendTopicMessageTest() throws InterruptedException{
3         for(int i=0;i<10;i++){
4             String text = "发送第"+i+"个topic消息";
5             System.out.println(text);
6             customJmsTemplate.sendTopicMessage("active_mq_topic", text);
7             Thread.sleep(2000);//发送后暂停2秒以便观察消费者接收消息
8         }
9     }
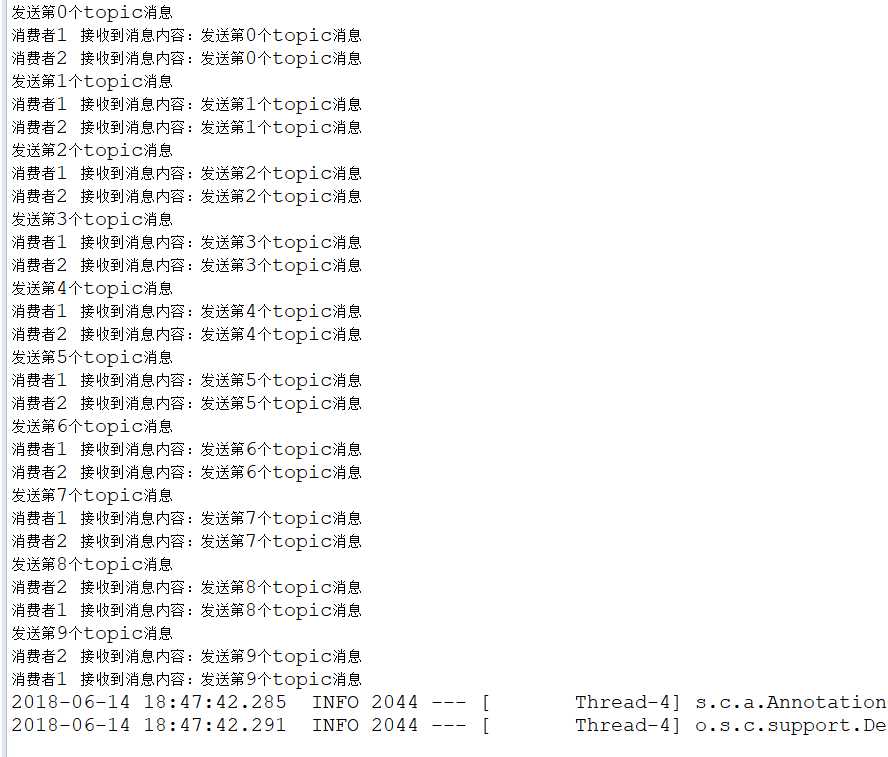
执行测试方法后可以看到,每一个消费者都接收到了消息

现在我们分别实现了发送一对一的队列消息和一对多的订阅消息,在发送不同模式的消息时,我们修改了spring.jms.pub-sub-domain的值,但是在项目中这个都是固定的,在项目启动时都已经确定了,不会被更改,而一般我们在项目中会同时用到两种不同模式的消息,所以接下来的问题就是如何来兼容这两种模式的消息呢,研究了半天,在网上也找了些资料都没有能实现。后期有时间再继续研究这个,如果哪位朋友有实现的方案或者思路,麻烦留言指导下。
以上是关于springboot入门_ActiveMq的主要内容,如果未能解决你的问题,请参考以下文章