Spring 中的接口知识整理
Posted Mr.袋鼠
tags:
篇首语:本文由小常识网(cha138.com)小编为大家整理,主要介绍了Spring 中的接口知识整理相关的知识,希望对你有一定的参考价值。
本想每个小知识一篇随笔,但是那样,看起来有些单薄,所以,就放在一片文章里了。而且,以后还会慢慢在最后不断的追加。
目录:
FactoryBean
BeanPostProcessor
1.FactoryBean
FactoryBean接口,它在Spring框架源码内部,被大量使用,如使用AOP创建bean的代理时,使用了ProxyFactoryBean;从JNDI中查找对象时,使用了JndiObjectFactoryBean。
它在框架外,很少使用。但是为了学习,也得研究研究,您说是不?
它怎么使用?首先看看构造。
1 public interface FactoryBean<T> {

 // 返回的是这个工厂管理的对象的实例
2 T getObject() throws Exception;
3
 // 返回的是工厂创建的对象的类型
4 Class<?> getObjectType();
5
6 boolean isSingleton();
7
8 }
上个例子,看具体东西。
 1 public class Tool {
 2
 3
 4     private int id;
 5     public Tool(int id) {
 6         this.id = id;
 7     }
 8     public int getId() {
 9         return id;
10     }
11
12     public void setId(int id) {
13         this.id = id;
14     }
15 }
 1 public class ToolFactory implements FactoryBean<Tool> {
 2
 3     private int factoryId;
 4     private int toolId;
 5
    // 创建的是Tool的对象
 6     @Override
 7     public Tool getObject() throws Exception {
 8         return new Tool(toolId);
 9     }
10
11     @Override
12     public Class<?> getObjectType() {
13         return Tool.class;
14     }
15
16     @Override
17     public boolean isSingleton() {
18         return false;
19     }
20
21     public int getFactoryId() {
22         return factoryId;
23     }
24
25     public int getToolId() {
26         return toolId;
27     }
28
29     public void setFactoryId(int factoryId) {
30         this.factoryId = factoryId;
31     }
32
33     public void setToolId(int toolId) {
34         this.toolId = toolId;
35     }
36
37 }
 1 public class Test {
 2
 3     public static void main(String[] args) {
 4         @SuppressWarnings("resource")
 5         ApplicationContext context = new ClassPathXmlApplicationContext("beaFactoryTest.xml");
 6         Tool tool = (Tool) context.getBean("tool");
       // 在名字前面加 & 表示要得到工厂类的bean
 7         ToolFactory tool2 = (ToolFactory) context.getBean("&tool");
 8         System.out.println("Tool Id is " + tool.getId());
 9         System.out.println("ToolFactory Id is " + tool2.getFactoryId());
10
11     }
12 }
1     <bean id="tool" class="com.lee.demo.beanfactory.ToolFactory">
2         <property name="factoryId" value="9090"/>
3         <property name="toolId" value="108"/>
4     </bean>
最后执行结果:
Tool Id is 108
ToolFactory Id is 9090
2.BeanPostProcessor
它叫bean后处理器,也就是处理bean,它针对所有的bean,在初始化前后,对bean进行操作。主要内容我会在例子中描述。
例子:
 1 public class HelloWorld {
 2     private String message;
 3
 4     public void setMessage(String message) {
 5         this.message = message;
 6     }
 7
 8     public void getMessage() {
 9         System.out.println("Your Message : " + message);
10     }
11

       // 加上init方法和destory方法,是为了在后面验证他们和postProcessBeforeInitialization  postProcessAfterInitialization 执行的先后顺序
12     public void init() {
13         System.out.println("Bean is going through init.");
14     }
15
16     public void destroy() {
17         System.out.println("Bean will destroy now.");
18     }
19 }
 1 public class InitHelloWorld implements BeanPostProcessor {
 2
    // BeanPostProcessor 接口中主要是下面两个方法 初始化前的后处理 初始化后的后处理
 3     @Override
 4     public Object postProcessBeforeInitialization(Object bean, String beanName) throws BeansException {
 5
 6         System.out.println("BeforeInitialization : " + beanName);
 7         return bean; // you can return any other object as well
 8     }
 9
10     @Override
11     public Object postProcessAfterInitialization(Object bean, String beanName) throws BeansException {
12
13         System.out.println("AfterInitialization : " + beanName);
14         return bean; // you can return any other object as well
15     }
16
17 }
Test.java
 1 public class Test {
 2
 3     public static void main(String[] args) {
 4         @SuppressWarnings("resource")
 5         AbstractApplicationContext  context = new ClassPathXmlApplicationContext("beaFactoryTest.xml");
 6         HelloWorld obj = (HelloWorld) context.getBean("helloWorld");
 7         obj.getMessage();
       // 注册钩子方法
 8         context.registerShutdownHook();
 9     }
10 }
查看源码:
 1 @Override
    // 在JVM运行期间,注册一个钩子关闭方法,关闭掉这个context。实际的关闭程序的操作,被代理给doClose方法。
 2     public void registerShutdownHook() {
 3         if (this.shutdownHook == null) {
 4             // No shutdown hook registered yet.
 5             this.shutdownHook = new Thread() {
 6                 @Override
 7                 public void run() {
 8                     doClose();
 9                 }
10             };
11             Runtime.getRuntime().addShutdownHook(this.shutdownHook);
12         }
13     }
xml文件
1     <bean id = "helloWorld" class = "com.lee.demo.beanfactory.HelloWorld"
2       init-method = "init" destroy-method = "destroy">
3       <property name = "message" value = "Hello World!"/>
4    </bean>
5
6    <bean class = "com.lee.demo.beanfactory.InitHelloWorld" />
执行结果:
1 BeforeInitialization : helloWorld
2 Bean is going through init.
3 AfterInitialization : helloWorld
4 Your Message : Hello World!
5 [org.springframework.context.support.ClassPathXmlApplicationContext] - Closing org.springframework.context.support.ClassPathXmlApplicationContext@6ae40994: startup date [Thu May 17 23:31:53 JST 2018]; root of context hierarchy
6 Bean will destroy now.
在这里大致说一下Spring的实例化过程:
实例化Bean对象→设置对象属性→检查Aware相关接口并设置相关依赖→BeanPostProcessor前置处理→检查是否是InitializingBean以决定是否调用afterPropertiesSet方法→
检查是否配置有自定义的init-method方法→BeanPostProcessor后置处理→是否实现DisposableBean接口→是否配置有自定义的destroy方法
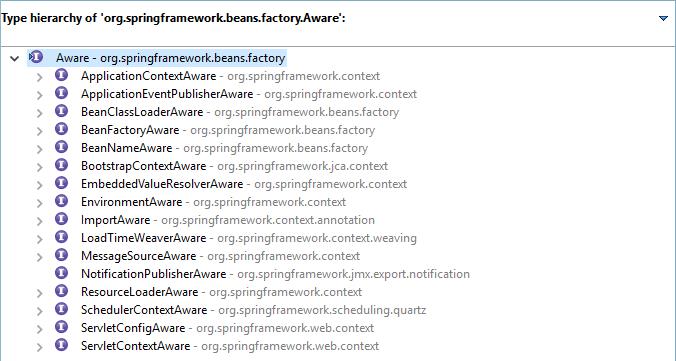
3.Aware接口
它是干什么用的呢?作用就是通过上下文(Context)可以获得当前环境。看看它的接口:
我们拿BeanNameAware来举个例子。
 1 public class User implements GetNameAware {
 2
 3     private String id;
 4     private String name;
 5     private String address;
 6     @Override
 7     public void setBeanName(String name) {
 8         this.id = name;
 9     }
10     public String getId() {
11         return id;
12     }
13     public String getName() {
14         return name;
15     }
16     public String getAddress() {
17         return address;
18     }
19     public void setId(String id) {
20         this.id = id;
21     }
22     public void setName(String name) {
23         this.name = name;
24     }
25     public void setAddress(String address) {
26         this.address = address;
27     }
28
29 }
 1 public class User2 {
 2
 3     private String id;
 4     private String name;
 5     private String address;
 6     public String getId() {
 7         return id;
 8     }
 9     public String getName() {
10         return name;
11     }
12     public String getAddress() {
13         return address;
14     }
15     public void setId(String id) {
16         this.id = id;
17     }
18     public void setName(String name) {
19         this.name = name;
20     }
21     public void setAddress(String address) {
22         this.address = address;
23     }
24
25 }
1 public interface GetNameAware extends BeanNameAware {
2
3
4 }
 1 public class Test {
 2     public static void main(String[] args) {
 3         ApplicationContext ctx = new ClassPathXmlApplicationContext("beaFactoryTest.xml");
 4         User user = (User) ctx.getBean("user1");
 5         User2 user2 = (User2) ctx.getBean("user2");
 6         System.out.println("user id " + user.getId() + " user name " + user.getName() + " user address " + user.getAddress());
 7         System.out.println("========================================");
 8         System.out.println("user2 id " + user2.getId() + " user2 name " + user2.getName() + " user2 address " + user2.getAddress());
 9     }
10 }
1     <bean id="user1" class="com.lee.demo.aware.User">
2         <property name="name" value="lee"/>
3         <property name="address" value="China"/>
4     </bean>
5
6     <bean id="user2" class="com.lee.demo.aware.User2">
7         <property name="name" value="lin"/>
8         <property name="address" value="Tokyo"/>
9     </bean>
执行结果(user id 因为继承了GetNameAware接口,对BeanName进行了设置):
1 user id user1 user name lee user address China
2 ========================================
3 user2 id null user2 name lin user2 address Tokyo
以上是关于Spring 中的接口知识整理的主要内容,如果未能解决你的问题,请参考以下文章