spring boot + vue + element-ui全栈开发入门——基于Electron桌面应用开发
Posted 刘冬的博客
tags:
篇首语:本文由小常识网(cha138.com)小编为大家整理,主要介绍了spring boot + vue + element-ui全栈开发入门——基于Electron桌面应用开发相关的知识,希望对你有一定的参考价值。
前言
Electron是由Github开发,用html,CSS和javascript来构建跨平台桌面应用程序的一个开源库。 Electron通过将Chromium和Node.js合并到同一个运行时环境中,并将其打包为Mac,Windows和Linux系统下的应用来实现这一目的。
Electron于2013年作为构建Github上可编程的文本编辑器Atom的框架而被开发出来。这两个项目在2014春季开源。
目前它已成为开源开发者、初创企业和老牌公司常用的开发工具。 看看谁在使用Electron 。
继续往下阅读可以了解Electron的贡献者们和已经发布的版本,或者直接阅读快速开始指引来开始用Electron来构建应用。
(摘抄至electronjs.org)
一、初始化项目
运行,vue init simulatedgreg/electron-vue 项目名称
vue init simulatedgreg/electron-vue admin
这里的项目名称是“admin”
如果没有安装vue脚手架,请查看《spring boot + vue + element-ui全栈开发入门——windows开发环境》
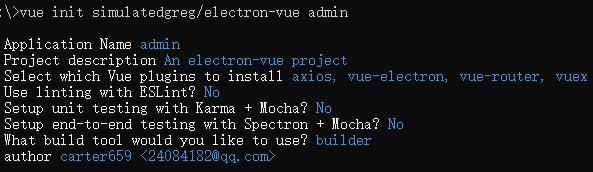
一路回车
然后运行npm install来安装依赖,运行方式和之前一样。
如果遇到run dev或者run build的时候出错,可能是因为国内的网络下载“electron-v1.8.3-win32-x64.zip”出错,这时,你需要设置npm的代理:
npm config set proxy http://服务器IP或域名:端口号
npm config set https-proxy http://服务器IP或域名:端口号
如果需要用户名密码:
npm config set proxy http://用户名:密码@服务器IP或域名:端口号
npm config set https-proxy http://用户名:密码@服务器IP或域名:端口号
设置回原库
npm config set registry http://registry.npmjs.org
关闭代理
npm config delete proxy
npm config delete https-prox
也可以使用yarn。
npm install -g yarn
安装依赖、开发模式运行和编程的命令分别是:
yarn install
yarn run dev
yarn run build
项目构建完毕后,结构如下图所示:

和之前项目区别是,main是用于桌面程序的代码,render是用于渲染的代码。我们只需要在render文件夹里写代码就可以。
开发模式运行:
npm run dev

二、代码编写
参照《spring boot + vue + element-ui全栈开发入门——集成element-ui》安装所需的依赖
cnpm install --save element-ui
cnpm install --save-dev node-sass
cnpm install --save-dev sass-loader
cnpm install --save font-awesome
参照《spring boot + vue + element-ui全栈开发入门——前端列表页面开发》的代码如下:
入口文件:


import Vue from \'vue\'
import axios from \'axios\'

import App from \'./App\'
import router from \'./router\'
import store from \'./store\'

if (!process.env.IS_WEB) Vue.use(require(\'vue-electron\'))

Vue.http = Vue.prototype.$http = axios
axios.defaults.baseURL = \'http://localhost:18080\'

Vue.config.productionTip = false

import \'font-awesome/css/font-awesome.min.css\'

import ElementUI from \'element-ui\'
//原始风格
// import \'element-ui/lib/theme-chalk/index.css\'
//自定义风格
import \'./assets/theme/element-#09345f/index.css\'
Vue.use(ElementUI)

/* eslint-disable no-new */
new Vue({
  components: {
    App
  },
  router,
  store,
  template: \'<App/>\'
}).$mount(\'#app\')
其中 axios.defaults.baseURL = \'http://localhost:18080\' 是设置后端项目URL,而这可以根据具体情况写到配置文件中,开发环境调用开发环境的配置,生产环境调用生产环境配置。
路由文件:
import Vue from \'vue\'
import Router from \'vue-router\'

Vue.use(Router)

import Main from \'@/pages/Main\'
import Dashboard from \'@/pages/Dashboard\'

import Member from \'@/pages/Member\'

// let routes = [
//   {
//     path: \'/\',
//     name: \'landing-page\',
//     component: require(\'@/components/LandingPage\').default
//   },
//   {
//     path: \'*\',
//     redirect: \'/\'
//   }
// ]

let routes = [{
  path: \'/\',
  component: Main,
  hidden: true,
  children: [{
    path: \'/\',
    component: Dashboard,
    name: \'首页\'
  }]
}]

routes.push({
  path: \'/member\',
  name: \'会员管理\',
  component: Main,
  iconCls: \'fa fa-user-circle-o\',
  children: [{
    path: \'/member/data\',
    component: Member,
    name: \'会员信息管理\'
  }]
})

const router = new Router({
  routes: routes
})

export default router
主页面:
<template>
<section>
  <el-container class="container">
    <!--左边-->
    <el-aside :width="collapsed? \'75px\' : \'280px\' ">
      <el-container>
        <el-header>
          <span class="menu-button" v-if="collapsed" @click.prevent="collapsed=!collapsed">
            <i class="fa fa-align-justify"></i>
          </span>
          <span v-else class="system-name">{{systemName}}</span>
        </el-header>
        <el-main>
          <el-menu :default-active="$route.path" :collapse="collapsed" :style="{\'height\':menuHeight}">
            <template v-for="(item,index) in menus">
              <el-submenu :index="index+\'\'" v-if="!item.leaf">
                <template slot="title"><i :class="item.iconCls"></i><span v-if="!collapsed">{{item.name}}</span></template>
            <el-menu-item v-for="child in item.children" :index="child.path" :key="child.path" @click="$router.push(child.path)">{{child.name}}</el-menu-item>
            </el-submenu>
            <el-menu-item v-if="item.leaf&&item.children.length>0" :index="item.children[0].path"><i :class="item.iconCls"></i>{{item.children[0].name}}</el-menu-item>
            </template>
          </el-menu>
        </el-main>
      </el-container>
    </el-aside>
    <!--内容-->
    <el-container>
      <!--页眉-->
      <el-header class="header">
        <el-row>
          <el-col :span="18" class="header-title">
            <span v-if="collapsed" class="system-name">{{systemName}}</span>
            <span v-else class="menu-button" @click.prevent="collapsed=!collapsed">
              <i class="fa fa-align-justify"></i>
            </span>
          </el-col>
          <el-col :span="6"><span class="el-dropdown-link userinfo-inner">你好:{{userName}}</span></el-col>
        </el-row>
      </el-header>
      <!--中间-->
      <el-main class="main">
        <transition name="fade" mode="out-in">
          <router-view></router-view>
        </transition>
      </el-main>
    </el-container>
  </el-container>
</section>
</template>

<script>
let data = () => {
  return {
    collapsed: false,
    systemName: \'后台管理\',
    userName: \'系统管理员\',
    menuHeight: \'100%\',
    menus: []
  }
}

let initMenu = function() {
  for (let i in this.$router.options.routes) {
    let root = this.$router.options.routes[i]
    if (root.hidden)
      continue
    let children = []
    for (let j in root.children) {
      let item = root.children[j]
      if (item.hidden)
        continue
      children.push(item)
    }

    if (children.length < 1)
      continue

    this.menus.push(root)
    root.children = children
  }
}

let initHeight = function() {
  this.menuHeight = (document.documentElement.clientHeight - 60) + \'px\'
}


export default {
  data: data,
  methods: {
    initMenu,
    //初始化高度
    initHeight
  },
  mounted: function() {
    this.initHeight()
    window.addEventListener(\'resize\', this.initHeight)
    this.initMenu()
  }
}
</script>

<style scoped="scoped"
  lang="scss">
$width: 100%;
$height: 100%;
$background-color: #09345f;
$header-color: #fff;
$header-height: 60px;

.container {
    position: absolute;
    top: 0;
    bottom: 0;
    width: 100%;
    .el-aside {
        .el-header {
            line-height: $header-height;
            background-color: $background-color;
            color: $header-color;
            text-align: center;
        }
        .el-container {
            height: $height;
            .el-main {
                padding: 0;
            }
        }
    }

    .main {
        width: $width;
        height: $height;
    }

    .menu-button {
        width: 14px;
        cursor: pointer;
    }

    .userinfo-inner {
        cursor: pointer;
    }

    .el-menu {
        height: $height;
    }

    .header {
        background-color: $background-color;
        color: $header-color;
        text-align: center;
        line-height: $header-height;
        padding: 0;

        .header-title {
            text-align: left;
            span {
                padding: 0 20px;
            }
        }
    }

    .system-name {
        font-size: large;
        font-weight: bold;
    }
}
</style>
会员数据列表页面:
<template>
<section>
  <!--工具条-->
  <el-col :span="24" class="toolbar" style="padding-bottom: 0px;">
    <el-form :inline="true" :model="filters">
      <el-form-item>
        <el-input v-model="filters.query" placeholder="姓名/手机号等条件" />
      </el-form-item>
      <el-form-item>
        <el-button type="primary" v-on:click="handleQuery" icon="el-icon-search">查询</el-button>
      </el-form-item>
      <el-form-item>
        <el-button type="primary" v-on:click="handleAdd" icon="el-icon-plus">添加</el-button>
      </el-form-item>
    </el-form>
  </el-col>
  <el-table :data="rows" style="width: 100%;overflow: auto;" :height="clientHeight" stripe border highlight-current-row v-loading="pageLoading">
    <el-table-column label="注册日期" width="180">
      <template slot-scope="scope">
       <i class="el-icon-time"></i>
       <span style="margin-left: 10px">{{ scope.row.date }}</span>
     </template>
    </el-table-column>
    <el-table-column label="姓名" width="180" :show-overflow-tooltip="true">
      <template slot-scope="scope">
       <el-popover trigger="hover" placement="top">
         <p>姓名: {{ scope.row.name }}</p>
         <p>住址: {{ scope.row.address }}</p>
         <div slot="reference" class="name-wrapper">
           <el-tag size="medium">{{ scope.row.name }}</el-tag>
         </div>
       </el-popover>
     </template>
    </el-table-column>
    <el-table-column prop="sex" label="性别" width="100" align="center" :show-overflow-tooltip="true">
      <template slot-scope="scope">
        {{scope.row.sex===1?\'男\':\'女\'}}
      </template>
    </el-table-column>
    <el-table-column label="操作">
      <template slot-scope="scope">
       <el-button
         size="mini"
         type="primary"
         @click="handleEdit(scope.$index, scope.row)"><i class="el-icon-edit"></i>编辑</el-button>
       <el-button
         size="mini"
         type="danger"
         @click="handleDelete(scope.$index, scope.row)"><i class="el-icon-delete"></i>删除</el-button>
     </template>
    </el-table-column>
  </el-table>
  <!--底部-->
  <el-col :span="24" class="toolbar">
    <el-pagination layout="prev, pager, next" @current-change="handleCurrentChange" :page-size="20" :total="total" style="float:right;">
    </el-pagination>
  </el-col>

  <!--对话框-->
  <el-dialog :title="form && form.id ? \'编辑\' : \'新增\' " :visible.sync="formVisible" :clo以上是关于spring boot + vue + element-ui全栈开发入门——基于Electron桌面应用开发的主要内容,如果未能解决你的问题,请参考以下文章