Unity-ROS与Navigation 2
Posted 敢敢のwings
tags:
篇首语:本文由小常识网(cha138.com)小编为大家整理,主要介绍了Unity-ROS与Navigation 2相关的知识,希望对你有一定的参考价值。
0. 简介
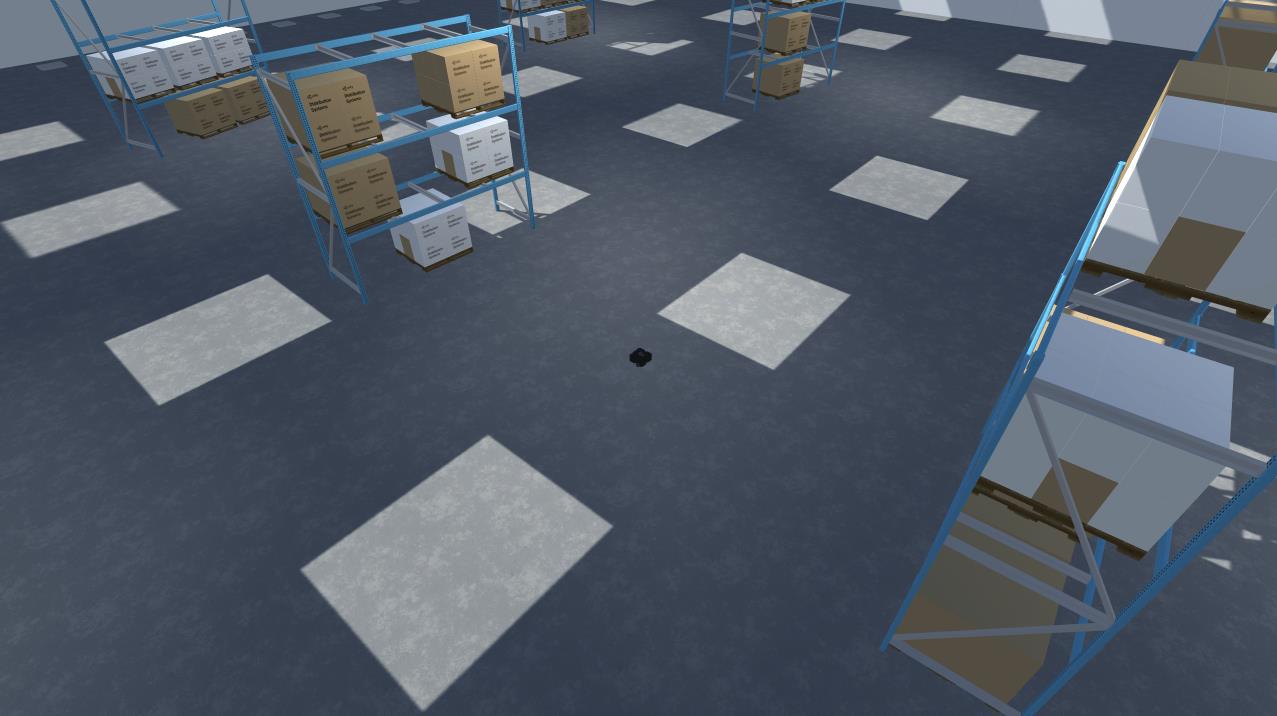
对于Gazebo而言,我们知道其是可以通过与ROS的连接完成机器人建图导航的,那我们是否可以通过Unity来完成相同的工作呢,答案是肯定的。这一讲我们就来讲述使用Unity的“Turtlebot3”模拟环境,来运行ROS2中的“Navigation 2”以及“slam_toolbox”。
1. 代码编译
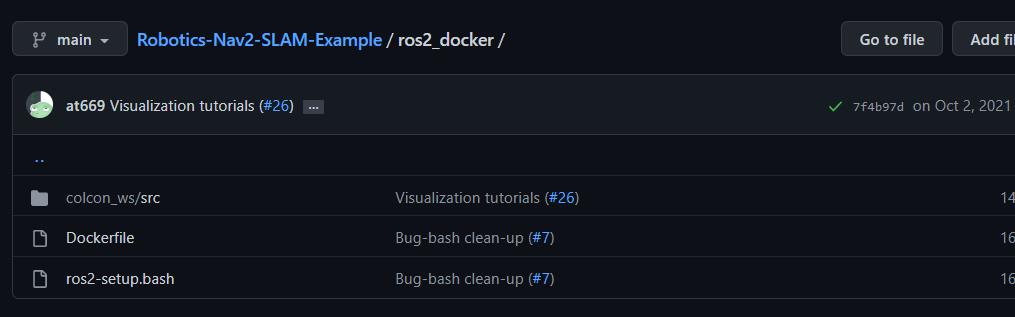
安装步骤如下所示,首先先下载“Navigation 2 SLAM Example Demo”仓库
git clone --recurse-submodule git@github.com:Unity-Technologies/Robotics-Nav2-SLAM-Example.git
然后确保在Unity的版本以及开发包都已经安装完成,并在2020.2版本以后的Unity中打开Assets/Skenes/SimpleWarehouseScene场景
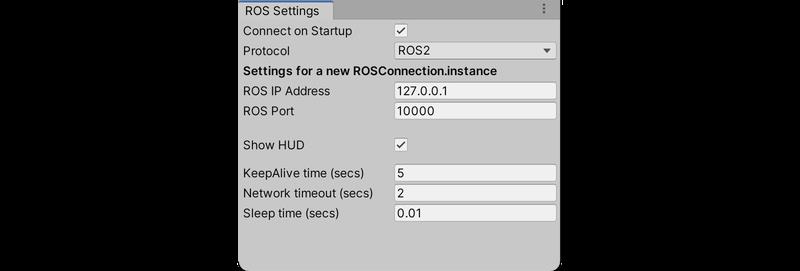
选择Unity的菜单“Robotics→ROSSettings”,确认以下设置
・连接启动:打钩
・Protocol:ROS2
・ROS Port:10000
・显示HUD:打钩
2. 设置ROS2 Docker环境
- 在“ros2_docker”的目录下运行以下命令
docker build -t unity-robotics:nav2-slam-example ./
- 在安装完后就可以直接通过命令行启动了
docker run -it --rm -p 6080:80 -p 10000:10000 --shm-size=1024m unity-robotics:nav2-slam-example
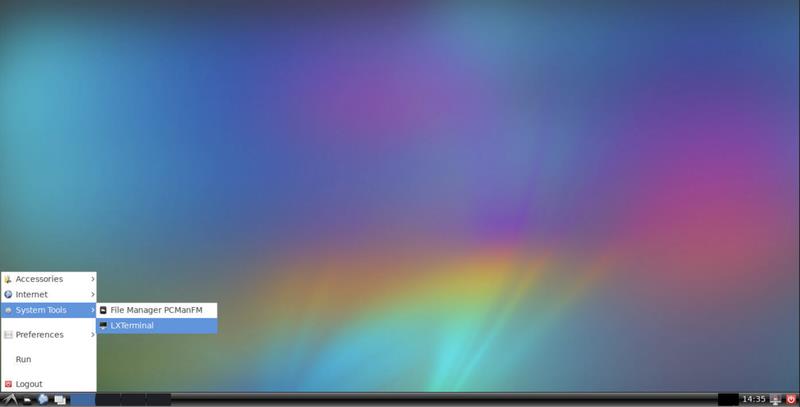
- 在浏览器中打开“http://127.0.0.1:6080”
- 并选择“System Tools→LXTerminal”
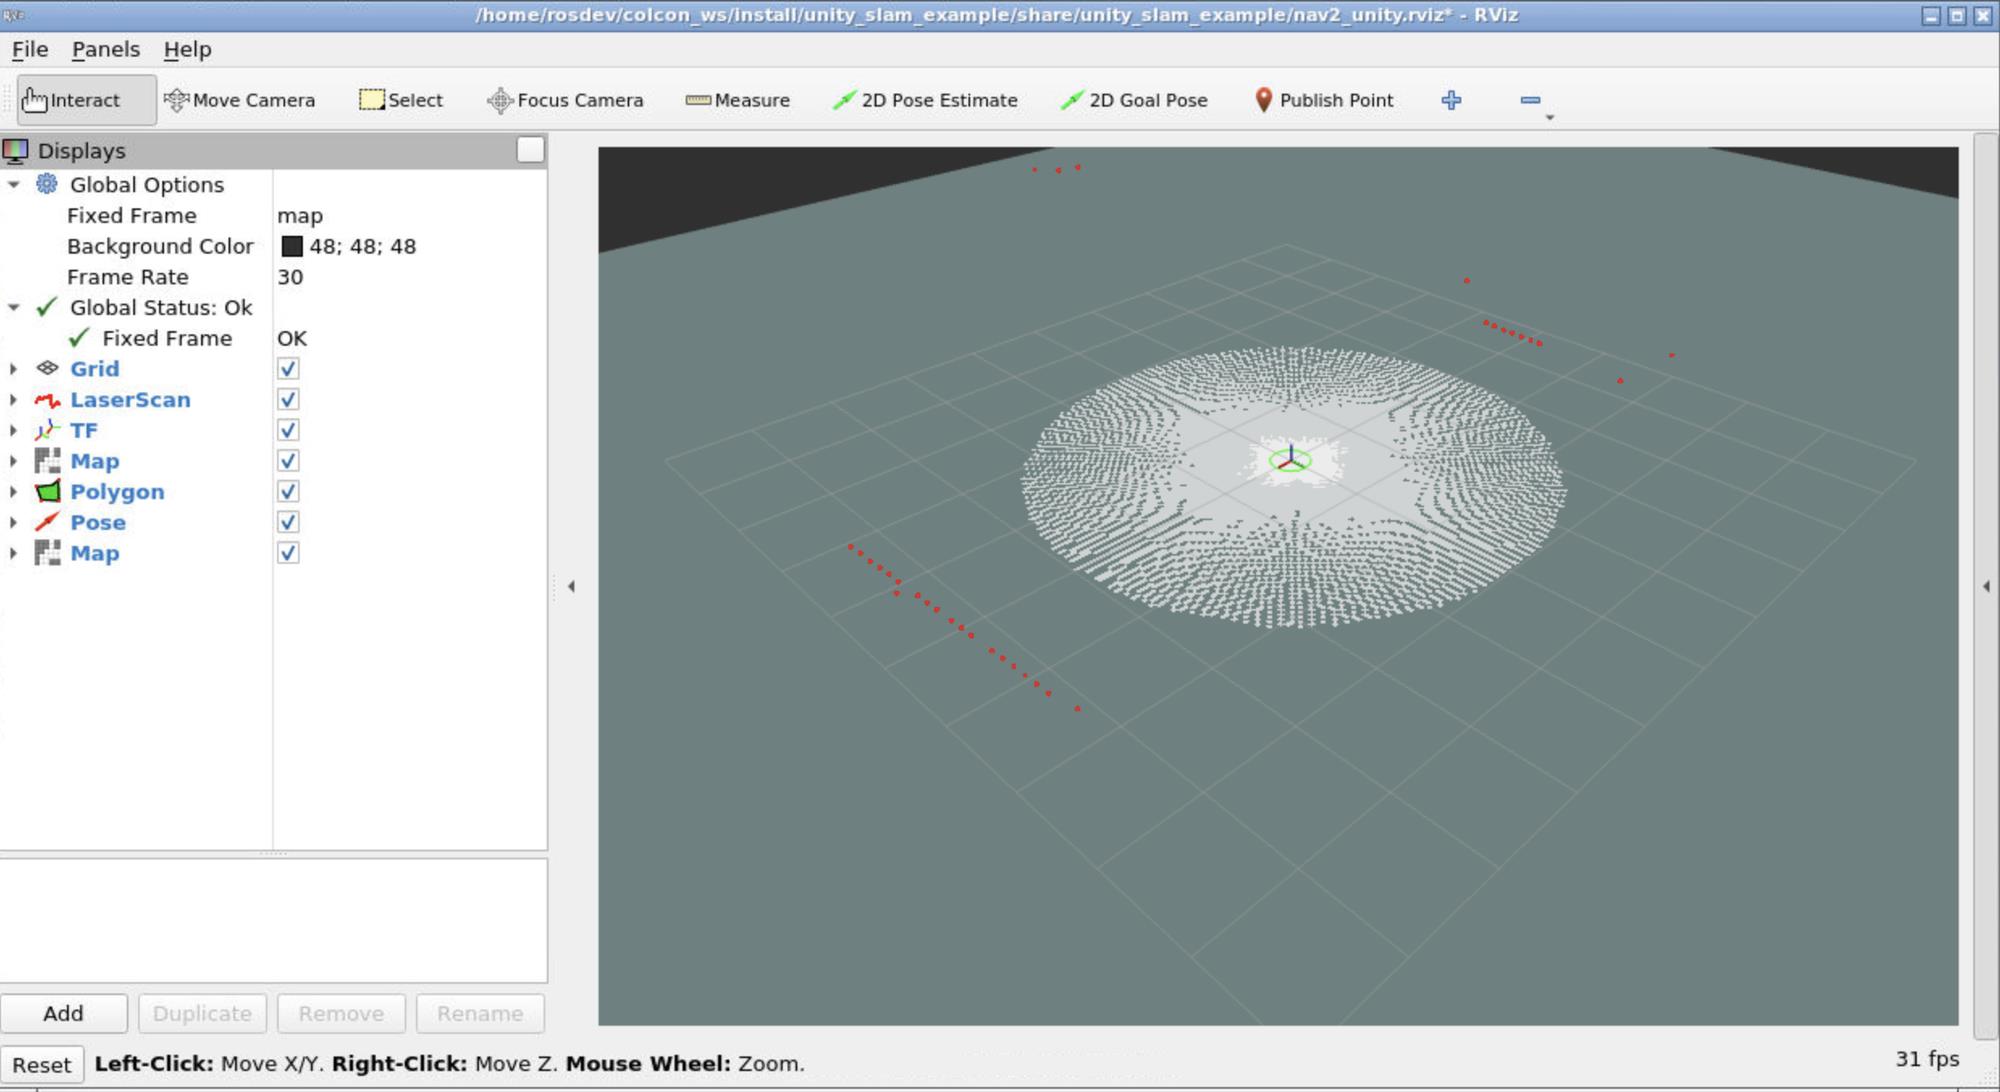
- launch文件的启动,并顺带启动了rviz2的界面

3. 实际运行
import os
from launch import LaunchDescription
from launch.actions import IncludeLaunchDescription
from launch.launch_description_sources import PythonLaunchDescriptionSource
from ament_index_python.packages import get_package_share_directory
from launch_ros.actions import Node


def generate_launch_description():
    package_name = 'unity_slam_example'
    package_dir = get_package_share_directory(package_name)

    return LaunchDescription(
        # ros的tcp节点启动
        IncludeLaunchDescription(
            PythonLaunchDescriptionSource(
                os.path.join(get_package_share_directory(
                    'ros_tcp_endpoint'), 'launch', 'endpoint.py')
            ),
        ),

        # rviz2启动
        Node(
            package='rviz2',
            executable='rviz2',
            output='screen',
            arguments=['-d', os.path.join(package_dir, 'nav2_unity.rviz')],
            parameters=['use_sim_time': True]
        ),

        # Nav2启动
        IncludeLaunchDescription(
            PythonLaunchDescriptionSource(
                os.path.join(get_package_share_directory(
                    'nav2_bringup'), 'launch', 'navigation_launch.py')
            ),
            launch_arguments=
                'use_sim_time': 'true'
            .items()
        ),

        # SLAM Toolbox启动
        IncludeLaunchDescription(
            PythonLaunchDescriptionSource(
                os.path.join(get_package_share_directory(
                    'slam_toolbox'), 'launch', 'online_async_launch.py')
            ),
            launch_arguments=
                'use_sim_time': 'true'
            .items()
        )
    )
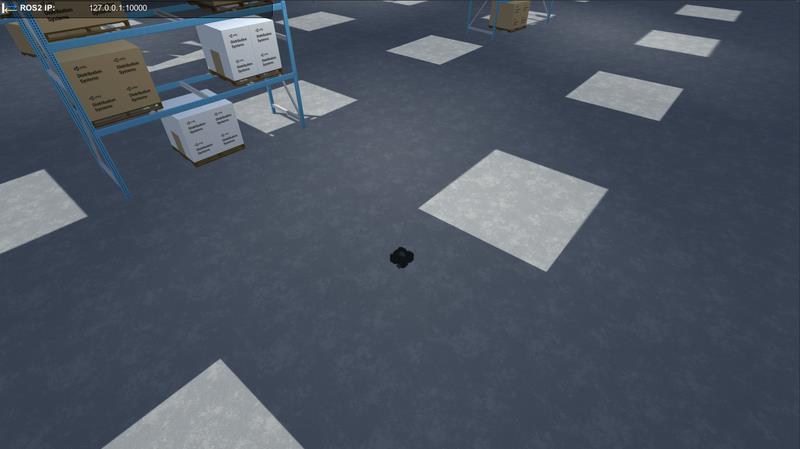
- 然后最后在Unity中按Play按钮。就可以看到在rviz输出了可视化信息。TurtleBot同时进行“建图”和“定位”。
- 同时Unity中也可以使用按键移动机器人以及相机
・WS : 前後
・AD : 左右
・EQ : 上下
…详情请参照古月居
如何将 TabBar + Navigation 与 XCode 结合使用
【中文标题】如何将 TabBar + Navigation 与 XCode 结合使用【英文标题】:How combine TabBar + Navigation with XCode 【发布时间】:2009-01-25 22:43:03 【问题描述】:我正在尝试将 TabBar + Navigation 应用程序结合起来。
我有 5 个标签栏,其中 4 个是内容列表并深入查看详细信息。
我尝试按照本教程进行操作:
http://www.iphonedevforums.com/forum/iphone-sdk-development/124-view-controller-problem.html
但总是得到一个空白视图。
这就是我所做的,一个干净的项目:
我从一个 TabBar 模板应用开始。 我放了 5 个标签栏按钮。我创建了一个控制器,例如:
@interface FirstViewController : UINavigationController
我将主 window.xib 设置为树模式并将选定的第一个视图更改为FirstViewController
我在界面生成器中选择了 TabBar 控制器,转到 TabBar 属性并将类更改为导航控制器。
选择第一个视图并将笔尖命名为“SecondView”
作为回应,我得到一个空白屏幕。
我必须补充一点,我想从详细信息视图导航,而不是从主窗口导航。
即在主窗口标签栏 1 中是人员列表。我选择了一个人,然后想要导航到详细信息窗口。
【问题讨论】:
【参考方案1】:首先,您永远不想继承 UINavigationController 或 UITabBarController。
其次,我不太明白你做了什么,但是在标签栏控制器中创建导航控制器的正确顺序是这样的:
// in MyAppDelegate.h
UINavigationController *nc1, *nc2;
FirstTabRootViewController *vc1;
SecondTabRootViewController *vc2;
UITabBarController *tbc;

// in MyAppDelegate.m
nc1 = [[UINavigationController alloc] init];
vc1 = [[FirstTabRootViewController alloc] initWithNibName:nil bundle:nil];
vc1.tabBarItem.title = @"Tab 1";
vc1.tabBarItem.image = [UIImage imageNamed:@"tab1.png"];
vc1.navigationItem.title = "Tab 1 Data";
nc1.viewControllers = [NSArray arrayWithObjects:vc1, nil];

nc2 = [[UINavigationController alloc] init];
vc2 = [[SecondTabRootViewController alloc] initWithNibName:nil bundle:nil];
vc2.tabBarItem.title = @"Tab 2";
vc2.tabBarItem.image = [UIImage imageNamed:@"tab2.png"];
vc2.navigationItem.title = "Tab 2 Data";
nc2.viewControllers = [NSArray arrayWithObjects:vc2, nil];

tbc = [[UITabBarController alloc] init];
tbc.viewControllers = [NSArray arrayWithObjects:nc1, nc2, nil];
请注意,控制标签栏和导航栏中的文本/图标的是您的视图控制器。为每个选项卡创建一个 UINavigationController 实例; UINavigationController 包含一堆视图控制器(请参阅 viewControllers 属性),其中至少应包含一个项目——该选项卡的根控制器。还要创建一个 UITabBarController 来管理选项卡。
当然,您可以(并且可能应该)使用界面构建器而不是代码来实例化上述类并设置属性。但重要的是您要了解幕后发生的事情;界面生成器只不过是一种实例化和设置对象的便捷方式。
希望这会有所帮助;如果不是,请完善您的问题。
【讨论】:
太棒了! Спасибо, Андрей, очень помогло! 这很有帮助,谢谢。我一直在寻找一个以编程方式构建的好的标签栏控制器。【参考方案2】:执行上述代码后,在启动应用程序时仍然出现空白屏幕。我在哪里写错了。
  nc1 = [[UINavigationController alloc] init];
  nc2 = [[UINavigationController alloc] init];
  vc1 = [[FirstRootViewController alloc]initWithNibName:@"FirstRootViewController" bundle:nil];
  vc1.tabBarItem.title = @"Item 1";
  vc1.tabBarItem.image= [UIImage imageNamed:@"home.png"];
  vc1.navigationItem.title = @"Tab1 Data";
  nc1.viewControllers = [NSArray arrayWithObjects:vc1,nil];
  vc2 = [[SecondRootViewController alloc]initWithNibName:@"SecondRootViewController" bundle:nil];
  vc2.tabBarItem.title = @"Item 2";
  vc2.tabBarItem.image= [UIImage imageNamed:@"home.png"];
  vc2.navigationItem.title = @"Tab2 Data";
  nc2.viewControllers = [NSArray arrayWithObjects:vc2,nil];
  tbc = [[UITabBarController alloc]init];
  tbc.viewControllers = [NSArray arrayWithObjects:nc1,nc2,nil];
  [window addSubview:tbc.view];
  [window makeKeyAndVisible];
【讨论】:
【参考方案3】:这是我能够开始工作的tutorial。
我还阅读了有关该主题的官方 SDK 文档:Combining Tab Bar and Navigation Controllers。因为我还在学习,所以教程比文档对我的帮助更大。
注意:在本教程中,我认为您不需要继承 UINavigationController,我现在正在试验这个想法。
【讨论】:
我环顾四周,但您引用的教程已经/已经移动。现在在:this location【参考方案4】:我尝试创建一个包含 UITabBarController 和一些 UINavigationController 的 iphone 应用程序,但遇到了与“mamcx”相同的问题。使用您的示例代码,我可以运行它:) 非常感谢。
这对我来说是这样的。
// YOURS
fourthNavigation = [[UINavigationController alloc ] init ];
fourthViewController = [[[FourthTabRootController alloc] initWithNibName:@"FourthView" bundle:nil] autorelease];
fourthNavigation.tabBarItem.title = @"YOURS";
fourthNavigation.viewControllers = [NSArray arrayWithObjects:fourthViewController, nil];

// Add self-defined UIViewControllers to the tab bar
tabBarController.viewControllers = [NSArray arrayWithObjects:firstNavigation,secondNavigation, thirdNavigation, fourthNavigation, nil];
// Add the tab bar controller's current view as a subview of the window
[window addSubview:tabBarController.view];
其他 UINavigationControllers "firstNavigation, ..." 的创建方式相同。 我从连接到我的子类 UIViewController 类的 nib 文件加载视图元素。您不需要将 IB 中的 NavigationBar 添加到您的视图中,因为 UINavigationController 已经准备好了。所以你只需要在“initWithNibName”中设置标题
  // The designated initializer. Override to perform setup that is required before the view is loaded.
  - (id)initWithNibName:(NSString *)nibNameOrNil bundle:(NSBundle *)nibBundleOrNil
if (self = [super initWithNibName:nibNameOrNil bundle:nibBundleOrNil])
    // Custom initialization
    self.title = @"YOURS";

return self;
希望对你有帮助。
【讨论】:
【参考方案5】:查看View Controller Catalog for iOS 下的“将导航控制器添加到选项卡栏界面”,它将逐步了解如何实现这一目标
【讨论】:
以上是关于Unity-ROS与Navigation 2的主要内容,如果未能解决你的问题,请参考以下文章
React Navigation 与 React Native Navigation [关闭]
如何将 TabBar + Navigation 与 XCode 结合使用