hibernate框架在eclipse下的配置方法
Posted
tags:
篇首语:本文由小常识网(cha138.com)小编为大家整理,主要介绍了hibernate框架在eclipse下的配置方法相关的知识,希望对你有一定的参考价值。
一、ORM
O:object 对象
R:Realtion 关系(关系型数据库)
M:Mapping 映射
ORM:对象关系型映射
目前流行的编程语言,如Java、C# ,它们都是面向对象的编程语言,而目前主流的数据库产品例如Oracle、DB2等,依然是关系型数据库。编程语言和底层数据库发展的不协调(阻抗不匹配,例如数据库中无法直接实现存储继承、多态、封装等特征和行为),催生出了ORM框架。ORM框架可以作为面向对象语言和关系型数据库之间的桥梁。
二、Hibernate
Hibernate是一个开放源代码的对象关系映射框架,它对JDBC进行了非常轻量级的对象封装,使得Java程序员可以随心所欲的使用对象编程思维来操纵数据库。
三、hibernate框架在eclipse下的配置方法,这里我们以hibernate3.2为例,介绍一下hibernate3.2在eclipse里的配置方法:
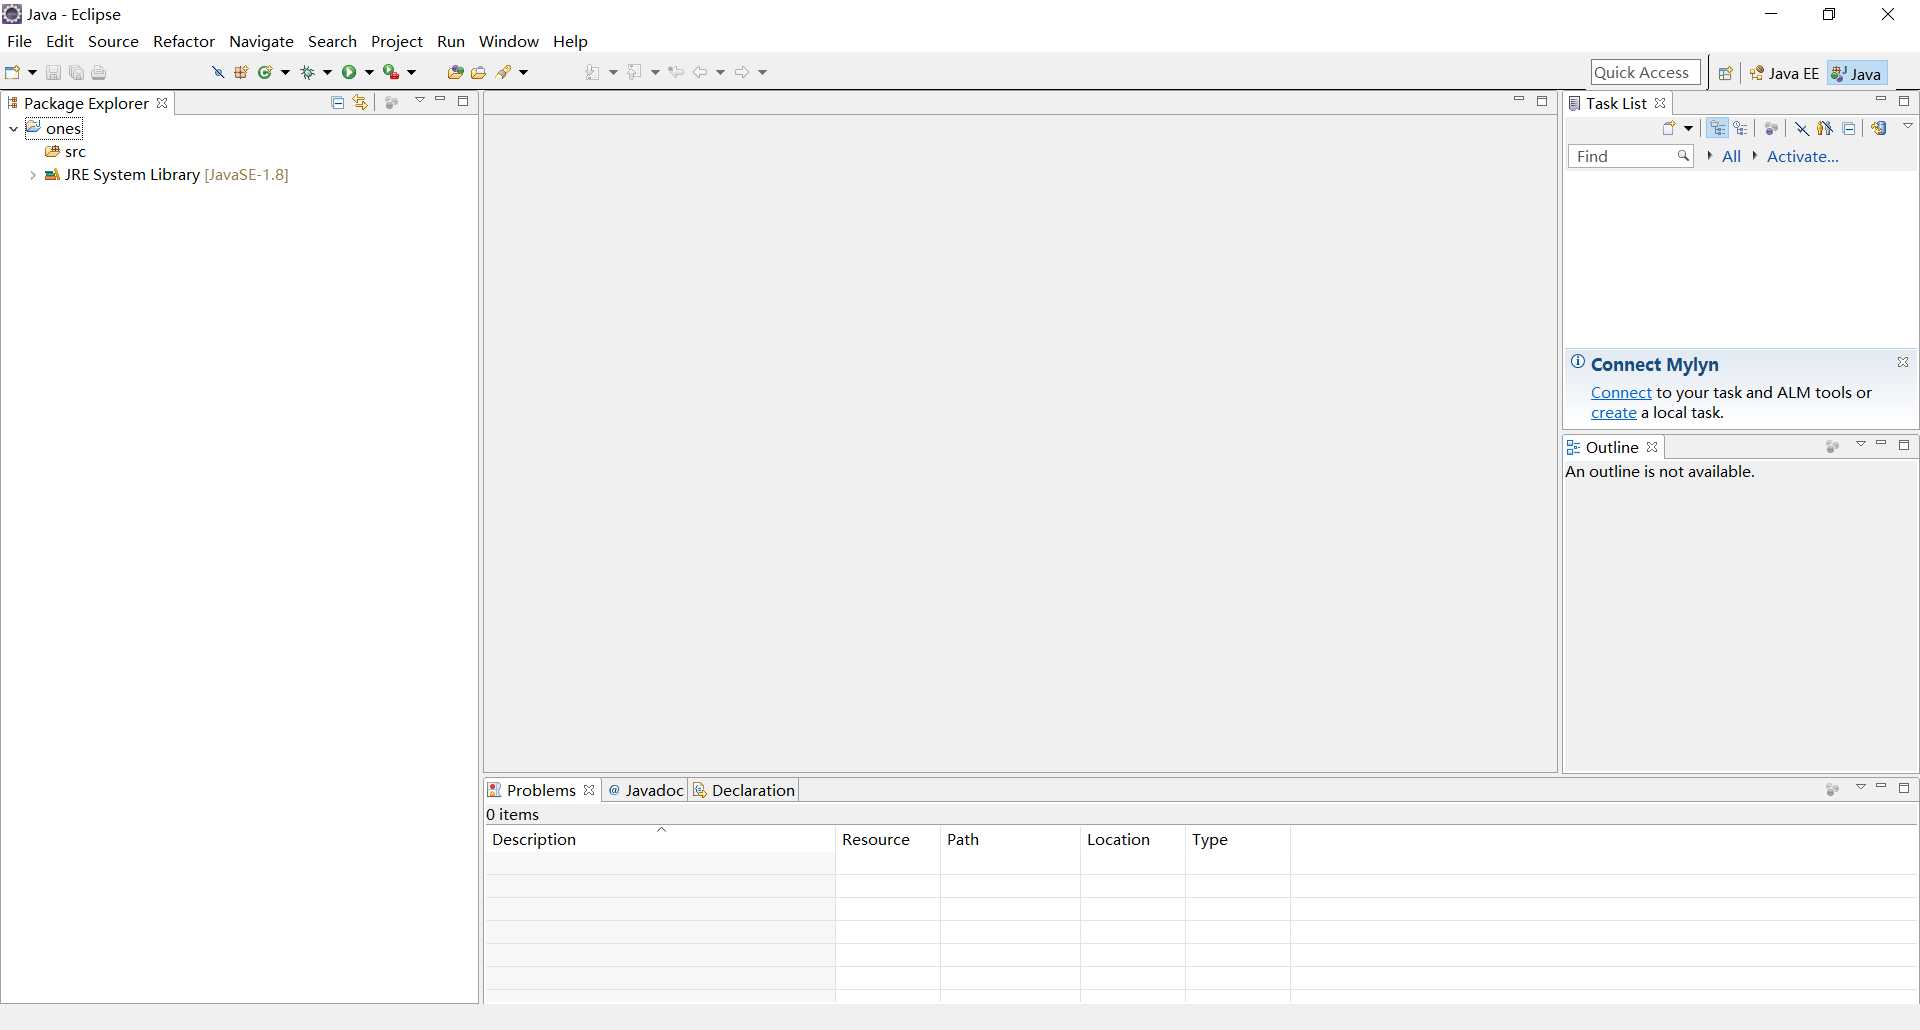
(1)打开eclipse,设置其工作空间,点击OK,进入eclipse主界面。
(2)首先我们创建一个java项目,File->new->java Project->创建项目名称,这里我们以ones为例。

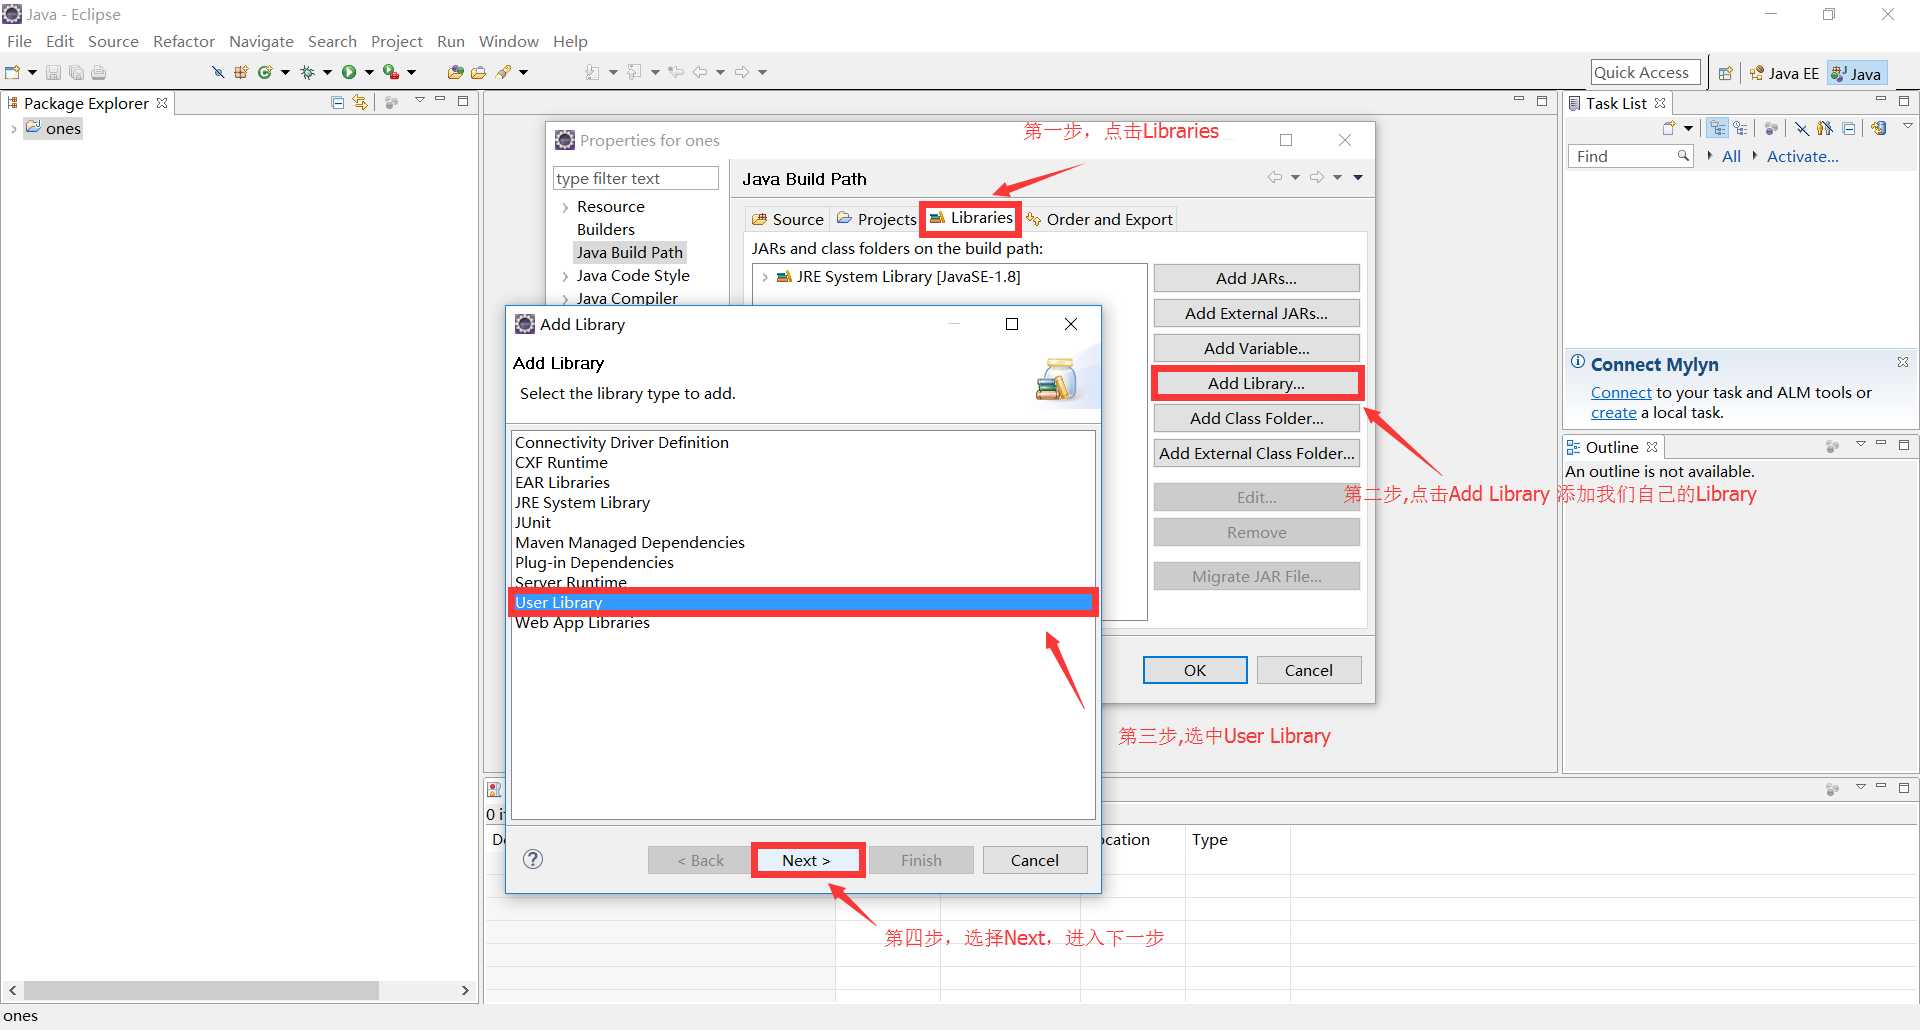
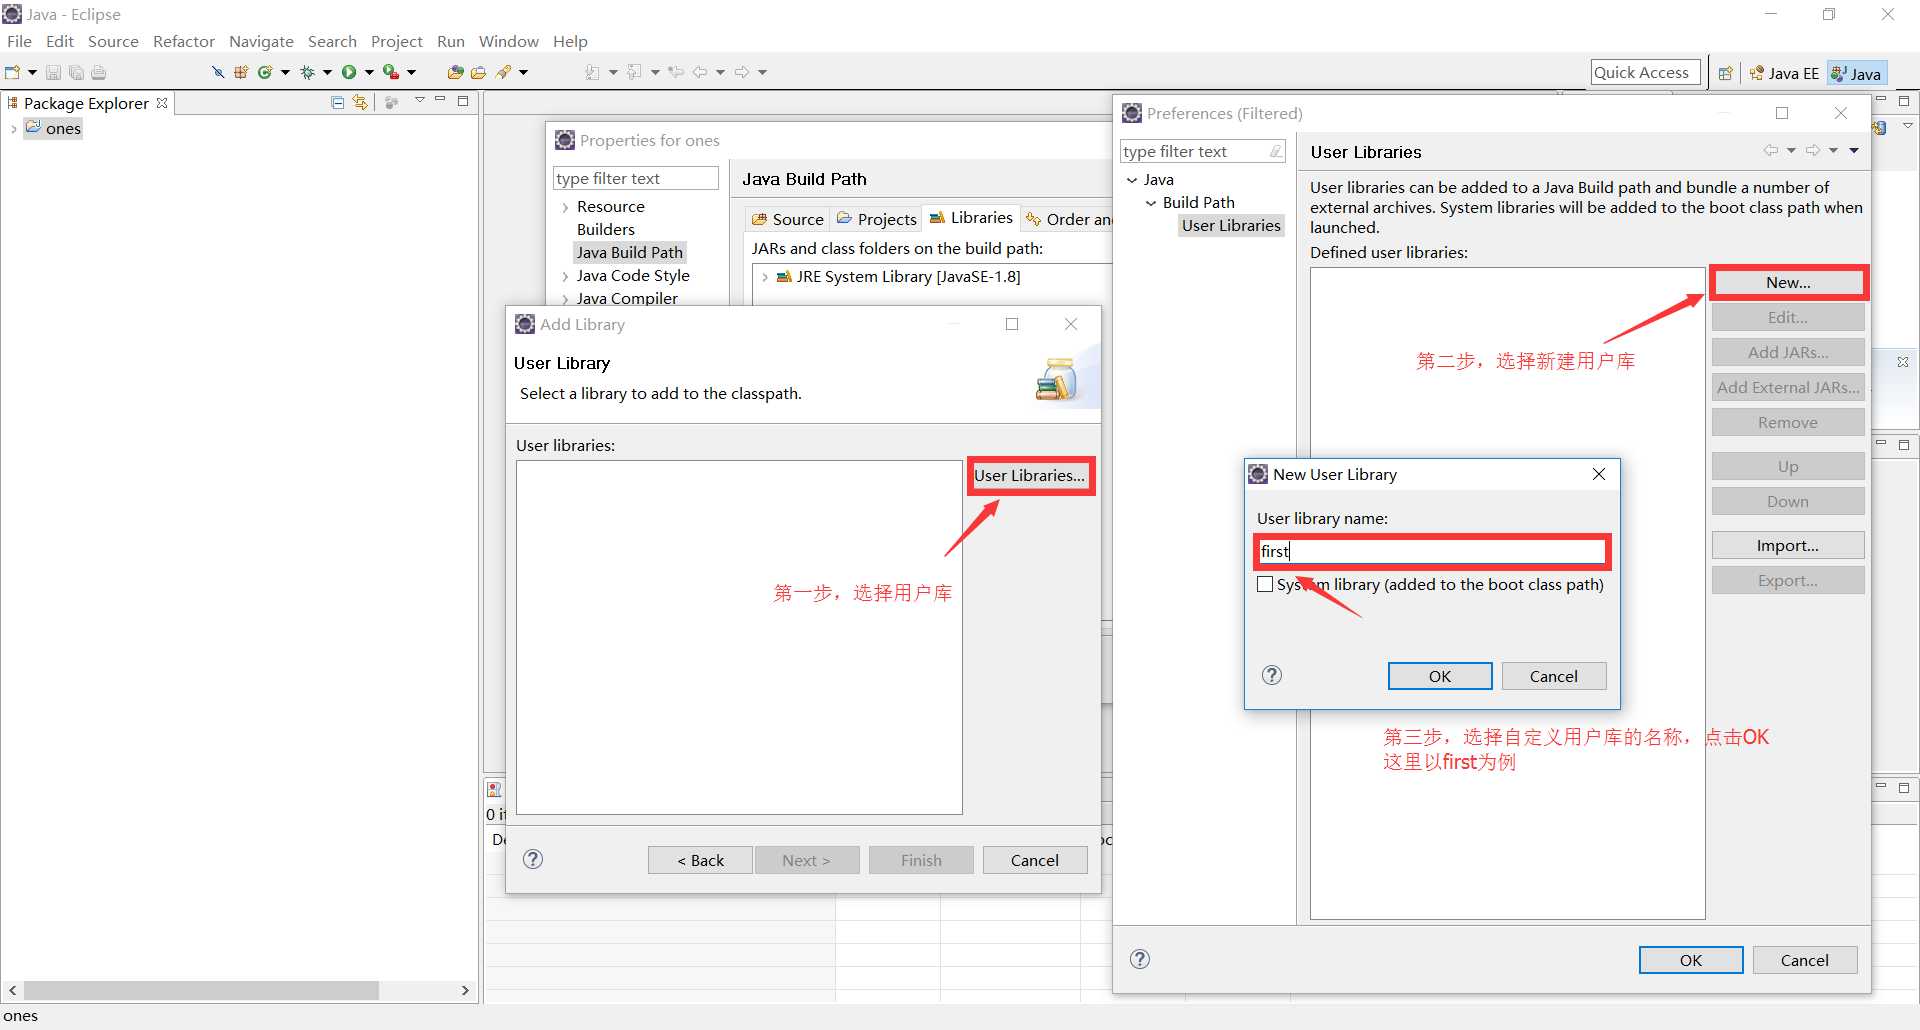
(3)导入我们所需要的JAR包,这里我们需要导入3类jar包,首先是hibernate3.jar,是使用hibernate时必备的库。lib文件中的所有文件。数据库连接jar包,这里以mysql数据库文件,我们需要导入的jar包是mysql.jar。这里我们创建一个用户自己的类库,可以将我们的jar包直接导入user library中,当我们再建立其他的项目时,就避免了再重新一个一个的引入jar包。创建步骤如图所示:


(4)点击Add External JARs... 以此导入上述jar包,点击OK,finish完成操作。此时,项目名下可看到名为first的用户自定义类库。
(5)我们在src文件目录下导入hibernate.cfg.xml文件。这里我们所需要更改的内容为第7行,localhost/ones(ones更改为自己的数据库名)
第9行为mysql用户名,第10行为mysql数据库的密码。第14行代码删掉。
 1 <!DOCTYPE hibernate-configuration PUBLIC
 2     "-//Hibernate/Hibernate Configuration DTD 3.0//EN"
 3     "http://hibernate.sourceforge.net/hibernate-configuration-3.0.dtd">
 4
 5 <hibernate-configuration>
 6     <session-factory>
 7         <property name="hibernate.connection.url">jdbc:mysql://localhost/ones</property>
 8         <property name="hibernate.connection.driver_class">com.mysql.jdbc.Driver</property>
 9         <property name="hibernate.connection.username">root</property>
10         <property name="hibernate.connection.password">88888888</property>
11         <property name="hibernate.dialect">org.hibernate.dialect.MySQLDialect</property>
12         <property name="hibernate.show_sql">true</property>
13
14         <mapping resource="com/bjsxt/hibernate/User.hbm.xml"/>
15     </session-factory>
16 </hibernate-configuration>
(6)在src下建立用户类以及映射文件。Src右键->New->Class->选择类名,这里我们创建名为User的类。
(7)编写用户类代码(这里eclipse支持批量自动写入set/get方法)点击Source->Generate Ftters and Setters 选择全部,导入。User类已经编写完成,接下来我们编写映射文件。
 1 package ones;
 2
 3 public class User {
 4     private String id;
 5     private String name;
 6     private String password;
 7     public String getId() {
 8         return id;
 9     }
10     public void setId(String id) {
11         this.id = id;
12     }
13     public String getName() {
14         return name;
15     }
16     public void setName(String name) {
17         this.name = name;
18     }
19     public String getPassword() {
20         return password;
21     }
22     public void setPassword(String password) {
23         this.password = password;
24     }
25
26 }
(8)选择User.hbm.xml文件,拷入Src文件夹下的包中,文件位置在hiberate\\rg\\org\\hiberate\\auction中,这里我们所要修改的代码是第6行,org.hibernate.auction改为自己项目的包名。第八行代码,可以只保留<Class name="User">,其余部分可以删掉。第九行代码删掉。将第12行的native删掉,native是配置整形数据的,我们之前设置的id为字符型,所以这里我们改为uuid,15行至50行,删掉。在<class>中编写属性,属性值等于User.java中定义的属性(不包括id)。
 1 <?xml version="1.0"?>
 2 <!DOCTYPE hibernate-mapping PUBLIC
 3     "-//Hibernate/Hibernate Mapping DTD 3.0//EN"
 4     "http://hibernate.sourceforge.net/hibernate-mapping-3.0.dtd">
 5 <hibernate-mapping
 6     package="org.hibernate.auction">
 7
 8     <class name="User" table="AuctionUser" lazy="true">
 9         <comment>Users may bid for or sell auction items.</comment>
10
11         <id name="id">
12             <generator class="native"/>
13         </id>
14
15         <natural-id mutable="true">
16             <property name="userName"
17                     length="10"/>
18         </natural-id>
19
20         <property name="password"
21                 not-null="true"
22                 length="15"
23                 column="`password`"/>
24
25         <property name="email"/>
26
27         <component name="name">
28             <property name="firstName"
29                     length="50"
30                     not-null="true"/>
31             <property name="initial"
32                     column="`initial`"/>
33             <property name="lastName"
34                     length="50"
35                     not-null="true"/>
36         </component>
37
38         <bag name="bids"
39                 inverse="true"
40                 cascade="save-update,lock">
41             <key column="bidder"/>
42             <one-to-many class="Bid"/>
43         </bag>
44
45         <bag name="auctions"
46                 inverse="true"
47                 cascade="save-update,lock">
48             <key column="seller"/>
49             <one-to-many class="AuctionItem"/>
50         </bag>
51
52     </class>
53
54 </hibernate-mapping>
(9)编写后的User.hbm.xml文件如图所示:
 1 <?xml version="1.0"?>
 2 <!DOCTYPE hibernate-mapping PUBLIC
 3     "-//Hibernate/Hibernate Mapping DTD 3.0//EN"
 4     "http://hibernate.sourceforge.net/hibernate-mapping-3.0.dtd">
 5 <hibernate-mapping
 6     package="ones">
 7
 8     <class name="User" >
 9
10
11         <id name="id">
12             <generator class="uuid"/>
13         </id>
14
15
16         <property name="name"></property>
17         <property name="password"></property>
18     </class>
19
20 </hibernate-mapping>
(10)编写导入类,建立名为ExportDB的类,直接产生它的主方法
 1 package ones;
 2
 3 import org.hibernate.cfg.Configuration;
 4 import org.hibernate.tool.hbm2ddl.SchemaExport;
 5
 6
 7
 8 public class ExportDB {
 9
10     public static void main(String[] args) {
11         //读取文件的配置
12         Configuration cfg = new Configuration().configure();
13         SchemaExport export = new SchemaExport(cfg);
14         export.create(ture, ture);
15     }
16
17 }
(11)修改hibernate.cfg.xml中的第14行代码,将路径改为ones(包名)/User.hbm.xml
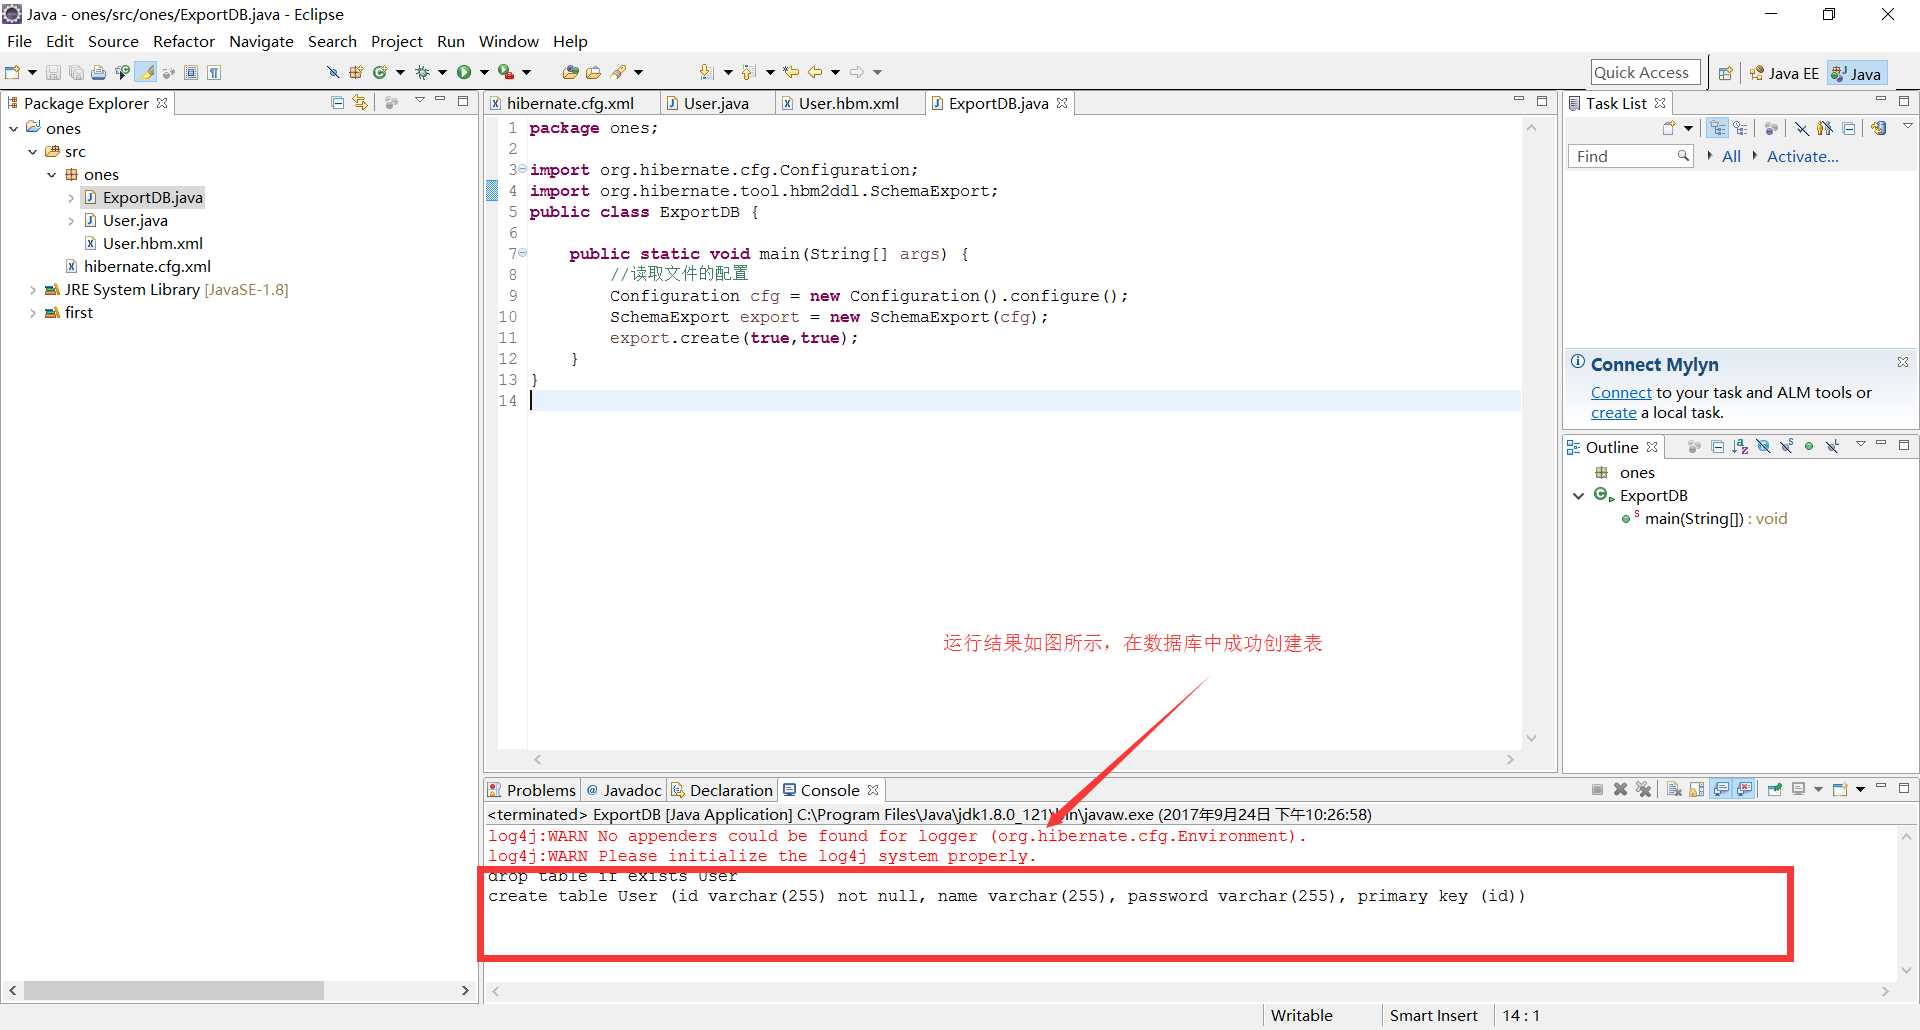
(12)在mysql数据库 中建立测试表,运行eclipse中的ExportDB文件,右键->Run As->java Application

以上是关于hibernate框架在eclipse下的配置方法的主要内容,如果未能解决你的问题,请参考以下文章