hardhat + typescript合约部署测试
Posted Ruin丶
tags:
篇首语:本文由小常识网(cha138.com)小编为大家整理,主要介绍了hardhat + typescript合约部署测试相关的知识,希望对你有一定的参考价值。
Hardhat + Typescript 智能合约的部署与测试
这篇文章主要介绍从零开始搭建Hardhat框架下使用typescrip进行合约的部署和测试
哪里有不足的地方请多指教
主要使用的框架和技术:
- hardhat
- yarn(当然也可用npm,只是我喜欢用yarn)
- waffle
- mocha
项目搭建
-
创建一个项目目录,并进行yarn初始化
mkdir hardhat-example
cd hardhat-example
yarn init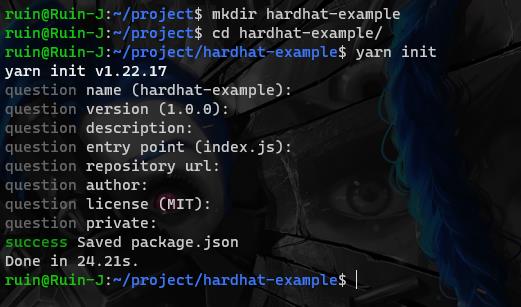
-
安装hardhat
直接运行
yarn add hardhat就可以了 -
初始化项目为hardhat+typescript项目
-
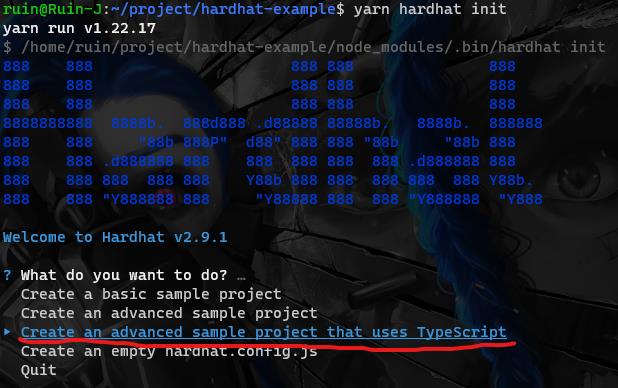
运行
yarn hardhat init -
选择
Create an advanced sample project that uses TypeScript
-
下面分别是
选择项目跟目录
是否创建
.gitignore文件是否安装所需要的一些包
直接敲回车就行
注意:用
yarn进行安装的时候有可能出现ethereum-waffle包装不上的问题,这时候这个包可以单独用npm进行安装到这里这个项目框架基本已经搭建完成了,下面就是对它进行各种配置了
-
项目配置
-
在项目跟目录下新建
.env文件,用于配置与链和网络相关配置相应的配置也可以直接从
.env.example文件拷贝过去替换成自己的ETHERSCAN_API_KEY=ABC123ABC123ABC123ABC123ABC123ABC1 ROPSTEN_URL=https://ropsten.infura.io/v3/<YOUR ALCHEMY KEY> PRIVATE_KEY=0xabc123abc123abc123abc123abc123abc123abc123abc123abc123abc123abc1 -
安装hardhat部署插件
hardhat-deploy、hardhat-deploy-ethers,并引入到hardhat.confit.ts中:yarn add hardhat-deploy hardhat-deploy-ethersimport 'hardhat-deploy'; import 'hardhat-deploy-ethers'; -
对配置
hardhat.config.ts文件进行配置在文件中有一段task的代码,个人觉得用处不大就直接删除了
task("accounts", "Prints the list of accounts", async (taskArgs, hre) =>
  const accounts = await hre.ethers.getSigners();

  for (const account of accounts)
    console.log(account.address);

);
一下配置均在
hardhat.config.ts文件下config中const config: HardhatUserConfig =配置hardhat多版本solidity编译环境,还需要其他的话直接照着加就行
solidity:
    compilers: [
      version: "0.8.0",
      settings:
        optimizer:
          enabled: true,
          runs: 200


    ,
      version: "0.6.0",
      settings:
        optimizer:
          enabled: true,
          runs: 200


    ]
  ,
配置合约路径
  paths:
    sources: "contracts"
  ,
配置地址对应的名称(主要用于部署时更方便调用部署地址)
  namedAccounts:
    deployer: 0
  ,
配置typechain(用于生成智能合约对应的typescript接口)
  typechain:
    outDir: "types"
  ,
配置区块链网络
//process.env.ROPSTEN_URL配置在.env文件中,对应区块链网络的RPC URL
//process.env.PRIVATE_KEY配置在.env文件,对应钱包地址的私钥
networks:
    ropsten:
      url: process.env.ROPSTEN_URL || "",
      accounts:
        process.env.PRIVATE_KEY !== undefined ? [process.env.PRIVATE_KEY] : [],
      chainId: 3,
      live: true,
      saveDeployments: true,
    ,
  ,
到这里关于hardhat的配置基本差不多了。
-
配置waffle和mocha,用于智能合约测试
在项目根目录下创建
.mocharc.json和waffle.json文件.mocharc.json下主要配置测试文件扩展名:"require": "ts-node/register/transpile-only", "timeout": 50000, "extension": "test.ts"waffle.json下主要配置所要编译的solidity版本和合约目录(注意:这里是用于waffle编译的,不是hardhat):"compilerType": "solcjs", "compilerVersion": "0.8.13", "sourceDirectory": "./contracts", "outputDirectory": "./build"到这里基本配置结束了,如果还需要配置其他的再配置吧。
智能合约编写
-
既然要编写智能合约,那怎么能少得了openzeppelin开源合约库呢,那就来用上它吧
yarn add -D @openzeppelin/contracts -
这里就写一个ERC20 Token的合约吧,在
contracts目录下创建sol文件,我这里直接用了openzeppelin的ERC20,就不再自己写了。//SPDX-License-Identifier: Unlicense pragma solidity ^0.8.0; import "@openzeppelin/contracts/token/ERC20/ERC20.sol"; import "@openzeppelin/contracts/access/Ownable.sol"; contract RuinToken is ERC20, Ownable constructor(uint256 amount) ERC20("RuinToken", "RUIN") Ownable() _mint(msg.sender, amount); function mint(address account, uint256 amount) public onlyOwner require(account != address(0), "address is zero"); _mint(account, amount); function burn(address account, uint256 amount) public require(account == msg.sender, "burn error"); _burn(account, amount); -
合约编写完成后进行编译
## hardhat 编译用于部署
yarn hardhat compile
## waffle 编译用于测试
yarn waffle
智能合约测试
-
到这里我发现我忘记安mocha了,现在安也没事
yarn add mocha -
mocha安装好了之后直接在test目录下编写测试文件就可以了,
index.test.ts:import expect, use from "chai"; import ethers from "hardhat"; import deployContract, MockProvider, solidity, from "ethereum-waffle"; import ERC20USDT from "../build/RuinToken.json"; import Contract, Wallet from "ethers"; use(solidity); describe("RuinToken", function () let wallet: Wallet; let RuinToken: Contract; let owner: string; beforeEach(async () => [wallet] = new MockProvider().getWallets(); RuinToken = await deployContract(wallet, ERC20USDT, [ethers.utils.parseEther("1000")]); ) it("name/symbol/totalSupply", async function () console.log("token address::", RuinToken.address); owner = await RuinToken.owner(); const name = await RuinToken.name(); const symbol = await RuinToken.symbol(); const totalSupply = await RuinToken.totalSupply(); console.log("owner::", owner) console.log("name::", name) console.log("symbol::", symbol); console.log("totalSupply::", totalSupply.toString()); console.log("RUIN balance::", ethers.utils.formatEther(await RuinToken.balanceOf(wallet.address)).toString()); ); it("exchange", async function () await RuinToken.transfer(RuinToken.address, ethers.utils.parseEther("10")) await RuinToken.approve(owner, ethers.utils.parseEther("1000")); await RuinToken.transferFrom(wallet.address, RuinToken.address, ethers.utils.parseEther("10")); console.log("my balance::", ethers.utils.formatEther(await RuinToken.balanceOf(wallet.address)).toString()); console.log("contract balance::", ethers.utils.formatEther(await RuinToken.balanceOf(RuinToken.address)).toString()) ) ); -
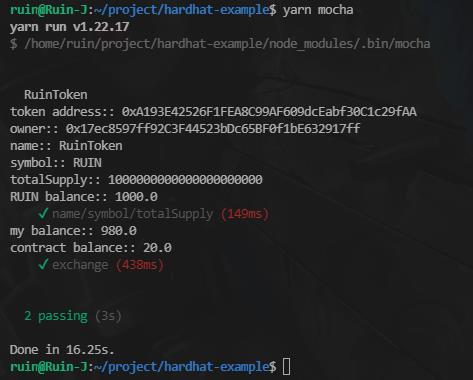
输入
yarn mocha进行测试,输出结果:
智能合约部署
合约编写和测试完成后,那最后一步就是部署了
-
这里我使用的时hardhat-deploy插件进行部署,所以先安装
hardhat-deploy和hardhat-deploy-ethers插件,之前已经在hardhat.config.ts配置文件中配置引入了插件,这里就直接安装就行yarn add hardhat-deploy hardhat-deploy-ethers -
在项目根目录下创建
deploy目录,然后编写部署文件import ethers from "ethers"; import DeployFunction from "hardhat-deploy/dist/types"; import HardhatRuntimeEnvironment from "hardhat/types"; const func: DeployFunction = async function (hre: HardhatRuntimeEnvironment) const deployments, getNamedAccounts = hre; console.log(hre.network.name) const deploy = deployments; // 这里的deployer就是hardhat.confit.ts中namedAccounts下deployer,由.env下配置的私钥生成 const deployer = await getNamedAccounts(); console.log(deployer) const RuinToken = await deploy("RuinToken", from: deployer, args: [ethers.utils.parseEther("1000")], log: true ) console.log(RuinToken.address); ; export default func; // 这个tags就是部署时命令 --tags后面要输入的名称 func.tags = ["RUIN"]; -
部署文件编写完成后就可以执行部署了
yarn hardhat deploy --network ropsten --tags RUIN -
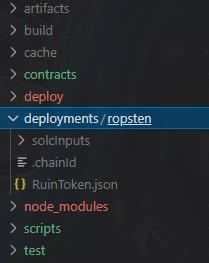
部署过程

- 部署的详细信息会生成在项目根目录下的
deployments目录中
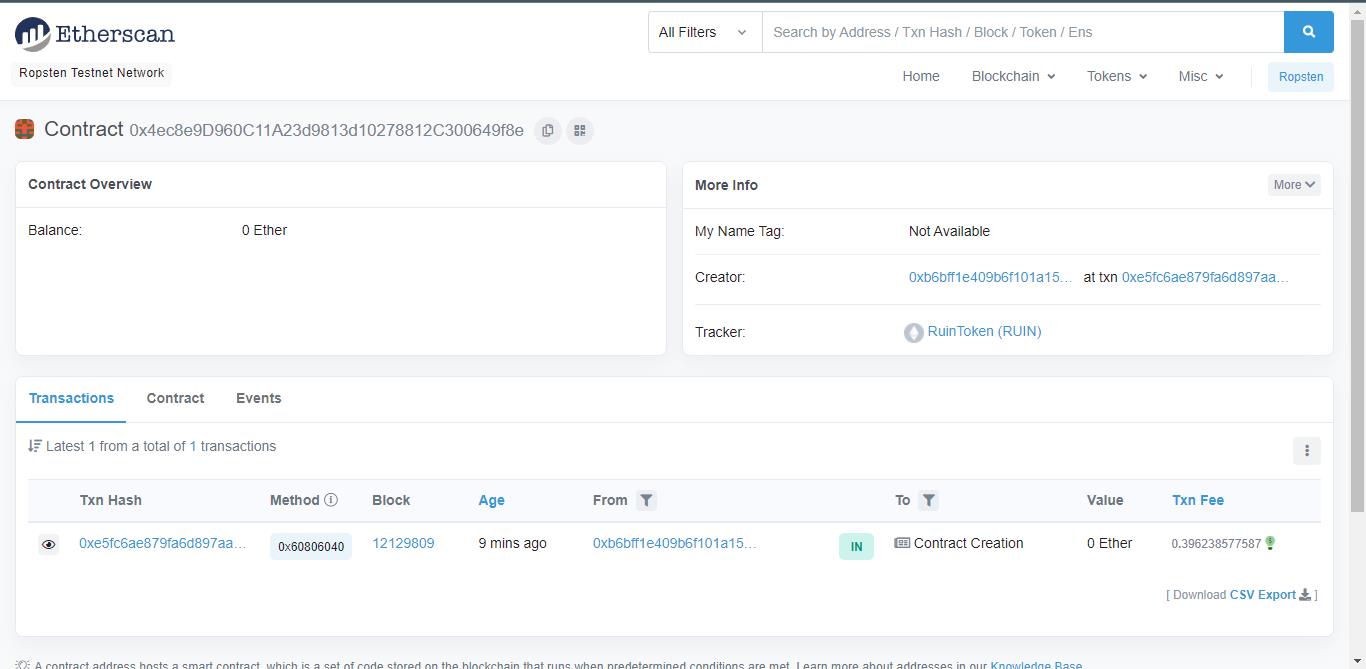
- 部署的这个地址可在区块浏览器中进行查看
最后
到这里就基本结束了,祝大家玩得开心!★,°:.☆( ̄▽ ̄)/$:.°★ 。
下面这里是完整项目的地址
https://github.com/Ruin-aBug/myhardhatexample
以上是关于hardhat + typescript合约部署测试的主要内容,如果未能解决你的问题,请参考以下文章