剑指架构师系列-持续集成之Maven实现项目的编译发布和部署
Posted
tags:
篇首语:本文由小常识网(cha138.com)小编为大家整理,主要介绍了剑指架构师系列-持续集成之Maven实现项目的编译发布和部署相关的知识,希望对你有一定的参考价值。
Maven组织项目进行编译、部署
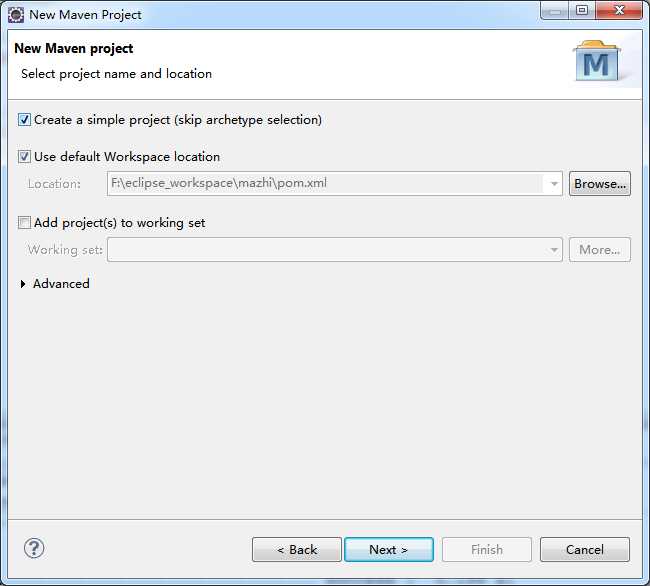
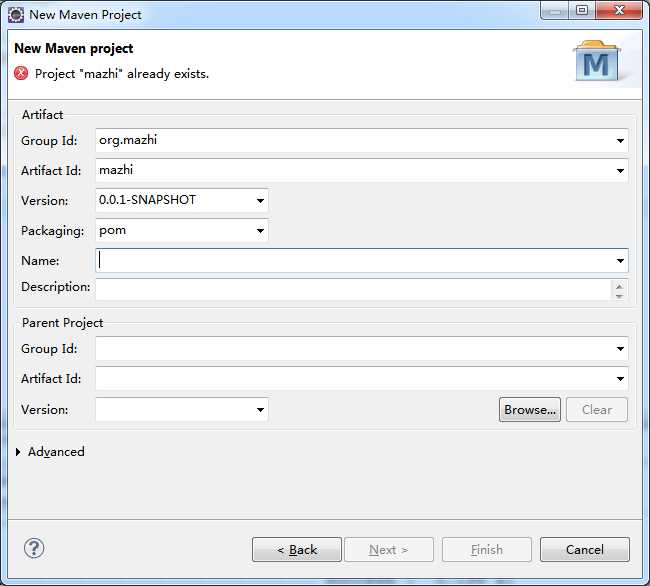
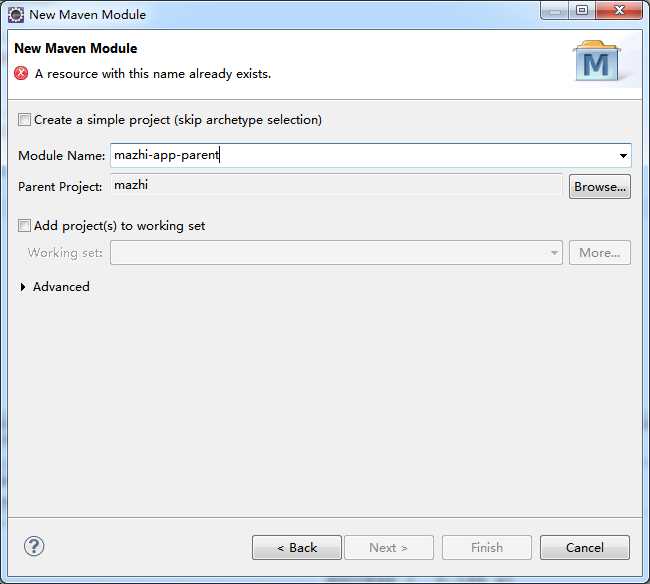
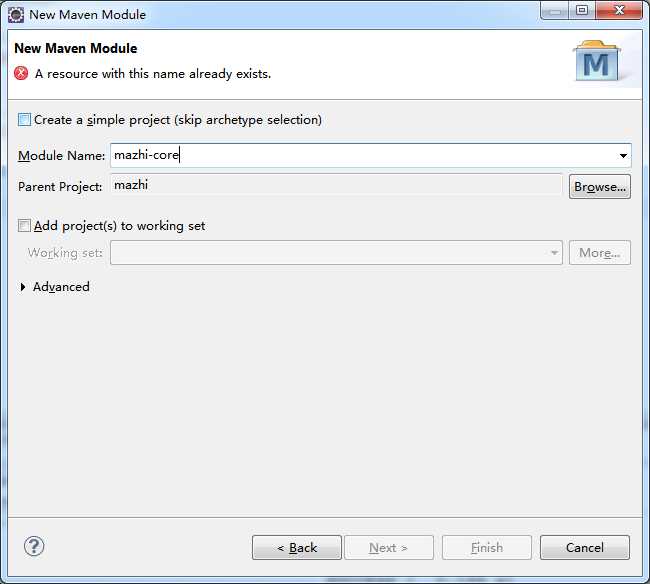
Maven项目基本的结构说明如下:
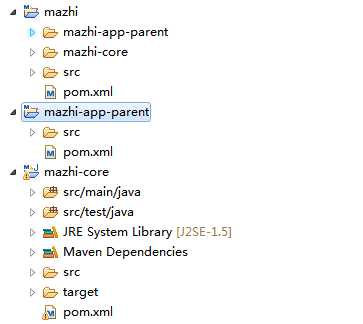
<parent>
    <groupId>org.mazhi</groupId>
    <artifactId>mazhi-app-parent</artifactId>
    <version>0.0.1-SNAPSHOT</version>
    <relativePath>../mazhi-app-parent</relativePath>
  </parent>
注意添加relativePath节点。

|----src
| |----main
| | |----java ——存放项目的.java文件
| | |----resources ——存放项目资源文件,如spring boot, hibernate配置文件
| |----test
| | |----java ——存放所有测试.java文件,如JUnit测试类
| | |----resources ——存放项目资源文件,如spring boot, hibernate等配置文件
|----target ——项目输出位置
|----pom.xml ----Maven的配置文件
<?xml version="1.0"?>
<project xmlns="http://maven.apache.org/POM/4.0.0" xmlns:xsi="http://www.w3.org/2001/XMLSchema-instance"
    xsi:schemaLocation="http://maven.apache.org/POM/4.0.0 http://maven.apache.org/maven-v4_0_0.xsd">

    <modelVersion>4.0.0</modelVersion>
    <!-- 项目的父项目 -->
    <parent>
       <groupId>org.mazhi</groupId>
       <artifactId>mazhi-app-parent</artifactId>
       <version>0.0.1-SNAPSHOT</version>
       <relativePath>../mazhi-app-parent</relativePath>
    </parent>

    <!-- groupId: groupId:项目或者组织的唯一标志,并且配置时生成的路径也是由此生成, 如com.mycompany.app生成的相对路径为:/com/mycompany/app -->
    <groupId>org.mazhi</groupId>

    <!-- artifactId: 项目的通用名称 -->
    <artifactId>mazhi-core</artifactId>

    <!-- packaging: 打包的机制,如pom, jar, maven-plugin, ejb, war, ear, rar, par -->
    <packaging>jar</packaging>

    <!-- version:项目的版本 -->
    <version>SNAPSHOT-0.0.1</version>

    <!-- 项目的名称, Maven 产生的文档用 -->
    <name>Mazhi Core</name>

    <!-- 哪个网站可以找到这个项目,提示如果 Maven 资源列表没有,可以直接上该网站寻找, Maven 产生的文档用 -->
    <url>http://mazhi.org</url>

    <!-- 项目的描述, Maven 产生的文档用 -->
    <description>A maven project to study maven.</description>

    <!-- 用于配置分发管理,配置相应的产品发布信息,主要用于发布,在执行mvn deploy后表示要发布的位置 -->
    <distributionManagement>
        <repository>
            <id>nexus-releases</id>
            <url>http://ip:端口/nexus/content/repositories/releases/</url>
        </repository>
        <snapshotRepository>
            <id>nexus-snapshots</id>
            <url>http://ip:端口/nexus/content/repositories/snapshots/</url>
        </snapshotRepository>
    </distributionManagement>

    <!-- 依赖关系 -->
    <dependencies>
         <!-- 自动加入的依赖包,它们是通过项目坐标来找到依赖包的。所以用了maven之后就不需要再拷jar包了 -->
        <dependency>
            <groupId>junit</groupId>
            <artifactId>junit</artifactId>
            <version>3.8.1</version>
            <!-- 依赖的范围:默认为compile -->
            <!--     test:测试范围有效。即编译和打包时不会加入该依赖包 -->
            <!--  compile:编译范围有效。即编译和打包时会将该依赖包一并加入 -->
            <!-- provided:编译和测试时有效,最后生成war包时不会加入该依赖包。比如web容器本身已包含的servlet-api.jar,再打包则会冲突 -->
            <!--  runtime:运行范围有效,编译时则不依赖 -->
            <scope>test</scope>
            <!-- <exclusions><exclusion></exclusion></exclusions> -->
            <!-- - exclusions表示只包括指定的项目,不包括相关的依赖。试想一下,两个三方jar依赖不同版本的日志包jar,项目会知道应该使用哪个吗?答案是否定的 -->
        </dependency>
    </dependencies>

</project>
微服务开发之Spring Boot
<properties>
		<!-- 表示项目根目录 -->
		<main.basedir>${basedir}/..</main.basedir>
		<java.version>1.7</java.version>
		<spring.version>4.1.4.RELEASE</spring.version>
		<hibernate.api.version>1.0.1.Final</hibernate.api.version>
</properties>
<dependencyManagement>
		<dependencies>
			<dependency>
				Import dependency management from spring boot
				<groupId>org.springframework.boot</groupId>
				<artifactId>spring-boot-dependencies</artifactId>
				<version>1.2.1.RELEASE</version>
				<type>pom</type>
				<scope>import</scope>
			</dependency>
		</dependencies>
</dependencyManagement>
这样子模块就可以引用这些属性。
在mazhi-app-parent项目中,配置spring boot集成maven的插件,如下:
 <!--  安装spring boot集成Maven的插件 -->
	<build>
		<plugins>
			<plugin>
				<groupId>org.springframework.boot</groupId>
				<artifactId>spring-boot-maven-plugin</artifactId>
			</plugin>
		</plugins>
	</build>
在mazhi-service模块中引入Spring boot的包,如下:
 <!-- Add typical dependencies for a web application -->
    <dependencies>
        <dependency>
            <groupId>org.springframework.boot</groupId>
            <artifactId>spring-boot-starter-web</artifactId>
        </dependency>
    </dependencies>
在 org.mazhi.service包中新建Application.class类,内容如下:
package org.mazhi.service;

import org.springframework.boot.SpringApplication;
import org.springframework.boot.autoconfigure.EnableAutoConfiguration;
import org.springframework.stereotype.Controller;
import org.springframework.web.bind.annotation.RequestMapping;
import org.springframework.web.bind.annotation.ResponseBody;

@Controller
@EnableAutoConfiguration
public class Application {

    @RequestMapping("/")
    @ResponseBody
    String home() {
        return "Hello World!";
    }

    public static void main(String[] args) throws Exception {
        SpringApplication.run(Application.class, args);
    }
}
添加Spring boot的配置文件,放到java/main/resource下,内容如下:
# Server settings (ServerProperties)
server:
  port: 8090
  sessionTimeout: 30
#  contextPath: /

  # Tomcat specifics
  tomcat:
    accessLogEnabled: false
    protocolHeader: x-forwarded-proto
    remoteIpHeader: x-forwarded-for
    basedir:
    backgroundProcessorDelay: 30 # secs

management:
  address: 127.0.0.1
  port: 8090


info:
  app:
    name: springtest
    description: spring test
    version: 1.0.0
注意缩近和格式,不要随便做对齐什么的操作,这是一种约定。
在这个类上右键,Run As >> Java Application,可以看到Eclipse的控制台输出如下信息,表示启动成功!!

可以用浏览器去访问一下这个服务,地址为:
http://localhost:8090/
浏览器会输出:
Hello World!
  <dependency>
			<groupId>org.mazhi</groupId>
			<artifactId>mazhi-core</artifactId>
			<version>0.0.1-SNAPSHOT</version>
	   </dependency>
如果这时候没有对mazhi-core进行build和instaling过程时,可能会报错,需要对mazhi-core模块install一下,然后进行引入即可。
Maven项目有时候本身没错,但是项目名上显示红叉,这时候只要更新一下项目即可。
项目上右键 >> Maven >> Update Project .. 即可。
或者还报错的话,需要先运行mazhi项目下的pom.xml文件,install一下,保证几个子模块成功进行了build和installing过程。
以上是关于剑指架构师系列-持续集成之Maven实现项目的编译发布和部署的主要内容,如果未能解决你的问题,请参考以下文章