Spring 控制反转
Posted
tags:
篇首语:本文由小常识网(cha138.com)小编为大家整理,主要介绍了Spring 控制反转相关的知识,希望对你有一定的参考价值。
Spring 控制反转
- 具体内容
Spring 开发框架之中有几个概念DI&IOC、AOP。那么要想理解Spring就必须首先理解控制反转的核心意义是什么?
对于IOC来讲如果直接进行文字的描述,听起来会很麻烦。下面直接通过一套具体案例来分析什么IOC的核心本质。
- IOC分析场景
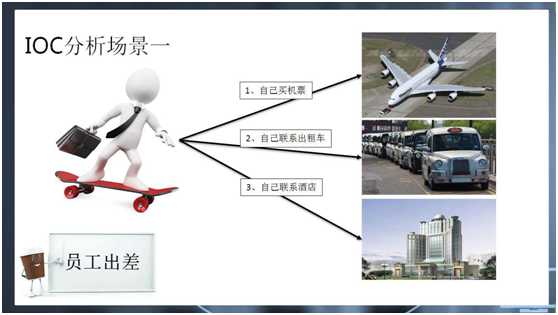
实际上这样的操作过程就属于最初的开发阶段模式。如果换到程序的开发之中,那么可能最直白的做法就相当于是使用new来进行对象的产生。
package cn.wnh.service; public interface IMessageService { public String getInfo() ; } |
package cn.wnh.service.impl; import cn.wnh.service.IMessageService; public class MessageServiceImpl implements IMessageService { @Override public String getInfo() { return "www.mldn.cn"; } } |
对于开发者来讲,最简单的使用形式就是直接利用关键字new实例化对象。
package cn.wnh.test; import cn.wnh.service.IMessageService; import cn.wnh.service.impl.MessageServiceImpl; public class TestMessage { public static void main(String[] args) { IMessageService msg=new MessageServiceImpl(); System.out.println(msg.getInfo());; } } |
如果把TestMessage类比喻为一个出差员工,那么整个的处理过程中该员工必然要自己处理一切的可能出现的事务;
在整个的代码编写之中的确可以完成自己所需要描述的功能,但是会带来一个严重的问题:耦合度加深,因为在java中所有的开发里面,new是造成代码耦合度关键的元凶。
所以后来发现,如果继续这样的开发模式下去,整个代码将变为一潭死水。
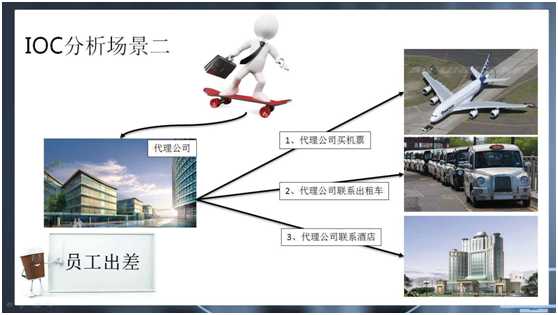
这个时候应该引入一个专门负责具体操作的代理公司完成开发,这样就避免了程序员直接使用new来实例化对象了,就相当于提供了一个工厂的模型。如下图所
示:
package cn.wnh.factory; import cn.wnh.service.IMessageService; public class ServiceFactory { public static IMessageService getInstance(String className){ IMessageService msg=null; try{ msg=(IMessageService)Class.forName(className).newInstance(); }catch(Exception e){ e.printStackTrace(); } return msg; } } |
用户只需要关注这个代理公司即可,就等于说程序员只需要传递一个完整的类名称给工厂即可。实例化交个工厂去完成。
package cn.wnh.test; import cn.wnh.factory.ServiceFactory; import cn.wnh.service.IMessageService; import cn.wnh.service.impl.MessageServiceImpl; public class TestMessage { public static void main(String[] args) { //IMessageService msg=new MessageServiceImpl(); IMessageService msg=ServiceFactory.getInstance("cn.wnh.service.impl.MessageImpl"); System.out.println(msg.getInfo()); } } |
通过工厂类取得了指定对象的实例,看似一切都很好,但是新的问题出现了:
所有的开发者都需要去关注工厂类;
所有的调用都必须明确的找到工厂类。
二、搭建Spring开发环境
本次将直接使用maven来进行Spring开发环境的搭建。同时本次所有的开发包都已经保存在了nexus私服上。
- 建立一个Mavenue的项目,mavenspring,搭建完成后需要配置与Spring有关的开发包。编辑pom.xml文件:
<dependencies> <dependency> <groupId>junit</groupId> <artifactId>junit</artifactId> <version>4.12</version> </dependency> <dependency> <groupId>commons-logging</groupId> <artifactId>commons-logging</artifactId> <version>1.1.3</version> </dependency> <dependency> <groupId>org.slf4j</groupId> <artifactId>slf4j-api</artifactId> <version>1.7.21</version> </dependency> <dependency> <groupId>org.slf4j</groupId> <artifactId>slf4j-log4j12</artifactId> <version>1.7.21</version> </dependency> <dependency> <groupId>javax</groupId> <artifactId>javaee-api</artifactId> <version>7.0</version> <scope>provided</scope> </dependency> <dependency> <groupId>org.glassfish.web</groupId> <artifactId>javax.servlet.jsp.jstl</artifactId> <version>1.2.2</version> </dependency> <dependency> <groupId>javax.servlet</groupId> <artifactId>jstl</artifactId> <version>1.2</version> </dependency> <dependency> <groupId>org.springframework</groupId> <artifactId>spring-core</artifactId> <version>4.3.3.RELEASE</version> </dependency> <dependency> <groupId>org.springframework</groupId> <artifactId>spring-beans</artifactId> <version>4.3.3.RELEASE</version> </dependency> <dependency> <groupId>org.springframework</groupId> <artifactId>spring-tx</artifactId> <version>4.3.3.RELEASE</version> </dependency> <dependency> <groupId>org.springframework</groupId> <artifactId>spring-context</artifactId> <version>4.3.3.RELEASE</version> </dependency> <dependency> <groupId>org.springframework</groupId> <artifactId>spring-context-support</artifactId> <version>4.3.3.RELEASE</version> </dependency> <dependency> <groupId>org.springframework</groupId> <artifactId>spring-web</artifactId> <version>4.3.3.RELEASE</version> </dependency> <dependency> <groupId>org.springframework</groupId> <artifactId>spring-webmvc</artifactId> <version>4.3.3.RELEASE</version> </dependency> <dependency> <groupId>org.springframework</groupId> <artifactId>spring-aop</artifactId> <version>4.3.3.RELEASE</version> </dependency> <dependency> <groupId>org.springframework</groupId> <artifactId>spring-aspects</artifactId> <version>4.3.3.RELEASE</version> </dependency> <dependency> <groupId>org.springframework</groupId> <artifactId>spring-jdbc</artifactId> <version>4.3.3.RELEASE</version> </dependency> <dependency> <groupId>c3p0</groupId> <artifactId>c3p0</artifactId> <version>0.9.1.2</version> </dependency> <dependency> <groupId>com.mchange</groupId> <artifactId>mchange-commons-java</artifactId> <version>0.2.12</version> </dependency> <dependency> <groupId>mysql</groupId> <artifactId>mysql-connector-java</artifactId> <version>5.1.25</version> </dependency> </dependencies> |
- 如果要想实现Spring的编写需要有一个核心配置文件:applicationContext.xml文件,并需要在此文件中配置一下信息:
<?xml version="1.0" encoding="UTF-8"?> <beans xmlns="http://www.springframework.org/schema/beans" xmlns:xsi="http://www.w3.org/2001/XMLSchema-instance" xmlns:p=http://www.springframework.org/schema/p xmlns:context="http://www.springframework.org/schema/context" xmlns:mvc="http://www.springframework.org/schema/mvc" xmlns:aop="http://www.springframework.org/schema/aop" xmlns:tx="http://www.springframework.org/schema/tx" xsi:schemaLocation="http://www.springframework.org/schema/aop http://www.springframework.org/schema/aop/spring-aop-4.1.xsd http://www.springframework.org/schema/mvc http://www.springframework.org/schema/mvc/spring-mvc-4.1.xsd http://www.springframework.org/schema/beans http://www.springframework.org/schema/beans/spring-beans-4.1.xsd http://www.springframework.org/schema/tx http://www.springframework.org/schema/tx/spring-tx-4.1.xsd http://www.springframework.org/schema/context http://www.springframework.org/schema/context/spring-context-4.1.xsd"> </beans> |
- 实现Spring基础配置
在整个的开发过程之中,首先只能够通过代码来感受一下Spring基础配置,如果你需要感受到Spring完整的优点更多的学习。
- 之前已经实现了基础的接口和实现类,现在在此基础上修改applicationContext.xml配置文件,加入一下信息:
<bean id="msg" class="cn.mldn.service.impl.MessageServiceImpl"/>
- 在测试类中编写程序代码:
·Spring是一个容器所以需要先模拟该容器的启动,这里面需要使用一些Spring直接的类;
·要通过资源文件取得IMessageService接口对象;
package cn.wnh.test; import org.springframework.context.ApplicationContext; import org.springframework.context.support.ClassPathXmlApplicationContext; import cn.wnh.service.IMessageService; public class TestMessage { public static void main(String[] args) { //IMessageService msg=new MessageServiceImpl(); //IMessageService msg=ServiceFactory.getInstance("cn.wnh.service.impl.MessageImpl"); ApplicationContext ctx = new ClassPathXmlApplicationContext("applicationContext.xml"); IMessageService msgService = ctx.getBean("msg",IMessageService.class) ; System.out.println(msgService.getInfo()); } } |
3、如果说现在使用了eclipse直接开发,但是此网络比较慢的话,这样的话程序对于xml文件的验证速度会很慢,所以为了了解这个文件,可以采用如下步骤完成:
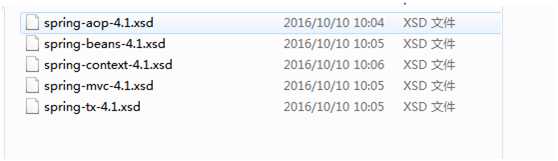
·将所需要的xsd的文件下载下来
·建议关闭xml验证操作:在首选项中选择 "validation"配置,取消xml的验证规则:
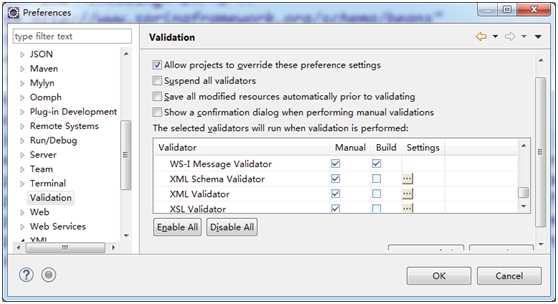
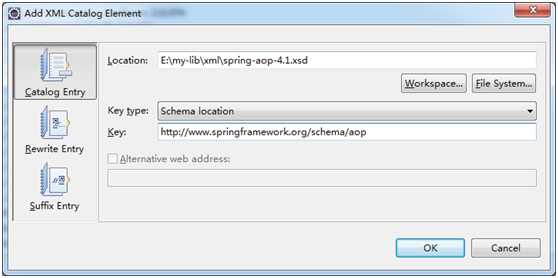
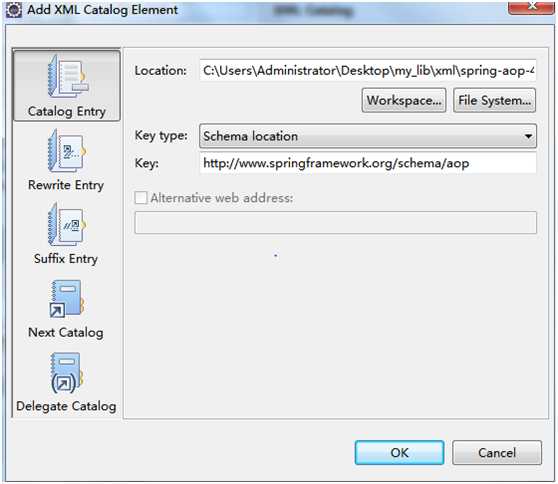
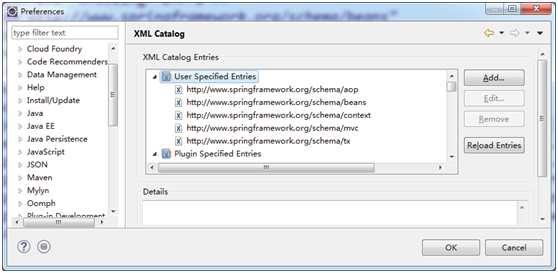
然后将所需要的*.xsd的格式文件配置都项目里:"首选项",进入"xml"配置,添加"xml Catalog",选择"用户特定实体",然后将下载好的*.xsd文件一一添加进去,添加时请注意选择key Type 为Schema location;
为了保证正确,建议Eclipse重新启动。
4、都已经涉及到了开发框架,且开发框架以及配置好了一个常用的日志组件:log4j、slf4j。建议在 "/src/main/resources"中拷贝一个log4j.properties文件,果不配置日志文件,那么所有的错误信息都会看不到。
5、配置好了日志文件,以后进行代码测试时就可以不再使用System.out了,应该使用日志文件的形式输出;
·配置要使用的开发包,别导错了:
import org.slf4j.Logger; import org.slf4j.LoggerFactory; |
取得Logger类对象后,通过这个对象进行输出。输出日志有如下几种形式:
·info():表示普通的信息输出;
·warn():表示警告信息,但是不致命;
·error():表示出现异常信息;
·debug():表示调试信息;
通过以上的配置就可以发现在整个的Spring里面对于对象的产生完全由Spring自己来进行维护,这样的开发是有好处的,避免了关键字new。
import org.slf4j.Logger; import org.slf4j.LoggerFactory; import org.springframework.context.ApplicationContext; import org.springframework.context.support.ClassPathXmlApplicationContext; import cn.wnh.service.IMessageService; public class TestMessage { public static void main(String[] args) { ApplicationContext ctx = new ClassPathXmlApplicationContext("applicationContext.xml"); IMessageService msgService = ctx.getBean("msg",IMessageService.class) ; //IMessageService msg=new MessageServiceImpl(); //IMessageService msg=ServiceFactory.getInstance("cn.wnh.service.impl.MessageImpl"); //System.out.println(msgService.getInfo());
Logger log=LoggerFactory.getLogger(TestMessage.class); log.info(msgService.getInfo()); log.error(msgService.getInfo()); log.warn(msgService.getInfo()); } } |
6、既然都使用到maven开发,那么对于代码的测试就不要再去编写测试类进行测试了,应该使用junit进行测试;
在pom.xml中配置一下信息即可;
<dependency> <groupId>junit</groupId> <artifactId>junit</artifactId> <version>4.12</version> </dependency> |
使用junit类测试:
public class TestMessage { ApplicationContext ctx = new ClassPathXmlApplicationContext("applicationContext.xml"); @Test public void TestGetInfo(){ IMessageService msgservice=ctx.getBean("msg",IMessageService.class); //输出MessageService类中getInfo()里的内容; Logger.getLogger(TestMessage.class).info(msgservice.getInfo()); //比较MessageService类中getInfo()里的输出信息与"www.wnh.cn"进行比较",如果相等则输出; TestCase.assertEquals(msgService.getInfo(),"www.wnh.cn"); } |
总结:控制反转简单的说就是通过Spring容器的applicationContext.xml文件进行简单的配置"<bean id="msg" class="cn.mldn.service.impl.MessageServiceImpl"/>",就可以轻松实现对类的实例化,实例化名称就相当于配置文件中的id;然后便可以在测试类中取得容器对象"ApplicationContext ctx = new ClassPathXmlApplicationContext("applicationContext.xml")",通过容器对象便可以取得类对象"IMessageService msgservice=ctx.getBean("msg",IMessageService.class)"然后便可以取得类中的内容,这样的一个过程,就称为控制反转;
总的来说,Spring 的确是提供了方便的对象管理,但是其开发的过程以及所需要的开发包是非常强大的,上只是实现了一个接口对象的注入处理,以后还可能牵扯到更多的对象的注入过程。