CXF整合spring,在tomcat中发布webService
Posted 一响贪欢
tags:
篇首语:本文由小常识网(cha138.com)小编为大家整理,主要介绍了CXF整合spring,在tomcat中发布webService相关的知识,希望对你有一定的参考价值。
服务端
1、首先下载CXF的jar包 http://pan.baidu.com/s/1dFBwSRf 密码: qyax。里面自带了需要用到的spring的jar包.
或者使用maven,如下配置。不论使用哪种方式,均要注意版本问题,cxf3.1.2必须配置jdk1.7及以上版本。
<dependency>
    <groupId>org.apache.cxf</groupId>
    <artifactId>cxf-rt-frontend-jaxws</artifactId>
    <version>3.1.2</version>
</dependency>
<dependency>
    <groupId>org.apache.cxf</groupId>
    <artifactId>cxf-rt-transports-http</artifactId>
    <version>3.1.2</version>
</dependency>
2、新建一个web项目,在这里我给它命名为cxfweb
3、将下载的jar包导入lib下,并build
4、在src目录下,新建两个包。com.yxf.controller,com.yxf.serviceImpl。
5、在src目录下,新建spring的配置文件。
<?xml version="1.0" encoding="UTF-8"?>
<beans xmlns="http://www.springframework.org/schema/beans"
    xmlns:xsi="http://www.w3.org/2001/XMLSchema-instance"
    xmlns:jaxws="http://cxf.apache.org/jaxws"
    xsi:schemaLocation="
        http://www.springframework.org/schema/beans
        http://www.springframework.org/schema/beans/spring-beans-4.0.xsd
        http://cxf.apache.org/jaxws
        http://cxf.apache.org/schemas/jaxws.xsd">

    <bean id="loginServiceImpl" class="com.yxf.serviceImpl.LoginServiceImpl" />

    <!-- address就是服务访问的地址:http://localhost:8080/cxfweb/cxf/hello -->
    <jaxws:server address="/hello">
        <jaxws:serviceBean>
        //这个类需要配置注解@webService
            <ref bean="loginServiceImpl"/>
        </jaxws:serviceBean>
    </jaxws:server>

</beans>
6、在com.yxf.contoller包下新建一个servlet,这里我命名为LoginController。
7、在com.yxf.serviceImpl包下新建一个JOPO,这里我命名为LoginServiceImpl。(为了简单方便,这里就不通过接口)
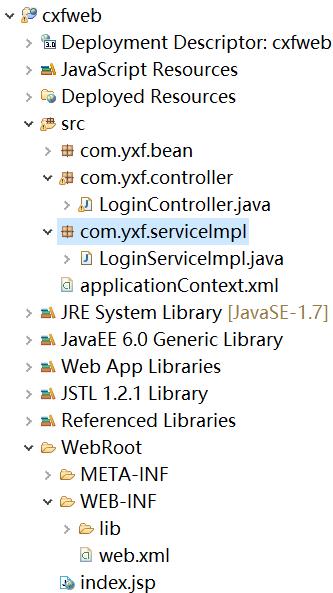
8、项目整体结构如下

9、配置web.xml
<?xml version="1.0" encoding="UTF-8"?>
<web-app xmlns:xsi="http://www.w3.org/2001/XMLSchema-instance" xmlns="http://java.sun.com/xml/ns/javaee" xsi:schemaLocation="http://java.sun.com/xml/ns/javaee http://java.sun.com/xml/ns/javaee/web-app_3_0.xsd" id="WebApp_ID" version="3.0">
  <display-name>cxfweb</display-name>
  <welcome-file-list>
    <welcome-file>index.jsp</welcome-file>
  </welcome-file-list>

  <servlet>
      <servlet-name>yxf</servlet-name>
      <servlet-class>com.yxf.controller.LoginController</servlet-class>
  </servlet>

  <servlet-mapping>
      <servlet-name>yxf</servlet-name>
      <url-pattern>*.do</url-pattern>
  </servlet-mapping>

  <listener>
      <listener-class>org.springframework.web.context.ContextLoaderListener</listener-class>
  </listener>

  <context-param>
      <param-name>contextConfigLocation</param-name>
      <param-value>classpath:applicationContext.xml</param-value>
  </context-param>

  //这里开始配置cxf。
  <servlet>
      <servlet-name>cxf</servlet-name>
      <servlet-class>org.apache.cxf.transport.servlet.CXFServlet</servlet-class>
      //项目启动时启动
    <load-on-startup>1</load-on-startup>
  </servlet>

  <servlet-mapping>
      <servlet-name>cxf</servlet-name>
    //配置访问路径
      <url-pattern>/cxf/*</url-pattern>
  </servlet-mapping>

</web-app>
10、给先前建立的LoginServiceImpl类,添加注解@webService。(如果要对wsdl进行配置,这里可以自行配置)
11、启动tomcat。
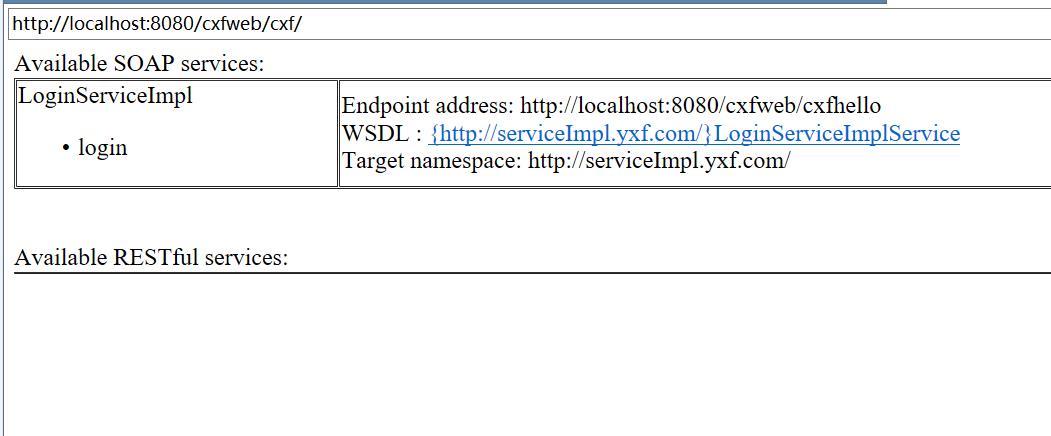
12、输入路径:我的是http://localhost:8080/cxfweb/cxf/。可见如下界面即配置成功

注意:上面截图时候spring的配置<jaxws:server address="/hello">路径没有带/,变成了localhost:8080/cxfweb/cxfhello。正确配置应添加/,则路径为cxfweb/cxf/hello。
wsdl地址应为:localhost:8080/cxfweb/cxf/hello?wsdl
下面也附上servlet和pojo里的内容
package com.yxf.controller;

import java.io.IOException;
import javax.servlet.ServletException;
import javax.servlet.annotation.WebServlet;
import javax.servlet.http.HttpServlet;
import javax.servlet.http.HttpServletRequest;
import javax.servlet.http.HttpServletResponse;

import org.springframework.beans.factory.annotation.Autowired;
import org.springframework.context.ApplicationContext;
import org.springframework.web.context.support.WebApplicationContextUtils;

import com.yxf.bean.User;
import com.yxf.serviceImpl.LoginServiceImpl;

/**
 * Servlet implementation class Login
 */
public class LoginController extends HttpServlet {
    private static final long serialVersionUID = 1L;

    private ApplicationContext context;

    private LoginServiceImpl loginServiceImpl;

    private volatile int count = 0;

    public LoginController() {}

    protected void doGet(HttpServletRequest request, HttpServletResponse response) throws ServletException, IOException {
        System.out.println("----------get---------------");
        String username = request.getParameter("username");
        String password = request.getParameter("password");
        User u = new User(username,password, count+"");
        System.out.println(u.toString());
        loginServiceImpl.login(u);
    }

    protected void doPost(HttpServletRequest request, HttpServletResponse response) throws ServletException, IOException {
        doGet(request, response);
    }

    @Override
    public void init() throws ServletException {
        context = WebApplicationContextUtils.getWebApplicationContext(this.getServletContext());
        loginServiceImpl = (LoginServiceImpl)context.getBean("loginServiceImpl");

    }

}
package com.yxf.serviceImpl;

import javax.jws.WebService;

import com.yxf.bean.User;

@WebService
public class LoginServiceImpl {

    public LoginServiceImpl() {
        System.out.println("LoginServiceImpl is created");
    }

    public void login(User user){
        System.out.println("登录信息:");
        System.out.println("用户ID--------------"+user.getId());
        System.out.println("用户帐号--------------"+user.getUsername());
        System.out.println("用户密码--------------"+user.getPassword());
    }

}
客户端
1、利用cxf生成客户端,需要先在官网下载工具,官网地址:http://cxf.apache.org/download.html ,进去后会见到如下内容,根据你的环境选择对应的下载文件。

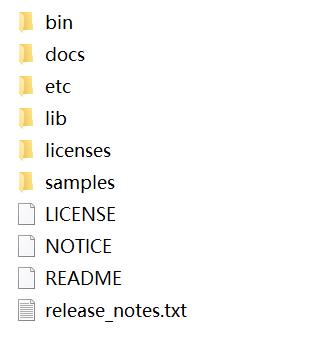
2、下载文件后进行解压,解压后的目录如下,例如D:\\apache-cxf-3.2.2

3、唤出运行窗口工具,进入解压文件的bin目录下,或者在系统环境的path中配置bin的目录。
4、执行命令“wsdl2java -p 本地包名 -d 本地src目录 -client -encoding utf-8 -noAddressBinding wsdl地址”
例如:wsdl2java -p com.yxf1 -d D://myeclipse2014Project/maventest/src -client -encoding utf-8 -noAddressBinding http://localhost:8080/sgy-web/cxf/ws?wsdl
执行以上命令后,客户端代码将会被自动生成。
5、调用接口,例如我的服务端接口实现类为SgyWsImpl,则客户端需要通过new SgyWslmplService().getSgyWsImplPort()来获得对象,然后通过对象调用想要调用的方法。
public class Main {

    public static void main(String[] args) {
        SgyWsImplService service = new SgyWsImplService();
        SgyWs sgy = service.getSgyWsImplPort();
                sgy.sayHello();
        }
}
以上是关于CXF整合spring,在tomcat中发布webService的主要内容,如果未能解决你的问题,请参考以下文章