项目——博客系统
Posted 迷宫白
tags:
篇首语:本文由小常识网(cha138.com)小编为大家整理,主要介绍了项目——博客系统相关的知识,希望对你有一定的参考价值。
文章目录
前言

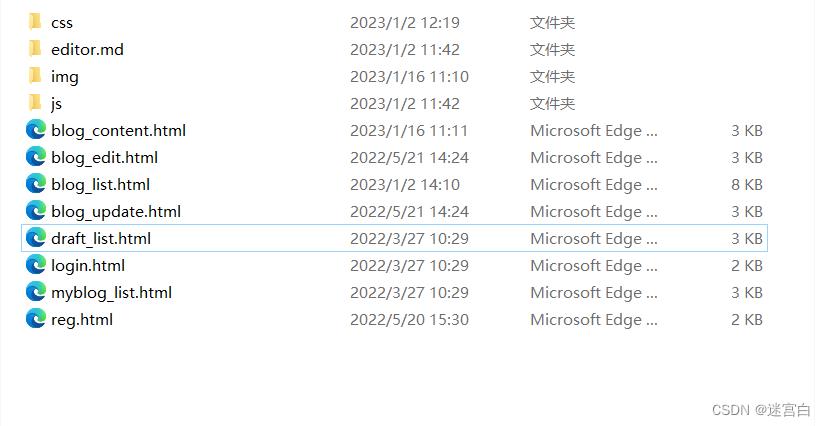
这个博客系统前端分为8个页面,分别是注册页,登录页,编辑页,修改页,个人主页,博客正文页,草稿列表页,博客列表页
项目优点
- 框架:使用ssm(SpringBoot + SpringMVC + MyBatis)
- 密码:用户登录用的密码是使用加盐算法处理然后存储到数据库
- 用户登录状态持久化:将session持久化到redis
- 功能升级:在博客列表页实现一个分页功能
- 使用拦截器进行用户的登录验证,统一数据返回格式,统一异常处理
项目创建
创建一个SpringBoot项目,添加需要的依赖
<dependencies>
		<dependency>
			<groupId>org.springframework.boot</groupId>
			<artifactId>spring-boot-starter-data-redis</artifactId>
		</dependency>
		<dependency>
			<groupId>org.springframework.session</groupId>
			<artifactId>spring-session-data-redis</artifactId>
		</dependency>

		<dependency>
			<groupId>org.springframework.boot</groupId>
			<artifactId>spring-boot-starter-web</artifactId>
		</dependency>
		<dependency>
			<groupId>org.mybatis.spring.boot</groupId>
			<artifactId>mybatis-spring-boot-starter</artifactId>
			<version>2.3.0</version>
		</dependency>

		<dependency>
			<groupId>org.springframework.boot</groupId>
			<artifactId>spring-boot-devtools</artifactId>
			<scope>runtime</scope>
			<optional>true</optional>
		</dependency>
		<dependency>
			<groupId>com.mysql</groupId>
			<artifactId>mysql-connector-j</artifactId>
			<scope>runtime</scope>
		</dependency>
		<dependency>
			<groupId>org.projectlombok</groupId>
			<artifactId>lombok</artifactId>
			<optional>true</optional>
		</dependency>
		<dependency>
			<groupId>org.springframework.boot</groupId>
			<artifactId>spring-boot-starter-test</artifactId>
			<scope>test</scope>
		</dependency>
	</dependencies>
创建相应的目录,文件,表,导入前端资源
首先在数据库建表,这里直接提供sql语句
-- 创建数据库
drop database if exists mycnblog;
create database mycnblog DEFAULT CHARACTER SET utf8mb4;

-- 使用数据数据
use mycnblog;

-- 创建表[用户表]
drop table if exists  userinfo;
create table userinfo(
    id int primary key auto_increment,
    username varchar(100) not null,
    password varchar(32) not null,
    photo varchar(500) default '',
    createtime datetime default now(),
    updatetime datetime default now(),
    `state` int default 1
) default charset 'utf8mb4';

-- 创建文章表
drop table if exists  articleinfo;
create table articleinfo(
    id int primary key auto_increment,
    title varchar(100) not null,
    content text not null,
    createtime datetime default now(),
    updatetime datetime default now(),
    uid int not null,
    rcount int not null default 1,
    `state` int default 1
)default charset 'utf8mb4';


-- 添加一个用户信息
INSERT INTO `mycnblog`.`userinfo` (`id`, `username`, `password`, `photo`, `createtime`, `updatetime`, `state`) VALUES
(1, 'admin', 'admin', '', '2021-12-06 17:10:48', '2021-12-06 17:10:48', 1);

-- 文章添加测试数据
insert into articleinfo(title,content,uid,state)
    values('喜讯','今天是正月初六',9,2);
- 实体层(model):创建实体类UserInfo,ArticleInfo
- 控制层(controller):创建控制器UserController和ArticleInfo
- 服务层(servlce):创建服务类:UserService和ArticleService
- 持久层(mapper):创建接口UserMapper和ArticleMapper,并创建对应的xml文件,在yml文件里配置好
- 工具层(common):统一返回类(ResponseAdvice,AjaxResult等)
注意:创建完相应的类就得将需要加的注解加上去,这里就不一一展示了
创建完后的目录结构

yml配置文件的内容
# 配置数据库的连接字符串
spring:
  datasource:
    url: jdbc:mysql://127.0.0.1:3306/mycnblog?characterEncoding=utf8
    username: root
    password: 123456
    driver-class-name: com.mysql.cj.jdbc.Driver
# 设置 Mybatis 的 xml 保存路径
mybatis:
  mapper-locations: classpath:mybatis/**Mapper.xml
  configuration: # 配置打印 MyBatis 执行的 SQL
    log-impl: org.apache.ibatis.logging.stdout.StdOutImpl
# 配置打印 MyBatis 执行的 SQL
logging:
  level:
    com:
      example:
        demo: debug
将前端的东西导入static


实现common工具类

由于工具类后面我们基本都会用到,所以这里先实现一下
实现拦截器验证用户登录
- 步骤1创建一个Constant类,定义session的key
- 步骤2:创建一个普通类实现HandlerInterceptor接口,重写preHandle
- 步骤3:创建一个普通类实现 WebMvcConfigurer接口,重写addInterceptors
public class Constant
    //登录信息存储到session中的key值
    public static final String SESSION_USERINFO_KEY = "session_userinfo_key";
@Component
public class LoginInterceptor implements HandlerInterceptor
    @Override
    public boolean preHandle(HttpServletRequest request, HttpServletResponse response, Object handler) throws Exception
        //判断登录业务
        HttpSession session = request.getSession(false);//会根据请求发送来的sessionId去服务器找对应的会话
        if(session.getAttribute(Constant.SESSION_USERINFO_KEY)!=null) //根据key拿到value
            return true;

        response.setStatus(401);
        return false;
@Configuration
public class AppConfig implements WebMvcConfigurer
    //不拦截的url
    List<String> excludes = new ArrayList<>()
        add("/**/*.html");
        add("/js/**");
        add("/editor.md/**");
        add("/css/**");
        add("/img/**"); // 放行 static/img 下的所有文件
    ;

    @Autowired
    LoginInterceptor loginInterceptor;

    @Override
    public void addInterceptors(InterceptorRegistry registry)
        //配置拦截器
        InterceptorRegistration registration = registry.addInterceptor(loginInterceptor);
        registration.addPathPatterns("/**");
        registration.excludePathPatterns(excludes);
实现统一数据返回格式
步骤1:创建一个普通的类,实现业务成功返回的方法和业务失败返回的方法
步骤2:创建一个普通的类实现ResponseAdvice接口,重写supports方法和beforeBodyWrite方法
代码
public class AjaxResult

    /**
     * 业务执行成功返回的方法
     * @param data
     * @return
     */
    public static HashMap<String,Object> success(Object data)
        HashMap<String,Object> result = new HashMap<>();
        result.put("code",200);
        result.put("msg","");
        result.put("data",data);
        return result;


    /**
     * 业务执行成功时返回的代码
     * @param data
     * @param msg
     * @return
     */
    public static HashMap<String,Object> success(Object data,String msg)
        HashMap<String,Object> result = new HashMap<>();
        result.put("code",200);
        result.put("msg",msg);
        result.put("data",data);
        return result;


    /**
     * 业务执行失败返回的方法
     * @param code
     * @param data
     * @param msg
     * @return
     */
    public static HashMap<String,Object> fail(int code,Object data,String msg)
        HashMap<String,Object> result = new HashMap<>();
        result.put("code",code);
        result.put("msg",msg);
        result.put("data",data);
        return result;


    /**
     * 业务执行失败返回的方法
     * @param code
     * @param msg
     * @return
     */
    public static HashMap<String,Object> fail(int code,String msg)
        HashMap<String,Object> result = new HashMap<>();
        result.put("code",code);
        result.put("msg",msg);
        result.put("data","");
        return result;
public class ResponseAdvice implements ResponseBodyAdvice
    @Override
    public boolean supports(MethodParameter returnType, Class converterType)
        return true;


    @SneakyThrows
    @Override
    public Object beforeBodyWrite(Object body, MethodParameter returnType, MediaType selectedContentType, Class selectedConverterType, ServerHttpRequest request, ServerHttpResponse response)
        if(body instanceof HashMap)
            return body;

        //如果body是字符串类型,需要特殊处理
        if(body instanceof String)
            ObjectMapper objectMapper = new ObjectMapper();
            return objectMapper.writeValueAsString(AjaxResult.success(body));

        return AjaxResult.success(body);
实现加盐加密类
创建一个普通类,实现两个方法,encrypt方法和decrypt方法。
- encrypt方法根据用户输入的密码,进行加盐加密,返回最终加密的密码
- decrypt方法根据用户输入的密码和数据库存的加密的密码进行验证
public class SecurityUtil

    /**
     * 对password进行加盐加密
     * @param password
     * @return
     */
    public static String encrypt(String password)


    /**
     * 验证password和数据库拿出来的finalPassword进行验证
     * @param password
     * @param finalPassword
     * @return
     */
    public static String decrypt(String password,String finalPassword)
实现encrypt方法
加盐思路:用UUID类生成一个32长度的字符串作为盐值,然后将盐值+password进行md5加密生成一个32长度的字符串,然后盐值+这个有md5加密的字符串,就是最终的结果
 /**
     * 对password进行加盐加密
     * @param password
     * @return
     */
    public static String encrypt(String password)
        //每次生成内容不同,但是长度固定为32的字符串
        String salt = UUID.randomUUID().toString().replace("-","");
        //盐值+password进行md5加密
        String finalPassword = DigestUtils.md5DigestAsHex((salt+password).getBytes());
        //返回盐值+密码,总共64位,存到数据库中
        return salt+finalPassword;
实现decrypt方法
这个方法用来解密验证密码
思路:这个方法有两个参数password:待验证的密码,finalPassword:最终正确的密码(在数据库查询的密码),从finalPassword中提取出盐值,然后盐值+password进行md5加密生成一个字符串,然后盐值+字符串和finalPassword判断是否相等
/**
     * 验证password和数据库拿出来的finalPassword进行验证
     * password:待验证的密码
     * finalPassword:最终正确的密码(在数据库查询的密码)
     * @param password
     * @param finalPassword
     * @return
     */
    public static boolean decrypt(String password,String finalPassword)
        //非空效验
        if(!StringUtils.hasLength(password) || !StringUtils.hasLength(finalPassword))
            return false;

        if(finalPassword.length()!=64)
            return false;

        //提取出盐值
        String salt = finalPassword.substring(0,32);
        //使用盐值+密码生成一个32位的密码
        String securityPassword = DigestUtils.md5DigestAsHex((salt+password).getBytes());
        //使用上一个32位的密码拼接上盐值进行密码验证
        return (salt+securityPassword).equals(finalPassword);
实现SessionUtil类
这个工具类用来查询当前用户登录的session信息
public class SessionUtil

    public static UserInfo getLoginUser(HttpServletRequest request)
        HttpSession session = request.getSession(false);
        if(session!=null && session.getAttribute(Constant.SESSION_USERINFO_KEY)!=null)
            UserInfo userInfo = (UserInfo) session.getAttribute(Constant.SESSION_USERINFO_KEY);
            return userInfo;

        return null;
实现注册页面
这里开始就涉及到前后端交互了,要约定好前后端交互的接口
实现前端代码
那先来编写前端代码(打开reg.html进行编写代码)
记得要引入jquery

mysub方法
function mysub()
            //1.非空效验
            var username = jQuery("#username");
            var password = jQuery("#password");
            var password2 = jQuery("#password2");
            if(username.val()=="")
                alert("用户名为空");
                username.focus();
                return false;

            if(password.val()=="")
                alert("密码为空");
                password.focus();
                return false;

            if(password2.val()=="")
                alert("确认密码为空");
                password2.focus();
                return false;

            if(password.val()!=password2.val())
                alert("两次输入的密码不一致");
                return false;

            //2.发送ajax请求
            jQuery.ajax(以上是关于项目——博客系统的主要内容,如果未能解决你的问题,请参考以下文章