Spring4-自动装配Beans-通过注解@Autowired在Set方法上
Posted
tags:
篇首语:本文由小常识网(cha138.com)小编为大家整理,主要介绍了Spring4-自动装配Beans-通过注解@Autowired在Set方法上相关的知识,希望对你有一定的参考价值。
1.创建Maven项目,项目名称springdemo18,如图所示
2.配置Maven,修改项目中的pom.xml文件,修改内容如下
<project xmlns="http://maven.apache.org/POM/4.0.0"
xmlns:xsi="http://www.w3.org/2001/XMLSchema-instance"
xsi:schemaLocation="http://maven.apache.org/POM/4.0.0 http://maven.apache.org/xsd/maven-4.0.0.xsd">
  <modelVersion>1.0.0</modelVersion>
  <groupId>shequ</groupId>
  <artifactId>springdemo13</artifactId>
  <version>0.0.1-SNAPSHOT</version>

  <properties>
  	<java.version>1.7</java.version>
  	<project.build.sourceEncoding>UTF-8</project.build.sourceEncoding>
  	<project.reporting.outputEncoding>UTF-8</project.reporting.outputEncoding>
  </properties>

  <repositories>
  	<repository>
  		<id>codelds</id>
  		<url>https://code.lds.org/nexus/content/groups/main-repo</url>
  	</repository>
  </repositories>

  <dependencies>
  	<dependency>
  		<groupId>junit</groupId>
  		<artifactId>junit</artifactId>
  		<version>4.10</version>
  	</dependency>

  	<dependency>
  		<groupId>org.springframework</groupId>
  		<artifactId>spring-core</artifactId>
  		<version>4.1.4.RELEASE</version>
  	</dependency>

  	<dependency>
        <groupId>org.springframework</groupId>
        <artifactId>spring-context</artifactId>
        <version>4.1.4.RELEASE</version>
    </dependency>

    <dependency>
        <groupId>org.springframework</groupId>
        <artifactId>spring-jdbc</artifactId>
        <version>4.1.4.RELEASE</version>
    </dependency>

    <dependency>
        <groupId>mysql</groupId>
        <artifactId>mysql-connector-java</artifactId>
        <version>5.1.34</version>
    </dependency>


  </dependencies>
  <build/>
</project>
3.在src/main/java下创建实体Bean Forum,包名(com.mycompany.shequ.bean)如图所示
4.实体Bean Forum的内容如下
package com.mycompany.shequ.bean;

public class Forum {
	private int fid;
	private String name;
	public int getFid() {
		return fid;
	}
	public void setFid(int fid) {
		this.fid = fid;
	}
	public String getName() {
		return name;
	}
	public void setName(String name) {
		this.name = name;
	}

}
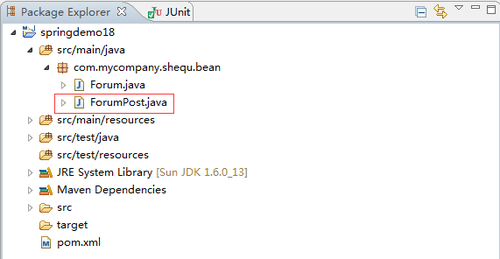
5.在src/main/java下创建实体Bean ForumPost,包名(com.mycompany.shequ.bean)如图所示
6.实体Bean ForumPost的内容如下
package com.mycompany.shequ.bean;

import org.springframework.beans.factory.annotation.Autowired;

public class ForumPost {
	private int pid;
	private String name;
	private Forum forum;

	public ForumPost() {
		super();
	}
	public ForumPost(Forum forum) {
		super();
		this.forum = forum;
	}
	public int getPid() {
		return pid;
	}
	public void setPid(int pid) {
		this.pid = pid;
	}
	public String getName() {
		return name;
	}
	public void setName(String name) {
		this.name = name;
	}
	public Forum getForum() {
		return forum;
	}
	@Autowired
	public void setForum(Forum forum) {
		this.forum = forum;
	}

}
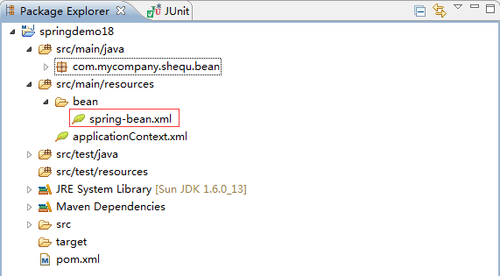
7.在src/main/resources下创建Bean配置文件,配置文件名称spring-bean.xml,如图所示
8.spring-bean.xml文件的内容如下
<?xml version="1.0" encoding="UTF-8"?>
<beans xmlns="http://www.springframework.org/schema/beans"
   xmlns:xsi="http://www.w3.org/2001/XMLSchema-instance"
   xsi:schemaLocation="http://www.springframework.org/schema/beans
   http://www.springframework.org/schema/beans/spring-beans.xsd">

   <bean id="forumpost"
       class="com.mycompany.shequ.bean.ForumPost">
   </bean>

   <bean id="forum" class="com.mycompany.shequ.bean.Forum">
   		<property name="fid" value="3"></property>
   		<property name="name" value="autowired"></property>
   </bean>

</beans>
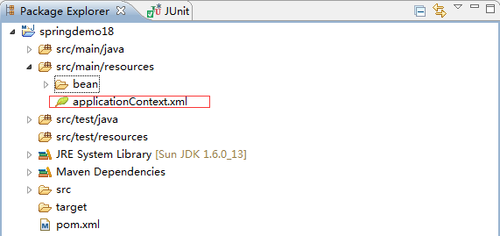
9.在src/main/resources下创建spring的核心配置文件applicationContext.xml,如图所示
10.spring的核心配置文件applicationContext.xml的内容如下
<?xml version="1.0" encoding="UTF-8"?>
<beans xmlns="http://www.springframework.org/schema/beans"
	xmlns:xsi="http://www.w3.org/2001/XMLSchema-instance"
	xmlns:context="http://www.springframework.org/schema/context"
	xsi:schemaLocation="http://www.springframework.org/schema/beans
	http://www.springframework.org/schema/beans/spring-beans-4.0.xsd
	http://www.springframework.org/schema/context
	http://www.springframework.org/schema/context/spring-context-4.0.xsd">

       <context:annotation-config />

	<import resource="bean/spring-bean.xml"/>

</beans>
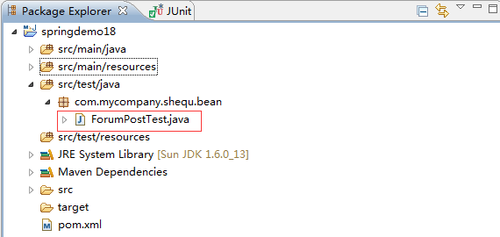
11.在src/test/java下创建测试类ForumPostTest,包名(com.mycompany.shequ.bean),如图所示
12.测试类ForumPostTest的内容如下
package com.mycompany.shequ.bean;

import org.junit.Test;
import org.springframework.context.ApplicationContext;
import org.springframework.context.support.ClassPathXmlApplicationContext;

public class ForumPostTest {

	/**
	 * spring 的自动装配Beans,通过注解@Autowired
	 */
	@Test
	public void autowiredTest(){
	    ApplicationContext context = new ClassPathXmlApplicationContext("applicationContext.xml");

	    ForumPost forumPost = (ForumPost) context.getBean("forumpost");

	    System.out.println(forumPost.getForum().getName());
	}
}
13.在测试类ForumPostTest的byTypeTest方法上右键运行,输出结果如图所示
本文出自 “素颜” 博客,请务必保留此出处http://suyanzhu.blog.51cto.com/8050189/1909532
以上是关于Spring4-自动装配Beans-通过注解@Autowired在Set方法上的主要内容,如果未能解决你的问题,请参考以下文章


