网络摄像头拉流的方法总结(附python代码)
Posted AI浩
tags:
篇首语:本文由小常识网(cha138.com)小编为大家整理,主要介绍了网络摄像头拉流的方法总结(附python代码)相关的知识,希望对你有一定的参考价值。
文章目录
摘要🐇
网络摄像头拉流是获取图片数据常用的方法,本文总结了几种从网络摄像头拉流的方法。
1、直接使用OpenCV🐇
直接使用opencv的cv2.VideoCapture直接读取rtsp视频流,但是这样做的缺点是延迟严重、出现掉帧、花屏现象等,原因在于opencv自己有一个缓存,每次会顺序从自己的缓存中读取,而不是直接读取最新帧。
代码如下:
import cv2
import datetime
def time_str(fmt=None):
    if fmt is None:
        fmt = '%Y_%m_%d_%H_%M_%S'
    return datetime.datetime.today().strftime(fmt)

user_name, user_pwd = "admin", "1234"
ca_ip="192.168.1.100"
channel=2
cap = cv2.VideoCapture("rtsp://%s:%s@%s//Streaming/Channels/%d" \\
                           % (user_name, user_pwd, ca_ip, channel))
if cap.isOpened():
    print("Opened")
while cap.isOpened():
        ret, frame = cap.read()
        cv2.imwrite("opencv_"+time_str() + ".jpg", frame)

2、使用ffmpeg🐇
FFmpeg是一套强大的视频、音频处理程序,也是很多视频处理软件的基础 。但是FFmpeg的命令行使用起来有一定的学习成本。而ffmpeg-python就是解决FFmpeg学习成本的问题,让开发者使用python就可以调用FFmpeg的功能,既减少了学习成本,也增加了代码的可读性。

github地址:https://github.com/kkroening/ffmpeg-python
2.1、安装方法 🐇
2.1.1、安装ffmpeg-python 🐇
ffmpeg-python可以通过典型的 pip 安装获取最新版本(注意:是ffmpeg-python,不要写成了python-ffmpeg):
pip install ffmpeg-python
或者可以从本地克隆和安装源:
git clone git@github.com:kkroening/ffmpeg-python.git
pip install -e ./ffmpeg-python
2.1.2、安装FFmpeg 🐇
使用该库,需要自行安装FFmpeg,如果电脑已经安装了,可以忽略本步骤。这里推荐直接使用conda进行安装,可以省下很多麻烦,其他的安装方式自行百度。
conda install ffmpeg
2.2、代码实现🐇
使用ffmpeg读取rtsp流并转换成numpy array,并使用cv2.imwrite保存。
import ffmpeg
import numpy as np
import cv2
import datetime

def main(source):
    args =
        "rtsp_transport": "tcp",
        "fflags": "nobuffer",
        "flags": "low_delay"
        # 添加参数
    probe = ffmpeg.probe(source)
    cap_info = next(x for x in probe['streams'] if x['codec_type'] == 'video')
    print("fps: ".format(cap_info['r_frame_rate']))
    width = cap_info['width']           # 获取视频流的宽度
    height = cap_info['height']         # 获取视频流的高度
    up, down = str(cap_info['r_frame_rate']).split('/')
    fps = eval(up) / eval(down)
    print("fps: ".format(fps))    # 读取可能会出错错误
    process1 = (
        ffmpeg
        .input(source, **args)
        .output('pipe:', format='rawvideo', pix_fmt='rgb24')
        .overwrite_output()
        .run_async(pipe_stdout=True)
    )
    while True:
        in_bytes = process1.stdout.read(width * height * 3)     # 读取图片
        if not in_bytes:
            break
        # 转成ndarray
        in_frame = (
            np
            .frombuffer(in_bytes, np.uint8)
            .reshape([height, width, 3])
        )
        frame = cv2.cvtColor(in_frame, cv2.COLOR_RGB2BGR)  # 转成BGR
        # cv2.imshow(time_str(), frame)
        cv2.imwrite(time_str()+".jpg", frame)
        # if cv2.waitKey(1) == ord('q'):
        #     break
    process1.kill()             # 关闭

def time_str(fmt=None):
    if fmt is None:
        fmt = '%Y_%m_%d_%H_%M_%S'
    return datetime.datetime.today().strftime(fmt)

if __name__ == "__main__":
    # rtsp流需要换成自己的
    user_name, user_pwd = "admin", "1234"
    ca_ip = "192.168.1.168"
    channel = 2
    alhua_rtsp="rtsp://%s:%s@%s//Streaming/Channels/%d" \\
                           % (user_name, user_pwd, ca_ip, channel)

    main(alhua_rtsp)
3、多线程的方式读取图片🐇
采用多线程的方式,新开一个线程,利用变量、队列等方式保存最新帧,使得每次都读取最新帧,而不是opencv自己缓存中的顺序帧,不会延迟,不会花屏了,代码如下:
import cv2
import threading
import sys
import  datetime
def time_str(fmt=None):
    if fmt is None:
        fmt = '%Y_%m_%d_%H_%M_%S'
    return datetime.datetime.today().strftime(fmt)

class RTSCapture(cv2.VideoCapture):
    _cur_frame = None
    _reading = False
    schemes = ["rtsp://","rtmp://"]
    @staticmethod
    def create(url, *schemes):
        rtscap = RTSCapture(url)
        rtscap.frame_receiver = threading.Thread(target=rtscap.recv_frame, daemon=True)
        rtscap.schemes.extend(schemes)
        if isinstance(url, str) and url.startswith(tuple(rtscap.schemes)):
            rtscap._reading = True
        elif isinstance(url, int):
            pass
        return rtscap

    def isStarted(self):
        ok = self.isOpened()
        if ok and self._reading:
            ok = self.frame_receiver.is_alive()
        return ok

    def recv_frame(self):
        while self._reading and self.isOpened():
            ok, frame = self.read()
            if not ok: break
            self._cur_frame = frame
        self._reading = False

    def read2(self):
        frame = self._cur_frame
        self._cur_frame = None
        return frame is not None, frame

    def start_read(self):
        self.frame_receiver.start()
        self.read_latest_frame = self.read2 if self._reading else self.read

    def stop_read(self):
        self._reading = False
        if self.frame_receiver.is_alive(): self.frame_receiver.join()


if __name__ == '__main__':
    user_name, user_pwd = "admin", "1234"
    ca_ip = "192.168.1.100"
    channel = 2
    alhua_rtsp="rtsp://%s:%s@%s//Streaming/Channels/%d" \\
                           % (user_name, user_pwd, ca_ip, channel)

    rtscap = RTSCapture.create(alhua_rtsp)
    rtscap.start_read()

    while rtscap.isStarted():
        ok, frame = rtscap.read_latest_frame()
        # if cv2.waitKey(100) & 0xFF == ord('q'):
        #     break
        if not ok:
            continue


        # inhere
        # cv2.imshow(time_str(), frame)
        cv2.imwrite(time_str() + ".jpg", frame)


    rtscap.stop_read()
    rtscap.release()
    cv2.destroyAllWindows()
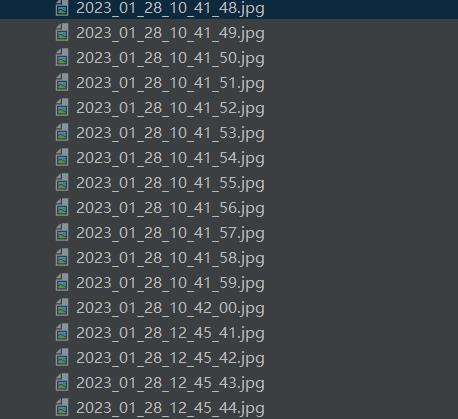
运行结果:

4、多进程的方式拉流🐇
使用Python3自带的多进程模块,创建一个队列,进程A从通过rtsp协议从视频流中读取出每一帧,并放入队列中,进程B从队列中将图片取出,处理后进行显示。进程A如果发现队列里有两张图片(证明进程B的读取速度跟不上进程A),那么进程A主动将队列里面的旧图片删掉,换上新图片。通过多线程的方法:
代码如下:
import cv2
import multiprocessing as mp
import time
import datetime


def time_str(fmt=None):
    if fmt is None:
        fmt = '%Y_%m_%d_%H_%M_%S'
    return datetime.datetime.today().strftime(fmt)

def image_put(q, user, pwd, ip, channel=1):
    cap = cv2.VideoCapture("rtsp://%s:%s@%s//Streaming/Channels/%d" % (user, pwd, ip, channel))
    if cap.isOpened():
        print('HIKVISION')
    else:
        cap = cv2.VideoCapture("rtsp://%s:%s@%s/cam/realmonitor?channel=%d&subtype=0" % (user, pwd, ip, channel))
        print('DaHua')

    while True:
        q.put(cap.read()[1])
        q.get() if q.qsize() > 1 else time.sleep(0.01)


def image_get(q, window_name):
    # cv2.namedWindow(window_name, flags=cv2.WINDOW_FREERATIO)
    while True:
        frame = q.get()
        # cv2.imshow(window_name, frame)
        # cv2.waitKey(1)
        cv2.imwrite("opencv_"+time_str() + ".jpg", frame)
        cv2.waitKey(1)

def run_single_camera():
    user_name, user_pwd, camera_ip = "admin", "admin123456", "192.168.35.121"

    mp.set_start_method(method='spawn')  # init
    queue = mp.Queue(maxsize=2)
    processes = [mp.Process(target=image_put, args=(queue, user_name, user_pwd, camera_ip)),
                 mp.Process(target=image_get, args=(queue, camera_ip))]

    [process.start() for process in processes]
    [process.join() for process in processes]

def run_multi_camera():
    # user_name, user_pwd = "admin", "password"
    user_name, user_pwd = "admin", "1234"
    camera_ip_l = [
        "192.168.1.XX3",  # ipv4
        "192.168.1.XX2",
        "192.168.1.XX1",
    ]

    mp.set_start_method(method='spawn')  # init
    queues = [mp.Queue(maxsize=90) for _ in camera_ip_l]

    processes = []
    for queue, camera_ip in zip(queues, camera_ip_l):
        processes.append(mp.Process(target=image_put, args=(queue, user_name, user_pwd, camera_ip)))
        processes.append(mp.Process(target=image_get, args=(queue, camera_ip)))

    for process in processes:
        process.daemon = True
        process.start()
    for process in processes:
        process.join()


if __name__ == '__main__':
    # run_single_camera()
    run_multi_camera()
    pass

参考文章:https://blog.csdn.net/ljx1400052550/article/details/106987943
以上是关于网络摄像头拉流的方法总结(附python代码)的主要内容,如果未能解决你的问题,请参考以下文章