Android 自定义 ViewCanvas.drawXXX() 系列方法及 Paint 最基本的使用
Posted Kevin-Dev
tags:
篇首语:本文由小常识网(cha138.com)小编为大家整理,主要介绍了Android 自定义 ViewCanvas.drawXXX() 系列方法及 Paint 最基本的使用相关的知识,希望对你有一定的参考价值。
前言
自定义 View 的绘制上手非常容易:提前创建好 Paint 对象,重写 onDraw() 方法,把绘制代码写在 onDraw() 里面,自定义绘制最基本的就实现了。大概就像这样:
public class PracticeFirstView extends View
private Paint mPaint = new Paint();
public PracticeFirstView(Context context)
this(context,null);
public PracticeFirstView(Context context, @Nullable AttributeSet attrs)
this(context, attrs,0);
public PracticeFirstView(Context context, @Nullable AttributeSet attrs, int defStyleAttr)
super(context, attrs, defStyleAttr);
@Override
protected void onDraw(Canvas canvas)
super.onDraw(canvas);
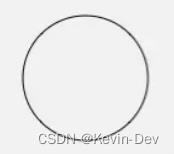
// 绘制一个圆
canvas.drawCircle(200,200,100,mPaint);
就这么简单。所以关于 onDraw() 其实没什么好说的,一个很普通的方法重写,唯一需要注意的是别漏写了 super.onDraw()。
Google 的官方文档里,打开 Canvas 和 Paint 的页面。
Paint 的基础
Paint 类的几个最常用的方法。具体是:
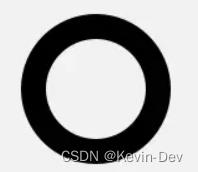
Paint.setStyle(Style style)设置绘制模式
例如,你想画的不是实心圆,而是空心圆(或者叫环形),可以使用paint.setStyle(Paint.Style.STROKE)来把绘制模式改为画线模式。
		mPaint.setStyle(Paint.Style.STROKE); // Style 修改为画线模式
        // 绘制一个圆
        canvas.drawCircle(200,200,100,mPaint);
Style 具体来说有三种: FILL, STROKE 和 FILL_AND_STROKE 。FILL 是填充模式,STROKE 是画线模式(即勾边模式),FILL_AND_STROKE 是两种模式一并使用:既画线又填充。它的默认值是 FILL,填充模式。
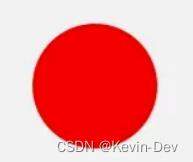
Paint.setColor(int color)设置颜色
例如,你要画一个红色的圆
		mPaint.setColor(Color.RED);  //设置为红色
        // 绘制一个圆
        canvas.drawCircle(200,200,100,mPaint);
Paint.setStrokeWidth(float width)设置线条宽度
例如,你要画一个线宽为20的圆环
		mPaint.setStyle(Paint.Style.STROKE); // Style 修改为画线模式
		mPaint.setStrokeWidth(20); // 线条宽度为 20 像素
        // 绘制一个圆
        canvas.drawCircle(200,200,100,mPaint);
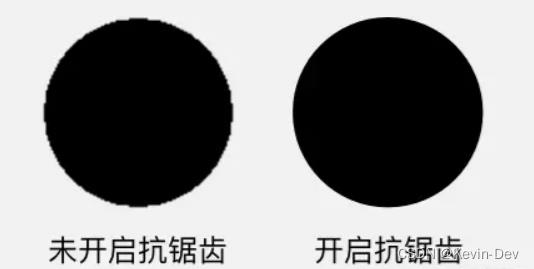
Paint.setTextSize(float textSize)设置文字大小Paint.setAntiAlias(boolean aa)设置抗锯齿开关
开启抗锯齿很简单,只要在new Paint()的时候加上一个ANTI_ALIAS_FLAG参数就行:
Paint mPaint = new Paint(Paint.ANTI_ALIAS_FLAG);
你也可以使用 Paint.setAntiAlias(boolean aa) 来动态开关抗锯齿。
drawXXX() 系列方法
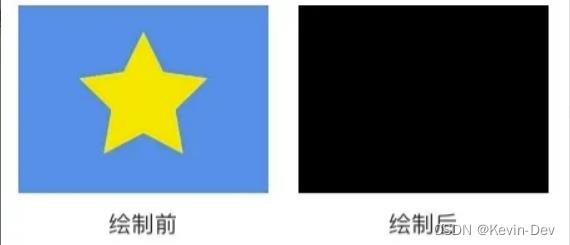
1. Canvas.drawColor(@ColorInt int color) 颜色填充
这是最基本的 drawXXX() 方法:在整个绘制区域统一涂上指定的颜色。
drawColor(Color.BLACK)会把整个区域染成纯黑色,覆盖掉原有内容;
drawColor(Color.parse("#88880000")会在原有的绘制效果上加一层半透明的红色遮罩

类似的方法还有drawRGB(int r, int g, int b)和drawARGB(int a, int r, int g, int b),它们和drawColor(color)只是使用方式不同,作用都是一样的。
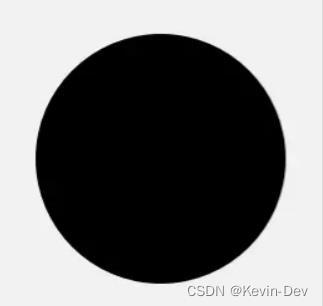
2. drawCircle(float centerX, float centerY, float radius, Paint paint) 画圆
前两个参数 centerX centerY 是圆心的坐标,第三个参数 radius 是圆的半径,单位都是像素,它们共同构成了这个圆的基本信息(即用这几个信息可以构建出一个确定的圆);第四个参数 paint 提供基本信息之外的所有风格信息,例如颜色、线条粗细、阴影等。
		// 绘制一个圆
        canvas.drawCircle(200,200,100,mPaint);
3. drawRect(float left, float top, float right, float bottom, Paint paint) 画矩形
left, top, right, bottom 是矩形四条边的坐标。
paint.setStyle(Style.FILL);
canvas.drawRect(100, 100, 500, 500, paint);

paint.setStyle(Style.STROKE);
canvas.drawRect(700, 100, 1100, 500, paint);
另外,它还有两个重载方法 drawRect(RectF rect, Paint paint) 和 drawRect(Rect rect, Paint paint) ,让你可以直接填写 RectF 或 Rect 对象来绘制矩形。
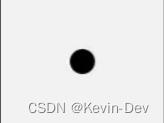
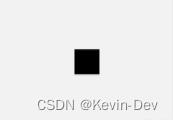
4. drawPoint(float x, float y, Paint paint) 画点
x 和 y 是点的坐标。点的大小可以通过 paint.setStrokeWidth(width) 来设置;点的形状可以通过 paint.setStrokeCap(cap) 来设置:ROUND 画出来是圆形的点,SQUARE 或 BUTT 画出来是方形的点。
paint.setStrokeWidth(20);
paint.setStrokeCap(Paint.Cap.ROUND);
canvas.drawPoint(50, 50, paint);
paint.setStrokeWidth(20);
paint.setStrokeCap(Paint.Cap.SQUARE;
canvas.drawPoint(50, 50, paint);
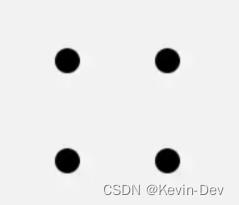
5. drawPoints(float[] pts, int offset, int count, Paint paint) / drawPoints(float[] pts, Paint paint) 画点(批量)
同样是画点,它和 drawPoint() 的区别是可以画多个点。pts 这个数组是点的坐标,每两个成一对;offset 表示跳过数组的前几个数再开始记坐标;count 表示一共要绘制几个点。
float[] points = 0, 0, 50, 50, 50, 100, 100, 50, 100, 100, 150, 50, 150, 100;
// 绘制四个点:(50, 50) (50, 100) (100, 50) (100, 100)
canvas.drawPoints(points, 2 /* 跳过两个数,即前两个 0 */,
          8 /* 一共绘制 8 个数(4 个点)*/, paint);
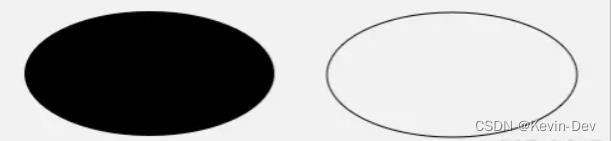
6. drawOval(float left, float top, float right, float bottom, Paint paint) 画椭圆
只能绘制横着的或者竖着的椭圆,不能绘制斜的。left, top, right, bottom 是这个椭圆的左、上、右、下四个边界点的坐标。
paint.setStyle(Style.FILL);
canvas.drawOval(50, 50, 350, 200, paint);

paint.setStyle(Style.STROKE);
canvas.drawOval(400, 50, 700, 200, paint);
另外,它还有一个重载方法 drawOval(RectF rect, Paint paint),让你可以直接填写 RectF 来绘制椭圆。
7. drawLine(float startX, float startY, float stopX, float stopY, Paint paint) 画线
startX, startY, stopX, stopY 分别是线的起点和终点坐标。
canvas.drawLine(200, 200, 800, 500, paint);
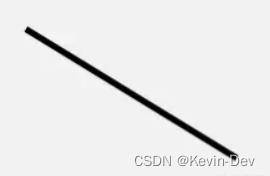
由于直线不是封闭图形,所以
setStyle(style)对直线没有影响。
8. drawLines(float[] pts, int offset, int count, Paint paint) / drawLines(float[] pts, Paint paint) 画线(批量)
drawLines() 是 drawLine() 的复数版。
float[] points = 20, 20, 120, 20, 70, 20, 70, 120, 20, 120, 120, 120, 150, 20, 250, 20, 150, 20, 150, 120, 250, 20, 250, 120, 150, 120, 250, 120;
canvas.drawLines(points, paint);

9. drawRoundRect(float left, float top, float right, float bottom, float rx, float ry, Paint paint) 画圆角矩形
left, top, right, bottom 是四条边的坐标,rx 和 ry 是圆角的横向半径和纵向半径。
canvas.drawRoundRect(100, 100, 500, 300, 50, 50, paint);
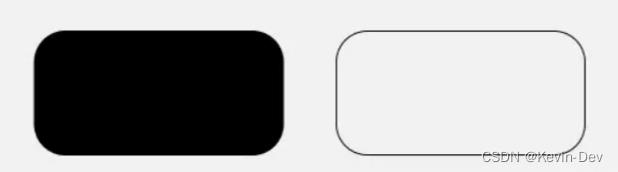
另外,它还有一个重载方法 drawRoundRect(RectF rect, float rx, float ry, Paint paint),让你可以直接填写 RectF 来绘制圆角矩形。
10. drawArc(float left, float top, float right, float bottom, float startAngle, float sweepAngle, boolean useCenter, Paint paint) 绘制弧形或扇形
drawArc() 是使用一个椭圆来描述弧形的。left, top, right, bottom 描述的是这个弧形所在的椭圆;startAngle 是弧形的起始角度(x 轴的正向,即正右的方向,是 0 度的位置;顺时针为正角度,逆时针为负角度),sweepAngle 是弧形划过的角度;useCenter 表示是否连接到圆心,如果不连接到圆心,就是弧形,如果连接到圆心,就是扇形。
paint.setStyle(Paint.Style.FILL); // 填充模式
canvas.drawArc(200, 100, 800, 500, -110, 100, true, paint); // 绘制扇形
canvas.drawArc(200, 100, 800, 500, 20, 140, false, paint); // 绘制弧形
paint.setStyle(Paint.Style.STROKE); // 画线模式
canvas.drawArc(200, 100, 800, 500, 180, 60, false, paint); // 绘制不封口的弧形
进阶
到此为止,以上就是 Canvas 所有的简单图形的绘制。除了简单图形的绘制, Canvas 还可以使用 drawPath(Path path) 来绘制自定义图形。
1. drawPath(Path path, Paint paint) 画自定义图形
前面的这些方法,都是绘制某个给定的图形,而 drawPath() 可以绘制自定义图形。
drawPath(path) 这个方法是通过描述路径的方式来绘制图形的,它的 path 参数就是用来描述图形路径的对象。path 的类型是 Path ,使用方法大概像下面这样:
public class PracticeFirstView extends View
    private Paint mPaint = new Paint();

    private Path mPath = new Path();

    public PracticeFirstView(Context context)
        this(context,null);


    public PracticeFirstView(Context context, @Nullable AttributeSet attrs)
        this(context, attrs,0);


    public PracticeFirstView(Context context, @Nullable AttributeSet attrs, int defStyleAttr)
        super(context, attrs, defStyleAttr);

        initView();


    private void initView()
        // 使用 path 对图形进行描述
        mPath.addArc(200, 200, 400, 400, -225, 225);
        mPath.arcTo(400, 200, 600, 400, -180, 225, false);
        mPath.lineTo(400, 542);


    @Override
    protected void onDraw(Canvas canvas)
        super.onDraw(canvas);

        // 绘制一个心形
        canvas.drawPath(mPath,mPaint);
Path 可以描述直线、二次曲线、三次曲线、圆、椭圆、弧形、矩形、圆角矩形。把这些图形结合起来,就可以描述出很多复杂的图形。
2. drawBitmap(Bitmap bitmap, float left, float top, Paint paint) 画 Bitmap
绘制 Bitmap 对象,也就是把这个 Bitmap 中的像素内容贴过来。其中 left 和 top 是要把 bitmap 绘制到的位置坐标。它的使用非常简单。
它的重载方法:
drawBitmap(Bitmap bitmap, Rect src, RectF dst, Paint paint) /
drawBitmap(Bitmap bitmap, Rect src, Rect dst, Paint paint) /
drawBitmap(Bitmap bitmap, Matrix matrix, Paint paint)
public class PracticeFirstView extends View
    private Paint mPaint = new Paint();

    private Bitmap mBitmap;

    public PracticeFirstView(Context context)
        this(context,null);


    public PracticeFirstView(Context context, @Nullable AttributeSet attrs)
        this(context, attrs,0);


    public PracticeFirstView(Context context, @Nullable AttributeSet attrs, int defStyleAttr)
        super(context, attrs, defStyleAttr);

        initView();


    private void initView()
        mBitmap = BitmapFactory.decodeResource(getContext().getResources(), R.mipmap.ic_girl);


    @Override
    protected void onDraw(Canvas canvas)
        super.onDraw(canvas);

        // 将图片从(0,0)位置向左偏移100,向右偏移100
        canvas.drawBitmap(mBitmap,100,100,mPaint);

        //截取图片左上1/4的区域
        Rect srcRect = new Rect(0,0,mBitmap.getWidth()/2,
                mBitmap.getHeight()/2);

        //图片需要绘制的矩形区域
        Rect dstRect = new Rect(500,500,800,800);

        canvas.drawBitmap(mBitmap,srcRect,dstRect, mPaint);

3. drawText(String text, float x, float y, Paint paint) 绘制文字
界面里所有的显示内容,都是绘制出来的,包括文字。 drawText() 这个方法就是用来绘制文字的。参数 text 是用来绘制的字符串,x 和 y 是绘制的起点坐标。
canvas.drawText(text, 200, 100, paint);
以上是关于Android 自定义 ViewCanvas.drawXXX() 系列方法及 Paint 最基本的使用的主要内容,如果未能解决你的问题,请参考以下文章