学习笔记之openssl文件加密CA证书的创建
Posted Ghost_02
tags:
篇首语:本文由小常识网(cha138.com)小编为大家整理,主要介绍了学习笔记之openssl文件加密CA证书的创建相关的知识,希望对你有一定的参考价值。
1.openssl 的基础知识
首先openssl的英文是Secure Sockets Laye。安全套接层协议。可以在Internet上提供秘密性传输。 SSL能使用户/服务器应用之间的通信不被攻击者窃听,并且始终对服务器进行认证,还可选择对用户进行认证。SSL协议要求建立在可靠的传输层协议(TCP)之上。SSL协议的优势在于它是与应用层协议独立无关的。 高层的应用层协议(例如:HTTP,FTP等)能透明地建立于SSL协议之上。SSL协议在应用层协议通信之前就已经完成加密算法、通信的协商及服务器认证工作。在此之后应用层协议所传送的数据都会被加密,从而保证通信的私密性。介绍一下常见的加密算法吧。等会会在openssl中使用 对称加密: DES( Data Encrption Standard )、3重DES、AES(Advanced Encrption Standard)、Blowfish 单项加密:MD4、MD5、SHA1、SHA256、CRC(循环冗余校验) 公钥加密:身份认证、数据加密、秘钥交换。RSA、DSA、ElGamal。
我的linux使用的是CentOS7。来看看openssl是否被安装
[root@www ~]# rpm -q openssl
openssl-1.0.1e-51.el7_2.5.x86_64
我提前已经安装好了的。 那查查openssl的命令帮助吧
[root@www ~]# openssl --help
openssl:Error: '--help' is an invalid command.

Standard commands
asn1parse         ca                ciphers           cms
crl               crl2pkcs7         dgst              dh
dhparam           dsa               dsaparam          ec
ecparam           enc               engine            errstr
gendh             gendsa            genpkey           genrsa
nseq              ocsp              passwd            pkcs12
pkcs7             pkcs8             pkey              pkeyparam
pkeyutl           prime             rand              req
rsa               rsautl            s_client          s_server
s_time            sess_id           smime             speed
spkac             ts                verify            version
x509

Message Digest commands (see the `dgst' command for more details)
md2               md4               md5               rmd160
sha               sha1

Cipher commands (see the `enc' command for more details)
aes-128-cbc       aes-128-ecb       aes-192-cbc       aes-192-ecb
aes-256-cbc       aes-256-ecb       base64            bf
bf-cbc            bf-cfb            bf-ecb            bf-ofb
camellia-128-cbc  camellia-128-ecb  camellia-192-cbc  camellia-192-ecb
camellia-256-cbc  camellia-256-ecb  cast              cast-cbc
cast5-cbc         cast5-cfb         cast5-ecb         cast5-ofb
des               des-cbc           des-cfb           des-ecb
des-ede           des-ede-cbc       des-ede-cfb       des-ede-ofb
des-ede3          des-ede3-cbc      des-ede3-cfb      des-ede3-ofb
des-ofb           des3              desx              idea
idea-cbc          idea-cfb          idea-ecb          idea-ofb
rc2               rc2-40-cbc        rc2-64-cbc        rc2-cbc
rc2-cfb           rc2-ecb           rc2-ofb           rc4
rc4-40            seed              seed-cbc          seed-cfb
seed-ecb          seed-ofb          zlib
看来分为3部分。标准命令、信息摘要的命令、密码命令。 那在标准命令里。还想查看具体的帮助怎么办呢? 用man -f 就够了。比如查看enc、passwd这两个标准命令的man手册
[root@www ~]# man -f passwd
sslpasswd (1ssl)     - compute password hashes
passwd (1)           - update user's authentication tokens
passwd (5)           - password file
[root@www ~]# man -f enc
enc (1ssl)           - symmetric cipher routines
通过man enc就可以查看命令的用法了
NAME
       enc - symmetric cipher routines

SYNOPSIS
       openssl enc -ciphername [-in filename] [-out filename] [-pass arg] [-e] [-d] [-a/-base64] [-A] [-k password] [-kfile filename] [-K key]
       [-iv IV] [-S salt] [-salt] [-nosalt] [-z] [-md] [-p] [-P] [-bufsize number] [-nopad] [-debug] [-none] [-engine id]
2.文件加密
好了,来试一下加密工具吧。这里就用openssl和gpg加密。gpg有木有在yum源安装时比较熟悉呢。gpg其实也是个很好的加密工具。 先来openssl吧 1.先创建一个待加密的文本文件[root@www Desktop]# echo "Red Alert --- Yuri's Revenge" > Secure
[root@www Desktop]# ls
Secure
[root@www Desktop]# openssl enc -des3 -salt -a -in Secure -out Secure.des3
enter des-ede3-cbc encryption password:
Verifying - enter des-ede3-cbc encryption password:
来看看加密的效果吧,加密前
[root@www Desktop]# cat Secure
Red Alert --- The revenge of Yuri
[root@www Desktop]# cat Secure.des3
U2FsdGVkX1+Q6R4OraBcrsVn+SCdTlGnIo/dzSsrmgsH9XEf7lGF0gpLpiFlQQVu
F5qU39OAqr0=
那加个-d选项就是解密了
[root@www Desktop]# openssl enc -des3 -d -a -salt -in Secure.des3 -out Secure.bak
enter des-ede3-cbc decryption password:
gpg 的加密可以使用 gpg --encrypt --armor -r key-id file
这里gpg加密不是重点。就说一点就可以了
还记得有一个命令叫做md5sum。这个命令可以计算和核对MD5的摘要信息。
[root@www Desktop]# md5sum Secure
e4f56eb723fe256df71db76201cea34d  Secure
[root@www Desktop]# openssl dgst -md5 Secure
MD5(Secure)= e4f56eb723fe256df71db76201cea34d
看,openssl也可以得出摘要值,只要加密算法一样。用什么工具都可以的
登录用户的密码在/etc/shadow里使用加密算法得出。首先来看看
[root@www Desktop]# head -n 1 /etc/shadow|cut -d ":" -f 2
$1$q0AhJEZ2$/LHGyenpDku3N5RmldNYM1[root@www Desktop]# openssl passwd -1 -salt q0AhJEZ2
Password:
$1$q0AhJEZ2$/LHGyenpDku3N5RmldNYM1
openssl还有一个生成随机数的工具叫做rand。使用此工具可以生成任意长度的随机数
[root@www etc]# openssl rand -base64 22
5MSMRwzCwNMvN/PeqmyIXfrV0gz2MA==
生成一对秘钥。可以使用如下命令
[root@www Desktop]# openssl genrsa -out secure.key
Generating RSA private key, 1024 bit long modulus
.............++++++
..++++++
e is 65537 (0x10001)
将公钥提取出来
[root@www Desktop]# openssl rsa -in secure.key -pubout
writing RSA key
-----BEGIN PUBLIC KEY-----
MIGfMA0GCSqGSIb3DQEBAQUAA4GNADCBiQKBgQD15/RinbJQ3+1aH2skXM8FTyMn
beIK6oOp0oPnP9zs3ssn5RmbTbfYJgwm1lnutXoPSCWXWl3lIg6U1hph01GKH1WX
7J36U/SrGPtha+ogGphqx8ZNYhbl2rKiSfOvgMnZjtQej5/kgAFSgBcn/8yDUciy
aLdATT8NYgshdsYq0QIDAQAB
-----END PUBLIC KEY-----
3.私有CA证书的创建
openssl最强大的功能!!
1.先生成一对秘钥。将公钥做成证书
2.生成自签署证书
首先生成一堆秘钥
关于CA的创建在/etc/pki/tils/openssl.cnf 下有详细的说明
####################################################################
[ CA_default ]
                                        #
dir             = /etc/pki/CA           # Where everything is kept
certs           = $dir/certs            # Where the issued certs are kept
crl_dir         = $dir/crl              # Where the issued crl are kept
database        = $dir/index.txt        # database index file.
#unique_subject = no                    # Set to 'no' to allow creation of
                                        # several ctificates with same subject.
new_certs_dir   = $dir/newcerts         # default place for new certs.
                                        #
certificate     = $dir/cacert.pem       # The CA certificate
serial          = $dir/serial           # The current serial number
crlnumber       = $dir/crlnumber        # the current crl number
                                        # must be commented out to leave a V1 CRL
crl             = $dir/crl.pem          # The current CRL
private_key     = $dir/private/cakey.pem# The private key
RANDFILE        = $dir/private/.rand    # private random number file
                                        #
x509_extensions = usr_cert              # The extentions to add to the cert
这里说的很清楚。/etc/pki/CA是工作目录。database中是给谁发的证书。后面都有英文注释.cr
是吊销的。
这里还有一些默认值
default_days    = 365                   # how long to certify for
default_crl_days= 30                    # how long before next CRL
default_md      = sha256                # use SHA-256 by default
preserve        = no                    # keep passed DN ordering
然后设置一些默认值。以后就不用再填写了
进入这个目录中创建CA才真正有效
[root@www CA]# pwd
/etc/pki/CA
开始创建秘钥对。(要把权限改成仅自己可见) [root@www CA]# openssl genrsa -out private/cakey.pem 2048;chmod 600 private/cakey.pem
Generating RSA private key, 2048 bit long modulus
...........................................+++
....+++
e is 65537 (0x10001)
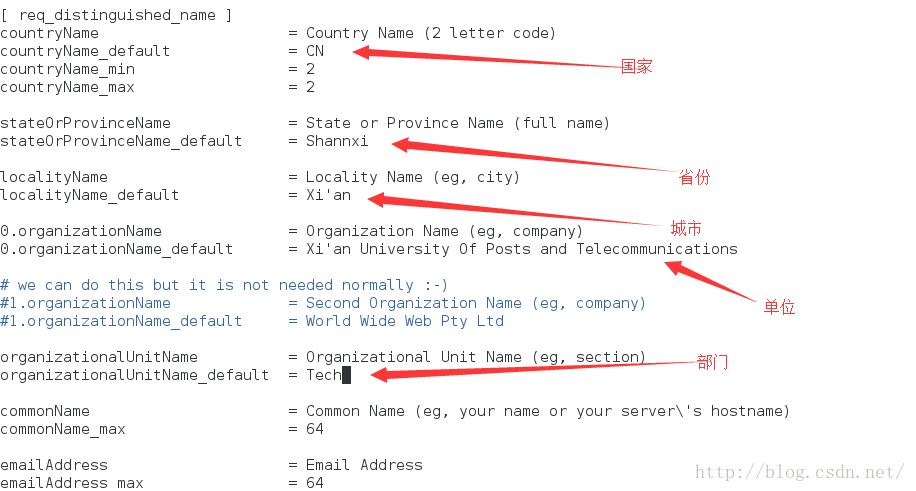
[root@www CA]# openssl req -new -x509 -key private/cakey.pem -out cacert.pem
You are about to be asked to enter information that will be incorporated
into your certificate request.
What you are about to enter is what is called a Distinguished Name or a DN.
There are quite a few fields but you can leave some blank
For some fields there will be a default value,
If you enter '.', the field will be left blank.
-----
Country Name (2 letter code) [CN]:
State or Province Name (full name) [Shannxi]:
Locality Name (eg, city) [Xian]:
Organization Name (eg, company) [Xian University Of Posts and Telecommunications]:
Organizational Unit Name (eg, section) [Tech]:
Common Name (eg, your name or your server's hostname) []:ca.double2.com
Email Address []:caadmin@double2.com
根据配置文件要求的那样生成一些目录和文件
[root@www CA]# ls
cacert.pem  certs  crl  newcerts  private
[root@www CA]# touch index.txt
[root@www CA]# echo 01 > serial
[root@www CA]# ls
cacert.pem  certs  crl  index.txt  newcerts  private  serial
好了,现在服务器端就好了,假设。我们为同一台主机的不同应用签署一个证书 1.为httpd签署一个证书 在/etc/httpd下建一个目录叫做ssl
[root@www ssl]# pwd
/etc/httpd/ssl
[root@www ssl]# (umask 077;openssl genrsa -out httpd.key 1024)
Generating RSA private key, 1024 bit long modulus
............................................................................++++++
............................................++++++
e is 65537 (0x10001)
[root@www ssl]# openssl req -new -key httpd.key -out httpd.csr
You are about to be asked to enter information that will be incorporated
into your certificate request.
What you are about to enter is what is called a Distinguished Name or a DN.
There are quite a few fields but you can leave some blank
For some fields there will be a default value,
If you enter '.', the field will be left blank.
-----
Country Name (2 letter code) [CN]:
State or Province Name (full name) [Shannxi]:
Locality Name (eg, city) [Xian]:
Organization Name (eg, company) [Xian University Of Posts and Telecommunications]:
Organizational Unit Name (eg, section) [Tech]:
Common Name (eg, your name or your server's hostname) []:www.double2.com
Email Address []:www.admin@double2.com

Please enter the following 'extra' attributes
to be sent with your certificate request
A challenge password []:
An optional company name []:
[root@www ssl]# openssl ca -in httpd.csr -out httpd.crt -days 365
Using configuration from /etc/pki/tls/openssl.cnf
Check that the request matches the signature
Signature ok
Certificate Details:
        Serial Number: 1 (0x1)
        Validity
            Not Before: Nov 14 07:11:20 2016 GMT
            Not After : Nov 14 07:11:20 2017 GMT
        Subject:
            countryName               = CN
            stateOrProvinceName       = Shannxi
            organizationName          = Xian University Of Posts and Telecommunications
            organizationalUnitName    = Tech
            commonName                = www.double2.com
            emailAddress              = www.admin@double2.com
        X509v3 extensions:
            X509v3 Basic Constraints:
                CA:FALSE
            Netscape Comment:
                OpenSSL Generated Certificate
            X509v3 Subject Key Identifier:
                BD:E8:F4:35:D2:60:85:5A:7E:BF:0C:50:6F:00:14:A6:CA:7D:E2:36
            X509v3 Authority Key Identifier:
                keyid:6A:08:1A:19:D5:C8:03:6B:B0:A3:9F:23:AB:90:D9:09:B3:B8:12:9C

Certificate is to be certified until Nov 14 07:11:20 2017 GMT (365 days)
Sign the certificate? [y/n]:y


1 out of 1 certificate requests certified, commit? [y/n]y
Write out database with 1 new entries
Data Base Updated
[root@www ssl]# cd /etc/pki/CA
[root@www CA]# ls
cacert.pem  certs  crl  index.txt  index.txt.attr  index.txt.old  newcerts  private  serial  serial.old
[root@www CA]# cat index.txt
V	171114071120Z		01	unknown	/C=CN/ST=Shannxi/O=Xian University Of Posts and Telecommunications/OU=Tech/CN=www.double2.com/emailAddress=www.admin@double2.com
这个过程为了更加简便。可以使用脚本来完成。一个脚本一执行立马建立CA服务器端的
#!/bin/bash
#############################################################
# File Name:autocreateCA.sh
# Author:Nicolas Cage
# mail:454041823@qq.com
# Created Time: Mon 14 Nov 2016 03:27:04 PM CST
#====================================================
#

echo -e '\\e[1;35m'"Generating a secret key ..." '\\e[0;0m'

openssl genrsa -out /etc/pki/CA/private/cakey.pem 2048 &> /dev/null
chmod 600 /etc/pki/CA/private/cakey.pem
echo -e '\\e[1;35m' "Generating a secret key successfully ..." '\\e[0;0m'
echo -e '\\e[1;34m' "+........................................+" '\\e[0;0m'
echo -e '\\e[1;35m' "Now,Generating certificate ..." '\\e[0;0m'
openssl req -new -x509 -key /etc/pki/CA/private/cakey.pem -out /etc/pki/CA/cacert.pem


touch /etc/pki/CA/index.txt
echo 01 > /etc/pki/CA/serial
echo -e '\\e[1;35m' "Complete ... " '\\e[0;0m'
然后再写一个可以
以上是关于学习笔记之openssl文件加密CA证书的创建的主要内容,如果未能解决你的问题,请参考以下文章