Android入门第22天-Android里的计时器Chronometer的使用
Posted TGITCIC
tags:
篇首语:本文由小常识网(cha138.com)小编为大家整理,主要介绍了Android入门第22天-Android里的计时器Chronometer的使用相关的知识,希望对你有一定的参考价值。
介绍
非常简单的一个计时器,没有太多原理,我们直接上代码。
先看课程目标
课程目标
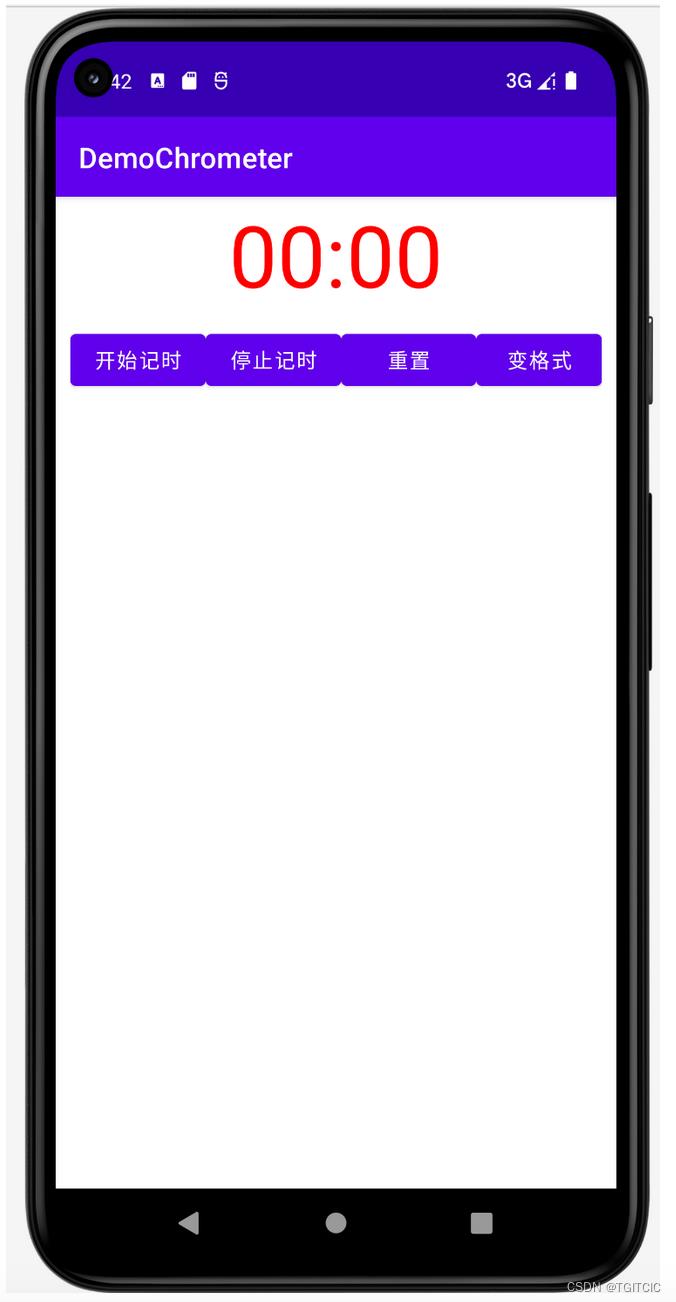
就是一个简单的计时器,我们直接上使用示例吧

界面里有一个计时器,4个按钮。
- 开始计时,上面这个计时器就开始读秒;
- 停止计时,计时器会暂停计时;
- 重置,计时器会归零;
- 变格式,计时器会变成:Time:%s"的格式显示;
界面端代码
<?xml version="1.0" encoding="utf-8"?>
<LinearLayout xmlns:android="http://schemas.android.com/apk/res/android"
    xmlns:tools="http://schemas.android.com/tools"
    android:layout_width="match_parent"
    android:layout_height="match_parent"
    android:orientation="vertical"
    tools:context=".MainActivity">

    <Chronometer
        android:id="@+id/chronometer"
        android:layout_width="fill_parent"
        android:layout_height="wrap_content"
        android:gravity="center"
        android:textColor="#ff0000"
        android:textSize="60dip" />

    <LinearLayout
        android:layout_width="fill_parent"
        android:layout_height="wrap_content"
        android:layout_margin="10dip"
        android:orientation="horizontal">

        <Button
            android:id="@+id/btnStart"
            android:layout_width="fill_parent"
            android:layout_height="wrap_content"
            android:layout_weight="1"
            android:text="开始记时" />

        <Button
            android:id="@+id/btnStop"
            android:layout_width="fill_parent"
            android:layout_height="wrap_content"
            android:layout_weight="1"
            android:text="停止记时" />

        <Button
            android:id="@+id/btnReset"
            android:layout_width="fill_parent"
            android:layout_height="wrap_content"
            android:layout_weight="1"
            android:text="重置" />

        <Button
            android:id="@+id/btnFormat"
            android:layout_width="wrap_content"
            android:layout_height="wrap_content"
            android:text="变格式" />
    </LinearLayout>

</LinearLayout>
后端交互代码
package org.mk.android.demo.demochrometer;

import androidx.appcompat.app.AppCompatActivity;

import android.os.Bundle;
import android.os.SystemClock;
import android.util.Log;
import android.view.View;
import android.widget.Button;
import android.widget.Chronometer;

public class MainActivity extends AppCompatActivity
    private Chronometer chronometer;
    private Button btnStart,btnStop,btnReset,btnFormat;
    @Override
    protected void onCreate(Bundle savedInstanceState)
        super.onCreate(savedInstanceState);
        setContentView(R.layout.activity_main);
        btnFormat=(Button) findViewById(R.id.btnFormat);
        btnStart=(Button) findViewById(R.id.btnStart);
        btnStop=(Button) findViewById(R.id.btnStop);
        btnReset=(Button) findViewById(R.id.btnReset);
        btnStart.setOnClickListener(new OnClickListener());
        btnStop.setOnClickListener(new OnClickListener());
        btnReset.setOnClickListener(new OnClickListener());
        btnFormat.setOnClickListener(new OnClickListener());
        chronometer=(Chronometer) findViewById(R.id.chronometer);

    private class OnClickListener implements View.OnClickListener
        @Override
        public void onClick(View v)
            switch (v.getId())
                case R.id.btnStart:
                    chronometer.start();// 开始计时
                    break;
                case R.id.btnStop:
                    chronometer.stop();// 停止计时
                    break;
                case R.id.btnReset:
                    chronometer.setBase(SystemClock.elapsedRealtime());// 复位
                    break;
                case R.id.btnFormat:
                    Log.i("app","into formatter");
                    chronometer.setFormat("Time:%s");// 更改时间显示格式
                    break;
运行效果

以上是按下了【变格式】按钮后显示的变化,自己去动动手试一下呗。
以上是关于Android入门第22天-Android里的计时器Chronometer的使用的主要内容,如果未能解决你的问题,请参考以下文章