生成GAN模型工具箱MMGeneration安装及使用示例
Posted fengbingchun
tags:
篇首语:本文由小常识网(cha138.com)小编为大家整理,主要介绍了生成GAN模型工具箱MMGeneration安装及使用示例相关的知识,希望对你有一定的参考价值。
MMGeneration是一个基于PyTorch和MMCV的强有力的生成模型工具箱,尤其专注于GAN模型,是OpenMMLab项目的一部分,源码在https://github.com/open-mmlab/mmgeneration,最新发布版本为v0.7.1,License为Apache-2.0。它支持在Windows、Linux和Mac上运行。
1.安装:使用conda安装,mmgen与之前的openmmlab环境存在不兼容性,如mmcv-full在MMGeneration中要求的版本不能大于1.5.0,这里单独安装一个mmgen的虚拟环境
(1).创建mmgen虚拟环境:
conda create -n mmgen python=3.8
conda activate mmgen
(2).安装PyTorch:这里PyTorch使用1.11.0版本,CUDA使用10.2版本,此CUDA版本对PyTorch各版本都支持
conda install pytorch==1.11.0 torchvision==0.12.0 torchaudio==0.11.0 cudatoolkit=10.2 -c pytorch (3).安装MMCV:MMCV有两个版本,这里安装带CUDA的mmcv-full
1).mmcv-full: 完整版,包含所有的特性以及丰富的开箱即用的CUDA算子,安装此版本需要较长时间。
2).mmcv:精简版,不包含CUDA算子但包含其余所有特性和功能,类似MMCV 1.0之前的版本。
不要在同一个环境中安装两个版本,否则可能会遇到类似ModuleNotFound的错误。在安装一个版本之前,需要先卸载另一个:
pip uninstall mmcv-full
pip uninstall mmcv
注意:这里mmcv-full使用1.5.0版本,之前的openmmlab中使用的是1.5.3版本。CUDA版本和PyTorch版本与安装PyTorch时保持一致
pip install mmcv-full==1.5.0 -f https://download.openmmlab.com/mmcv/dist/cu102/torch1.11.0/index.html(4).安装MMGeneration:没有通过源码安装,这里安装0.6.0版本,因为安装完0.7.1或0.7版本,或通过0.7.1源码安装"pip install -v .",后发现在python中添加"from mmgen.apis import init_model, sample_conditional_model"后一直报"ModuleNotFoundError: No module named 'mmgen.models.architectures.stylegan.ada'"错误
pip install mmgen==0.6.02.测试:基于Conditional GANs、 基于Conditional GANs和基于Image2Image Translation的它们流程相似
sample_conditional_model函数说明:返回tensor
(1).model:继承于PyTorch中的nn.Module,MMGeneration中的conditional model;
(2).num_samples:可选参数,类型为int,默认值为16,生成最终合成图像的数量;
(3).num_batches:可选参数,类型为int,默认值为4,推理时设置的batch size大小;
(4).sample_model:可选参数,类型为str,默认值为ema(exponential moving average),还可以为orig,which model you want to use;
(5).label:可选参数,类型可为int | torch.Tensor | list[int],指定用于合成图像的label。注:当指定label时,需num_samples//num_batches>0 ,ImageNet 1000 labels
(1).基于Conditional GANs合成图像,论文:《Self-attention generative adversarial networks》,可合成多label图像,这里选择的label为8,在Imagenet1000 labels为hen
def mmgeneration_conditional(device):
	path = "../../data/model/"
	checkpoint = "sagan_128_woReLUinplace_noaug_bigGAN_imagenet1k_b32x8_Glr1e-4_Dlr-4e-4_ndisc1_20210818_210232-3f5686af.pth"
	url = "https://download.openmmlab.com/mmgen/sagan/" + checkpoint
	download_checkpoint(path, checkpoint, url)

	config = "../../src/mmgeneration/configs/sagan/sagan_128_woReLUinplace_noaug_bigGAN_Glr-1e-4_Dlr-4e-4_ndisc1_imagenet1k_b32x8.py"
	model = init_model(config, path+checkpoint, device)

	results = sample_conditional_model(model, num_samples=2, num_batches=1, label=[8])
	print("results shape:", results.shape)
	results = (results[:, [2, 1, 0]] + 1.) / 2.

	utils.save_image(results, "../../data/result_mmgeneration_conditional.png")
(2).基于Unconditional GANs合成图像,论文:《Analyzing and Improving the Image Quality of Stylegan》,合成单一label图像
def mmgeneration_unconditional(device):
	path = "../../data/model/"
	checkpoint = "stylegan2_c2_ffhq_1024_b4x8_20210407_150045-618c9024.pth"
	url = "https://download.openmmlab.com/mmgen/stylegan2/" + checkpoint
	download_checkpoint(path, checkpoint, url)

	config = "../../src/mmgeneration/configs/styleganv2/stylegan2_c2_ffhq_1024_b4x8.py"
	model = init_model(config, path+checkpoint, device)

	results = sample_unconditional_model(model, num_samples=2, num_batches=1)
	print("results shape:", results.shape)
	results = (results[:, [2, 1, 0]] + 1.) / 2.

	utils.save_image(results, "../../data/result_mmgeneration_unconditional.png")
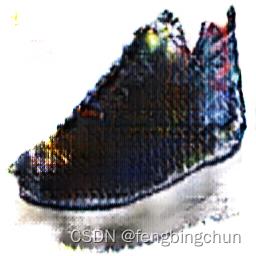
(3).基于Image2Image Translation合成图像,论文:《Image-to-Image Translation with Conditional Adversarial Networks》,需要输入图像,原始图像来自网络
image_path = "../../data/image/"
image_name = "11.png"
def mmgeneration_image2image_translation(image, device):
	path = "../../data/model/"
	checkpoint = "pix2pix_vanilla_unet_bn_wo_jitter_flip_1x4_186840_edges2shoes_convert-bgr_20210902_170902-0c828552.pth"
	url = "https://download.openmmlab.com/mmgen/pix2pix/refactor/" + checkpoint
	download_checkpoint(path, checkpoint, url)

	config = "../../src/mmgeneration/configs/pix2pix/pix2pix_vanilla_unet_bn_wo_jitter_flip_edges2shoes_b1x4_190k.py"
	model = init_model(config, path+checkpoint, device)

	results = sample_img2img_model(model, image)
	print("results shape:", results.shape)
	results = (results[:, [2, 1, 0]] + 1.) / 2.

	utils.save_image(results, "../../data/result_mmgeneration_image2image_translation.png")
执行结果如下图所示:

GitHub: https://github.com/fengbingchun/PyTorch_Test
以上是关于生成GAN模型工具箱MMGeneration安装及使用示例的主要内容,如果未能解决你的问题,请参考以下文章