Proxmox VE 7.2 qm 方式安装openwet
Posted CIAS
tags:
篇首语:本文由小常识网(cha138.com)小编为大家整理,主要介绍了Proxmox VE 7.2 qm 方式安装openwet相关的知识,希望对你有一定的参考价值。

系统配置,使用参考
| 变更默认访问端口 | 参考 |
| 重置系统密码 | 参考 |
| 创建标准虚拟机 | 参考 |
| 网卡直通 | 参考 |
| qm 方式安装openwet | 参考 |
| LXC 方式部署openwrt | 参考 |
| 备份恢复虚拟机 | 参考 |
| ESXi OVA 导入 | 参考 |
| 6 更新到 7 | 参考 |
| CT 模板导入虚拟机 | 参考 |
| SMB 服务 | 参考 |
| Grafana 监控PVE | 参考 |
| qemu-img格式转换 | 参考 |
| Proxmox Backup Server备份恢复 | 参考 |
| 更改登录横幅 | 参考 |
qm 方式安装openwet
-
下载openwet
wget -N -P /root/ https://downloads.openwrt.org/releases/21.02.3/targets/x86/64/openwrt-21.02.3-x86-64-generic-squashfs-combined-efi.img.gz
-
解压openwet
apt install gzip -y
gunzip openwrt-21.02.3-x86-64-generic-squashfs-combined-efi.img.gz
使用qm创建openwet 虚拟机
qm create 101 --name openwrt --ostype l26 --agent 1 --bios seabios --boot dcn --onboot yes --memory 2048 --cores 2 --sockets 1 --cpu host --serial0 socket --start 0 --net0 virtio,bridge=vmbr0-
导入镜像,启动就OK了
qm importdisk 101 openwrt-21.02.3-x86-64-generic-squashfs-combined-efi.img local-lvm
-
更改磁盘成为SATA
qm set 101 --scsihw pvscsi --sata0 local-lvm:vm-101-disk-0-
更改启动第一选型
qm set 101 --boot c --bootdisk sata0-
启动 Openwrt
qm start 101-
进入容器终端
lxc-attach 101进入Openwrt

进入Openwrt系统

更改Openwrt IP
- 再按ESC键,再按:wq保存退出,重启reboot即可
vim /etc/config/networkconfig interface 'loopback'
option device 'lo'
option proto 'static'
option ipaddr '127.0.0.1'
option netmask '255.0.0.0'
config globals 'globals'
option ula_prefix 'fdf6:bc41:f423::/48'
config device
option name 'br-lan'
option type 'bridge'
list ports 'eth0'
config interface 'lan'
option device 'br-lan'
option proto 'static'
option ipaddr '192.168.1.9'
option gateway '192.168.1.1'
option netmask '255.255.255.0'
option ip6assign '60'重启 OpenWrt网卡
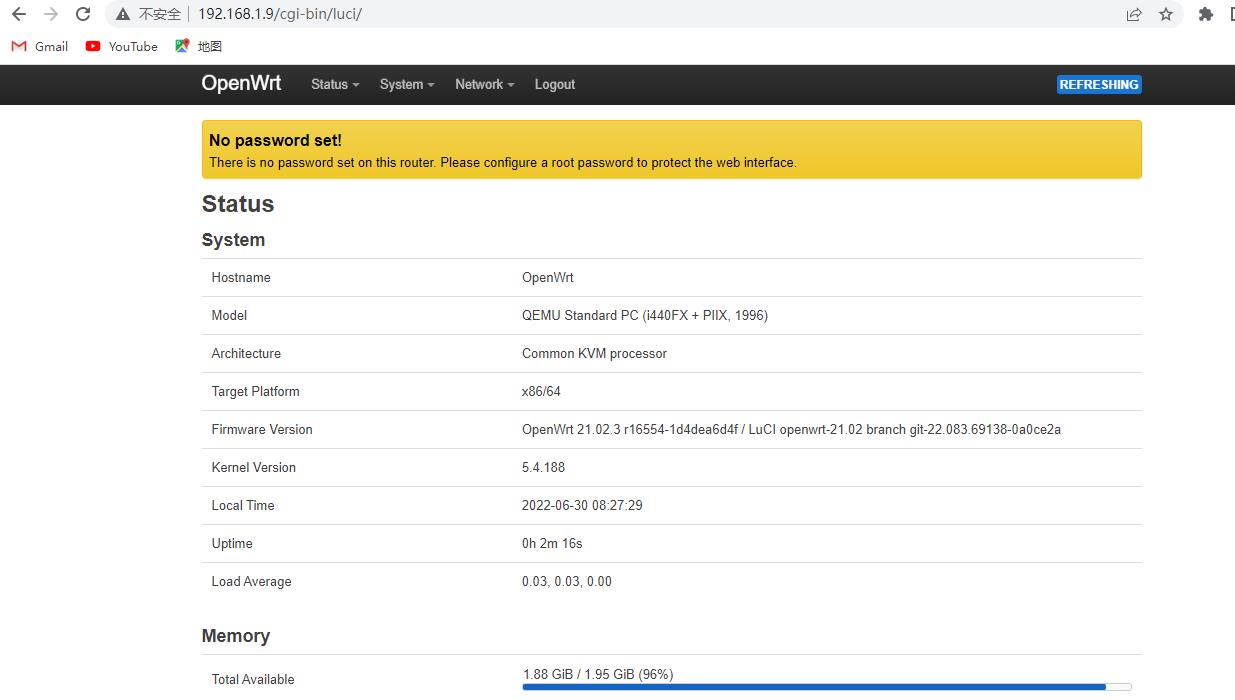
/etc/init.d/network restart登录 OpenWrt
- http://ip
- 默认用户 root
- 密码空

OpenWrt首页
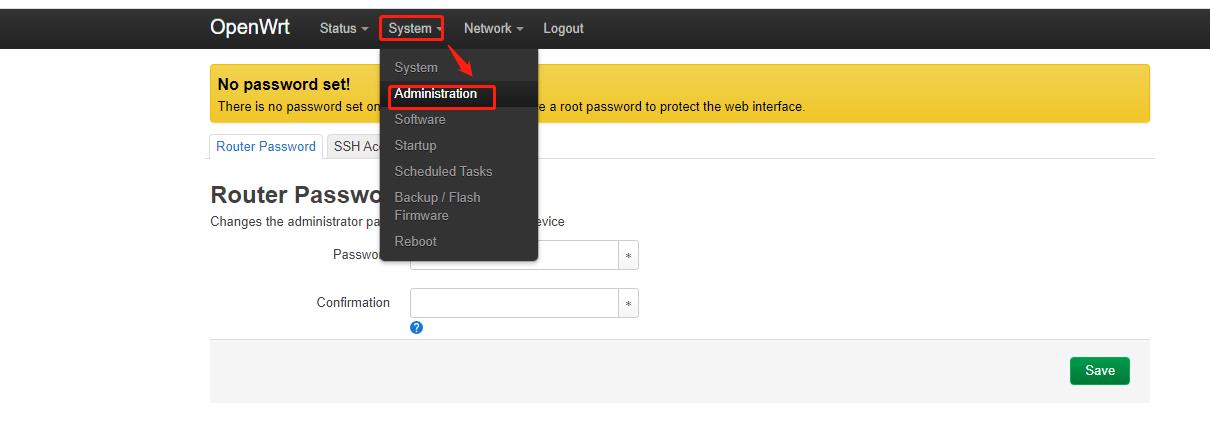
配置OpenWrt登录密码
OpenWrt中文设置
- 设置DNS解析
cat >>/etc/hosts<<EOF
185.199.108.133 raw.githubusercontent.com
140.82.112.4 github.com
EOF

cat >>/tmp/resolv.conf<<EOF
nameserver 114.114.114.114
nameserver 8.8.8.8
EOFOpenWrt进入ssh,执行命令
opkg update
切换OpenWrt成为中文
opkg install vim luci-i18n-base-zh-cn luci-i18n-firewall-zh-cn luci-i18n-opkg-zh-cn
刷新OpenWrt系统查看 Ctrl+F5 是否切换成为中文

安装微信插件
- 用于 OpenWRT/LEDE 路由器上进行 微信/Telegram 推送的插件
- 重启系统生效
opkg install luci-compat
opkg install https://github.com/tty228/luci-app-serverchan/releases/download/v2.01.4/luci-app-serverchan_2.01.4-9_all.ipk
reboot- 如果定时推送功能设置后没有收到消息,可能是由于
\\etc\\crontabs\\root文件不存在引起的,执行以下命令创建即可
touch \\etc\\crontabs\\root以上是关于Proxmox VE 7.2 qm 方式安装openwet的主要内容,如果未能解决你的问题,请参考以下文章
Proxmox VE 7.2 qm 方式批量导入ESXi OVA