酷炫的外部开启Activity新姿势
Posted 先知丨先觉
tags:
篇首语:本文由小常识网(cha138.com)小编为大家整理,主要介绍了酷炫的外部开启Activity新姿势相关的知识,希望对你有一定的参考价值。
##酷炫的外部开启Activity新姿势
在H5页面疯狂的今天,H5和Native的交互就至关重要,而且交互的方式有很多,google提供了一个公共的方式:js与native互调,即js可以调用Native方法,Native同样也可以调用js方法。不过今天要讲的并不是Url拦截的方式和javascript注入方式,因为这种交互方式存在着不少问题:
1、Java 调用 js 里面的函数、效率并不是很高、估计要200ms左右吧、做交互性很强的事情、这种速度很难让人接受、而js去调Java的方法、速度很快、50ms左右、所以尽量用js调用Java方法
2、Java 调用 js 的函数、没有返回值、调用了就控制不到了
3、Js 调用 Java 的方法、返回值如果是字符串、你会发现这个字符串是 native 的、转成 locale 的才能正常使用、使用 toLocaleString() 函数就可以了、不过这个函数的速度并不快、转化的字符串如果很多、将会很耗费时间
4、android4.2以下的系统存在着webview的js对象注入漏洞
所以处于这些原因,我们并未采用这种方式用于Native与webview交互,而是要介绍核武器—scheme,采用scheme + cookie的方式。
那你可能会思考什么是scheme? 到底哪些场景适合?具体怎么使用?
表要捉急,慢慢来介绍。
###什么是scheme?
客户端应用可以向操作系统注册一个 URL scheme,该 scheme 用于从浏览器或其他应用中启动本应用。通过指定的 URL 字段,可以让应用在被调起后直接打开某些特定页面,比如车辆详情页、订单详情页、消息通知页、促销广告页等等。也可以执行某些指定动作,如订单支付等。也可以在应用内通过 html 页来直接调用显示 app 内的某个页面。
###scheme格式?
客户端自定义的 URL 作为从一个应用调用另一个的基础,遵循 RFC 1808 (Relative Uniform Resource Locators) 标准。这跟我们常见的网页内容 URL 格式一样。
先来个完整的URL Scheme协议格式:
xl://goods:8888/goodsDetail?goodsId=10011002
通过上面的路径 Scheme、Host、port、path、query全部包含,基本上平时使用路径就是这样子的。
- xl代表该Scheme 协议名称
- goods代表Scheme作用于哪个地址域
- goodsDetail代表Scheme指定的页面
- goodsId代表传递的参数
- 8888代表该路径的端口号
举个栗子:
(该 URL 会调起车辆详情页):uumobile://mobile/carDetail?car_id=123456,其中 scheme 为 uumobile,host 为 mobile,relativePath 为 /carDetail,query 为 car_id=123456。
###在什么场景使用?
下面介绍一下本人曾经常用的场景:
- 其他应用想要调用你APP的某个页面
- 自己的H5页面想要调用native的某个页面
- 服务器下发路径,客户端根据服务器下发跳转路径跳转相应的页面
- APP端收到服务器端下发的PUSH通知栏消息,根据消息的点击跳转路径跳转相关页面
这样说大家没有在具体业务中使用可能不是很清楚,那么举个例子:
我们进入到h5的活动页面,这时候点击某个链接,要求跳回我们的native,那么就用到了scheme。
###scheme的使用
使用起来还是非常简单的:
####1.在Androidmanifest.xml中定义scheme
<activity android:name=".ProcessActivity">
    <!-- 要想在别的App上能成功调起App,必须添加intent过滤器 -->
    <intent-filter>
        <!-- 协议部分,名字随便设置 -->
        <data
            android:host="open.app.example"
            android:scheme="external" />
        <!-- 下面这几行也必须得设置 -->
        <category android:name="android.intent.category.DEFAULT" />
        <category android:name="android.intent.category.BROWSABLE" />

        <action android:name="android.intent.action.VIEW" />
    </intent-filter>
</activity>
⚠️:切记 android 小写 。
####2.获取Scheme跳转的参数
private static final String TAG = ProcessActivity.class.getSimpleName().toString();

    @Override
    protected void onCreate(Bundle savedInstanceState)
        super.onCreate(savedInstanceState);
        setContentView(R.layout.activity_process);

        distribute();


    private void distribute()
        Uri uri = getIntent().getData();
        if (uri != null)

            //url部分
            Log.e(TAG, "uri -----> " + uri);

            // scheme部分
            String scheme = uri.getScheme();
            Log.e(TAG, "scheme -----> " + scheme);

            // host部分
            String host = uri.getHost();
            Log.e(TAG, "host -----> " + host);

            // 访问路劲
            String path = uri.getPath();
            Log.e(TAG, "path -----> " + path);

            // Query部分
            String query = uri.getQuery();
            Log.e(TAG, "query -----> " + query);

            //获取指定参数值
            String isShowSplash = uri.getQueryParameter("isShowSplash");
            Log.e(TAG, "isShowSplash -----> " + isShowSplash);

            String infomation = uri.getQueryParameter("infomation");
            Log.e(TAG, "infomation -----> " + infomation);

         else
            finish();
####3.使用
只需要调用如下代码就可以:
startActivity(new Intent(Intent.ACTION_VIEW, Uri.parse("external://open.app.example/first?isShowSplash=true&infomation='我是携带的信息'")));
####4.效果展示
让我们看一下打印出来的log日志:

这是我们接收到的uri传递的相关信息,只打印了一部分不是全部,有兴趣大家可以自行打印更多信息。
##实战演示
接下来我们完成一个小DEMO,主要功能通过外部APP打开对应的Activity并传递相关数据。
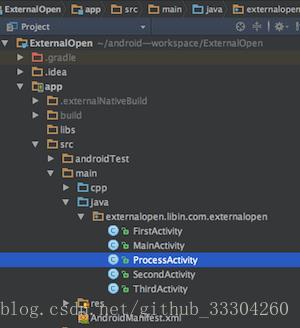
我们先看一下ExternalOpen这个工程里面最主要的就是配置了scheme能够通过uri的方式被启动。
看下目录结构:

功能清单文件
<?xml version="1.0" encoding="utf-8"?>
<manifest xmlns:android="http://schemas.android.com/apk/res/android"
    package="externalopen.libin.com.externalopen">

    <application
        android:allowBackup="true"
        android:icon="@mipmap/ic_launcher"
        android:label="@string/app_name"
        android:launchMode="singleTop"
        android:roundIcon="@mipmap/ic_launcher_round"
        android:supportsRtl="true"
        android:theme="@style/AppTheme.NoActionBar">

        <activity
            android:name="MainActivity"
            android:label="@string/app_name"
            android:theme="@style/AppTheme.NoActionBar">
            <intent-filter>
                <action android:name="android.intent.action.MAIN" />

                <category android:name="android.intent.category.LAUNCHER" />
            </intent-filter>
        </activity>
        <activity android:name=".FirstActivity" />
        <activity android:name=".SecondActivity" />
        <activity android:name=".ThirdActivity" />
        <activity android:name=".ProcessActivity">
            <!-- 要想在别的App上能成功调起App,必须添加intent过滤器 -->
            <intent-filter>
                <!-- 协议部分,名字随便设置 -->
                <data
                    android:host="open.app.example"
                    android:scheme="external" />
                <!-- 下面这几行也必须得设置 -->
                <category android:name="android.intent.category.DEFAULT" />
                <category android:name="android.intent.category.BROWSABLE" />

                <action android:name="android.intent.action.VIEW" />
            </intent-filter>
        </activity>
    </application>

</manifest>
这里包含一个负责跳转的ProcessActivity和四个等候演示用到的展示的Activity界面。
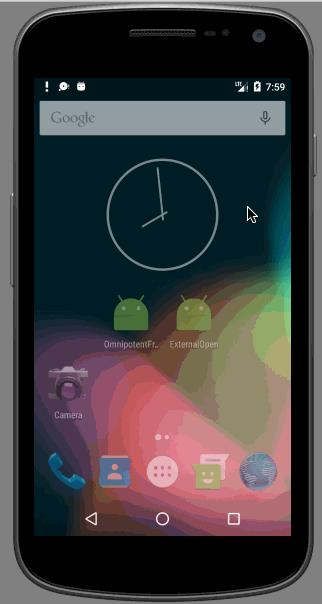
我们先预览一下效果:

可能只看效果图,可能会看的很迷茫,接下来看下讲解。
首先我们安装两个app,一个专门负责启动相应的activity的OmnipotentFrame工程,另外一个是我们的主角ExternalOpen工程。
首先我们看到有的会显示欢迎界面,有的不显示,都是根据isShowSplash控制。
我们在isShowSplash=true 显示欢迎界面,,在isShowSplash=false时不现实欢迎界面。然后具体跳转哪一个Activity根据path决定,然后传递的信息内容放在information里面。
我们看到我们通过OmnipotentFrame可以开启ExternalOpen里面的任意activity。
主要是通过scheme和自定义processActivity控制的。
除了在外部app可以打开,在内部也可以使用这个方法,同样H5页面也可,这样APP之间的交互就方便多了,不过具体的还是要和业务相关联
更多参数可以自己根据业务来定,这里只是给大家一个启发。
####负责分发跳转的activity
/**
 * 负责分发跳转的activity
 */
public class ProcessActivity extends AppCompatActivity
    private static final String TAG = ProcessActivity.class.getSimpleName().toString();
    public static final String FIRST = "/first";
    public static final String SECOND = "/second";
    public static final String THIRD = "/third";
    public static final String URI = "uri";
    public static final String ISSHOWSPLASH = "isShowSplash";
    public static final String INFOMATION = "infomation";

    private ImageView iv_bg;

    String path;
    Uri uri;

    @Override
    protected void onCreate(Bundle savedInstanceState)
        super.onCreate(savedInstanceState);
        setContentView(R.layout.activity_process);

        iv_bg = (ImageView) findViewById(R.id.iv_bg);

        try
            distribute();
         catch (Exception e)
            Log.e(TAG, "分发异常");


    private void distribute()
        uri = getIntent().getData();
        if (uri != null)

            //url部分
            Log.e(TAG, "uri -----> " + uri);

            // scheme部分
            String scheme = uri.getScheme();
            Log.e(TAG, "scheme -----> " + scheme);

            // host部分
            String host = uri.getHost();
            Log.e(TAG, "host -----> " + host);

            // 访问路劲
            path = uri.getPath();
            Log.e(TAG, "path -----> " + path);

            // Query部分
            String query = uri.getQuery();
            Log.e(TAG, "query -----> " + query);

            //获取指定参数值
            String isShowSplash = uri.getQueryParameter(ISSHOWSPLASH);
            Log.e(TAG, "isShowSplash -----> " + isShowSplash);

            String infomation = uri.getQueryParameter(INFOMATION);
            Log.e(TAG, "infomation -----> " + infomation);

            //===============================以上为log信息方便理解==============================>


            if (path != null && !path.isEmpty())

                /**
                 *  是否展示欢迎页面
                 *  很多情况下从外部开启APP需要展示广告或者欢迎页面,这里模拟下一欢迎页
                 */
                if (isShowSplash.equals("true"))
                    iv_bg.setVisibility(View.VISIBLE);
                    new Handler().postDelayed(new Runnable()
                        @Override
                        public void run()
                            iv_bg.setVisibility(View.INVISIBLE);
                            controlActivity(path, uri);
                            finish();

                    ,2000);
                else
                    controlActivity(path, uri);
                    finish();


         else
            finish();


    /**
     * 根据Path确定开启哪个Activity
     * @param path
     * @param uri
     */
    private void controlActivity(String path, Uri uri)

        if (path.equals(FIRST))
            Intent intent = new Intent(this, FirstActivity.class);
            intent.putExtra(INFOMATION, uri.getQueryParameter(INFOMATION));
            startActivity(intent);
         else if (path.equals(SECOND))
            Intent intent = new Intent(this, SecondActivity.class);
            intent.putExtra(INFOMATION, uri.getQueryParameter(INFOMATION));
            intent.putExtra(URI, uri);
            startActivity(intent);
         else if (path.equals(THIRD))
            Intent intent = new Intent(this, ThirdActivity.class);
            intent.putExtra(INFOMATION, uri.getQueryParameter(INFOMATION));
            intent.putExtra(URI, uri);
            startActivity(intent);
####使用
btn_1.setOnClickListener(new View.OnClickListener()
            @Override
            public void onClick(View v)
                startActivity(new Intent(Intent.ACTION_VIEW, Uri.parse("external://open.app.example/first?isShowSplash=true&infomation=Path---->FirstActivity******isShowSplash---->true")));


        );
        btn_2.setOnClickListener(new View.OnClickListener()
            @Override
            public void onClick(View v)
                startActivity(new Intent(Intent.ACTION_VIEW, Uri.parse("external://open.app.example/second?isShowSplash=false&infomation=Path---->SecondActivity******isShowSplash---->false")));


        );
        btn_3.setOnClickListener(new View.OnClickListener()
            @Override
            public void onClick(View v)
                startActivity(new Intent(Intent.ACTION_VIEW, Uri.parse("external://open.app.example/third?isShowSplash=true&infomation=Path---->ThirdActivity******isShowSplash---->true")));


        );
        btn_4.setOnClickListener(new View.OnClickListener()
            @Override
            public void onClick(View v)
                startActivity(new Intent(Intent.ACTION_VIEW, Uri.parse("external://open.app.example/home?isShowSplash=true&infomation=首页")));


        );
在需要使用的地方只需要添加uri即可。
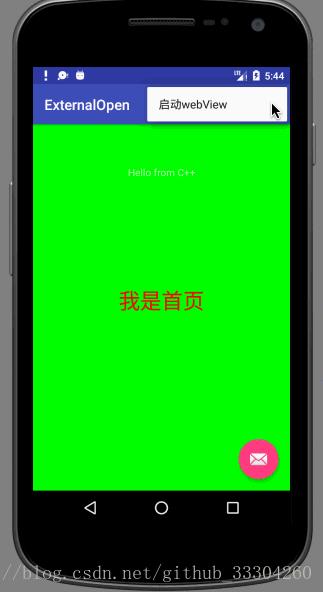
###加下来看一下比较酷炫的效果—web开启Activity
先看一下效果图:

是不是很炫 ,我们看一下实现原理 :
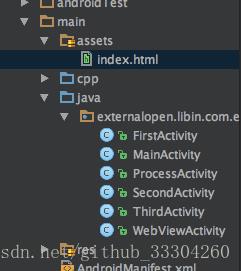
首先我这里写了一个本地的html文件,放在了asserts下面 ,代码非常简单如下:
<html>

  <body style="background-color:yellow">
      <p style="font-size:20px;text-align:center;">
        <h1>web跳转Activity</h1>
      </p>

      <p style="font-size:20px;text-align:center;" >
        <a href="external://open.app.example/home?isShowSplash=false&infomation=我是携带的信息">我是首页,不展示欢迎页</a>
      </p>

      <p style="font-size:20px;text-align:center;">
        <a href="external://open.app.example/first?isShowSplash=false&infomation=我是携带的信息">我是第一个Activity,不展示欢迎页</a>
      </p>

      <p style="font-size:20px;text-align:center;">
        <a href="external://open.app.example/second?isShowSplash=true&infomation=我是携带的信息">我是第二个Activity,展示欢迎页</a>
      </p>

      <p style="font-size:20px;text-align:center;">
        <a href="external://open.app.example/third?isShowSplash=true&infomation=我是携带的信息">我是第三个Activity,展示欢迎页</a>
      </p>

  </body>

</html>
这个文件放在了asserts下面,方便使用。

然后我们去加载web页面就可以啦 ,点击就能实现跳转啦,就是这么简单。
String ASSERTS_PATH  ="file:///android_asset/" ;

WebView wv_test = (WebView) findViewById(R.id.wv_test);

wv_test.loadUrl(ASSERTS_PATH+"index.html");
还有不明白的可以去看我的demo 非常详细。
DEMO下载地址:
http://download.csdn.net/detail/github_33304260/9873191
扫码关注公众号“伟大程序猿的诞生“,更多干货新鲜文章等着你~

公众号回复“资料获取”,获取更多干货哦~
有问题添加本人微信号“fenghuokeji996” 或扫描博客导航栏本人二维码
以上是关于酷炫的外部开启Activity新姿势的主要内容,如果未能解决你的问题,请参考以下文章