安卓学习笔记07:事件处理窗口跳转与传递数据
Posted howard2005
tags:
篇首语:本文由小常识网(cha138.com)小编为大家整理,主要介绍了安卓学习笔记07:事件处理窗口跳转与传递数据相关的知识,希望对你有一定的参考价值。
文章目录
- 零、学习目标
- 一、三个基本控件
- 二、安卓事件处理机制
- 三、案例演示:实现用户登录功能
- 四、利用意图启动组件
- 五、利用意图传递数据
- 六、案例演示:修改用户登录程序
- 七、课后作业
零、学习目标
- 会使用线性布局和三个基本控件设计用户界面
- 能说出安卓事件处理机制的实现步骤
- 能编写代码完成安卓应用的事件处理
- 会使用Intent控件实现窗口的跳转
- 会在不同的窗口之间传递数据(Bundle)
一、三个基本控件
1、标签控件(TextView)
- 类层次继承图
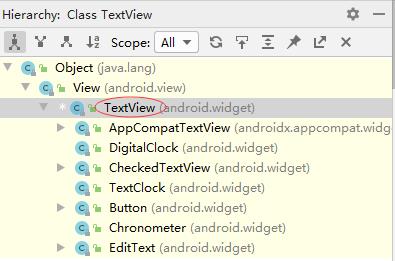
- 常用属性:text、textSize、textColor……
2、编辑框控件(EditText)
- 类层次继承图
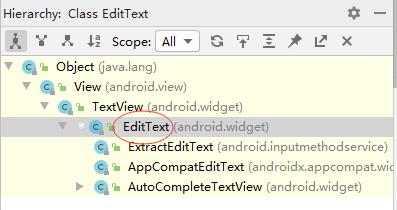
- 常用属性:text、textSize、textColor、hint……
3、按钮控件(Button)
- 类层次继承图
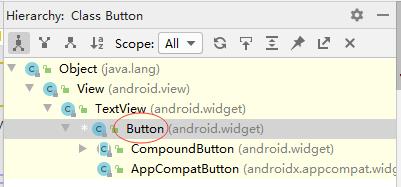
- 常用属性:text、background、layout_width、layout_height……
二、安卓事件处理机制
(一)安卓事件处理概述
- 不论是桌面应用还是手机应用程序,需要对用户的动作提供响应,这种为用户动作提供响应的机制就是事件处理。
- 安卓提供了两种事件处理机制:基于回调的事件处理和基于监听的事件处理。
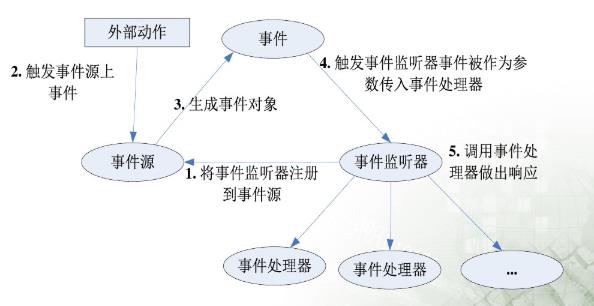
- 基于监听的事件处理是一种“面向对象”的事件处理,涉及三种对象:事件源(EventSource)、事件(Event)、事件监听器(EventListener)。
- 基于监听的事件处理流程图
(二)安卓事件处理步骤
- 以按钮单击事件处理为例说明安卓事件处理步骤
- 在界面类里声明按钮控件变量
- 通过findViewById()方法得到按钮实例
- 利用setOnClickListener()方法给按钮注册单击事件监听器
- 实现单击事件监听器接口,采用匿名实现方式
- 在接口的抽象方法里编写事件处理代码
三、案例演示:实现用户登录功能
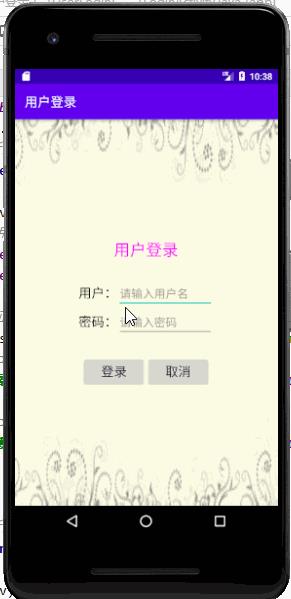
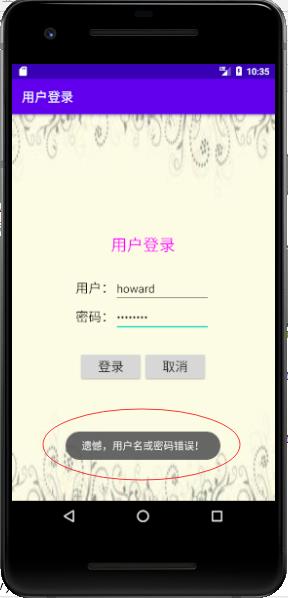
《安卓学习笔记04》课后作业让大家做一个登录窗口,本案例对按钮进行事件处理,如果登录成功,弹出吐司提示用户登录成功,否则弹出吐司提示用户登录失败。
(一)运行效果
(二)涉及知识点
- 线性布局(LinearLayout)
- 标签(TextView)
- 编辑框(EditText)
- 按钮(Button)
- 安卓事件处理机制(Event Handling Mechanism)
- 吐司(Toast)
(三)实现步骤
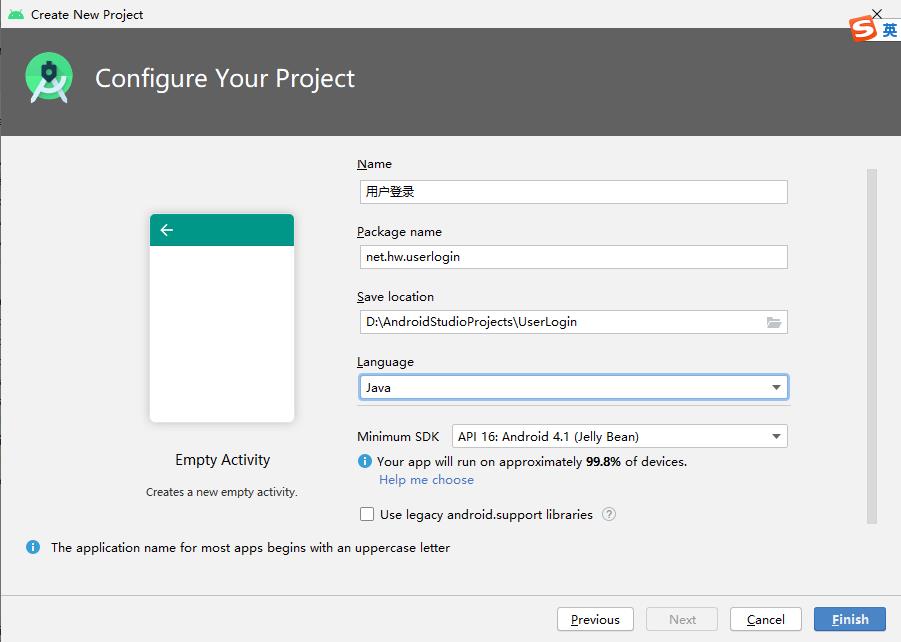
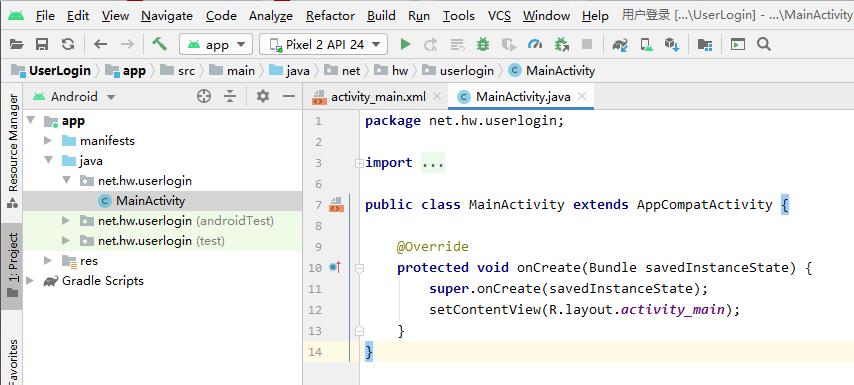
1、创建安卓应用【UserLogin】
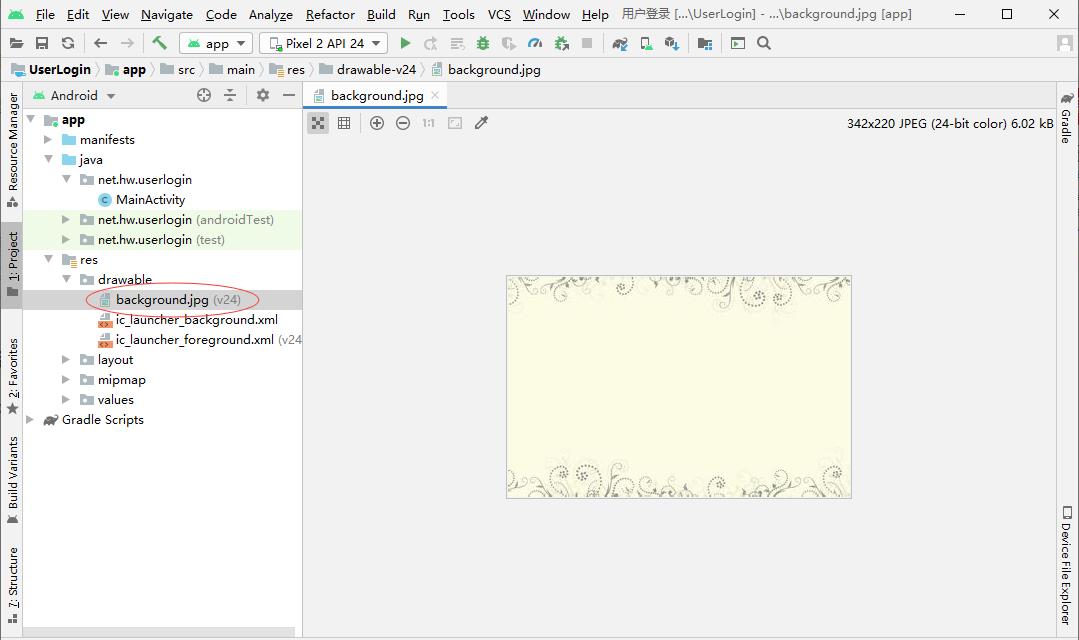
2、添加背景图片background.jpg
- 将背景图片background.jpg放在res/drawable目录
3、基于模板创建登录窗口LoginActivity
- 基于Empty Activity模板创建
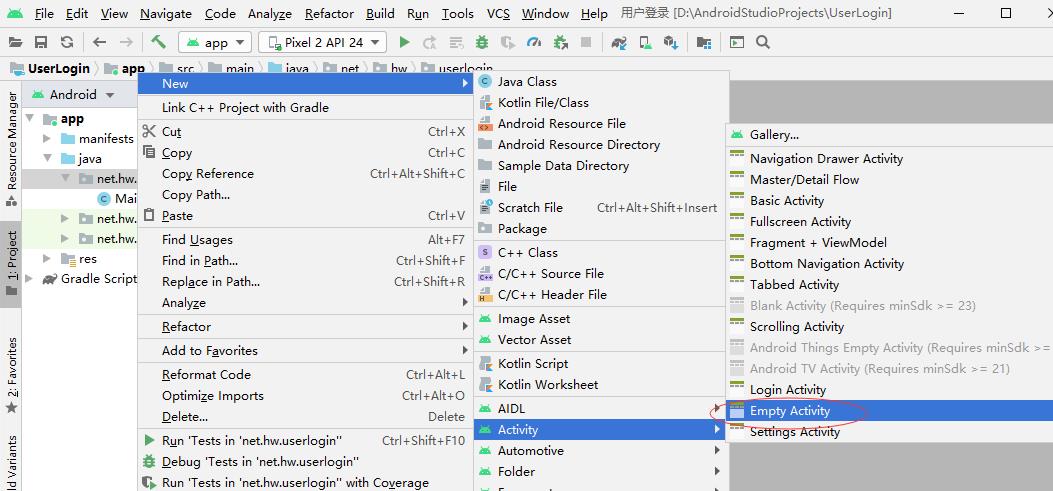
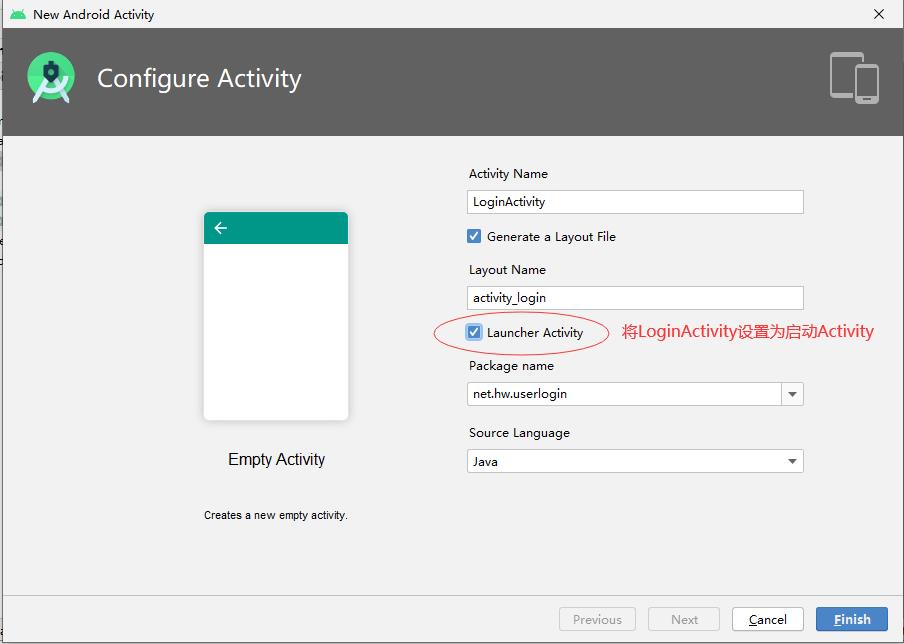
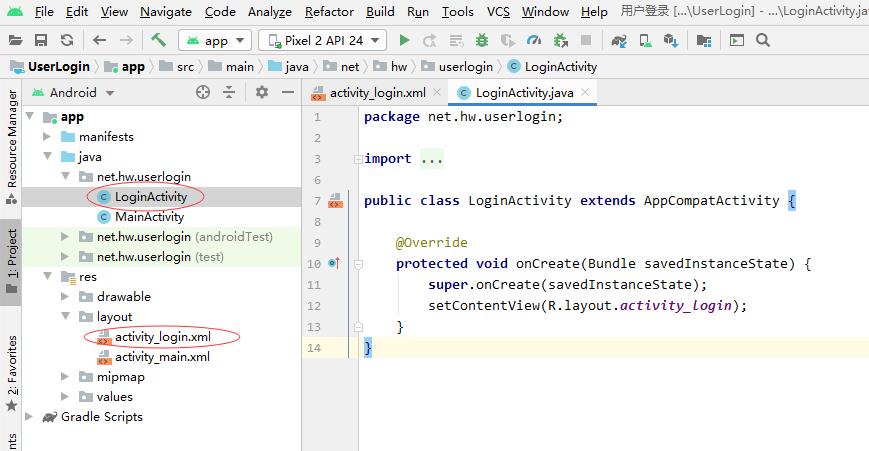
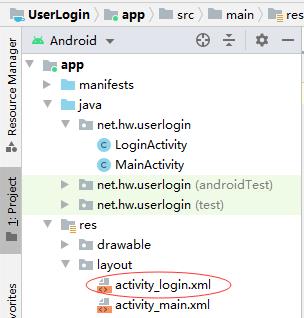
4、登录窗口布局资源文件activity_login.xml
<?xml version="1.0" encoding="utf-8"?>
<LinearLayout xmlns:android="http://schemas.android.com/apk/res/android"
    android:layout_width="match_parent"
    android:layout_height="match_parent"
    android:background="@drawable/background"
    android:gravity="center"
    android:padding="15dp"
    android:orientation="vertical" >

    <TextView
        android:id="@+id/tvUserLogin"
        android:layout_width="wrap_content"
        android:layout_height="wrap_content"
        android:layout_marginBottom="30dp"
        android:text="@string/user_login"
        android:textColor="#ff00ff"
        android:textSize="25sp" />

    <LinearLayout
        android:layout_width="match_parent"
        android:layout_height="wrap_content"
        android:gravity="center_horizontal"
        android:orientation="horizontal" >

        <TextView
            android:id="@+id/tvUsername"
            android:layout_width="wrap_content"
            android:layout_height="wrap_content"
            android:text="@string/username"
            android:textColor="#000000"
            android:textSize="20sp" />

        <EditText
            android:id="@+id/edtUsername"
            android:layout_width="150dp"
            android:layout_height="wrap_content"
            android:ems="10"
            android:hint="@string/input_username"
            android:singleLine="true" />
    </LinearLayout>

    <LinearLayout
        android:layout_width="match_parent"
        android:layout_height="wrap_content"
        android:gravity="center_horizontal"
        android:orientation="horizontal" >

        <TextView
            android:id="@+id/tvPassword"
            android:layout_width="wrap_content"
            android:layout_height="wrap_content"
            android:text="@string/password"
            android:textColor="#000000"
            android:textSize="20sp" />

        <EditText
            android:id="@+id/edtPassword"
            android:layout_width="150dp"
            android:layout_height="wrap_content"
            android:ems="10"
            android:hint="@string/input_password"
            android:inputType="textPassword"
            android:singleLine="true" />
    </LinearLayout>

    <LinearLayout
        android:layout_width="match_parent"
        android:layout_height="wrap_content"
        android:layout_marginTop="30dp"
        android:gravity="center_horizontal"
        android:orientation="horizontal" >

        <Button
            android:id="@+id/btnLogin"
            android:layout_width="wrap_content"
            android:layout_height="wrap_content"
            android:paddingLeft="30dp"
            android:paddingRight="30dp"
            android:text="@string/login"
            android:textSize="20sp" />

        <Button
            android:id="@+id/btnCancel"
            android:layout_width="wrap_content"
            android:layout_height="wrap_content"
            android:paddingLeft="30dp"
            android:paddingRight="30dp"
            android:text="@string/cancel"
            android:textSize="20sp" />
    </LinearLayout>

</LinearLayout>
- gravity:用于设置容器的子控件的对齐方式,或控件的内容的对齐方式
- orientation:线性布局的方向(horizontal——横向、vertical——纵向)
- padding:内边距,用于设置子控件与父容器边框的距离,或控件的内容与控件边框的距离;(paddingLeft、paddingRight、paddingTop、paddingBottom)
- layout_margin:外边距,用于设置控件之间的距离;(layout_marginLeft,layout_marginRight、layout_marginTop、layout_marginBottom)
- hint:用于设置编辑框的提示内容,当编辑框为空时就显示出来,一旦有内容就立马消失。
- singleLine:用于设置编辑框是否为单行输入,取值为“true”,那就是单行输入。
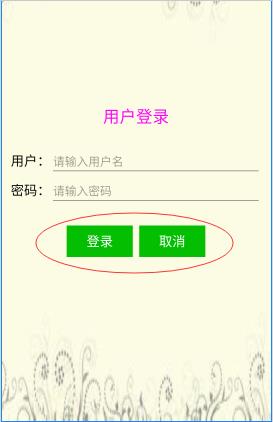
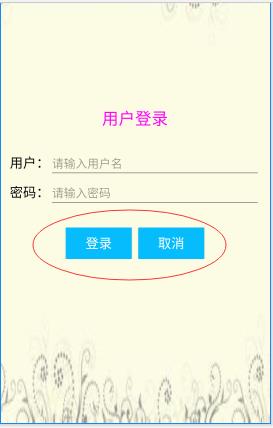
- 思考题:如何将按钮改成微信登录按钮的配色。
- #04be02
- #07bcfc
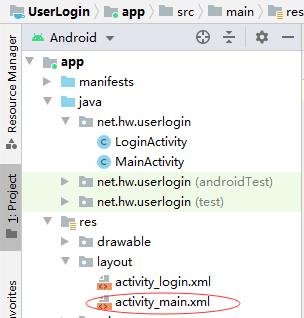
5、主窗口布局资源文件activity_main.xml
<?xml version="1.0" encoding="utf-8"?>
<LinearLayout xmlns:android="http://schemas.android.com/apk/res/android"
    xmlns:tools="http://schemas.android.com/tools"
    android:layout_width="match_parent"
    android:layout_height="match_parent"
    android:background="@drawable/background"
    android:gravity="center"
    tools:context=".MainActivity">

    <TextView
        android:id="@+id/tvMessage"
        android:layout_width="wrap_content"
        android:layout_height="wrap_content"
        android:textSize="25dp"
        android:textColor="#0000ff"/>
</LinearLayout>
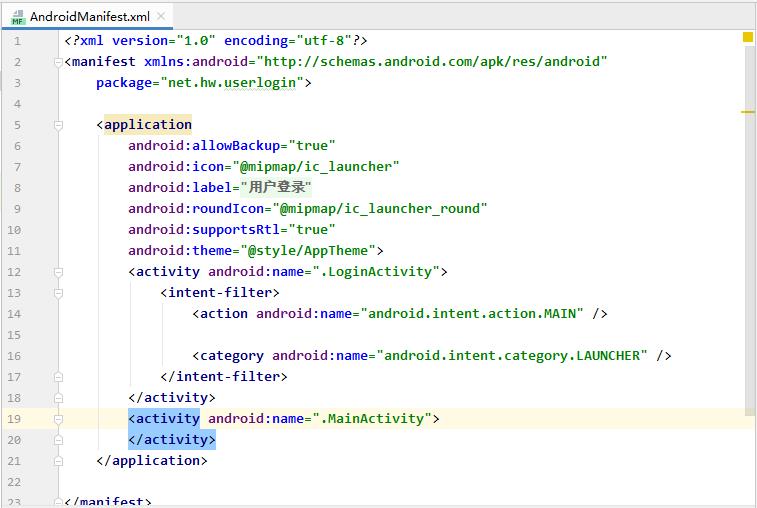
6、项目清单文件AndroidManifest.xml
- 删除MainActivity元素的意图过滤器
7、字符串资源文件strings.xml
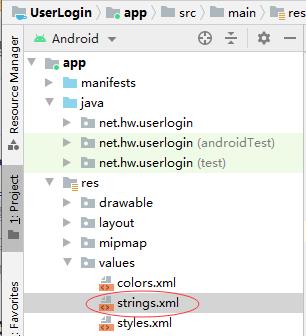
<resources>
    <string name="app_name">用户登录</string>
    <string name="user_login">用户登录</string>
    <string name="username">用户:</string>
    <string name="input_username">请输入用户名</string>
    <string name="password">密码:</string>
    <string name="input_password">请输入密码</string>
    <string name="login">登录</string>
    <string name="cancel">取消</string>
</resources>
8、登录窗口LoginActivity
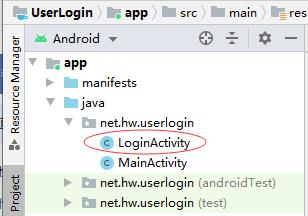
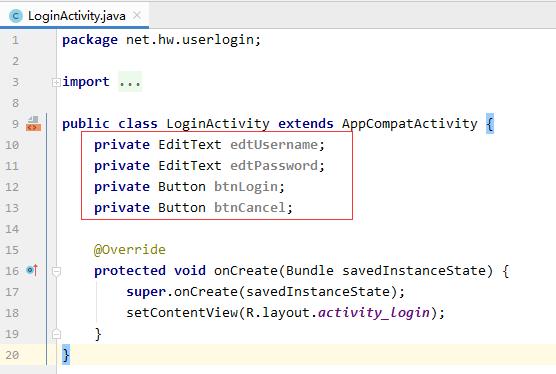
(1)声明控件变量
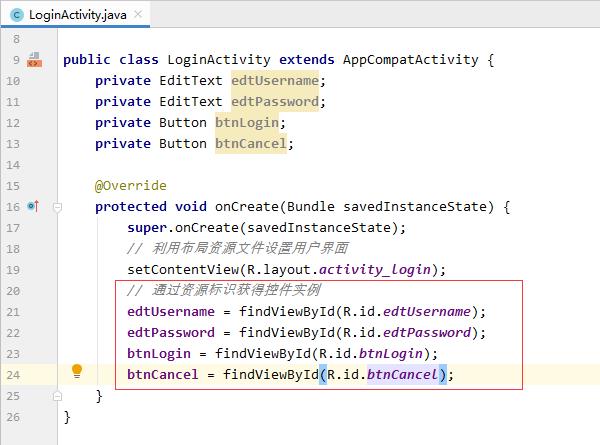
(2)通过资源标识符获取控件实例
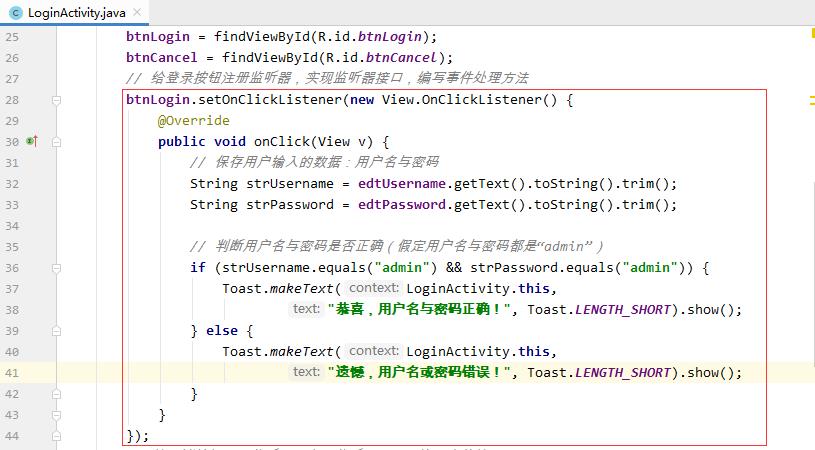
(3)登录按钮事件处理
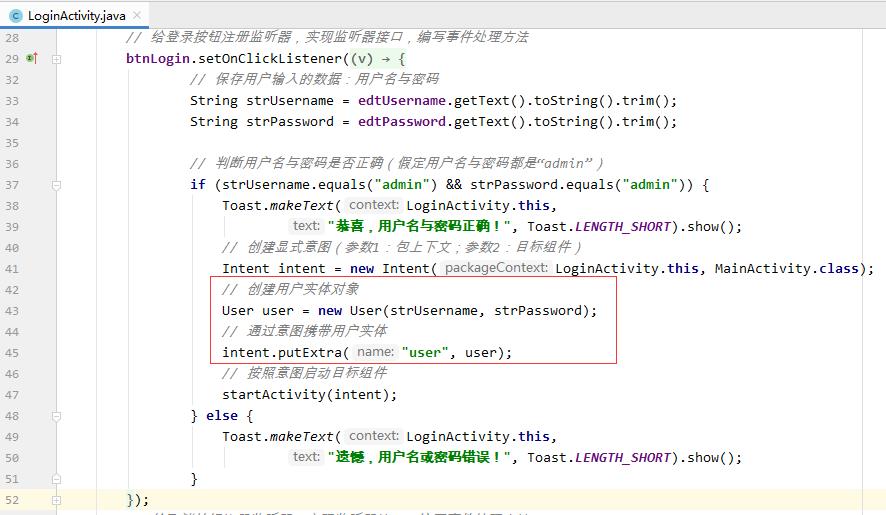
- 给登录按钮注册监听器,实现监听器接口,并且编写事件处理代码
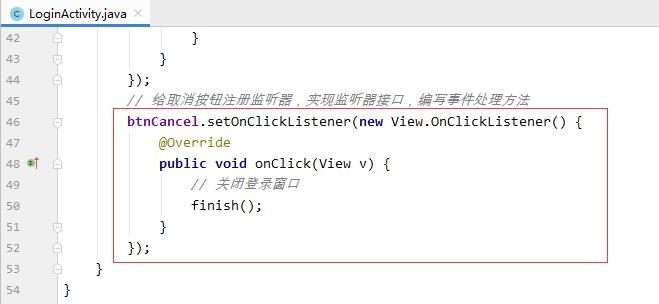
(4)取消按钮事件处理
- 给取消按钮注册监听器,实现监听器接口,并且编写事件处理代码
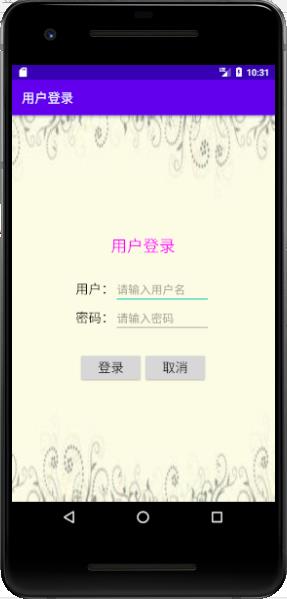
9、启动应用,查看效果
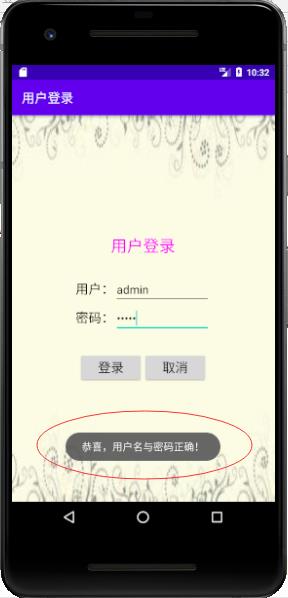
(1)输入用户名与密码正确的情况
(2)输入用户名或密码错误的情况
四、利用意图启动组件
(一)使用显式意图启动组件
- 假设有两个窗口:FirstActivity和SecondActivity
方式一
Intent intent = new Intent(FirstActivity.this, SecondActivity.class);
startActivity(intent);
方式二
Intent intent = new Intent();
intent.setClass(FirstActivity.this, SecondActivity.class);
startActivity(intent);
方式三
Intent intent = new Intent();
ComponentName component = new ComponentName(FirstActivity.this, SecondActivity.class);
intent.setComponent(component);
startActivity(intent);
(二)使用隐式意图启动组件
1、在Java代码创建隐式意图
Intent intent = new Intent();
intent.setAction("net.hw.ACTION_NEXT");
intent.addCategory(Intent.CATEGORY_DEFAULT);
startActivity(intent);
2、在项目清单文件里设置意图过滤器
<activity android:name="net.hw.SecondActivity">
    <intent-filter>
       <action android:name="net.hw.ACTION_NEXT" />
       <category android:name="android.intent.category.DEFAULT" />
   </intent-filter>
</activity>
五、利用意图传递数据
(一)传递单项数据
- 在起始组件通过意图传递单项数据
// 通过意图传递单项数据
intent.putExtra("username", strUsername);
intent.putExtra("password", strPassword);
- 在目标组件通过意图获取单项数据
// 通过意图获取单项数据
String username = intent.getStringExtra("username");
String password = intent.getStringExtra("password");
(二)传递数据包
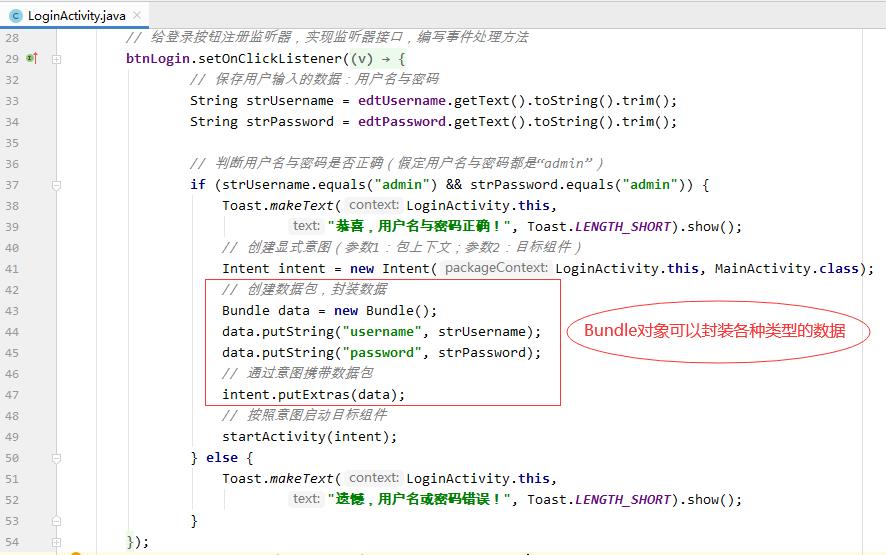
1、在起始组件通过意图携带数据包
// 创建数据包,封装数据
Bundle data = new Bundle();
data.putString("username", strUsername);
data.putString("password", strPassword);
// 通过意图携带数据包
intent.putExtras(data);
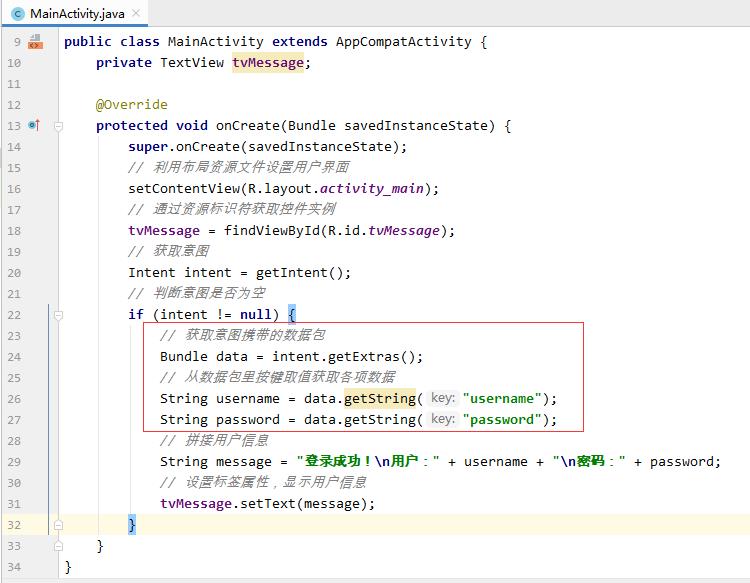
2、在目标组件通过意图获取数据包
// 获取意图携带的数据包
Bundle data = intent.getExtras();
// 从数据包里按键取值获取各项数据
String username = data.getString("username");
String password = data.getString("password");
(三)传递实体对象
1、传递实现了Serializable接口的实体对象
- 参看【六、案例演示:修改用户登录程序】
2、传递实现了Parcelable接口的实体对
六、案例演示:修改用户登录程序
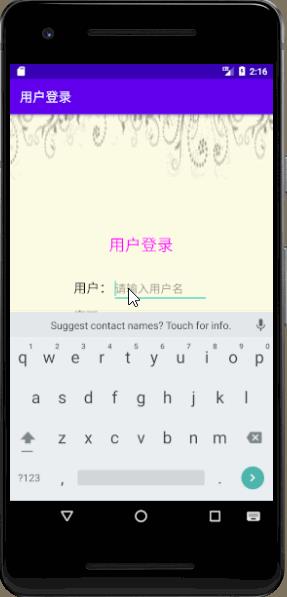
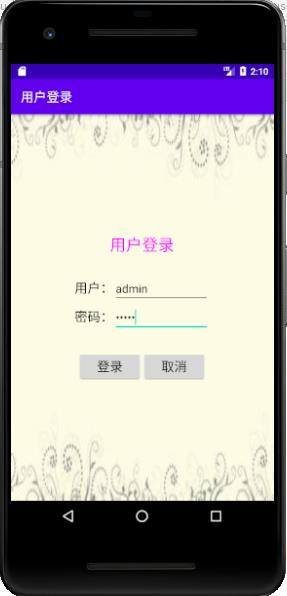
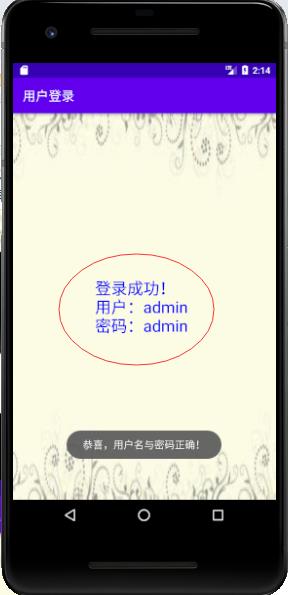
当登录成功,跳转到主窗口,显示用户名与密码。
(一)运行效果
(二)涉及知识点
- 线性布局(LinearLayout)
- 标签(TextView)
- 编辑框(EditText)
- 按钮(Button)
- 安卓事件处理机制
- 吐司(Toast)
- 意图(Intent)
(1)功能作用:联系安卓不同组件之间的一个重要桥梁
(2)使用方式:本案例采用显式意图启动组件方式实现窗口跳转
(三)实现步骤
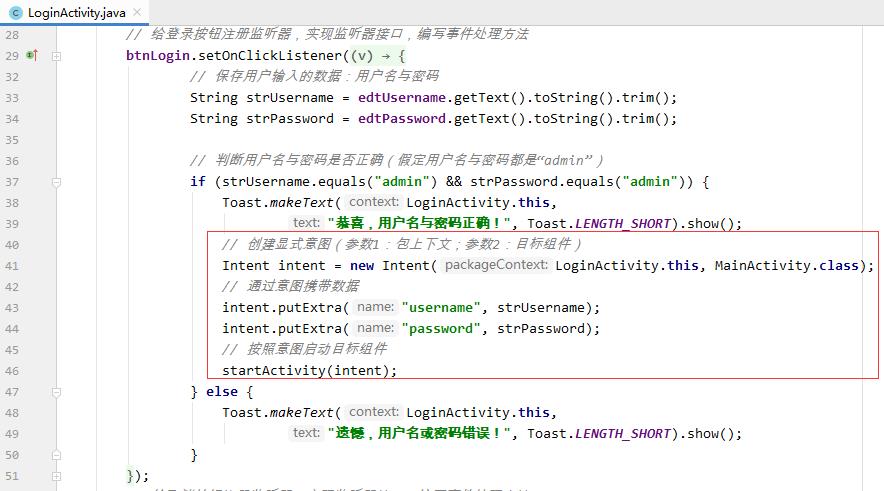
1、修改登录界面LoginActivity
- 创建显式意图,利用意图携带数据,按照意图启动目标组件
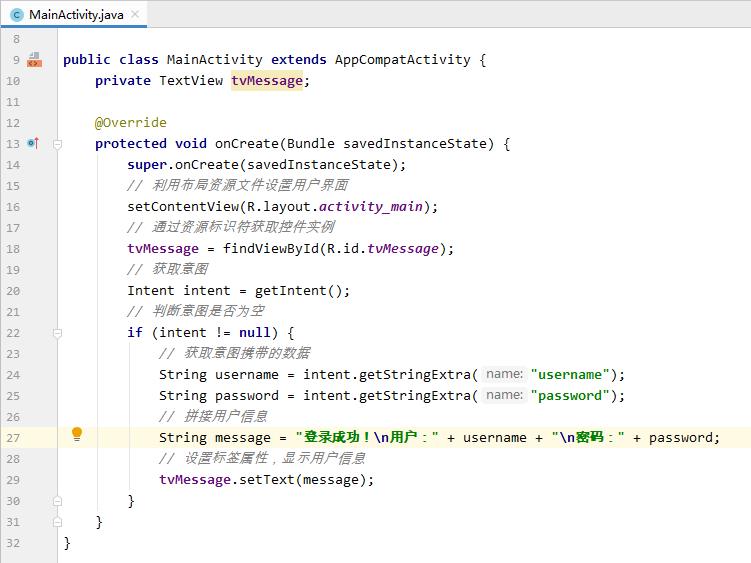
2、修改主界面MainActivity
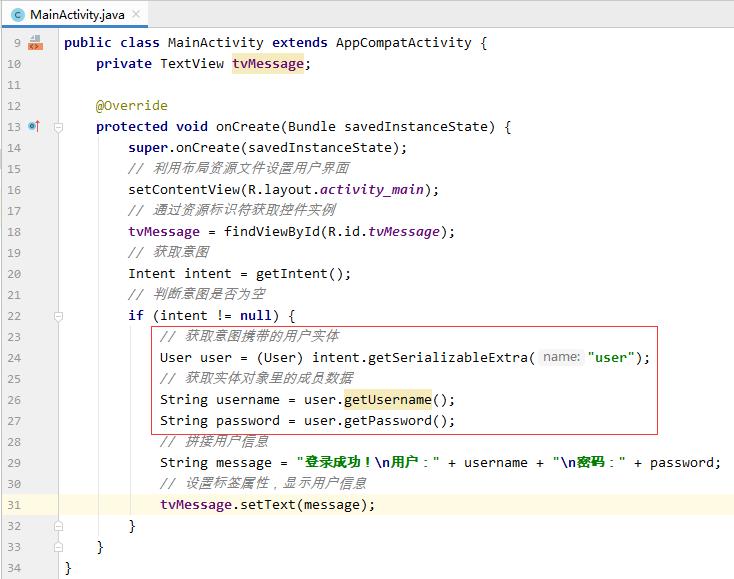
- 接收登录界面通过意图传递的数据并显示在标签里
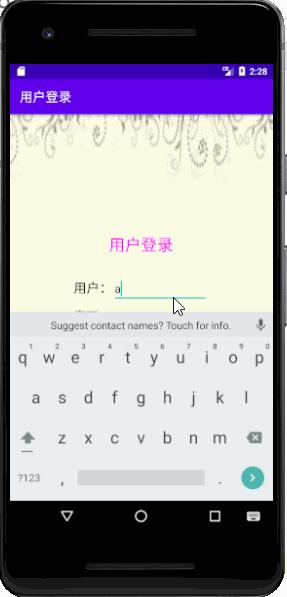
3、启动应用,查看效果
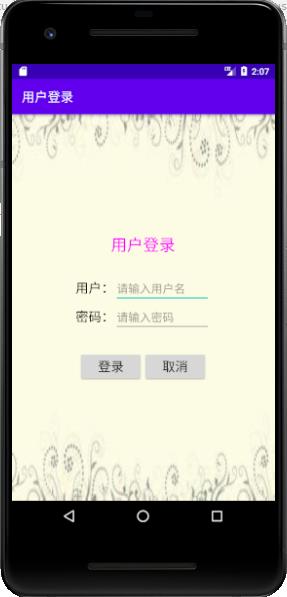
(1)输入用户名与密码正确的情况
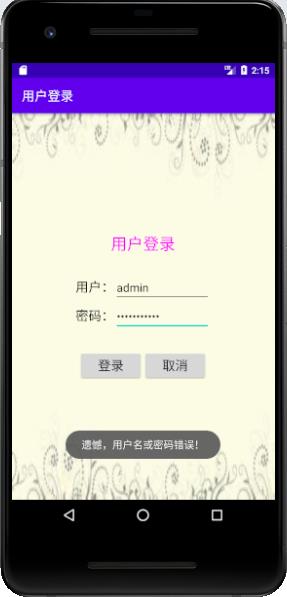
(2)输入用户名或密码错误的情况
4、修改登录界面LoginActivity
5、修改主界面MainActivity
6、启动应用,测试效果
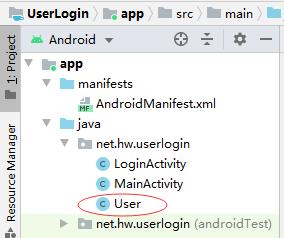
7、创建用户实体类
- 创建用户实体类,实现Serializable接口
package net.hw.userlogin;

import java.io.Serializable;

/**
 * 功能:用户类
 * 作者:华卫
 * 日期:2020年09月17日
 */
public class User implements Serializable
    private String username;
    private String password;

    public User()


    public User(String username, String password)
        this.username = username;
        this.password = password;


    public String getUsername()
        return username;


    public void setUsername(String username)
        this.username = username;


    public String getPassword()
        return password;


    public void setPassword(String password)
        this.password = password;
8、修改登录界面LoginActivity
9、修改主界面MainActivity
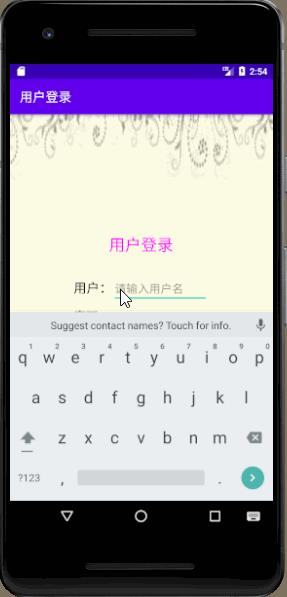
10、启动应用,测试效果
七、课后作业
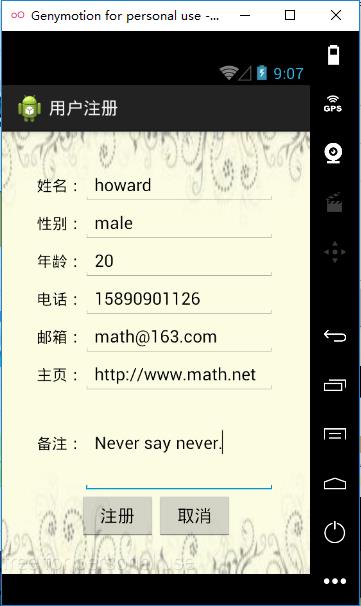
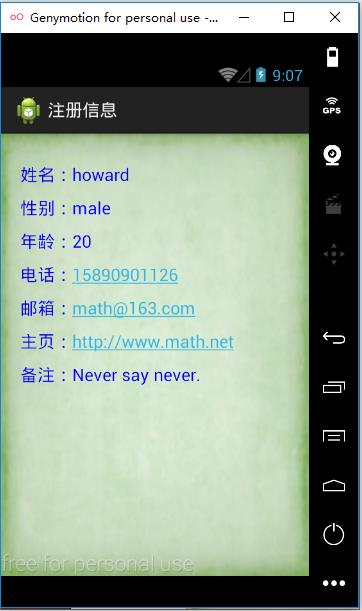
任务:实现用户注册功能
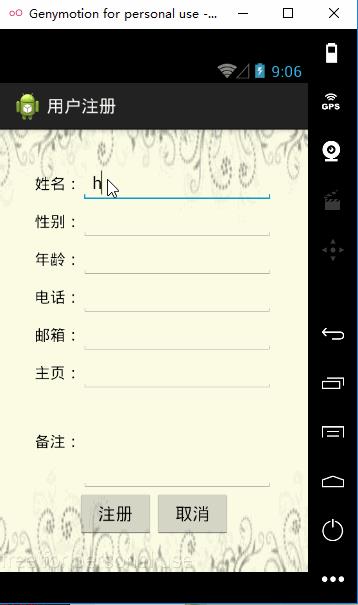
- 注册窗口
- 显示注册信息窗口
以上是关于安卓学习笔记07:事件处理窗口跳转与传递数据的主要内容,如果未能解决你的问题,请参考以下文章