SpringBoot学习
Posted
tags:
篇首语:本文由小常识网(cha138.com)小编为大家整理,主要介绍了SpringBoot学习相关的知识,希望对你有一定的参考价值。
Spring Boot配置文件
如果想引用配置文件中的值可以按照如下方法:
例如,在配置文件中增加两个属性,分别是cupSize和age
server:
  port: 8889
  context-path: /demo
cupSize: B
age: 18
那么在Controller可以使用标签绑定类里面的属性值,并直接获得属性文件中配置的值:
    @Value("${cupSize}")
    private String cupSize;

    @Value("${age}")
    private Integer age;
同样,也可以在配置文件中再使用配置文件的值,例如:
server:
  port: 8889
  context-path: /demo
cupSize: B
age: 18
content: "cupSize: ${cupSize}, age: ${age}"
Controller:
    @Value("${content}")
    private String content;
这样一个个属性的引用比较麻烦,这样我们可以写一个类,然后让这个类对应一个分组下的所有属性:
1. 修改属性文件
server:
  port: 8889
  context-path: /demo
girl:
  cupSize: B
  age: 18
2. 新建一个类对应girl这个分组下的所有属性
package com.lys.demo3;

import org.springframework.boot.context.properties.ConfigurationProperties;
import org.springframework.stereotype.Component;

@Component
@ConfigurationProperties(prefix = "girl")
public class GirlProperties {

    private String cupSize;

    private Integer age;

    public String getCupSize() {
        return cupSize;
    }

    public Integer getAge() {
        return age;
    }

    public void setCupSize(String cupSize) {
        this.cupSize = cupSize;
    }

    public void setAge(Integer age) {
        this.age = age;
    }

}
3. 修改Controller
package com.lys.demo3;

import org.springframework.beans.factory.annotation.Autowired;
import org.springframework.web.bind.annotation.RequestMapping;
import org.springframework.web.bind.annotation.RequestMethod;
import org.springframework.web.bind.annotation.RestController;

@RestController
public class HelloController {

    @Autowired
    private GirlProperties girlProperties;

    @RequestMapping(value = "/hello", method = RequestMethod.GET)
    public String sayHello() {
        return girlProperties.getCupSize() + girlProperties.getAge();
    }
}
那么关键来了,如果在实际工作中如果真对开发和生产两个环境使用不同的配置该如何呢?看下面例子。
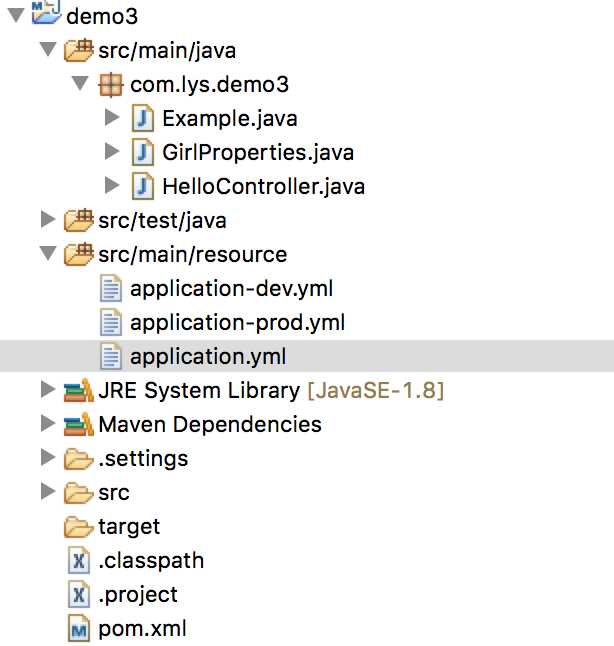
1. 新建立两个配置文件,分别取名为application-dev.yml和application-prod.yml
application-dev.yml:
server:
  port: 8880
  context-path: /demo
girl:
  cupSize: B
  age: 18
application-prod.yml:
server:
  port: 8889
  context-path: /demo
girl:
  cupSize: C
  age: 18
2. 更改默认配置文件application.yml
spring:
  profiles:
    active: dev
没错,就是active属性指定当前应用使用哪个配置文件。
3. 接下来就可以启动应用验证结果了。
同时,这样做获悉你仍然感觉有些麻烦,还记得springBoot的启动方式么,没错用命令行启动,这里可以指定使用的配置。
如:java -jar demo2-0.0.1-SNAPSHOT.jar --spring.profiles.active=prod
项目目录结构:

以上是关于SpringBoot学习的主要内容,如果未能解决你的问题,请参考以下文章