python自动化高效办公第二期,带你项目实战{数据可视化发送邮件(定时任务监控)python聊天机器人(基于微信钉钉)}
Posted 汀、
tags:
篇首语:本文由小常识网(cha138.com)小编为大家整理,主要介绍了python自动化高效办公第二期,带你项目实战{数据可视化发送邮件(定时任务监控)python聊天机器人(基于微信钉钉)}相关的知识,希望对你有一定的参考价值。
相关文章和数据源:
python自动化高效办公第二期,带你项目实战【一】{excel数据处理、批量化生成word模板、pdf和ppt等自动化操作}
Python自动化办公--Pandas玩转Excel数据分析【二】
Python自动化办公--Pandas玩转Excel数据分析【三】
python处理Excel实现自动化办公教学(含实战)【一】
python处理Excel实现自动化办公教学(含实战)【二】
python处理Excel实现自动化办公教学(数据筛选、公式操作、单元格拆分合并、冻结窗口、图表绘制等)【三】
python入门之后须掌握的知识点(模块化编程、时间模块)【一】
python入门之后须掌握的知识点(excel文件处理+邮件发送+实战:批量化发工资条)【二】
spandas玩转excel码源.zip-数据挖掘文档类资源-CSDN下载
Python自动化办公(2021最新版!有源代码,).zip-
Python自动化办公(可能是B站内容最全的!有源代码,).zip-
上面是对应码源,图方便的话可以直接下载都分类分好了,当然也可以看文章。
1.数据可视化
参考上面pandas文章即可
2.python发送邮件
2.1 发送普通邮件
import smtplib
from smtplib import SMTP_SSL
from email.mime.text import MIMEText
from email.mime.multipart import MIMEMultipart
from email.header import Header

host_server = 'smtp.sina.com' #新浪邮箱smtp服务器
sender_sina = 'your_email@sina.com' #发件人邮箱
pwd = 'your_pwd' #密码

sender_sina_mail = 'your_email@sina.com' #发件人邮箱
receiver = 'others_email@sina.com'  #收件人邮箱
mail_title = '这是标题'
mail_content = '这是正文'

msg = MIMEMultipart() #邮件主题
msg['Subject'] = Header(mail_title, 'utf-8') #邮件主题
msg['From'] = sender_sina_mail
msg['To'] = Header('mail_title', 'utf-8')
msg.attach(MIMEText(mail_content, 'plain', 'utf-8')) #邮件正文

smtp = SMTP_SSL(host_server) #ssl登录
smtp.login(sender_sina,pwd)
smtp.sendmail(sender_sina_mail,receiver,msg.as_string())
smtp.quit()
2.2.发送带附件邮件
import smtplib
from smtplib import SMTP_SSL
from email.mime.text import MIMEText
from email.mime.multipart import MIMEMultipart
from email.mime.application import MIMEApplication
from email.header import Header

host_server = 'smtp.sina.com'
sender_sina = 'your_email@sina.com'
pwd = 'your_pwd'

sender_sina_mail = 'your_email@sina.com'
receiver = 'others_email@sina.com'
mail_title = '这是标题'
mail_content = '这是正文'

msg = MIMEMultipart()
msg['Subject'] = Header(mail_title, 'utf-8')
msg['From'] = sender_sina_mail
msg['To'] = Header('mail_title', 'utf-8')

msg.attach(MIMEText(mail_content, 'html', 'utf-8')) #html格式
# 添加附件
attachment = MIMEApplication(open('student.xls', 'rb').read())

attachment.add_header('Content-Disposition', 'attachment', filename='student.xls')
msg.attach(attachment)
try:
    smtp = SMTP_SSL(host_server)
    smtp.set_debuglevel(1) #0关闭 1开启
    smtp.ehlo(host_server) #和服务器确定状态
    smtp.login(sender_sina, pwd)
    smtp.sendmail(sender_sina_mail, receiver, msg.as_string())
    smtp.quit()
    print('success')
except smtplib.SMTPException:
    print('error')
2.3 利用zmail接受邮件
安装
pip install zmailimport zmail
server = zmail. server(' pythonauto@sina.com', ' python1234' )
mail = server.get_ latest()
zmail.show(mail)
zmail.show(mail["subject"])#只取标题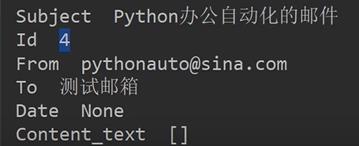

2.4 计划任务进行邮箱监控
2.4.1 windows下计划任务设置
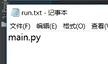
首先我们可以同级目录下建一个run.text文档,然后输入:main.py
 ,
,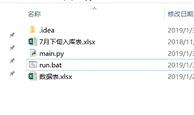
然后后缀名改掉改成bat
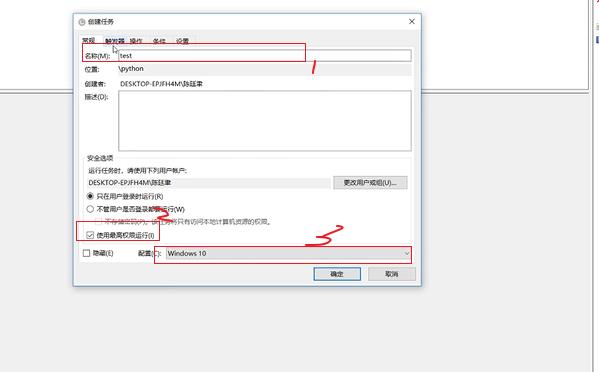
然后在windows下搜索计划任务

新建一个任务库:python

创建一个任务:
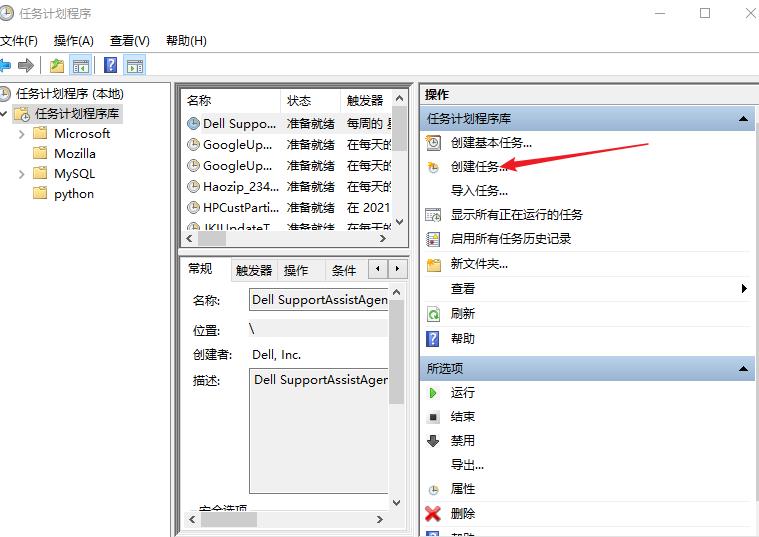
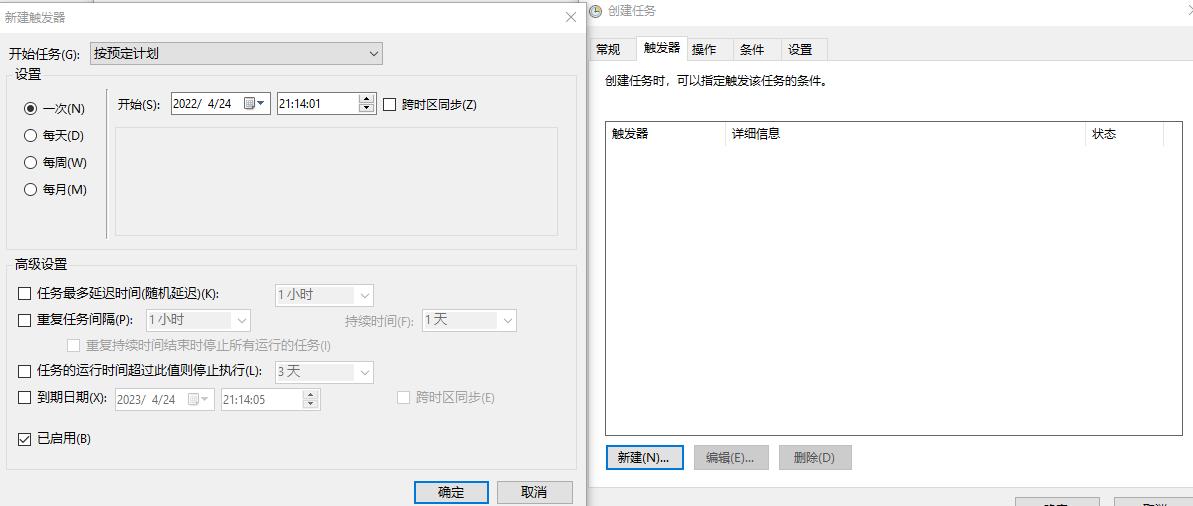
新建一个触发器:
操作:添加脚本
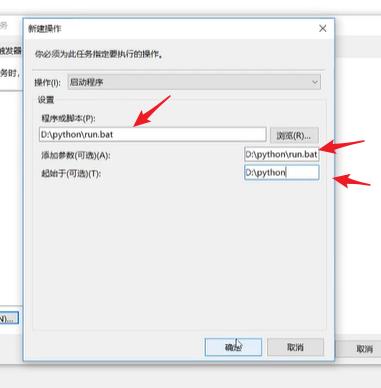
之后只需要等待即可。时间到了就会执行main.py

2.4.2计划任务监控邮箱
通过id判断邮件数量:
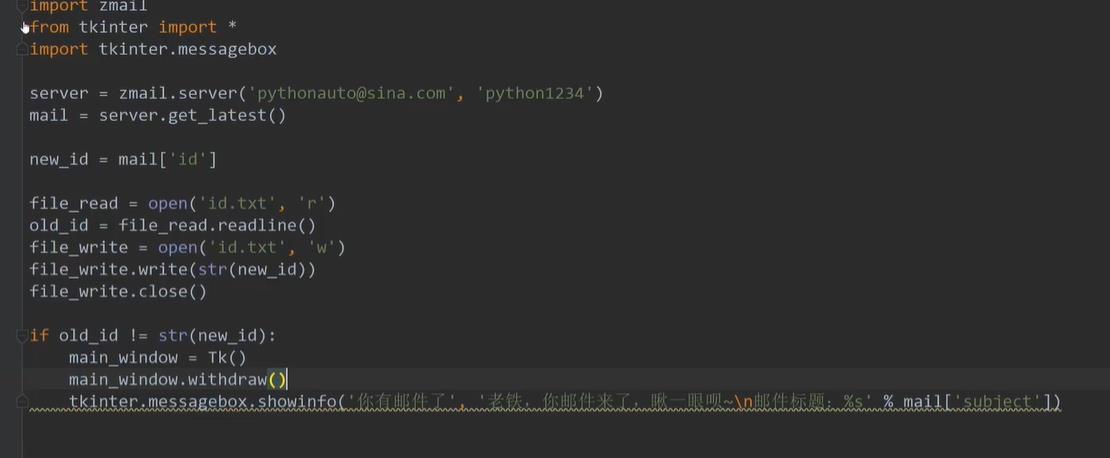
同级目录:新建一个id的text:写入当前邮件id

定时执行上述文件方法相同。
3.打造python聊天机器人(基于微信、钉钉)
3.1 API调用教学
以上是关于python自动化高效办公第二期,带你项目实战{数据可视化发送邮件(定时任务监控)python聊天机器人(基于微信钉钉)}的主要内容,如果未能解决你的问题,请参考以下文章