Electron 主进程和渲染进程都可使用的模块
Posted 沿着路走到底
tags:
篇首语:本文由小常识网(cha138.com)小编为大家整理,主要介绍了Electron 主进程和渲染进程都可使用的模块相关的知识,希望对你有一定的参考价值。
shell模块
index.html
<!DOCTYPE html>
<html lang="en">

<head>
  <meta charset="UTF-8">
  <meta name="viewport" content="width=device-width, initial-scale=1.0">
  <title></title>
  <style>
    *
      margin: 0;
      padding: 0;

  </style>
</head>

<body>
  <h2>shell 与 iframe</h2>
  <a id="openUrl" href="https://kaiwu.lagou.com/">打开URL</a>
  <br><br>
  <button id="openFolder">打开目录</button>
  <script src="index.js"></script>
</body>

</html>
index.js
const  shell  = require('electron')
const path = require('path')

window.addEventListener('DOMContentLoaded', () =>
  const oBtn1 = document.getElementById('openUrl')
  const oBtn2 = document.getElementById('openFolder')

  oBtn1.addEventListener('click', (e) =>
    e.preventDefault()
    const urlPath = oBtn1.getAttribute('href')
    shell.openExternal(urlPath) // 使用默认浏览器打开链接
  )

  oBtn2.addEventListener('click', () =>
    shell.showItemInFolder(path.resolve(__filename))
  )
)
iframe
<!DOCTYPE html>
<html lang="en">
<head>
  <meta charset="UTF-8">
  <meta name="viewport" content="width=device-width, initial-scale=1.0">
  <title></title>
  <style>
    *
      margin: 0;
      padding: 0;


    iframe
      top: 0;
      left: 0;
      width: 100%;
      height: 100%;
      position: fixed;

  </style>
</head>

<body>
  <h2>shell 与 iframe</h2>
  <iframe src="https://kaiwu.lagou.com/" frameborder="0" id="webview"></iframe>
  <script src="index.js"></script>
</body>
</html>
自定义菜单使用shell
main.js
const  app, BrowserWindow, Menu, shell  = require('electron')

console.log(process.platform)

// 定义全局变量存放主窗口 id
let mainWinId = null

// 创建窗口
function createWindow ()
  console.log('ready')
  // 创建主进程
  const mainWin = new BrowserWindow(
    title: '自定义菜单',
    show: false, // true:显示窗体,false: 不显示窗体
    width: 800,
    height: 400,
    webPreferences:
      nodeIntegration: true, // 允许浏览器环境使用Node API
      enableRemoteModule: true, // 允许页面使用 remote

  )

  let tmp = [

      label: '菜单',
      submenu: [

          label: '关于',
          click()
            shell.openExternal('https://kaiwu.lagou.com/')

        ,

          label: '打开',
          click()
            BrowserWindow.getFocusedWindow().webContents.send('openUrl')

        ,
      ]

  ]

  let menu = Menu.buildFromTemplate(tmp)
  Menu.setApplicationMenu(menu)

  // 在当前窗口中加载指定界面让它显示具体的内容
  mainWin.loadFile('index.html')

  mainWinId = mainWin.id

  mainWin.on('ready-to-show', () =>
    mainWin.show() // 在窗体完全加载完成后,显示窗体,避免白页现象
  )

  mainWin.on('close', () =>
    console.log('close')
    //mainWin = null
  )


// 当 app 启动之后,执行窗口创建等操作
app.on('ready', createWindow)

app.on('window-all-closed', () =>
  console.log('window-all-closed')
  app.quit()
)
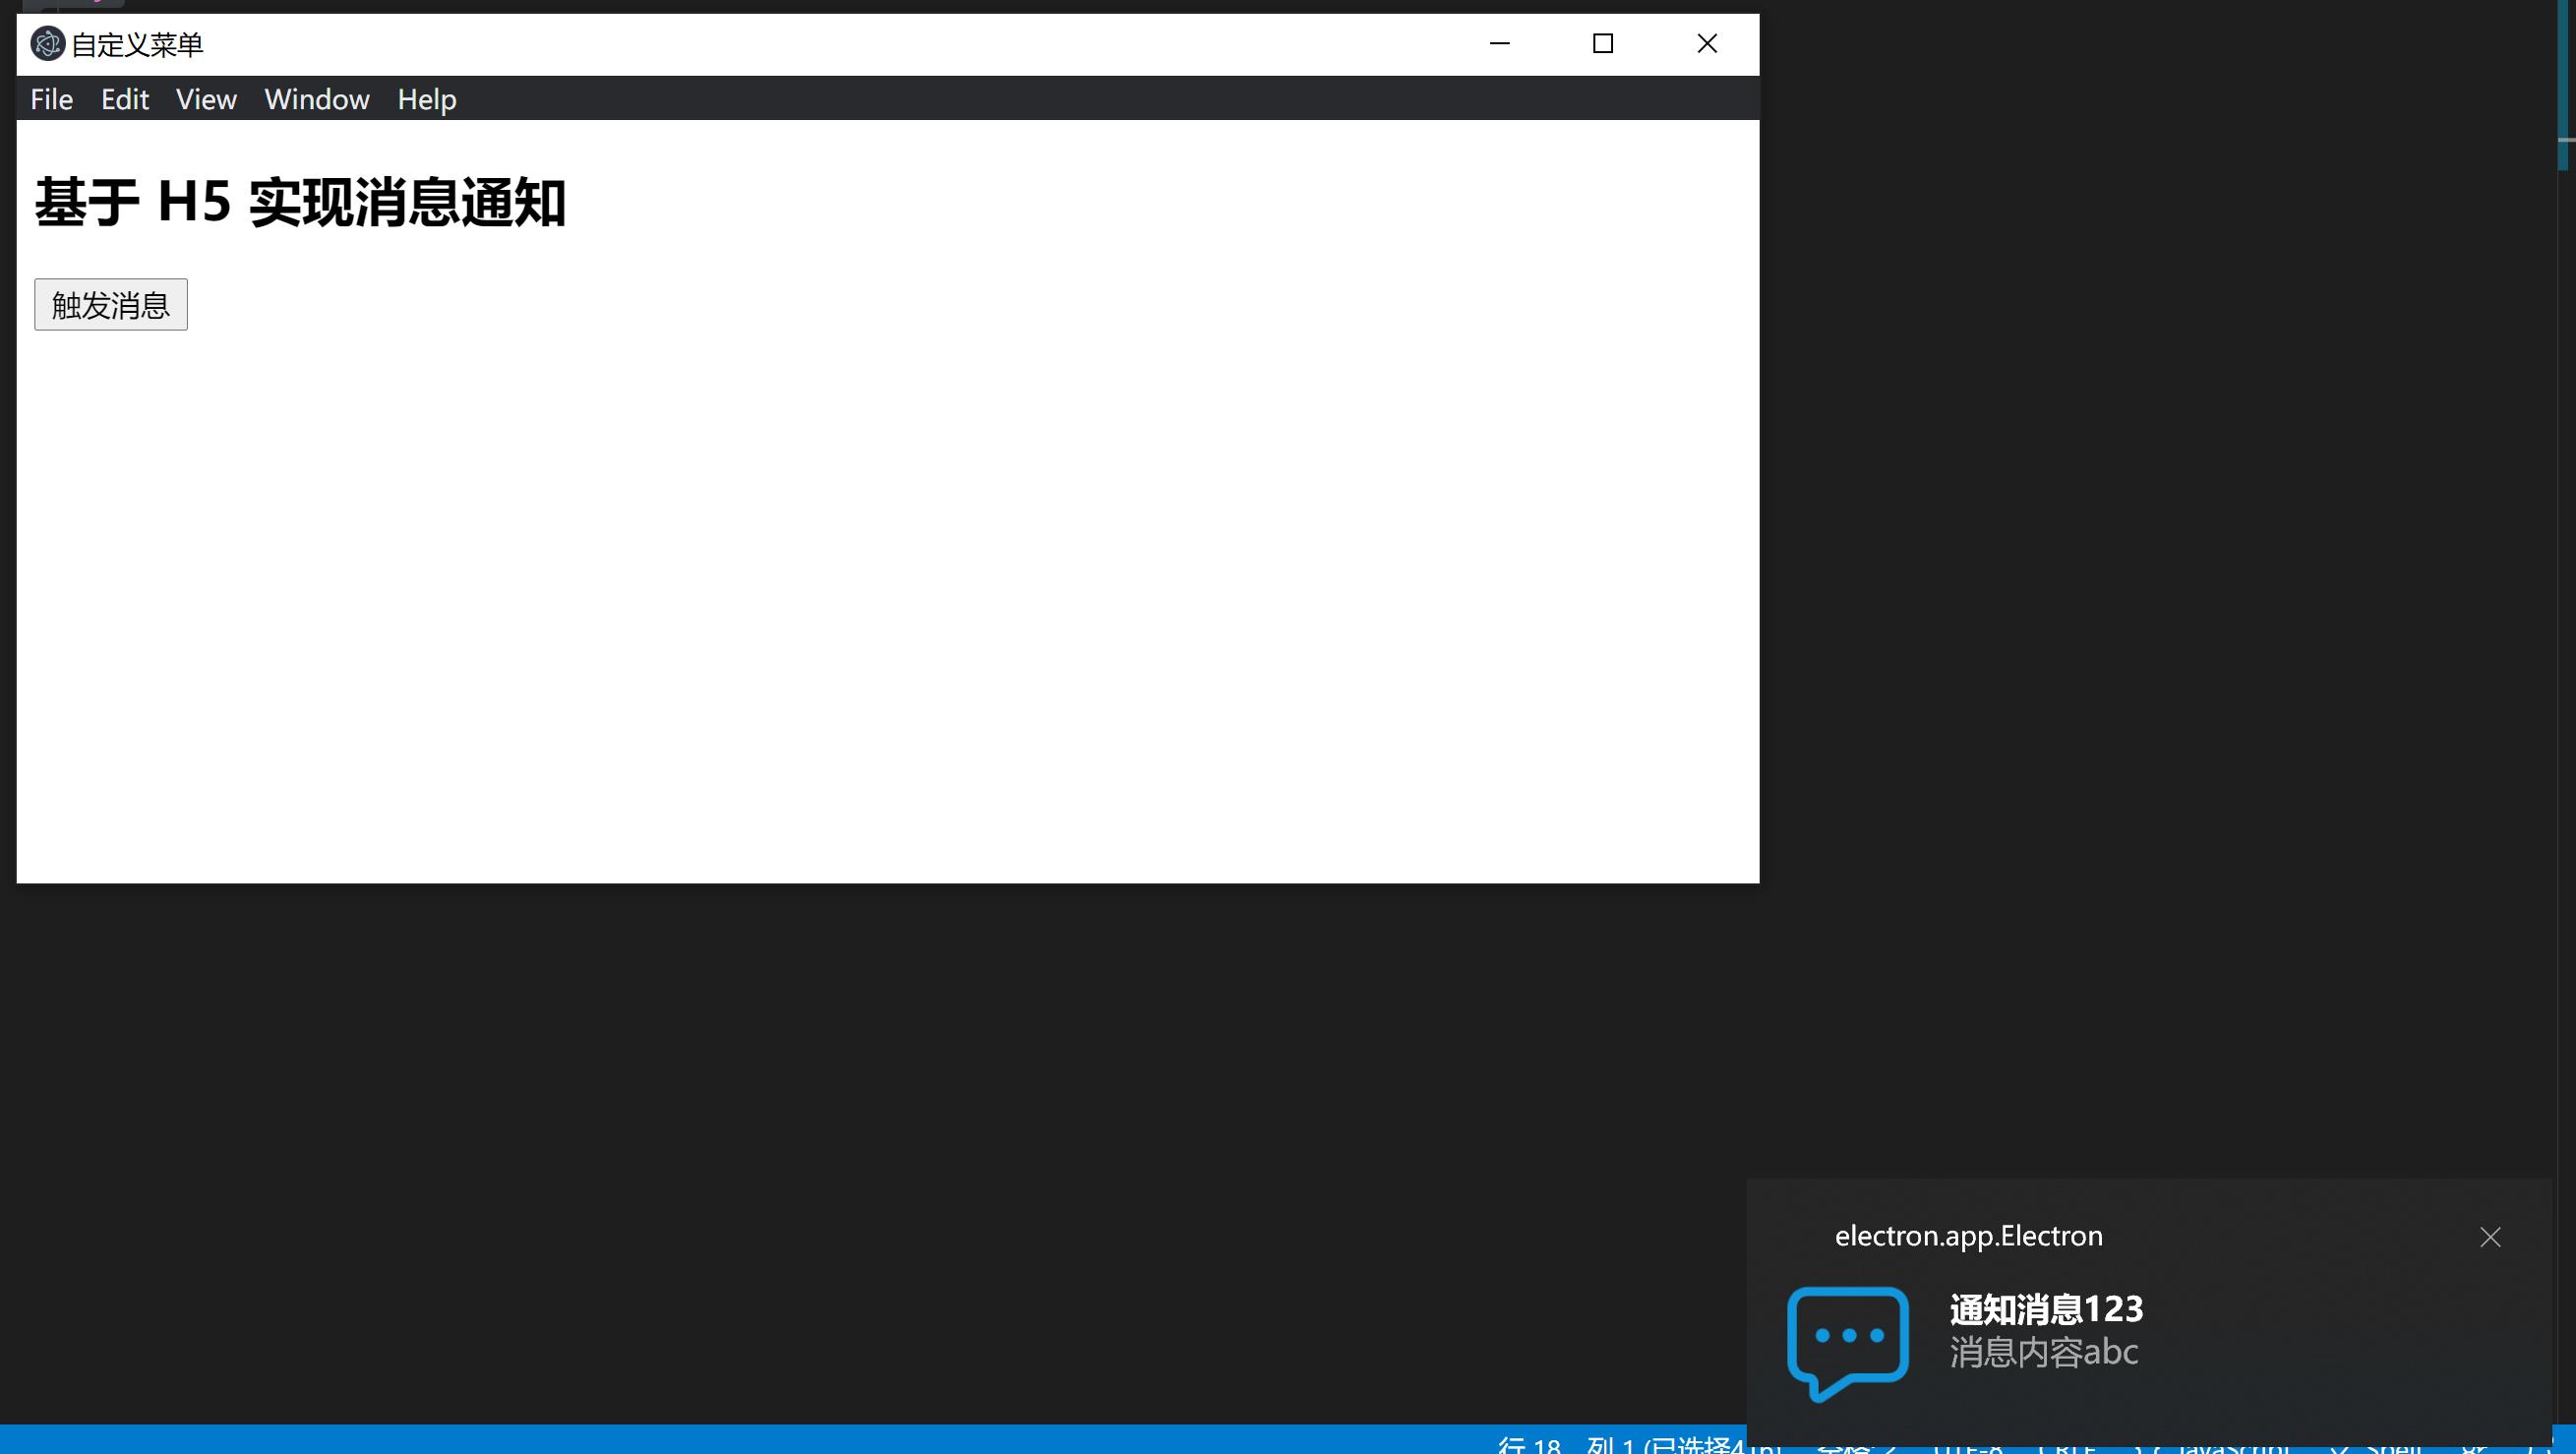
消息通知
index.html
<!DOCTYPE html>
<html lang="en">
<head>
  <meta charset="UTF-8">
  <meta name="viewport" content="width=device-width, initial-scale=1.0">
  <title></title>
</head>

<body>
  <h2>基于 H5 实现消息通知</h2>
  <button id="btn">触发消息</button>
  <script src="index.js"></script>
</body>
</html>
index.js
window.addEventListener('DOMContentLoaded', () =>
  const oBtn = document.getElementById('btn')

  oBtn.addEventListener('click', () =>
    const option =
      title: '通知消息123',
      body: '消息内容abc',
      icon: './msg.png',


    const myNotification = new window.Notification(option.title ,option)

    myNotification.onclick = function()
      console.log('点击了消息页卡')

  )
)
1

快捷键注册
main.js
const  app, BrowserWindow, globalShortcut  = require('electron')

console.log(process.platform)

// 定义全局变量存放主窗口 id
let mainWinId = null

// 创建窗口
function createWindow ()
  console.log('ready')
  // 创建主进程
  const mainWin = new BrowserWindow(
    title: '自定义菜单',
    show: false, // true:显示窗体,false: 不显示窗体
    width: 800,
    height: 400,
    webPreferences:
      nodeIntegration: true, // 允许浏览器环境使用Node API
      enableRemoteModule: true, // 允许页面使用 remote

  )

  // 在当前窗口中加载指定界面让它显示具体的内容
  mainWin.loadFile('index.html')

  mainWinId = mainWin.id

  mainWin.on('ready-to-show', () =>
    mainWin.show() // 在窗体完全加载完成后,显示窗体,避免白页现象
  )

  mainWin.on('close', () =>
    console.log('close')
    //mainWin = null
  )


// 当 app 启动之后,执行窗口创建等操作
app.on('ready', createWindow)

// 注册快捷键
app.on('ready', () =>
  const ret = globalShortcut.register('ctrl + q', () =>
    console.log('快捷键注册')
  )

  if (!ret)
    console.log('注册失败')


  console.log(globalShortcut.isRegistered('ctrl + q'))
  console.log(ret)
)

app.on('will-quit', () =>
  // 取消注册的快捷键
  globalShortcut.unregister('ctrl + q')

  // 取消所有注册的快捷键
  globalShortcut.registerAll()
)

app.on('window-all-closed', () =>
  console.log('window-all-closed')
  app.quit()
)
剪切板模块
index.html
<!DOCTYPE html>
<html lang="en">
<head>
  <meta charset="UTF-8">
  <meta name="viewport" content="width=device-width, initial-scale=1.0">
  <title></title>
</head>

<body>
  <h2>剪切版</h2>
  <input type="text" placeholder="输入需要复制的内容"> <button>复制</button>
  <br><br>
  <input type="text" placeholder="将内容粘贴至此处"> <button>粘贴</button>
  <br><br>
  <button id='clipImg'>将图片拷贝至剪切版再粘贴至界面</button>
  <br><br>
  <script src="index.js"></script>
</body>
</html>
index.js
const  clipboard, nativeImage  = require('electron')

window.addEventListener('DOMContentLoaded', () =>
  const aBtn = document.getElementsByTagName('button')
  const aInput = document.getElementsByTagName('input')
  const oBtn = document.getElementById('clipImg')
  let ret = null

  aBtn[0].addEventListener('click', () =>
    // 复制内容到剪切板
    ret = clipboard.writeText(aInput[0].value)
  )

  aBtn[1].addEventListener('click', () =>
    // 粘贴剪切板内的内容
    aInput[1].value = clipboard.readText(ret)
  )

  oBtn.addEventListener('click', () =>
    // 将图片放置于剪切板当中的时候要求图片类型属于 nativeImage 实例
    const oImage = nativeImage.createFromPath('./msg.png')
    clipboard.writeImage(oImage)

    // 将剪切板中的图片做为 DOM 元素显示在界面上
    const oImg = clipboard.readImage()
    const oImgDom = new Image()
    oImgDom.src = oImg.toDataURL()
    document.body.append(oImgDom)
  )
)
1
以上是关于Electron 主进程和渲染进程都可使用的模块的主要内容,如果未能解决你的问题,请参考以下文章