Redux学习——封装connect函数
Posted 小小白学计算机
tags:
篇首语:本文由小常识网(cha138.com)小编为大家整理,主要介绍了Redux学习——封装connect函数相关的知识,希望对你有一定的参考价值。
一、自定义connect函数
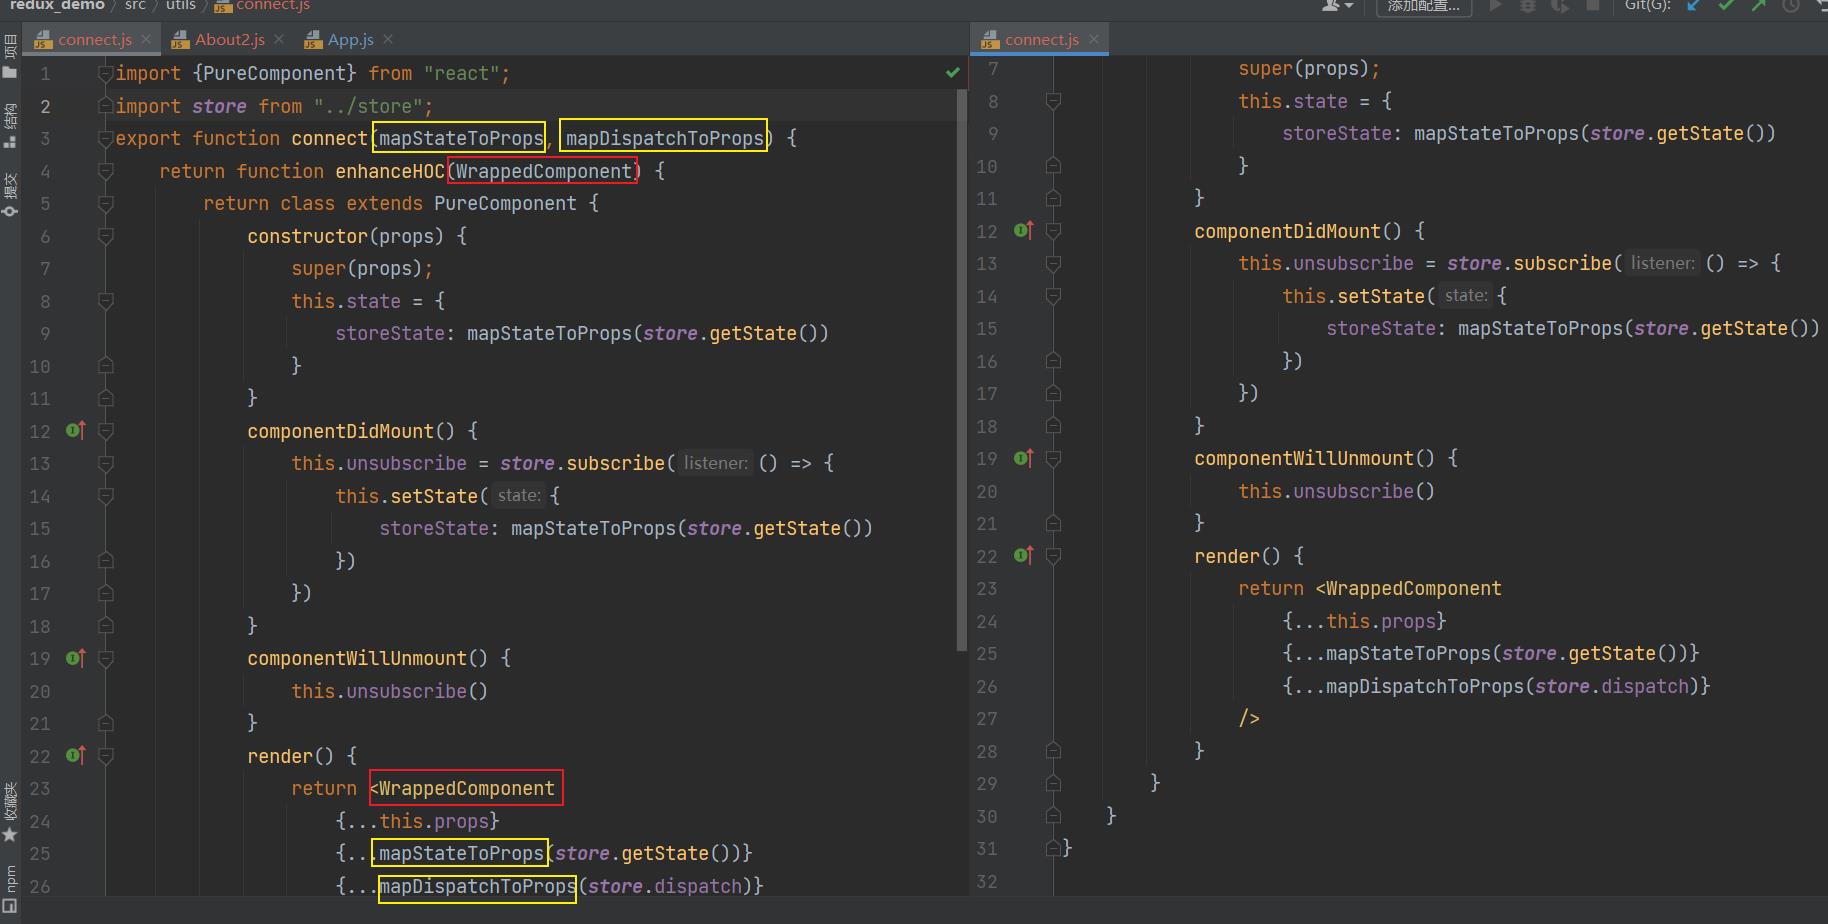
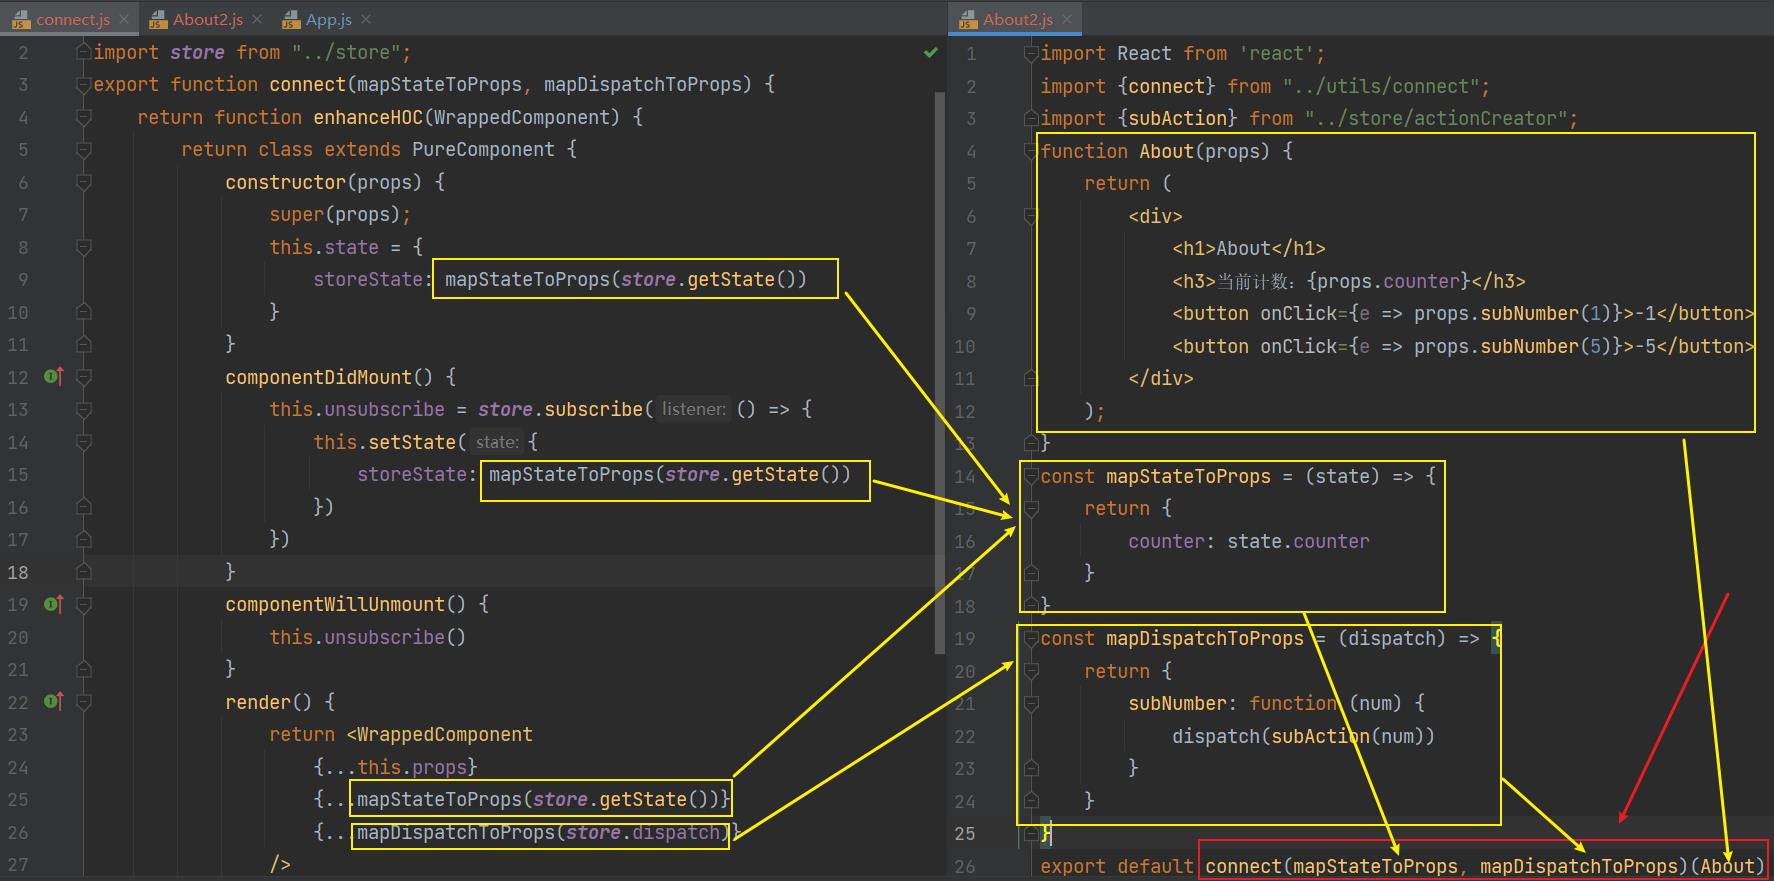
connect.js:
import PureComponent from "react";
import store from "../store";
export function connect(mapStateToProps, mapDispatchToProps)
    return function enhanceHOC(WrappedComponent)
        return class extends PureComponent
            constructor(props)
                super(props);
                this.state =
                    storeState: mapStateToProps(store.getState())


            componentDidMount()
                this.unsubscribe = store.subscribe(() =>
                    this.setState(
                        storeState: mapStateToProps(store.getState())
                    )
                )

            componentWillUnmount()
                this.unsubscribe()

            render()
                return <WrappedComponent
                    ...this.props
                    ...mapStateToProps(store.getState())
                    ...mapDispatchToProps(store.dispatch)
                />
About2.js:
import React from 'react';
import connect from "../utils/connect";
import subAction from "../store/actionCreator";
function About(props)
    return (
        <div>
            <h1>About</h1>
            <h3>当前计数:props.counter</h3>
            <button onClick=e => props.subNumber(1)>-1</button>
            <button onClick=e => props.subNumber(5)>-5</button>
        </div>
    );

const mapStateToProps = (state) =>
    return
        counter: state.counter


const mapDispatchToProps = (dispatch) =>
    return
        subNumber: function (num)
            dispatch(subAction(num))


export default connect(mapStateToProps, mapDispatchToProps)(About)
二、自定义context处理store
但是上面的connect函数有一个很大的缺陷:依赖导入的
store
如果我们将其封装成一个独立的库,需要依赖用于创建
的store,我们应该如何去获取呢?
难道让用户来修改我们的源码吗?不太现实;
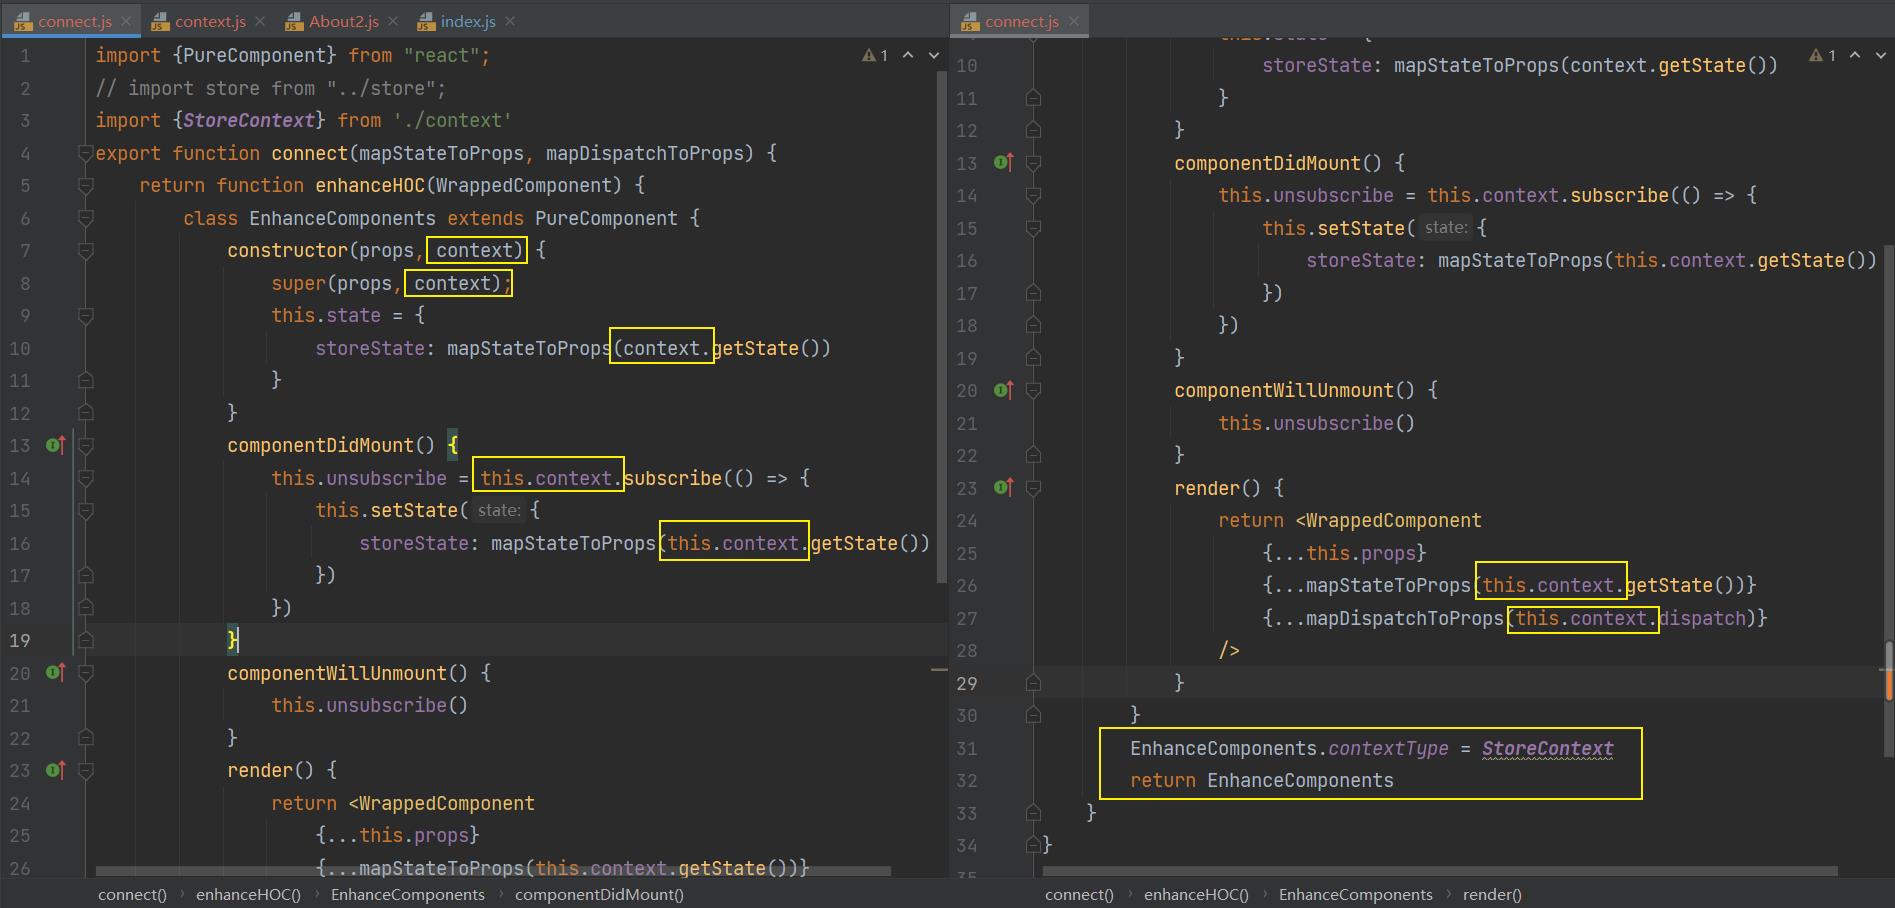
正确的做法是我们提供一个Provider,Provider来自于我们
创建的Context,让用户将store传入到value中即可;

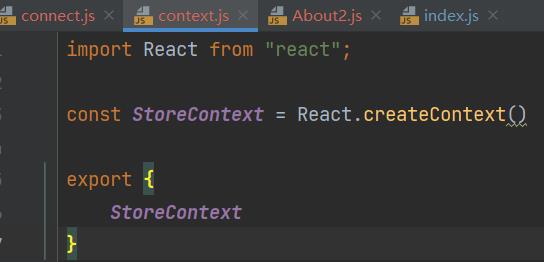
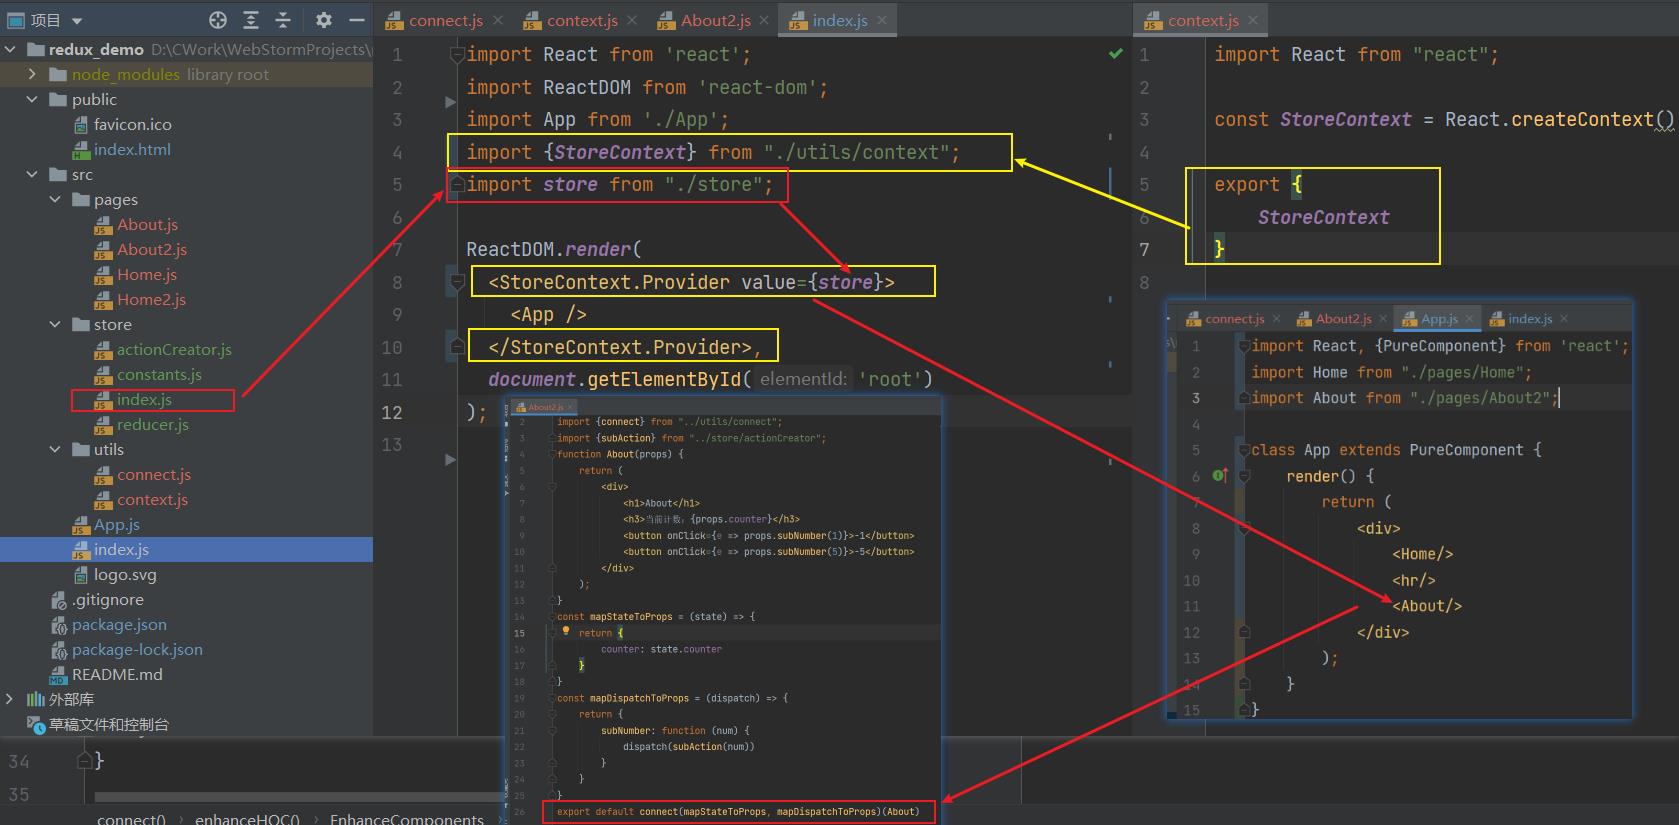
context.js:
import React from "react";

const StoreContext = React.createContext()

export
    StoreContext
connect.js:
import PureComponent from "react";
// import store from "../store";
import StoreContext from './context'
export function connect(mapStateToProps, mapDispatchToProps)
    return function enhanceHOC(WrappedComponent)
        class EnhanceComponents extends PureComponent
            constructor(props, context)
                super(props, context);
                this.state =
                    storeState: mapStateToProps(context.getState())


            componentDidMount()
                this.unsubscribe = this.context.subscribe(() =>
                    this.setState(
                        storeState: mapStateToProps(this.context.getState())
                    )
                )

            componentWillUnmount()
                this.unsubscribe()

            render()
                return <WrappedComponent
                    ...this.props
                    ...mapStateToProps(this.context.getState())
                    ...mapDispatchToProps(this.context.dispatch)
                />


        EnhanceComponents.contextType = StoreContext
        return EnhanceComponents
三、react-redux使用
开始之前需要强调一下,redux和react没有直接的关系,你完全可以在React, Angular, Ember, jQuery, or vanilla javascript中使用Redux。
尽管这样说,redux依然是和React或者Deku的库结合的更好,因为他们是通过state函数来描述界面的状态,Redux可以发射状态的更新,让他们作出相应。
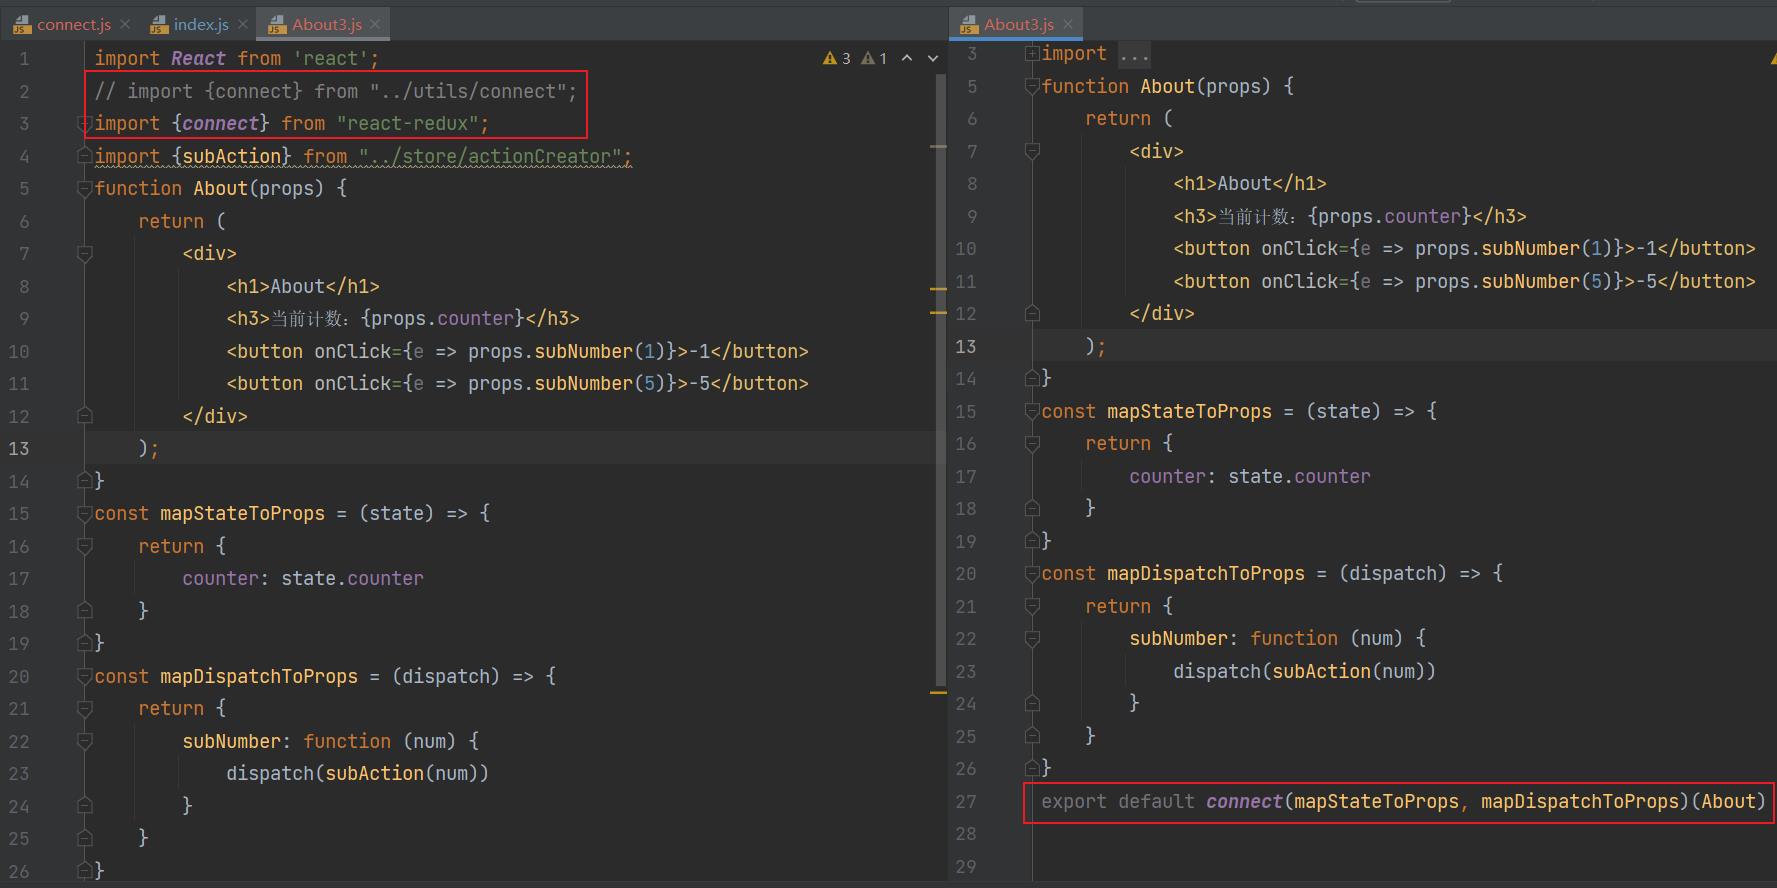
虽然我们之前已经实现了connect、Provider这些帮助我们完成连接redux、react的辅助工具,但是实际上redux官方帮助我们提供了 react-redux 的库,可以直接在项目中使用,并且实现的逻辑会更加的严谨和高效。
安装react-redux:
yarn add react-redux
或
npm i react-redux --save
在原有代码中做如下的修改:

四、组件中异步操作
在之前简单的案例中,redux中保存的counter是一个本地定义的数据
我们可以直接通过同步的操作来dispatch action,state就会被立即更新。
但是真实开发中,redux中保存的很多数据可能来自服务器,我们需要进行异步的请求,再将数据保存到redux中。
在之前学习网络请求的时候我们讲过,网络请求可以在class组件的componentDidMount中发送,所以我们可以有这样的结构:

我现在完成如下案例操作:
在Home3组件中请求banners和recommends的数据;
在About3组件中展示banners和recommends的数据;
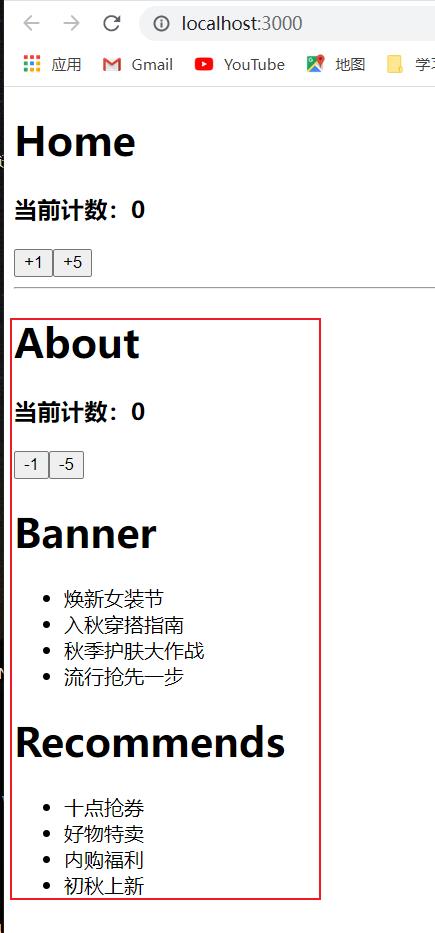


Home3.js:
import React, PureComponent from 'react';
import connect from "react-redux";
import addAction, changeBannersAction, changeRecommendsAction from "../store/actionCreator";
import axios from "axios";

class Home extends PureComponent
    componentDidMount()
        axios(
            url: 'http://123.207.32.32:8000/home/multidata',
        ).then(res =>
            console.log(res)
            const data = res.data.data
            console.log('轮播图:', data.banner.list)
            console.log('推荐:', data.recommend.list)
            this.props.changeBanners(data.banner.list)
            this.props.changeRecommends(data.recommend.list)
        )


    render()
        return (
            <div>
                <h1>Home</h1>
                <h3>当前计数:this.props.counter</h3>
                <button onClick=e => this.props.increment()>+1</button>
                <button onClick=e => this.props.addNumber(5)>+5</button>
            </div>
        );


const mapStateToProps = state => (
    counter: state.counter
)

const mapDispatchToProps = dispatch => (
    increment()
        dispatch(addAction(1));
    ,
    addNumber(num)
        dispatch(addAction(num));
    ,
    changeBanners(banners)
        dispatch(changeBannersAction(banners));
    ,
    changeRecommends(recommends)
        dispatch(changeRecommendsAction(recommends));

)

export default connect(mapStateToProps, mapDispatchToProps)(Home);
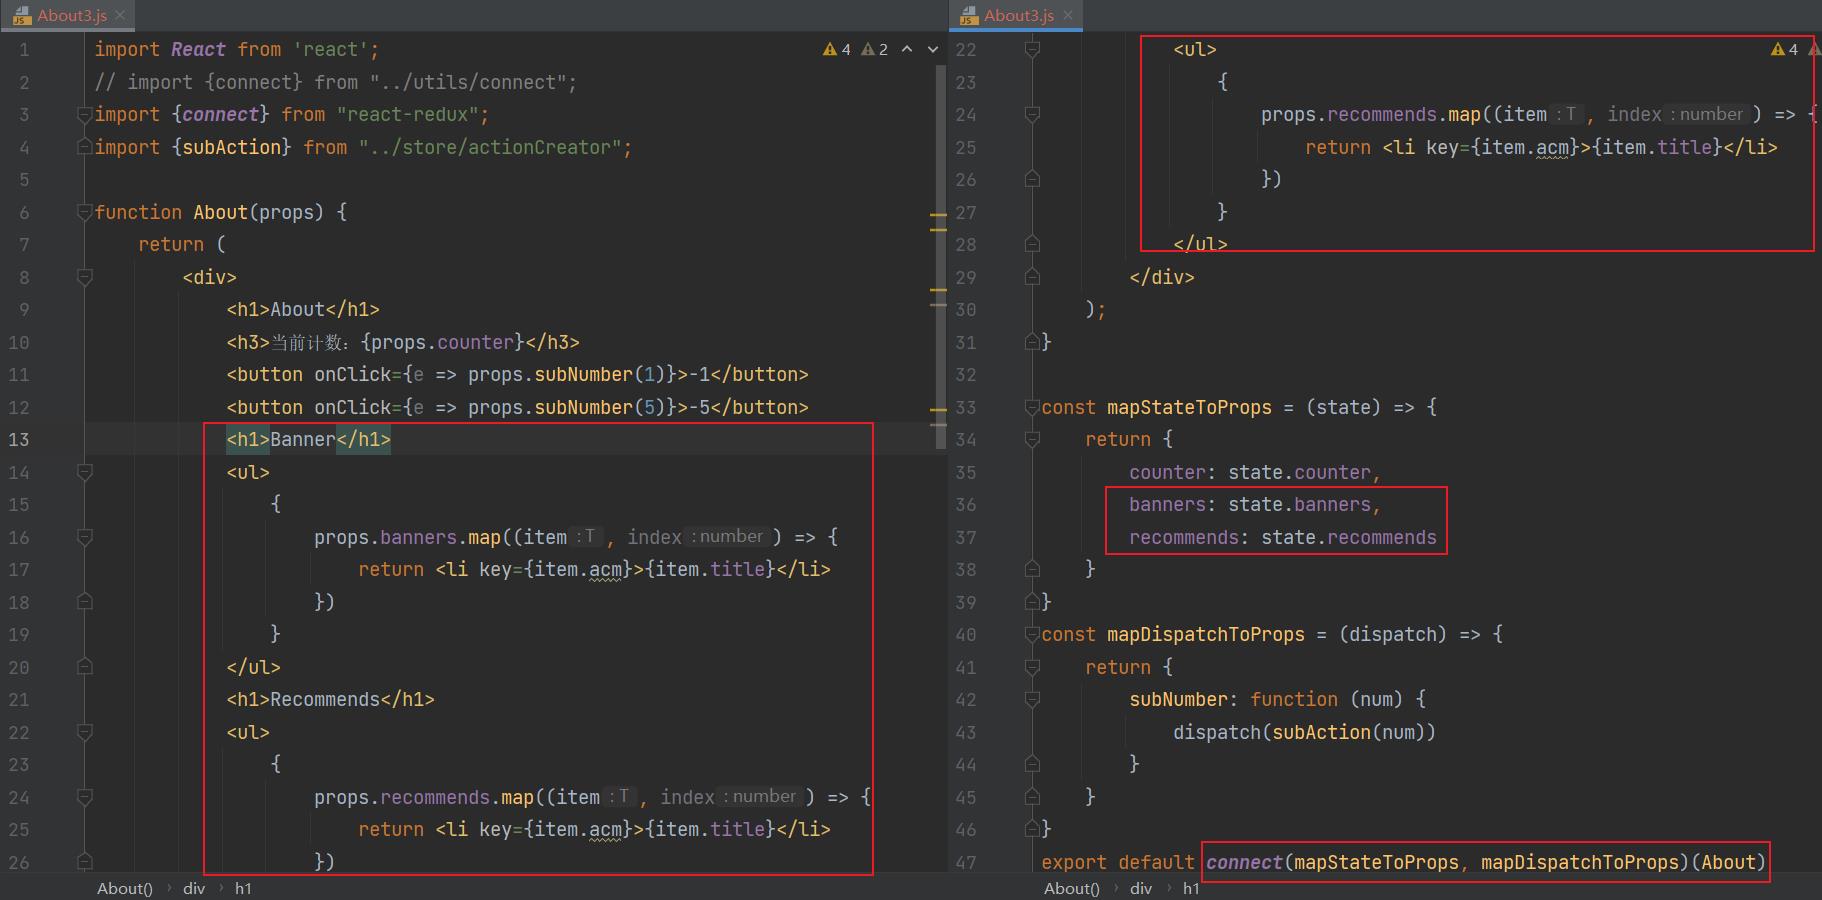
About3.js:
import React from 'react';
// import connect from "../utils/connect";
import connect from "react-redux";
import subAction from "../store/actionCreator";

function About(props)
    return (
        <div>
            <h1>About</h1>
            <h3>当前计数:props.counter</h3>
            <button onClick=e => props.subNumber(1)>-1</button>
            <button onClick=e => props.subNumber(5)>-5</button>
            <h1>Banner</h1>
            <ul>

                    props.banners.map((item, index) =>
                        return <li key=item.acm>item.title</li>
                    )

            </ul>
            <h1>Recommends</h1>
            <ul>

                    props.recommends.map((item, index) =>
                        return <li key=item.acm>item.title</li>
                    )

            </ul>
        </div>
    );


const mapStateToProps = (state) =>
    return
        counter: state.counter,
        banners: state.banners,
        recommends: state.recommends


const mapDispatchToProps = (dispatch) =>
    return
        subNumber: function (num)
            dispatch(subAction(num))


export default connect(mapStateToProps, mapDispatchToProps)(About)
五、redux中异步操作
上面的代码有一个缺陷:
我们必须将网络请求的异步代码放到组件的生命周期中来完成;
事实上,网络请求到的数据也属于我们状态管理的一部分,更好的一种方式应该是将其也交给redux来管理;

但是在redux中如何可以进行异步的操作呢?
答案就是使用中间件(Middleware);
学习过Express或Koa框架的童鞋对中间件的概念一定不陌生;
在这类框架中,Middleware可以帮助我们在请求和响应之间嵌入一些操作的代码,比如cookie解析、日志记录、文件压缩等操作;
六、理解中间件
redux也引入了中间件(Middleware)的概念:
这个中间件的目的是在dispatch的action和最终达到的reducer之间,扩展一些自己的代码;
比如日志记录、调用异步接口、添加代码调试功能等等;
我们现在要做的事情就是发送异步的网络请求,所以我们可以添加对应的中间件:
这里官网推荐的、包括演示的网络请求的中间件是使用 redux-thunk;
redux-thunk是如何做到让我们可以发送异步的请求呢?
-
我们知道,默认情况下的dispatch(action),action需要是一个JavaScript的对象;
-
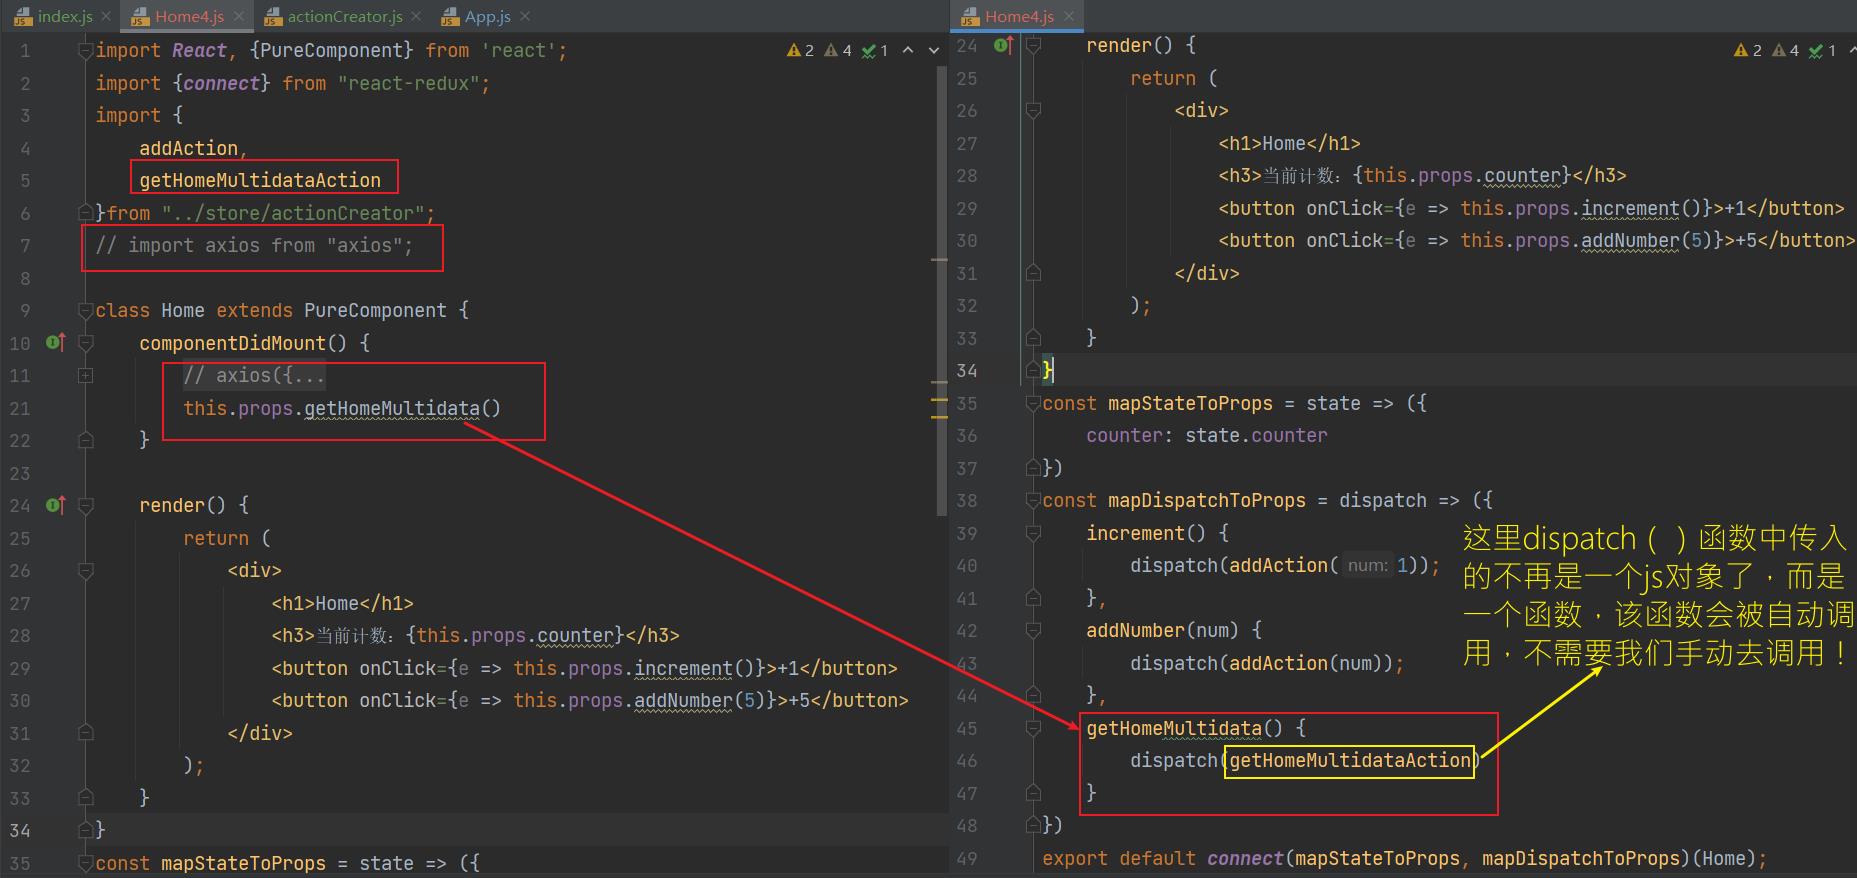
redux-thunk可以让dispatch(action函数),action可以是一个函数;
-
该函数会被调用,并且会传给这个函数一个dispatch函数和getState函数;
- dispatch函数用于我们之后再次派发action;
- getState函数考虑到我们之后的一些操作需要依赖原来的状态,用于让我们可以获取之前的一些状态;
七、如何使用redux-thunk
- 安装redux-thunk
yarn add redux-thunk
-
在创建store时传入应用了middleware的enhance函数
通过applyMiddleware来结合多个Middleware, 返回一个enhancer;
将enhancer作为第二个参数传入到createStore中;


-
定义返回一个函数的action:
注意:这里不是返回一个对象了,而是一个函数;
该函数在dispatch之后会被执行;


以上是关于Redux学习——封装connect函数的主要内容,如果未能解决你的问题,请参考以下文章