Python3 实现批量图像数据增强(扩增)并复制xml标签文件目标检测笔记
Posted K同学啊
tags:
篇首语:本文由小常识网(cha138.com)小编为大家整理,主要介绍了Python3 实现批量图像数据增强(扩增)并复制xml标签文件目标检测笔记相关的知识,希望对你有一定的参考价值。
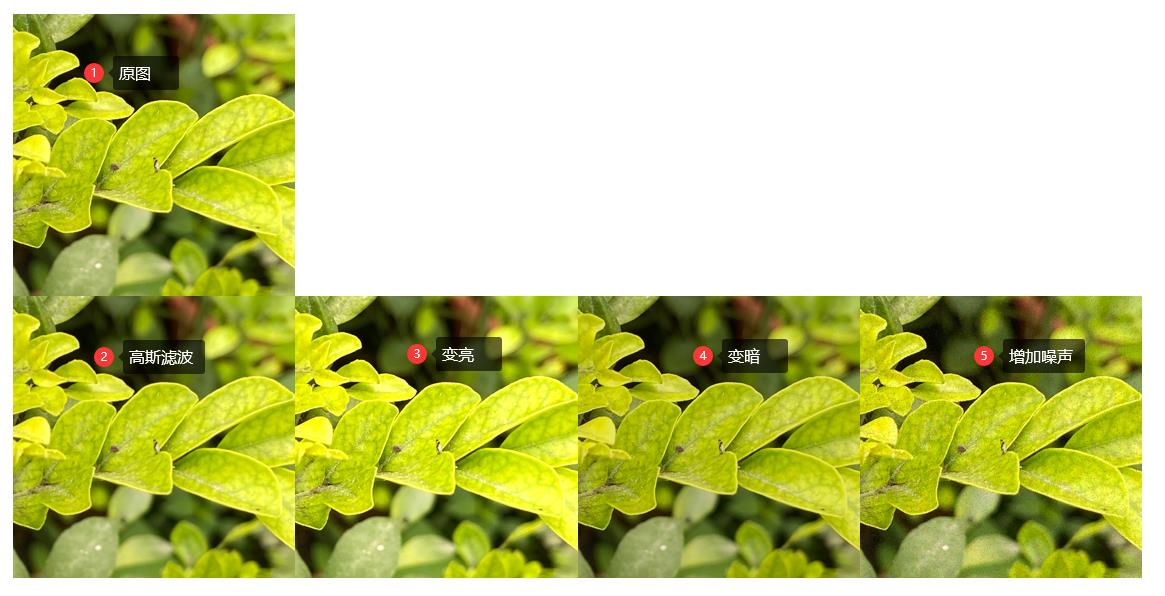
增强效果:

# -*- coding: utf-8 -*-

import cv2
import numpy as np
import os.path
import shutil

# 椒盐噪声
def SaltAndPepper(src, percetage):
    SP_NoiseImg = src.copy()
    SP_NoiseNum = int(percetage * src.shape[0] * src.shape[1])
    for i in range(SP_NoiseNum):
        randR = np.random.randint(0, src.shape[0] - 1)
        randG = np.random.randint(0, src.shape[1] - 1)
        randB = np.random.randint(0, 3)
        if np.random.randint(0, 1) == 0:
            SP_NoiseImg[randR, randG, randB] = 0
        else:
            SP_NoiseImg[randR, randG, randB] = 255
    return SP_NoiseImg

# 高斯噪声
def addGaussianNoise(image, percetage):
    G_Noiseimg = image.copy()
    w = image.shape[1]
    h = image.shape[0]
    G_NoiseNum = int(percetage * image.shape[0] * image.shape[1])
    for i in range(G_NoiseNum):
        temp_x = np.random.randint(0, h)
        temp_y = np.random.randint(0, w)
        G_Noiseimg[temp_x][temp_y][np.random.randint(3)] = np.random.randn(1)[0]
    return G_Noiseimg


# 亮度
def brightness(image, percetage):
    image_copy = image.copy()
    w = image.shape[1]
    h = image.shape[0]
    # get brighter
    for xi in range(0, w):
        for xj in range(0, h):
            image_copy[xj, xi, 0] = np.clip(int(image[xj, xi, 0] * percetage), a_max=255, a_min=0)
            image_copy[xj, xi, 1] = np.clip(int(image[xj, xi, 1] * percetage), a_max=255, a_min=0)
            image_copy[xj, xi, 2] = np.clip(int(image[xj, xi, 2] * percetage), a_max=255, a_min=0)
    return image_copy

if __name__ == '__main__':
    # 图片文件夹路径
    input_jpg = './dataset/images'
    input_xml = './dataset/Annotations'
    output_jpg = './augmentation_data/images'
    output_xml = './augmentation_data/Annotations'

    for img_name in os.listdir(input_jpg):
        name = img_name.split('.')[0]
        print(name)
        print(img_name)
        img_path = os.path.join(input_jpg, img_name)
        img = cv2.imread(img_path)
        xml_src_path = os.path.join(input_xml, name + '.xml')
        xml_dst_path = os.path.join(output_xml, name)

        # 增加噪声
        img_gauss = addGaussianNoise(img, 0.1)
        cv2.imwrite(os.path.join(output_jpg, name + '_noise.png'), img_gauss)
        shutil.copyfile(xml_src_path, xml_dst_path + '_noise.xml')
        print("Save " + os.path.join(output_jpg, name + '_noise.png') + " Successfully!")

        # 变暗
        img_darker = brightness(img, 0.9)
        cv2.imwrite(os.path.join(output_jpg, name + '_darker.png'), img_darker)
        shutil.copyfile(xml_src_path, xml_dst_path + '_darker.xml')
        print("Save " + os.path.join(output_jpg, name + '_darker.png') + " Successfully!")

        # 变亮
        img_brighter = brightness(img, 1.1)
        cv2.imwrite(os.path.join(output_jpg, name + '_brighter.png'), img_brighter)
        shutil.copyfile(xml_src_path, xml_dst_path + '_brighter.xml')
        print("Save " + os.path.join(output_jpg, name + '_brighter.png') + " Successfully!")

        # 高斯滤波
        blur = cv2.GaussianBlur(img, (7, 7), 1.1)
        #      cv2.GaussianBlur(图像,卷积核,标准差)
        cv2.imwrite(os.path.join(output_jpg, name + '_blur.png'), blur)
        shutil.copyfile(xml_src_path, xml_dst_path + '_blur.xml')
        print("Save " + os.path.join(output_jpg, name + '_blur.png') + " Successfully!")
以上是关于Python3 实现批量图像数据增强(扩增)并复制xml标签文件目标检测笔记的主要内容,如果未能解决你的问题,请参考以下文章