Excel插入图片实现单击放大或缩小
Posted 雪上
tags:
篇首语:本文由小常识网(cha138.com)小编为大家整理,主要介绍了Excel插入图片实现单击放大或缩小相关的知识,希望对你有一定的参考价值。
Excel插入图片实现单击放大或缩小
一、打开Excel,Alt+F11打开VBA(VBA自行安装)
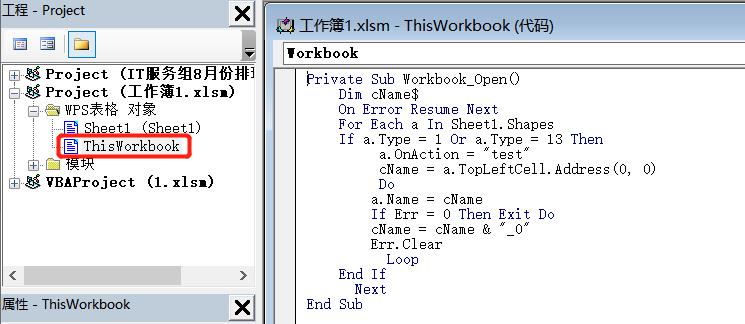
二、双击ThisWorkbook,输入VBA代码
Sheet1为的工作薄1
Private Sub Workbook_Open()
    Dim cName$
    On Error Resume Next
    For Each a In Sheet1.Shapes
	If a.Type = 1 Or a.Type = 13 Then
	     a.OnAction = "test"
	     cName = a.TopLeftCell.Address(0,0)
	     Do
		 a.Name = cName
		 If Err = 0 Then Exit Do
		 cName = cName & "_0"
		 Err.Clear
	     Loop
	End If
    Next
End Sub
如图:

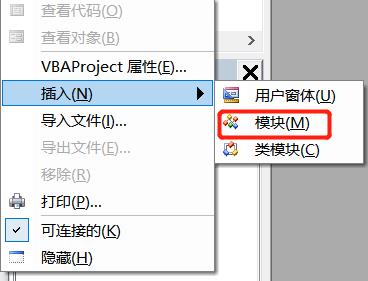
三、右键左边Project下方空白处,选择插入-模块,在模块处输入VBA代码

Sub test()
On Error Resume Next
For Each a In ActiveSheet.Shapes
    If a.Type = 1 Or a.Type = 13 Then
        If a.Name = Application.Caller And a.AlternativeText = Empty Then
            a.AlternativeText = a.Height & Chr(28) & a.Width
            a.Height = a.Width * 3
            a.Width = a.Width * 3
            a.ZOrder msoBringToFront
        Else
            a.Height = Split(a.AlternativeText, Chr(28))(0)
            a.Width = Split(a.AlternativeText, Chr(28))(1)
            a.AlternativeText = Empty
        End If
    Err.Clear
End If
Next
End Sub
如图:

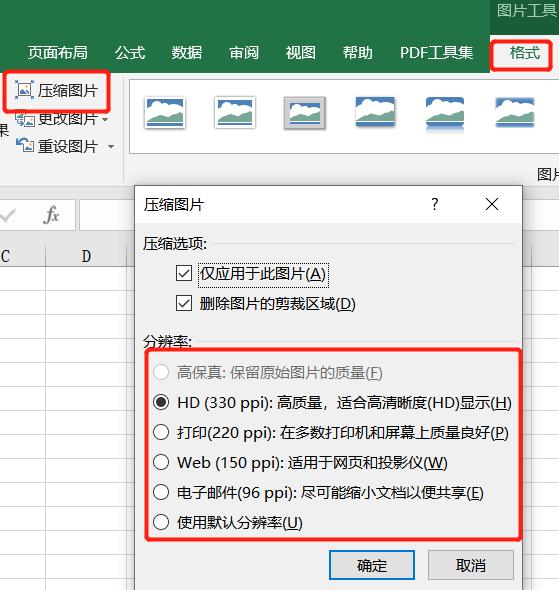
四、保存后关掉VBA,在Sheet1插入图片,把图片缩小(如果想放大图片清晰,需要在图片格式-压缩图片处勾选最高清的图片)

五、插入图片后,调整后保存关掉,重新打开即可实现单击放大或缩小

代码非原创
以上是关于Excel插入图片实现单击放大或缩小的主要内容,如果未能解决你的问题,请参考以下文章