导入C_C++应用到Torizon
Posted toradexsh
tags:
篇首语:本文由小常识网(cha138.com)小编为大家整理,主要介绍了导入C_C++应用到Torizon相关的知识,希望对你有一定的参考价值。
By Toradex秦海
1). 简介
对于初次使用Torizon的客户,可能会需要将现有的项目工程导入到Torizon开发环境,本文就基于一个中等规模的开源项目来演示如何借助Torizon Virtual Studio Code Extension来将其导入到Torizon,并进行编译和部署。
本文所选择的是一个基于autotools编译框架的中等规模的项目,基本上符合大多数嵌入式应用的规模,通过整个流程演示来提供相关的思路和解决导入中遇到问题的线索,当然由于实际应用的不同以及所采用比如Makefiles、Cmake等其他编译框架,不能完全保证所有的导入都是按照文章所演示的流程,甚至是否一定能够导入成功也肯定不是完全确定,但是大的思路是可以参考借鉴的。
2). 准备
a). Apalis iMX8 ARM核心版配合Ixora载板,连接调试串口UART1(载板X22)到开发主机方便调试,连接HDMI显示器用于显示。
b). Ubuntu 18.04 64bit开发主机,参考这里说明配置好Docker环境。请注意在每次重启电脑后,都要执行一次下面命令来提供ARM emulation环境。
----------------------------------------------------------------------------
$ docker run --rm -it --privileged torizon/binfmt
----------------------------------------------------------------------------
c). 参考这里的说明配置好Virtual Studio Code并安装好Torizon Extension。
d). 参考这里的说明使用VS Code配合Torizon Extension,编译测试一个Hello world 的C/C++应用来验证整个开发和部署环境工作正常。
3). 导入C/C++项目
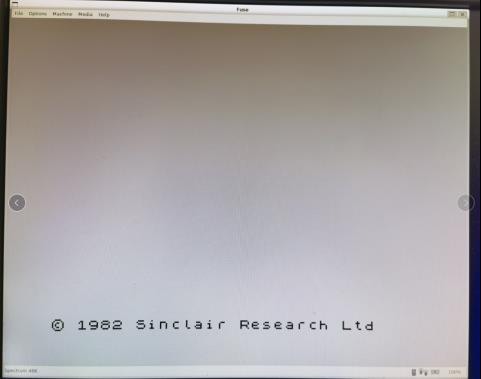
a). 本次测试所使用的开源项目Fuse从如下github地址下载,项目是一个跨平台的针对1980年代流行的Sinclair ZX Spectrum 8bit 个人键盘式电脑的模拟器。项目于基于C语言开发并拥有一个基于Gtk开发的用户界面,虽然Debian已经提供了现成的Fuse安装包,但是本文主要演示导入项目源码并进行编译和部署的流程。
----------------------------------------------------------------------------
### download fuse-emulator-fuse source code
$ git clone https://git.code.sf.net/p/fuse-emulator/fuse fuse-emulator-fuse
### download libspectrum library source code
$ cd fuse-emulator-fuse
$ git clone https://git.code.sf.net/p/fuse-emulator/libspectrum fuse-emulator-libspectrum
----------------------------------------------------------------------------
b). 通过VS Code Torizon Extension将上面下载的 fuse-emulator-fuse项目导入
./ 在VS Code执行 ”Torizon: Import an existing C/C++ application”命令
----------------------------------------------------------------------------
- Open the fuse base source folder (fuse-emulator-fuse)
- Define the application name (fuse)
- Select autotools-based project as the project type
- Select “Wayland arm64v8-vivante bullseye“ platform (as we use apalis imx8 which is 64-bit)
- Select user as torizon (default)
- Select debug configuration
- Provide the relative path (bin/fuse) where main executable binary will be installed into.
----------------------------------------------------------------------------
c). 然后Torizon extension会根据上面配置信息自动创建一个编译容器,重新加载VS Code并通过Microsoft 的Remote-containers extension来在创建的编译容器中运行导入的项目
d). 创建完成后Output输出会给出如下Error,这个在当前这个阶段是正常的,后面修改配置文件会解决。
----------------------------------------------------------------------------
checking for LIBSPECTRUM... no
configure: error: in `/workspaces/fuse-emulator-fuse':
configure: error: The pkg-config script could not be found or is too old. Make sure it
is in your PATH or set the PKG_CONFIG environment variable to the full
path to pkg-config.
Alternatively, you may set the environment variables LIBSPECTRUM_CFLAGS
and LIBSPECTRUM_LIBS to avoid the need to call pkg-config.
See the pkg-config man page for more details.
To get pkg-config, see <http://pkg-config.freedesktop.org/>.
See `config.log' for more details
The terminal process terminated with exit code: 1
----------------------------------------------------------------------------
4). 添加编译依赖库
a). 通常你可以通过查询项目源码提供的README和INSTALL等文件查询到项目编译所需要的依赖库,但有时候也可能不那么明确,就需要直接查询源码文件,或者只能通过 ”测试-失败-修改-测试” 的循环来找出所需要的依赖库。
b). 然后,添加的依赖库要对应所需要编译的平台和版本,比如本文测试的平台是arm64环境,版本是Debian bullseye。通常可以通过在Package.debian.org 上面查询相关的库,也可以参考这里说明直接在模块上面交互模式运行一个基础Debian bullseye容器,并在容器内通过”apt-cache search” 命令查询所需要的库。
c). fuse项目所需要的依赖库参考如下添加,添加完成后VS Code会自动弹出窗口询问是否重新编译SDK并添加新的库,选择是进行重新编译。
----------------------------------------------------------------------------
- Select Torizon icon in the Visual Studio Code activity bar.
- Go to the CONFIGURATION panel.
- Set the property “devpackages” to:
libglib2.0-dev:arm64 libaudiofile-dev:arm64 libgtk-3-dev:arm64 bison flex
----------------------------------------------------------------------------
5). 修改项目Build Tasks
a). 项目Build Tasks由VS Code 项目文件管理器中的 “.vscode/tasks.json” 文件中定义,包含configure/build等任务的定义,并通过autotools生成真正的makefile用于编译。
b). 由于fuse项目编译所需要的libspectrum库需要先于fuse项目本身进行编译并生成binary库文件被调用,因此这里需要对应修改tasks.json文件以适配,而如果你的项目不包含这样的库,则无需这个步骤。
c). 首先添加如下内容到tasks.json文件增加libspectrum库的configure和build 子任务
----------------------------------------------------------------------------
"label": "autoreconf_libspectrum",
"command": "autoreconf",
"type": "shell",
"args": [
"--install",
"--force"
],
"options":
"cwd": "$workspaceFolder/fuse-emulator-libspectrum"
,
"problemMatcher": [],
"group": "none"
,
"label": "configure_libspectrum",
"command": "./configure",
"type": "shell",
"args": [
"--prefix",
"$workspaceFolder",
"--host",
"$command:torizon.ccpp.getHostTriplet"
],
"options":
"cwd": "$workspaceFolder/fuse-emulator-libspectrum"
,
"problemMatcher": [],
"group": "none",
"dependsOn": [
"autoreconf_libspectrum"
]
,
"label": "build_libspectrum",
"command": "make",
"type": "shell",
"args": [
"install-strip"
],
"problemMatcher":
"base": "$gcc"
,
"options":
"cwd": "$workspaceFolder/fuse-emulator-libspectrum",
"env":
"CFLAGS": "-g",
"CXXFLAGS": "-g"
,
"group": "build",
"dependsOn": [
"configure_libspectrum"
]
,
----------------------------------------------------------------------------
d). 然后修改tasks.json文件中fuse主应用本身configure/build配置增加libspectrum库的编译任务,同时还需要配置pkgconfig环境变量以便于从libspectrum编译目录找到对应的 .pc 描述文件。
----------------------------------------------------------------------------
"label": "configure_debug",
"command": "./configure",
"type": "shell",
"args": [
"--prefix",
"/$command:torizon.getAppName",
"--host",
"$command:torizon.ccpp.getHostTriplet",
"CFLAGS=-g",
"CXXFLAGS=-g",
"LDFLAGS=-g"
],
"problemMatcher": [],
"options":
"env":
"PKG_CONFIG_PATH": "$env:PKG_CONFIG_PATH:$workspaceFolder/lib/pkgconfig"
,
"group": "none",
"dependsOn": [
"autoreconf",
"build_libspectrum"
]
,
"label": "configure_release",
"command": "./configure",
"type": "shell",
"args": [
"--prefix",
"/$command:torizon.getAppName",
"--host",
"$command:torizon.ccpp.getHostTriplet"
],
"problemMatcher": [],
"group": "none",
"dependsOn": [
"autoreconf",
"build_libspectrum"
]
,
----------------------------------------------------------------------------
e). 最后修改tasks.json文件的deploy任务,新增libspectrum库的deploy子任务,以及fuse主应用deploy任务中增加libspectrum库。
----------------------------------------------------------------------------
"detail": "deploy application to work folder",
"label": "deploy",
"command": "make",
"args": [
"install"
],
"type": "shell",
"options":
"env":
"DESTDIR": "$workspaceFolder/$config:torizon.appfolder/work"
,
"group": "none",
"dependsOn": [
"deploy_libspectrum"
]
,
"detail": "deploy libspectrum to work folder",
"label": "deploy_libspectrum",
"command": "install",
"args": [
"-D",
"-t",
"$workspaceFolder/$config:torizon.appfolder/work/$command:torizon.getAppName/lib",
"lib/libspectrum.so.*"
],
"type": "shell",
"group": "none"
----------------------------------------------------------------------------
f).最终完整的tasks.json文件可以参考这里,保存所有修改后,执行””命令重新加载,然后执行”Tasks:Run Build Task”任务,此时就可以将fuse项目完整编译成功。
6). 增加Runtime库支持
a). 如下增加runtime库支持,使得应用部署后可以正常运行
----------------------------------------------------------------------------
- Select Torizon icon in the Visual Studio Code activity bar.
- Go to the CONFIGURATION panel.
- Set the property “extrapackages” to:
glib2.0 libaudiofile1 libgtk-3-0
----------------------------------------------------------------------------
7). 增加应用Wayland Socket和Audio设备的访问权限
a). 为了显示应用界面,一个Wayland compositor也会在设备上同步下载启动,为了和Wayland compositor交互,需要增加位于/tmp的Wayland socket访问权限,更多关于添加volumes和bind-mount的说明可以参考这里。
----------------------------------------------------------------------------
- Select Torizon icon in the Visual Studio Code activity bar.
- Go to the CONFIGURATION panel.
- Press the + button near “volumes”
- Insert “/tmp” as the key value, press Enter to confirm
- Insert “/tmp” also as value, press enter to confirm
----------------------------------------------------------------------------
b). 应用需要访问设备OSS音频设备来运行,如下在应用container中增加所需音频设备的访问权限
----------------------------------------------------------------------------
- Select Torizon icon in the Visual Studio Code activity bar.
- Go to the CONFIGURATION panel.
- Press the + button near “[ ] devices”
- Insert the device path “/dev/dsp”, press Enter to confirm
----------------------------------------------------------------------------
8). 设置 Shared Libraries Path 环境变量
a). libspectrum 库会被部署到fuse应用目录的 /lib 子目录,因此需要增加如下环境变量指定相关路径。更多关于环境变量的说明请参考这里。
b). 参考这里说明修改config文件添加开机画面图片
----------------------------------------------------------------------------
- Select Torizon icon in the Visual Studio Code activity bar.
- Go to the CONFIGURATION panel.
- Set the property “env” to:
ENV LD_LIBRARY_PATH="$LD_LIBRARY_PATH:/#%application.appname%#/lib"
----------------------------------------------------------------------------
9). Update MIME Database
a). 由于一个Gtk相关的问题,在Debug应用时候,需要运行”update-mime-database” 工具来加载应用图标,因此我们可以通过如下设置在配置好的container环境中运行相关命令
----------------------------------------------------------------------------
- Select Torizon icon in the Visual Studio Code activity bar.
- Go to the CONFIGURATION panel.
- Set the property “buildcommands” to:
RUN update-mime-database /usr/share/mime
----------------------------------------------------------------------------
10). 通过Ycoto定制TorizonCore镜像
a). 由于默认的TorizonCore系统只有Alsa音频的支持,并未提供OSS音频的支持,因此我们需要通过Ycoto重新编译TorizonCore镜像来增加OSS音频支持,以便fuse应用在设备上面运行
b). 首先参考这里的说明下载适用于Apalis iMX8 的TorizonCore v5.4.0版本对应的Linux Kernel源代码,参考这里进行编译配置。
c). 如下修改Kernel configuration,增加Alsa OSS Emulation驱动。修改后重新编译生成”.config”配置文件,并重命名为”defconfig”文件以备后续使用。
----------------------------------------------------------------------------
Device Drivers > Sound card support > Advanced Linux Sound Architecture
[*] Enable OSS Emulation
<M> OSS Mixer API
<M> OSS PCM (digital audio) API
[*] OSS PCM (digital audio) API - Include plugin system
----------------------------------------------------------------------------
d). 参考这里配置Torizon Ycoto编译环境,增加如下文件以适配修改的Kernel configuration。
./ 创建 “linux-toradex_5.4-2.3.x.bbappend” 文件,指定修改的”defconfig” Kernel configuration文件
----------------------------------------------------------------------------
$ cd <torizon_ycoto_root>/layers/meta-toradex-torizon/recipes-kernel/linux
$ vi linux-toradex_5.4-2.3.x.bbappend
FILESEXTRAPATHS_prepend := "$THISDIR/files:"
SRC_URI_append = " \\
file://defconfig \\
"
----------------------------------------------------------------------------
./ 创建”files”目录,将上一步生成好的”defconfig”文件复制到这里
----------------------------------------------------------------------------
$ mkdir files
$ cp .../defconfig files
----------------------------------------------------------------------------
e). 重新编译生成TorizonCore 镜像,然后参考这里的说明安装到Apalis iMX8模块上面。
----------------------------------------------------------------------------
$ bitbake torizon-core-docker
----------------------------------------------------------------------------
11). 在设备上面部署运行Fuse应用
a). 参考这里说明在VS Code中连接更新好TorizonCore 镜像的Apalis iMX8模块。系统启动后,通过调试串口执行下面命令加载PCM_OSS驱动
----------------------------------------------------------------------------
$ sudo modprobe snd-pcm-oss
$ ls /dev/dsp*
/dev/dsp /dev/dsp1 /dev/dsp2
----------------------------------------------------------------------------
b). 此时基于上述步骤5以及编译好的Fuse项目,接下来就可以进行Debug或者Deploy
c). 输入”F5”即可以开始Debug,Torizon Extension会自动完整生成debug container并部署到模块运行进入Debug模式状态,按需要设置断点既可以进一步调试了。

d). 调试完成后,也可以通过下面命令将Fuse应用Deploy到设备上面并运行应用
----------------------------------------------------------------------------
### compile release container ###
- Command “Torizon: Build release container for the application”
### deploy release container ###
- Command “Torizon: Deploy release container”
### run release container ###
- Command “Torizon: Run/restart release container”
----------------------------------------------------------------------------
运行效果

12). 总结
本文演示了基于NXP iMX8 ARM处理器将现有C/C++导入到Torizon的一个示例供参考,具体不同项目所需要的流程和遇到的问题可能会不同,但解决问题的思路可以参考借鉴。
参考文档
https://developer.toradex.cn/knowledge-base/torizon-cc-application-importing-example
以上是关于导入C_C++应用到Torizon的主要内容,如果未能解决你的问题,请参考以下文章