Vue实现数据增删改查
Posted
tags:
篇首语:本文由小常识网(cha138.com)小编为大家整理,主要介绍了Vue实现数据增删改查相关的知识,希望对你有一定的参考价值。
参考技术A <!DOCTYPE html><html lang="en">
<head>
<meta charset="UTF-8">
<meta http-equiv="X-UA-Compatible" content="IE=edge">
<meta name="viewport" content="width=device-width, initial-scale=1.0">
<title>增删改查</title>
<script src="./vue2.6.14.js"></script>
<style>
table
border-collapse: collapse;
th,
td
border: 1px solid #eee;
padding: 2px 10px;
.box
position: absolute;
width: 320px;
height: 200px;
border: 1px solid #ccc;
left: 0;
top: 0;
bottom: 0;
right: 0;
margin: auto;
.box .close
width: 20px;
height: 20px;
background-color: pink;
text-align: center;
line-height: 20px;
border-radius: 50%;
cursor: pointer;
position: absolute;
right: 10px;
top: 10px;
.edit
margin-top: 30px;
margin-left: 30px;
</style>
</head>
<body>
<div id="app">
<button v-on:click="showBox=true">添加</button>
<table>
<thead>
<tr>
<th>编号</th>
<th>姓名</th>
<th>性别</th>
<th>年龄</th>
<th>操作</th>
</tr>
</thead>
<tbody>
<tr v-for="(item,index) in user" :key="index">
<td>item.no</td>
<td>item.name</td>
<td>item.sex</td>
<td>item.age</td>
<td>
<button v-on:click="getOne(index)">修改</button>
<button v-on:click="del(index)">删除</button>
</td>
</tr>
</tbody>
</table>
<div v-show="showBox" class="box">
<div v-on:click="close" class="close">X</div>
<table class="edit">
<tr>
<td>编号:</td>
<td><input type="text" v-model="no"></td>
</tr>
<tr>
<td>姓名:</td>
<td><input type="text" v-model="name"></td>
</tr>
<tr>
<td>性别:</td>
<td><input type="text" v-model="sex"></td>
</tr>
<tr>
<td>年龄:</td>
<td><input type="text" v-model="age"></td>
</tr>
<tr>
<td></td>
<td>
<!-- isAdd返回true,显示添加按钮,否则显示修改按钮 -->
<button v-if="isAdd" v-on:click="add()">添加</button>
<button v-else v-on:click="update()">修改</button>
<button v-on:click="cancel()">取消</button>
</td>
</tr>
</table>
</div>
</div>
<script>
Vue.config.devtools = false
Vue.config.productionTip = false
new Vue(
el: "#app",
data:
isAdd: true,
showBox: false,
user: [],
no: '',
name: '',
sex: '',
age: '',
// 用于备份修改时,数组中对应的下标
updateIndex: 0,
,
methods:
add()
let stu =
no: this.no,
name: this.name,
sex: this.sex,
age: this.age,
this.user.push(stu)
,
cancel()
this.no = '',
this.name = '',
this.sex = '',
this.age = '',
this.showBox = false;
,
getOne(index)
// 备份当前需要修改的学生对象,在数组中的下标
this.updateIndex = index;
// 根据数组下标,获取指定对象,赋值给stu2
let stu2 = this.user[index];
// 将该用户对象身上的四个属性的值传给当前vue实例身上的四个属性
this.no = stu2.no;
this.name = stu2.name;
this.age = stu2.age;
this.sex = stu2.sex;
// 显示编辑框
this.showBox = true;
// 表示此时做的是修改操作
this.isAdd = false;
,
// 修改用户信息
update()
// 获取数组中对应下标的学生对象
let stu3 = this.user[this.updateIndex];
stu3.no = this.no;
stu3.name = this.name;
stu3.age = this.age;
stu3.sex = this.sex;
,
// 删除学生
del(index)
if (confirm('确定删除吗?'))
this.user.splice(index, 1)
,
// 关闭编辑窗口的方法
close()
// 隐藏编辑窗口
this.showBox = false;
// 显示添加按钮,隐藏修改按钮
this.isAdd = true;
// 清空数据
this.clear();
)
</script>
</body>
</html>
a
vue+express+mongodb 实现 增删改查
一、创建一个vue项目
用脚手架vue-cli搭建一个项目,数据请求用axios方式,写几个按钮用来调接口(vue这块不做多解释,不懂的可以先去官网学习vue-cli:https://cli.vuejs.org/zh/guide/cli-service.html axios:http://www.axios-js.com/)
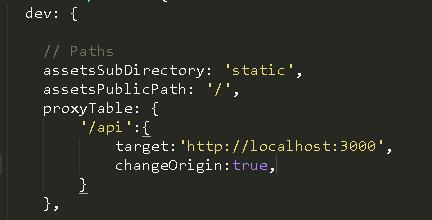
注意点:在用axios调用接口的时候会产生跨域,所以有配置下:在vue项目根目录下打开config文件夹下的index.js文件中proxyTable中加入配置内容
proxyTable: {
\'/api\':{
target:\'http://localhost:3000\',
changeOrigin:true,
}
},
这里我服务器开的是3000端口,而vue默认是8080端口
二、express接口
1、新创建一个文件夹,用于放服务端代码,这里文件夹名字一mongodb为例
在根目录下打开命令窗口(默认都安装了node)npm init -y 初始化,然后下载依赖包
express模块用来创建路由
mongoose模块用来创建数据库,连接数据库
body-parser模块用来对post请求的请求体进行解析
npm install express body-parser mongoose --save2、在根目录下创建app.js文件,用来启动express服务
//app.js文件

//引入刚才定义的hero路由
const hero = require(\'./router/hero\')
//1.引入express模块
const express = require(\'express\')

//中间介  解析post ,get 登返回的数据
var bodyParser = require(\'body-parser\');

//2.创建app对象
const app = express()
app.use(bodyParser());
app.use(\'/api\',hero)
//定义简单路由
app.use(\'/\',(req,res) => {
  res.send(\'成功\')
})
//定义服务启动端口
app.listen(3000,() => {
    console.log(\'服务器开启成功,端口3000\')
})
在根目录下打开命令窗口输入node app 执行后打印“服务器开启成功,端口号3000”,这代表服务器已开启,浏览器访问 http://localhost:3000/ 页面会显示 :成功
3、创建数据模型
在项目根目录建立一个models文件夹,用来存储数据模型,每个模型都是由一个Schema生产,具体的我们不用太在意,如果有兴趣可自行百度。
在models文件夹中创建一个hero.js文件,内容如下
//hero.js文件

//引入mongoose模块
const mongoose = require(\'mongoose\')

//定义数据模型,可以看到,我们下面创建了一个表,表中的数据有name、age、sex等字段,并且这些字段的数据类型也定义了,最后将model导出即可
const heroSchema = mongoose.Schema({
  name :String,
  age : String,
  sex : String,
  address : String,
  dowhat : String,
  imgArr:[],
  favourite:String,
  explain:String
}, { collection: \'myhero\'})
//这里mongoose.Schema最好要写上第二个参数,明确指定到数据库中的哪个表取数据,我这里写了myhreo,目的就是为了以后操作数据要去myhreo表中。
// 这里不写第二个参数的话,后面你会遇到坑。

//导出model模块
const Hero = module.exports = mongoose.model(\'hero\',heroSchema);
4、创建exress增删改查 业务代码
在项目根目录创建一个router文件夹,文件夹中创建一个hero.js文件,内容如下,分别为增删改查、添加图片等路由 ,在逻辑代码中药注意在这里插入了一下内容用来连接mongodb数据库。
// 连接数据库
mongoose.connect("mongodb://localhost:27017/test", { useNewUrlParser: true });
const conn = mongoose.connection;
conn.on("error", () => console.error("连接数据库失败"));
//引入express模块
const express = require("express");
//定义路由级中间件
const router = express.Router();
//引入数据模型模块
const Hero = require("../models/hero");

// mongoose.js
const mongoose = require("mongoose");

// 连接数据库
mongoose.connect("mongodb://localhost:27017/test", { useNewUrlParser: true });
const conn = mongoose.connection;
conn.on("error", () => console.error("连接数据库失败"));

// 查询所有英雄信息路由
router.get("/hero", (req, res) => {
  Hero.find({})
    .sort({ update_at: -1 })
    .then(heros => {

      res.json(heros);
    })
    .catch(err => {

      res.json(err);
    });
});

router.get("/user", (req, res) => {
  res.end("来啦");
});

// 通过ObjectId查询单个英雄信息路由
router.get("/hero/:id", (req, res) => {
  Hero.findById(req.params.id)
    .then(hero => {
      res.json(hero);
    })
    .catch(err => {
      res.json(err);
    });
});

// 添加一个英雄信息路由
router.post("/hero", (req, res) => {
  //使用Hero model上的create方法储存数据

  Hero.create(req.body, (err, hero) => {

    if (err) {
      res.json(err);
    } else {
      console.log(\'1\');
     res.json(hero);
    }
  });

});

//更新一条英雄信息数据路由
router.put("/hero/:id", (req, res) => {
  Hero.findOneAndUpdate(
    { _id: req.params.id },
    {
      $set: {
        name: req.body.name,
        age: req.body.age,
        sex: req.body.sex,
        address: req.body.address,
        dowhat: req.body.dowhat,
        favourite: req.body.favourite,
        explain: req.body.explain
      }
    },
    {
      new: true
    }
  )
    .then(hero => res.json(hero))
    .catch(err => res.json(err));
});

// 添加图片路由
router.put("/addpic/:id", (req, res) => {
  Hero.findOneAndUpdate(
    { _id: req.params.id },
    {
      $push: {
        imgArr: req.body.url
      }
    },
    {
      new: true
    }
  )
    .then(hero => res.json(hero))
    .catch(err => res.json(err));
});

//删除一条英雄信息路由
router.delete("/hero/:id", (req, res) => {
  console.log(req.params.id);
  Hero.findOneAndRemove({
    _id: req.params.id
  })
    .then(hero => res.send(`${hero.title}删除成功`))
    .catch(err => res.json(err));
});

module.exports = router;
这个文件会在app.js中引入,上面app.js中代码已引入
三、mongodb数据持久化
为了方便我们查询和观看效果,可以先在数据库中插入一条数据
1、下载 mongodb https://www.mongodb.com/download-center/community 具体安装可以自行去百度,这里不做解释
2、下载mongo可视化工具 https://studio3t.com/download/ 数据库客户端,可以方便的操作数据库
3、开启数据库:在安装目录下 执行命令mongod -dbpath "自己的安装目录/data"
4、在安装目录下的lib中执行命令 mongo
show dbs 查看数据库
use test 创建数据库
db.myhero.insert({
//根据创建的数据模型 插入的数据
//myhero是一个集合
})
插入数据后年可以在studio3t中直接查看 。
更多的数据库操作命令可以百度去查,这里不做过多扩展。
四、执行程序
开启数据库=》开启服务器=》开启vue项目
可以在vue页面调用接口操作数据了
===========================================================================
结束 大家有好的见解可以提出来,不懂的地方可以提问,谢谢!
以上是关于Vue实现数据增删改查的主要内容,如果未能解决你的问题,请参考以下文章